
Baking School Day 19: Layer Cakes

The Kitchn’s Baking School Day 19: All about layer cakes.
Join The Kitchn’s Baking School: Sign up and see all The Kitchn’s Baking School assignments
Let’s face it. Layer cakes will always steal the show. Heavenly cake layers slathered in fluffy frosting — who could turn down a slice?
There are endless combinations of layer cake delights. From tender butter cake and decadent chocolate cake to light-as-air chiffon cake and fruit-studded seasonal cake, there is a layer cake for everyone. And while there are so many different varieties of cakes, fillings, and frostings, many follow the same methods for preparation, checking doneness, stacking, and storing. Let’s explore what you need to know for massive layer cake success.
What Make a Great Layer Cake?
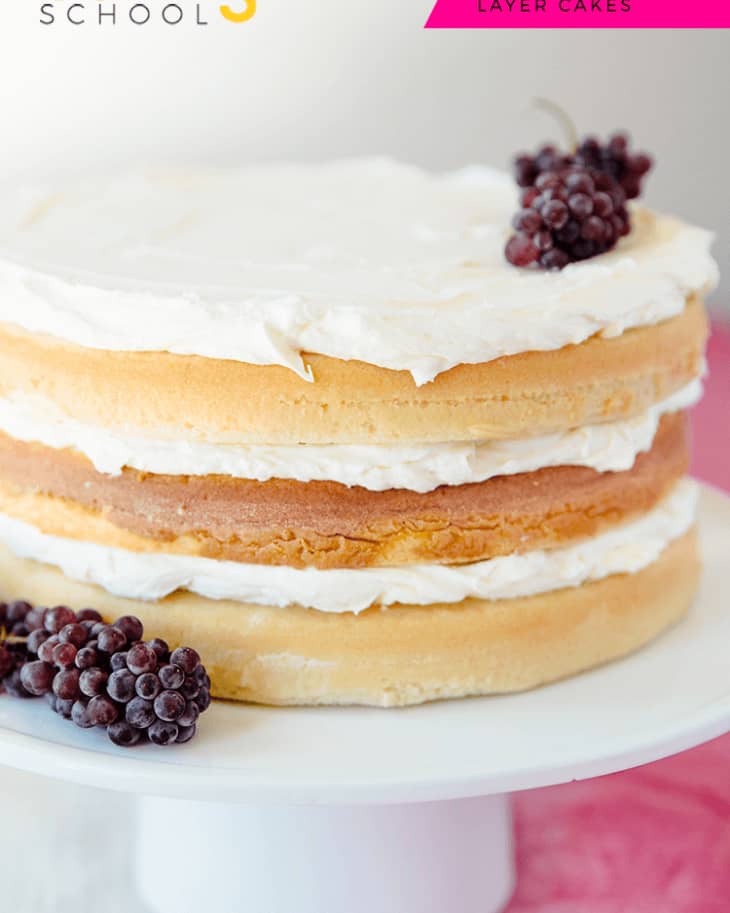
A good question, right? A lot of this will come down to personal preference, but I think most of us will agree that a great layer cake is about balance. The cake itself should be moist and soft. Whether you are using a light chiffon cake or something as dense as a pound cake, I bet nobody likes dry or hard cake layers. The filling and frosting should account for sweetness and decadence. While some might argue that nothing can be too sweet or too rich, you don’t want to overpower the cake layers, or any of the other components, really.
Consider the ratio of cake to filling. For buttercream, fudge, or cream cheese types of fillings, try sticking to layers of fillings that are half the height of the layers of cakes. For example, if each layer of cake is about 1-inch tall, spread on about a 1/2-inch of filling in between. When using something like sweet fruit preserves or rich chocolate ganache, consider using a bit less filling. Or better yet, use a bit of both to balance out the sweet and rich elements!
For frosting, use as little or as much as you’d like. If you are not big on sweet frosting, consider only icing the the top of the cake and leaving the sides “naked” for a more rustic look.
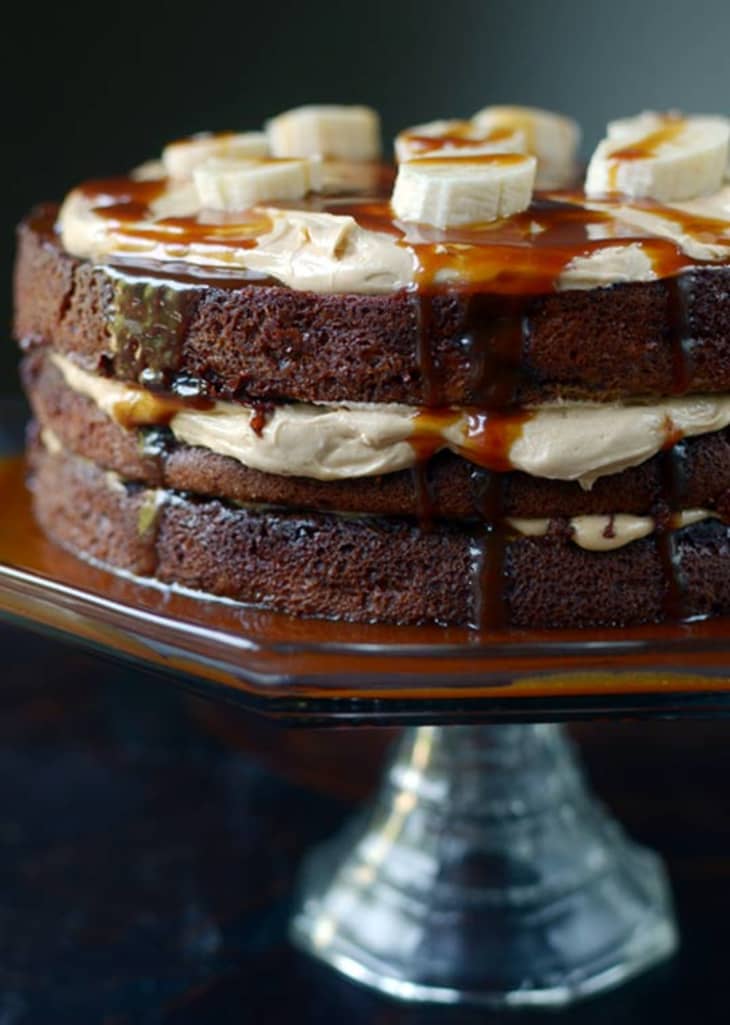
9 Classic Layer Cakes
As mentioned before, there are infinite cake and filling combinations to choose from when making a layer cake. Here are some traditional layer cakes that are worth checking out. Which is your favorite?
- Boston Cream Pie: Buttermilk cake with pastry cream filling and chocolate glaze.
- Black Forest: Chocolate cake with kirsch, cherries, and whipped cream.
- Brooklyn Blackout: Chocolate cake with chocolate custard filling and cake crumbs.
- Red Velvet: Red-colored cake with ermine (cooked buttercream) or cream cheese icing.
- Hummingbird: Banana, pineapple, and pecan cake with cream cheese icing.
- German Chocolate: Chocolate cake with coconut-pecan filling.
- Princess Torte: Sponge cake with fruit preserves, pastry cream, and whipped cream blanketed in a layer of marzipan.
- Lady Baltimore: White cake with chopped nuts, dried fruit, and seven-minute meringue icing.
- Lane Cake: Butter cake with a bourbon-raisin-coconut-pecan filling and meringue icing.

Mastering the Basics for Great Layer Cakes
A great layer cake is a symphony of all its many parts, coming together in one delicious whole. Today’s lesson focuses on the essentials of getting each part exactly right.
The Basic Cake Equations
Like with many other pastries and baked goods, cake recipes are developed according to specific ratios. A balance must be kept between sugar, flour, fat, and liquids to produce cakes with desirable texture, structure, and taste.
- The basic cake equation: A really easy equation for a basic butter cake is the 1-2-3-4 cake recipe. This classic calls for 1 cup of butter, 2 cups of sugar, 3 cups of flour, and 4 eggs.
- The pound cake equation: Although a bit heavy for a layer cake, basic pound cake will call for equal parts eggs, sugar, and flour (by weight).
Other Basic Cake Recipe Rules
If you are thinking of developing your own recipe, keep these general rules in mind and then begin altering to your preference.
- The flour and sugar should be equal in weight. This typically equates to about 3 cups of flour for every 2 cups of sugar.
- The eggs should weigh the same as or more than the fat. Recall from Day 1 that one large egg white weighs about 1 ounce, while the yolk weighs about 2/3 ounce. The total weight of both whites and yolks should weigh close to the same as the fat. When developing new recipes, try adding in the whites and yolks separately to come up with the perfect equation. Keep in mind that more egg yolks will yield a more velvety, tender crumb, while more egg whites will keep things nice and light, but may dry the cake out if the remaining liquids are not balanced properly.
- Liquids should weigh the same as the sugar. The total amount of liquids (eggs, milk, water, coffee, etc.) should weigh the same as or more than the sugar.

Steps for Success in Baking a Cake
Here’s a play-by-play of baking a cake, with tips for success at each step.
Before You Bake: Preparing Cake Pans
Before you even pull out the butter and sugar, a good recipe should let you know what type and size of cake pan to use and how to prepare it. Most layer cakes will use 6- to 9-inch (in diameter), round cake pans with 2-inch-tall sides.
When a recipe instructs you to grease and flour your pan, simply cover the inside of the cake pan with a thin layer of softened butter, oil, or even nonstick spray. You may use a pastry brush to apply the oil, or rub the pan with the inside of a butter wrapper.
Sprinkle with flour, shake the pan around to cover the inside, invert, and tap out the excess flour. This method will form a slight crust around your cake, allowing it to release easily from the pan. For chocolate cakes, try using a mixture of flour and cocoa powder!
If a particular cake is prone to getting stuck in the pan, line the bottom of the pan with parchment paper and grease the sides.
Be mindful of recipes that rise best without greased sides, like sponge cakes. For these types of cakes, line the bottom of the pan with parchment paper and detach the sides by running a thin knife or metal spatula around the edges before unmolding.
Get Your Step-by-Step Baking Lesson:
How To Line a Round Cake Pan with Parchment

The Crucial Step: Creaming Butter and Sugar
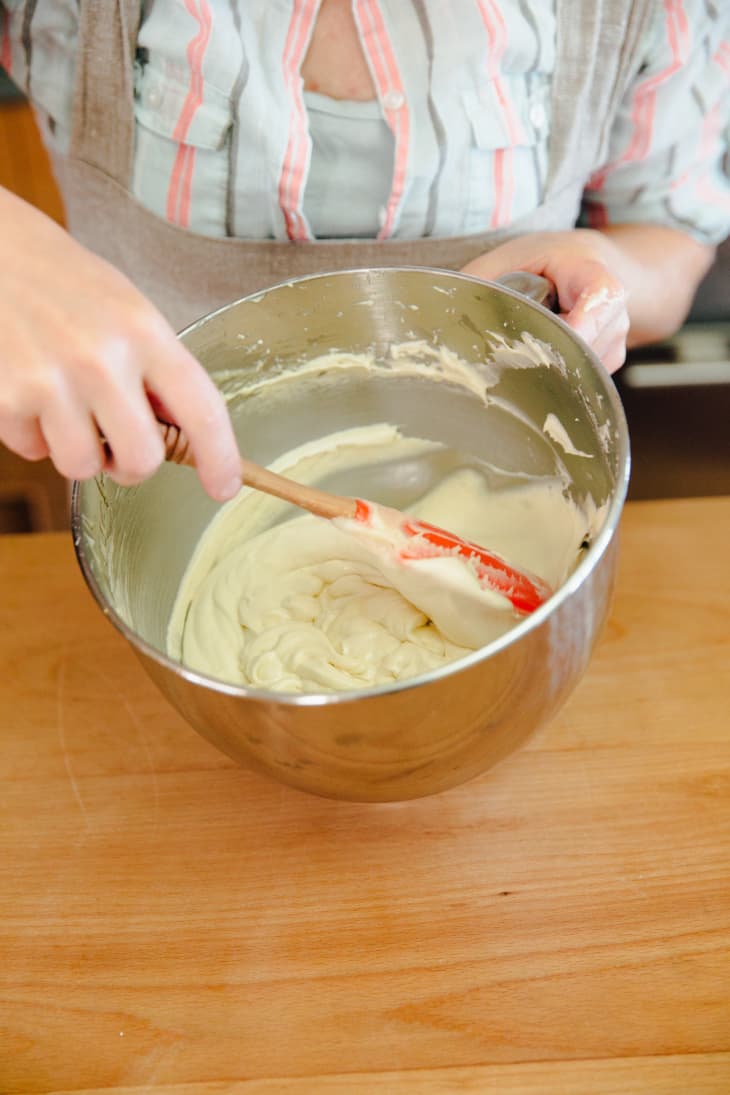
While we have already discussed how creaming butter and sugar together will help aerate and leaven cakes, we cannot stress how important this step can be when making butter cakes. This is usually the first step for many cakes — one that is definitely not worth skimping on. Plus, once you start adding in other ingredients, you can’t go back.
If using an electric mixer, beat softened butter until smooth with a paddle attachment. Add the sugar and mix for about three minutes on medium to medium-high speed.
Tip for Success: When done, the butter and sugar mixture should be light, fluffy, and very pale in color.
Emulsification & Eggs
After the butter and sugar have creamed together, add any extracts and the eggs. The eggs should be added in one at a time, making sure each has incorporated into the batter before adding in the next. The eggs help the fat emulsify throughout the batter. After all of the eggs are added, it is a good time to stop the mixer and scrape down the bottom and sides of the bowl.
Tip for Success: Eggs should be room temperature in order to incorporate better with the other ingredients and keep from appearing curdled.
The Wet Ingredients, and the Dry Ingredients
Cake recipes typically call for all of the dry ingredients (flour, salt, baking powder, baking soda, cocoa powder, etc.) to be sifted first. Add in half of this dry mixture and mix on low until combined. With the mixer still running, slowly stream in the wet ingredients. Add in the remaining dry ingredients and mix until just combined.
Alternating the wet with dry will help keep gluten development to a minimum and help the batter absorb the liquid.
Tip for Success: Turn the mixer to medium-low and mix no longer than about 15 to 20 seconds, or until the last of the dry streaks disappear.
In many cases, this is the most efficient way of mixing up an even cake batter without over-mixing. Be sure to follow the method as described in your particular recipe.
Alternate Method: The Two-Step Mix
For high-ratio cake recipes (those with more sugar than flour), a two-step mixing method may be used. This method is nearly opposite of those that begin with creaming the butter first — or the reverse!
In this method, the dry ingredients are mixed together first, then the sugar and butter are mixed in. The eggs and most of the liquid are added in last. With this method, the butter is able to coat the flour particles before the liquid is added, which slows gluten development. The butter and sugar are not creamed together, thus not creating those little air pockets that expand and help leaven the cake. This method produces a final product with a finer, tighter crumb.

Baking and Checking Doneness
For best results, divide your cake batter evenly between the prepared pans. Here’s our favorite method:
Read more → The Easiest Way to Divide Cake Batter Evenly
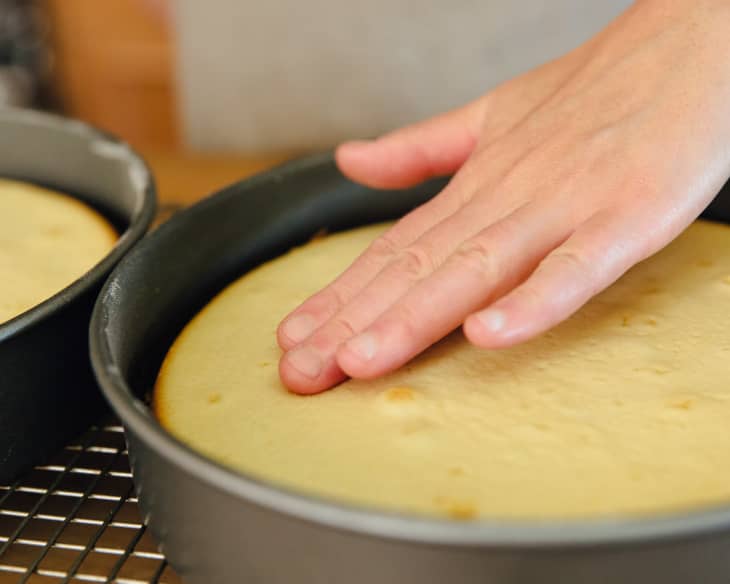
When your pans are filled with batter, drop them sharply on the countertop to get rid of any extra air bubbles (see photo above).
A recipe will usually give a window of time it takes for the cake to fully bake. This range accommodates for variations in actual oven temperature, the cake pans being used, humidity, etc. Here are a few better indicators to check whether your cake is done or not.
- Toothpick test: A toothpick inserted into the center of a cake should come out clean or with few crumbs when a cake is done baking.
- Coloring: For lighter-colored cakes, look for browning. A nice golden crust is a good indicator of a baked butter cake.
- Touch: For sponge cakes, the top of the cake should spring back when lightly pressed as an indicator of when the cake is done.
- Edges: For some cakes and pan preparation, the cake will begin to pull slightly away from the side of the pan as it nears doneness.
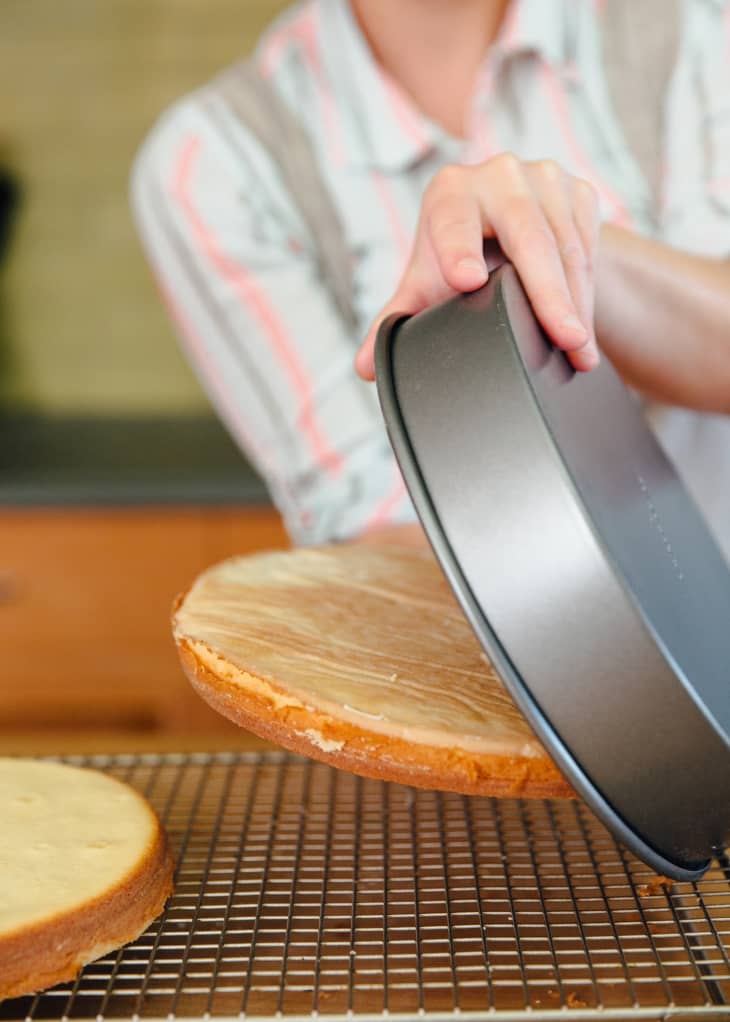
Cooling and Unmolding Cakes
As with many other baked goods, cool baked cakes on a wire rack.
Tip for Success: Most cakes should wait about 10 to 15 minutes before being removed from their pans. If the cake is too warm, it may break and crumble. If it is left in the pan too long, it may become stuck and fall out in pieces.
To remove a cake from its pan, carefully run a thin paring knife or metal spatula around the edges of the cake, taking care not to cut into the cake itself. Place a cake board, serving plate, or cooling rack on the top of the cake pan. Hold in place and flip! Invert the cake back right-side up until the cake completely cools.
Completely cooled cakes may be wrapped in plastic and left to chill in the refrigerator before being cut or frosted.
If you are stuck in the unfortunate situation where part of your cake breaks off (don’t worry, we’ve all been there), try to stick the pieces back together. Wrap in plastic and chill for a couple hours. When assembling, use icing to try to patch the crack.
Get Your Step-by-Step Baking Lesson:
How To Bake a Cake
Lessons in Assembling a Layer Cake
All right, so you have your cake! It’s baked and ready to be assembled into a gorgeous layered masterpiece. This is where some of us start hyperventilating a bit, right? Well, read on for more tips for success in building your cake.
First, Set Up Your Space
Building a layer cake is more akin to a craft project than whipping up a quick batch of cookies. It is important to prepare your space and make sure you have plenty of room, the right tools, and as much uninterrupted time as you can spare. Here are a few other things that are helpful to have on hand:
- A rotating cake stand is very helpful for getting your icing smooth.
- If using a rotating cake stand, a cardboard cake round should go on top. Then, when the cake is iced, used this to support the cake when you move it to your final cake plate for serving.
- An offset spatula for icing.
- Wax paper or parchment, for keeping the cake plate clean while icing
- Your final cake plate or pedestal for serving.
- Plenty of paper towels or kitchen rags for cleaning up smears and crumbs.
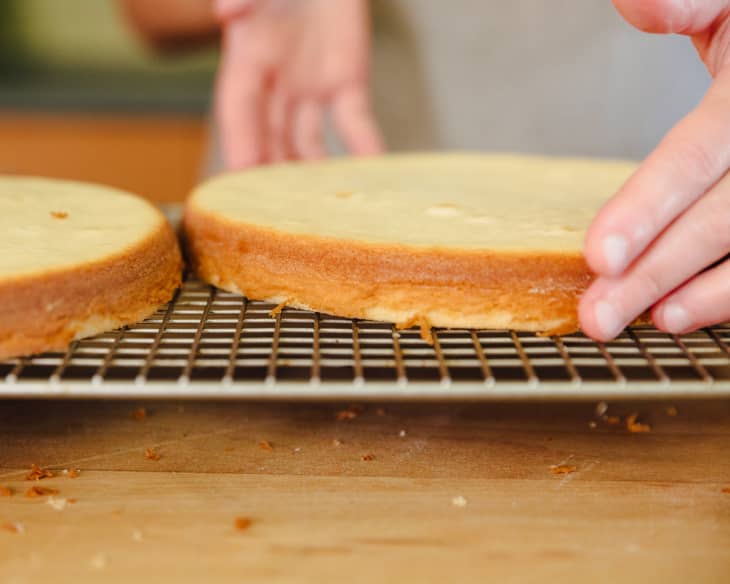
Trim and Torte
To prevent crumbs and tears, never cut a warm cake. In fact, it is best to chill a cake before attempting to trim it. For layer cakes, it is important to have even layers of cake. If a dome appears on the top of your cake after it comes out of the oven, remove it. Baker’s bonus: You can eat the scraps!
Place one hand on top of the cake and score where the dome connects with the sides of the cake with a long serrated knife. Holding the knife parallel to your work surface and as level as possible, begin cutting in towards the center of the cake. Rotate the cake as you go and continue until the top portion detaches from the rest of the cake.
To torte, or slice a cake into thinner layers, use the same principals as trimming the top of the cake. Always keep your serrated knife parallel to your work surface and as level as possible. Start with smaller cuts for more accuracy.
Tip for Success: To make even layers, measure the height of your cake and either score with a knife or mark with toothpicks either halfway up (for two layers) or into thirds (for three layers).
To move and separate layers that are quite thin and/or fragile, gently slide a cake board between the layer to help you pick up the cake.
Always place your second hand on top of the cake, as opposed to the side of the cake, just in case the knife slips and cuts through to the other side.
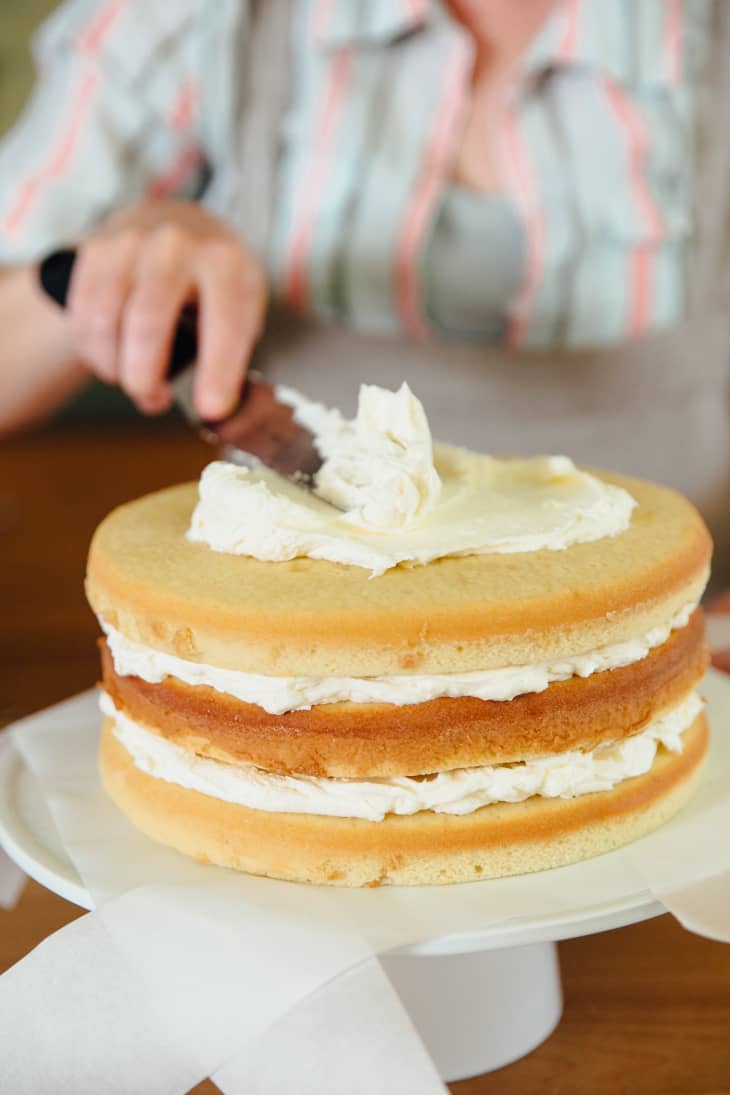
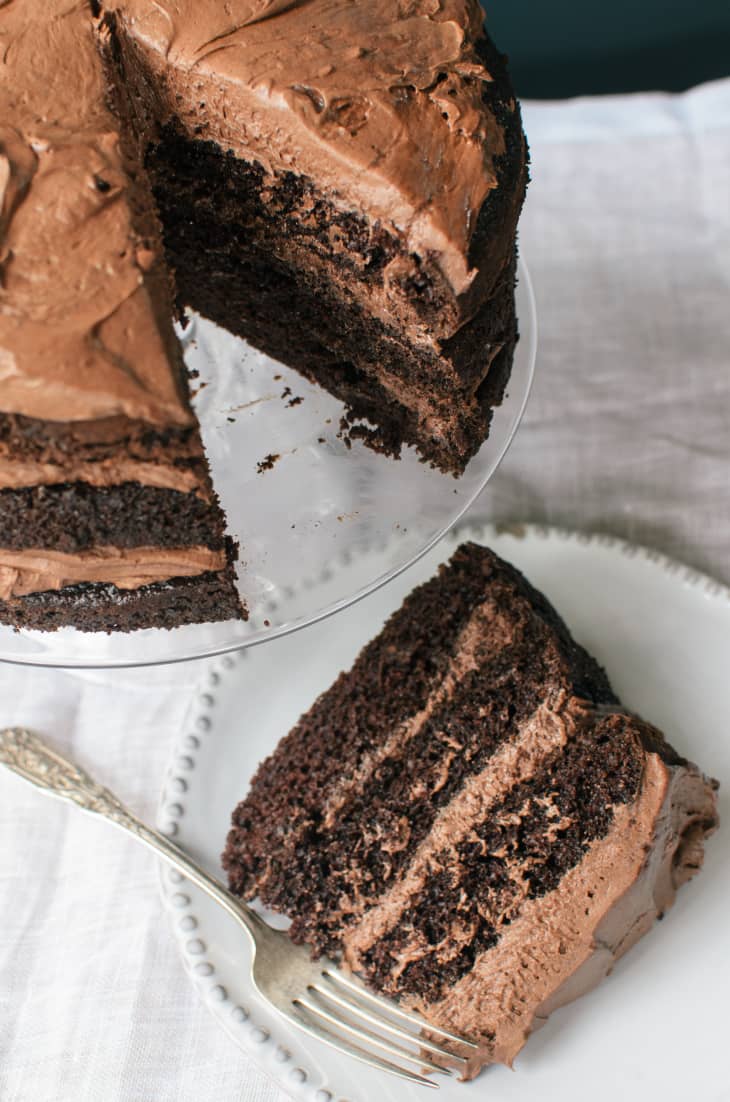
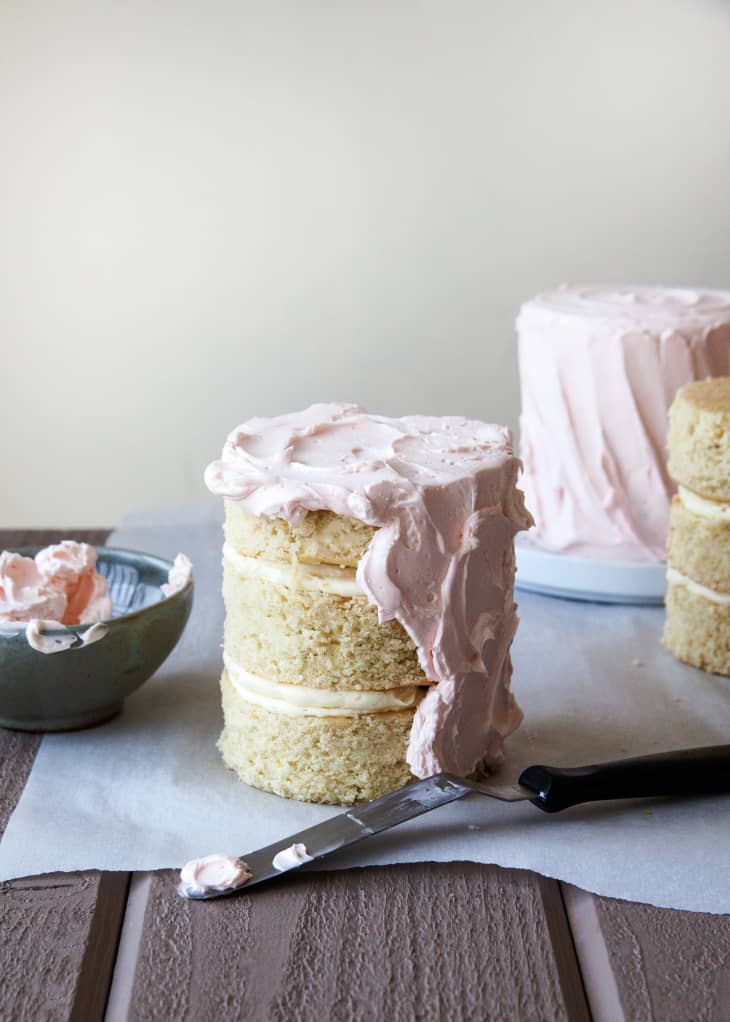
Next, Add Your Fillings and Frostings
Buttercream is always a good choice, but there are so many of other tasty options for filling and frosting your layer cakes.
More on Buttercream
To fill, try fruit preserves, pastry cream, lemon curd, flavored buttercream, or a thin layer of decadent ganache. To frost, try sweet and tangy cream cheese frosting, fluffy fudge, heavenly whipped cream, or airy meringue!

Storing Your Layer Cake
Cake layers can usually be wrapped in plastic and kept in the fridge for up to one week, or in the freezer for a month or two. Thaw frozen cakes in the refrigerator.
Tip for Success: Chilled cakes are easier to torte, fill, and frost. Even if you will be using the cake layers the same day, it is best to chill them for at least a couple hours before assembling your layer cake.

Every lesson has three homework options. Maybe you’ve already got one down, or you just have time for a quick study session. So pick one, and show us by tagging it with #kitchnbakingschool on Instagram or Twitter.

Memorize the basic cake equation shared above.

Make a cake from a boxed mix and practice techniques like greasing the pan and dividing the batter.

Make a basic layer cake from scratch; we’ll assemble it tomorrow. Use either our basic yellow cake recipe or chocolate cake recipe.
Join The Kitchn’s Baking School!
SIGN UP
SHARE YOUR PROGRESS
- Follow and show your progress on Instagram, Pinterest, Facebook, and Twitter! Make sure to use the #kitchnbakingschool hashtag.