
The Ingredients You Need to Brew Beer (and Where to Get Them)

- Today’s topic: A rundown of the basic ingredients you’ll need to brew a 1-gallon batch of beer
- The Kitchn’s Beer School: 20 lessons, 7 assignments to brew your first 1-gallon batch of beer.
- Sign up & see all the assignments! The Kitchn’s Beer School
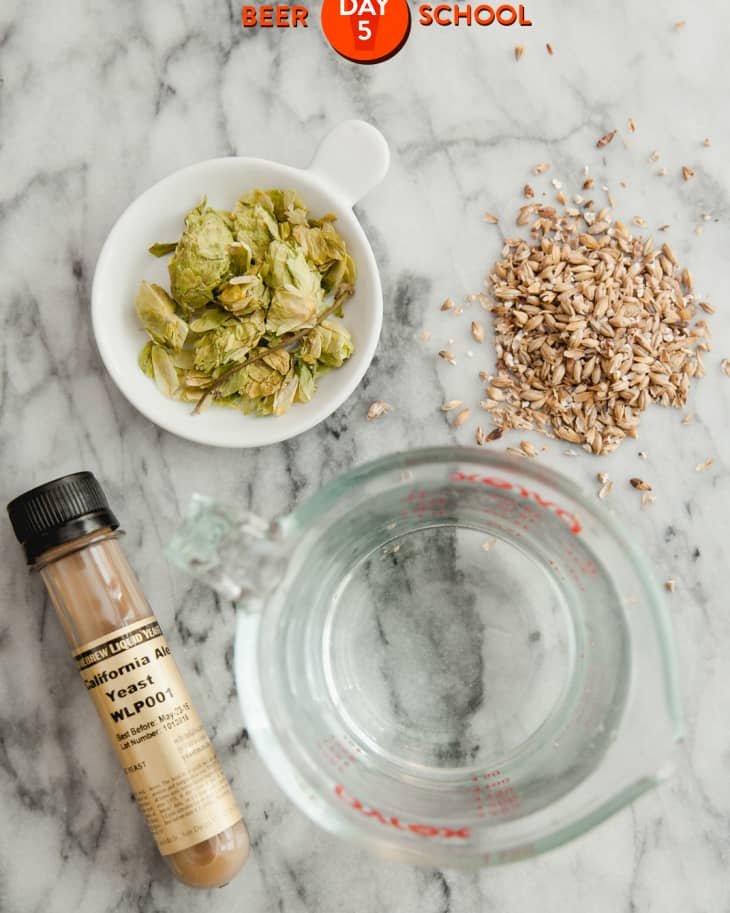
All right — what do you need to get this beer going? All beer is made with just four base ingredients: malts, water, hops, and yeast. It’s the specific kind and amount of each ingredient, and how you mix them together, that give us everything from the palest of pale ales to the darkest of stouts, and all the beautiful beers in between.
With just these four ingredients, it makes sense to spend some time talking about each one so you understand what makes them so special and what to look for at the store. That’s what we’re doing today — a deep dive into the basic ingredients that make a pint of beer.
Today’s lesson is a little longer, so load it up on your laptop or iPad, and kick back with a brew of your choice. You don’t need to memorize all of this, and we’ll revisit salient points when needed, but this will give you a deeper understanding of what each ingredient does.

1. All About Malts & Beer
Without malts, there would be no beer. Wine is made with grapes, cider with apples, and beer with malted grains.
What Are Malts?
Malts are simply malted grains. Barley is the most widely used grain for making beer, primarily due to the fact that it can give us more sugar than other grains and it also has a natural hull that makes it a lot easier to work with.
Besides barley, we can also make beer with grains like wheat, rye, oats, corn, and rice. These other grains are usually used in addition to a base of mostly barley, and they will add their own particular flavors and character to beer.
How Malts Are Made
Malts — malted grains — are made by letting grains partially sprout and then heating them up in a kiln or oven to halt the germination process before it gets too far along. This frees up the starches in the grain — starches that we, the brewers, can then convert into sugar, which will then be food for our yeast.
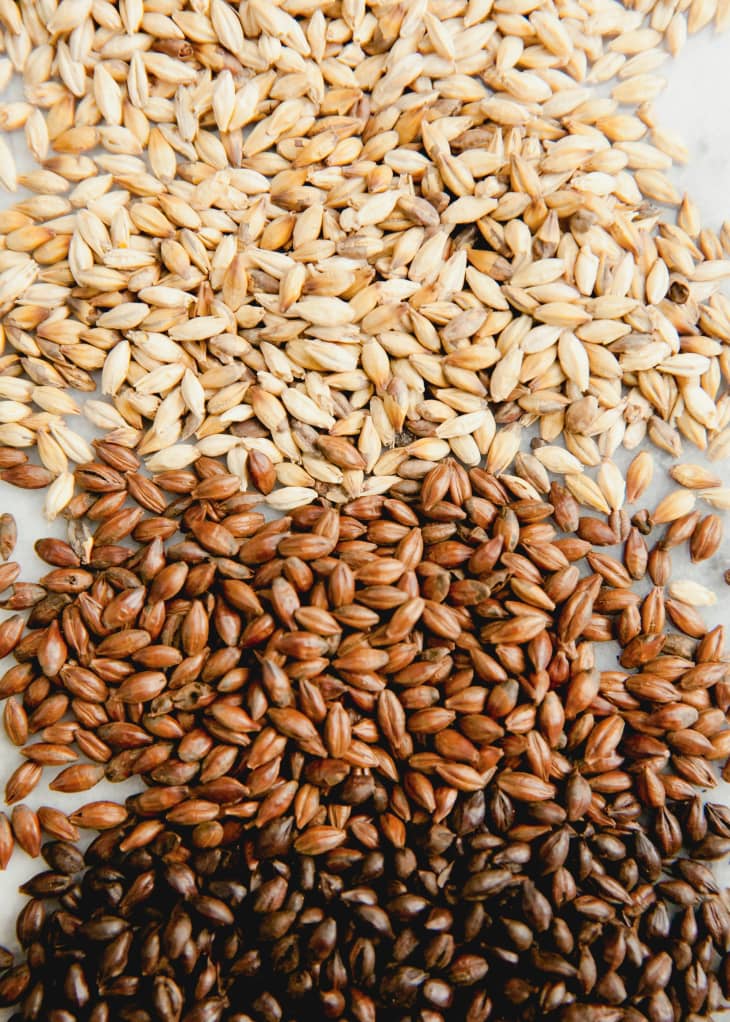
Just after malting, the grains are fairly boring. They have a ton of sugar-potential, but very little flavor. If we toast them a little more, the malts start to take on more interesting, caramel-like flavors, but they also start to lose their sugar-giving powers. Think of it like making sugar syrup: At first, the sugar is very sweet but also fairly one-note. Then, as you cook it, the sugar starts turning a darker color and picks up nutty and buttery flavors. Cooked long enough, the sugar will eventually burn and blacken.
We actually need a mix of those blander malts — called base malts — along with some of the more roasted malts — called specialty malts — to make a beer taste interesting. The base malts form the sugar-rich, if not very flavorful, foundation of the beer recipe, while the specialty malts bring the flavor party.
Specialty malts are also what affect the beer’s color — a beer made with very lightly toasted malts will be pale in color and a beer made with more darkly roasted malts will be darker in color.
Any grains used to make beer that aren’t malted are called adjunct grains. These can be ingredients like flaked oats, flaked corn, or rice hulls. They are primarily used in small amounts to give the beer a particular flavor, color, or other character, but are rarely a core ingredient in making the beer.
How to Buy Malts for Beer at the Store
To find malted grains for beer, you go to a homebrew store or online supplier.
Buy Them in Bulk
Homebrew stores all carry a wide variety of malts. They’ll have a few different kinds of base malts and specialty malts, as well as malts made from rye, wheat, and other grains. The grains are usually stored in bulk bins and you (or a store employee) can measure out exactly the amount of each grain you need for the beer you’re brewing.
If you’re buying your grains online, you’ll likely have to buy the grains in bulk (usually by the pound) and then weigh out the exact amount you need yourself.
Important tip: Beer recipes are very precise, so always weigh your grains with a scale.
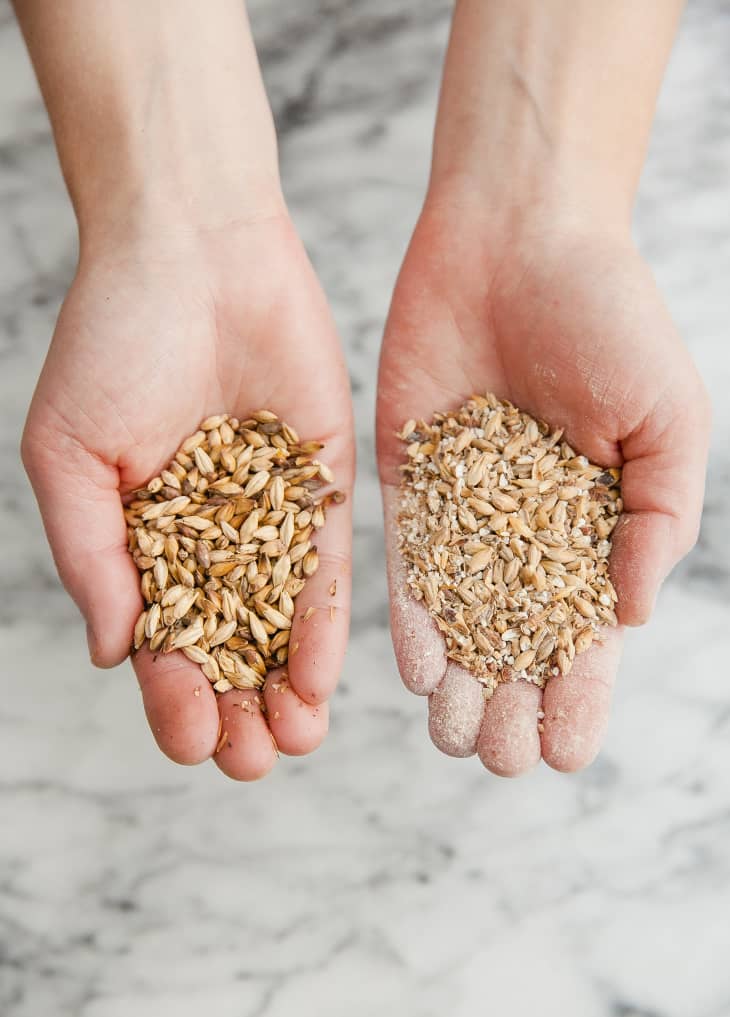
Get Them Crushed (or Milled)
Whether you buy your grains at a store or online, be sure to have the grains crushed or milled before purchasing. Most places will do this for you free of charge, even online retailers. Crushing exposes the insides of the grain and makes it much easier to extract the starches for beer-making; without milling, the starches stay stuck inside the grains. Which would be very sad.
If you have a grain mill, you can grind the malts yourself — grind them just enough to crack the grains open; don’t grind so finely that you make flour (which will just become a sticky mess when you try to make the beer).
How to Store Crushed Grains for Beer
If you’re going to be brewing within a week or so, you can keep the grains at room temperature in whatever bag or container they came from the store. If it will be longer, make sure the grains are in an airtight bag or container, preferably vacuum-sealed, and store them somewhere cool and dry.
2. All About Water & Beer
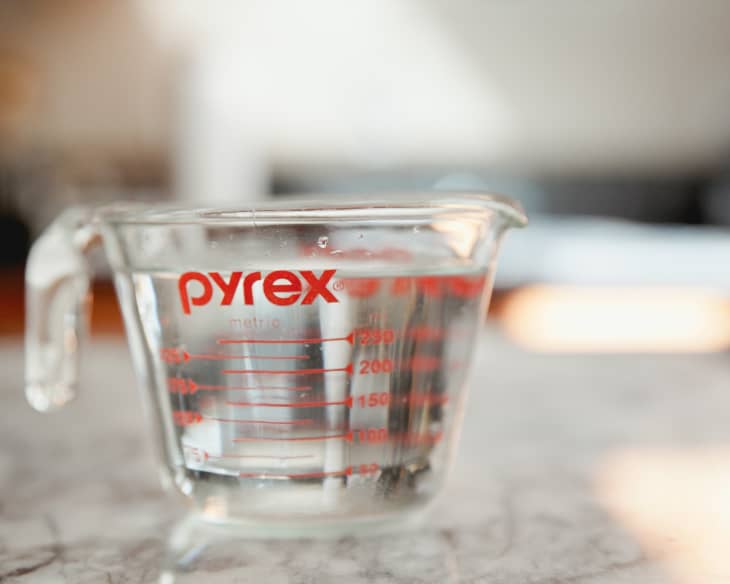
The water you use to brew your beer is both crucial and also not something you need to worry about too much, especially when you’re first getting into homebrewing. It’s crucial because we have to have it in order to make the beer happen (beer is mostly water, after all), but the water from your tap is generally just fine. No need to purchase a special water or filter it before brewing — as long as your tap water is good to drink, it’s good to brew.
Once you get hooked on homebrewing and want to play around, there are lots of ways you can get scientific and nerdy about your brewing water. Hard water and soft water definitely have different effects on your brew, for instance. You can also experiment with adding specific minerals to your water to duplicate the waters of famous brewing regions, like authentic German pilsners.
But for now, I say to just use your tap water and don’t fret about it too much!
2. All About Hops & Beer
Hops are a brewer’s favorite flower! These green buds give a sweet, malty brew its counterbalance of bitterness. They also give the beer some interesting flavors and aromas, and they act as a preservative to keep the beer fresh for longer.
Hops are also a relatively recent addition to the beer brewing family; before they came on the scene in the early 1800s, brewers used spices, herbs, and other ingredients to flavor their beers.
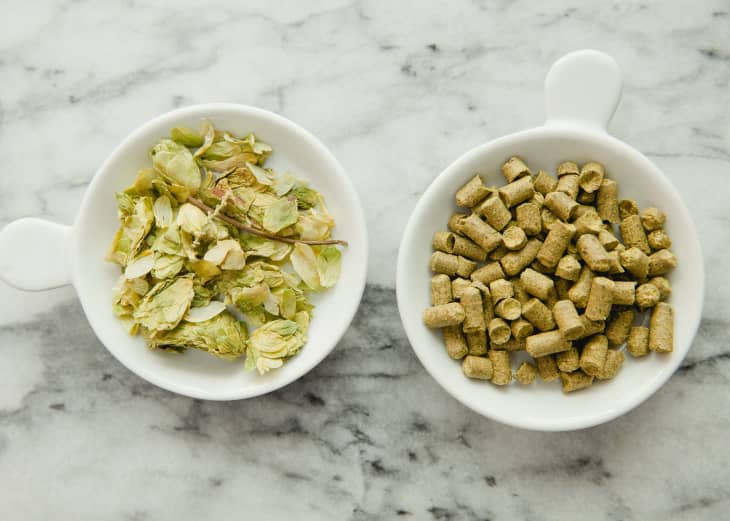
Know Whole Leaf Hops vs. Pellet Hops
A fresh hop will look a bit like a tiny green pinecone, but it’s actually a flower and those layers are petals. Fresh hops are delicate and spoil quickly. Unless you grow your own, the closest you can get is buying packages of frozen “whole-leaf” hops. Some stores carry this kind of hop year round, but you’re more likely to find them in the fall and winter after the hop harvest.
Pellet hops, made from dried and compressed hop flowers, are much more widely available. True, they look like rabbit food, but they last a lot longer in the fridge or freezer, they are more affordable than whole-leaf hops, and most importantly, they work just as hard to flavor your beer. The majority of beer recipes will call for pellet hops.
Understand Hop Resins vs. Hop Oils
Hops have two things that make them useful for beer brewing: resins and oils. Hop resins are what give beers their bitterness — that quality that twists your tongue and prickles your tastebuds when you sip a particularly potent IPA. Different varieties of hops have different amounts of this resin; hops with a lot will be powerful bittering agents, even in small doses, while hops with less resin will be gentler allies for bittering your brew. Resin is measured in terms of alpha acid percent (AA%), and when you buy hops at the store, the bags or containers should be marked with this on the side — so you know exactly what kind of bitterness situation you’re getting yourself into.
Hop resins don’t get to have all the fun — hop oils are pretty awesome, too! Hop oils are where we get the more delicate and nuanced hop flavors and aromas in our beer (mostly aroma, really). These flavors and aromas can really run the gamut and depend on the exact variety of hop: grapefruit peel, tangerine, ripe pear, pineapple, baking spices, guava, lemongrass, wild flowers, French perfume, and so very many more.
The difference between the hop resins and the hop oils is important, so I want to be sure to emphasize it before we go on: hop resins = bitterness; hop oils = flavor and aroma.
- Hops that are known for their solid bittering prowess are usually called “bittering hops.”
- Hops that have less bittering potential but a lot of fragrant hop oils are called “aroma hops.”
- Hops that are pretty good at both are called “dual hops.”
Got it? Good!
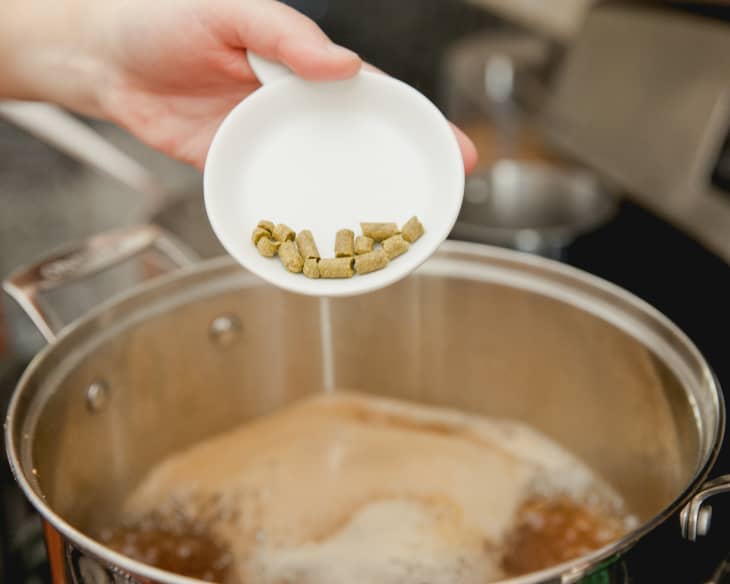
Adding Hop Bitterness, Flavor, and Aroma to Beer
Hops are generally added to the beer during the “hop boil” — the period after the grains are mashed and the resulting wort is strained, but before we add the yeast. Hop resins are stubborn substances and need a good hour-long boil in order to properly dissolve into the beer wort and bitter the beer. Hop oils, on the other hand, are really delicate; they only need a little time with the wort to add flavor and aroma, and they would be completely destroyed by a long boil.
To solve this apparent dilemma, hops get added in a few additions over the course of the hop boil. Hops added at the beginning are primarily for bittering purposes — it’s all about the resins and not at all about the oils. Hops added toward the middle get a bit of both — some resins and some oils. Hops added at the end are all about the oils and the lovely hop aromas they bring — zero resins are absorbed.
Buying and Storing Hops
Hops are usually sold in pre-measured packets, though some stores have bulk containers and you can scoop up just what you need. If you’re brewing within a few days, store your hops in the fridge; otherwise store the hops in the freezer.
Any hops left over after brewing can be repackaged in a zip-top bag or vacuum-sealed, and kept in the freezer for about six months. Hops can be measured and used straight from the freezer.

4. All About Yeast & Beer
Last, but definitely not least, we have yeast! These little organisms are what will transform your sugary, malty wort into real-life beer.
Yeast consume sugar and give us carbon dioxide and alcohol in return. In just a handful of days, the yeast will eat their way through the vast majority of the sugar in your wort — it’s like one long all-you-can-eat buffet for the yeast. After that, the yeast start to work on some of the more complex sugars and other various compounds made during the brewing process. Once everything has been eaten that can possibly be eaten, they slowly drift into a snoozy state of hibernation — at which point you have officially made beer.
Ale vs. Lager Yeast
There are two different kinds of yeast used for beer brewing: ale yeast and lager yeast. Ale yeast are happy in a fairly wide temperature range — 65°F to 75°F — which make them ideal for homebrewers brewing in our kitchens without a lot of special equipment. Ale yeast also tend to give your beer fuller, more complex flavors of fruit and spice.
Lager yeast work best at cooler temperatures — 50°F for the initial fermentation and 40°F for the lagering period afterward — and also tend to be a bit more fussy. In return, however, they make a superbly crisp and clean beer. As homebrewers, you need a dedicated temperature-controlled fridge in order to make homebrewed lagers. Lagers are a bit more than you might want to jump into as a new homebrewer, but it’s a fun project once you have some experience under your belt.
For The Kitchn’s Beer School, we will be focusing primarily on beers made with ale yeast.
Dry vs. Liquid Yeast
Homebrewers have the option of brewing with either dry yeast or liquid yeast — either is widely available at homebrew stores and online. Dry yeast comes in foil pouches and looks a lot like the powdered yeast used for bread baking. Unopened packets of dry yeast will keep in a drawer for a few months or refrigerated for years; even opened, half-used packets will keep well in the freezer for months.
Liquid yeast, on the other hand, is more perishable. It needs to be kept refrigerated and will only keep for about six months (the expiration date will be printed on the package). In its favor, however, liquid yeast can be found in huge variety of different yeast strains, many more than are currently available for dry yeast. As you start making new recipes or experimenting with your own brews, having all these options is a great deal of fun.
How to Buy & Store Yeast
One package of either dry or liquid yeast is enough to ferment five gallons of beer. For smaller one-gallon batches, I generally use half of the package — it’s not totally perfect from a science perspective, but it’s less of a headache than dividing packages into five portions, and won’t make a huge difference in your beginner homebrew.
When you get home from the homebrew store, put your yeast in the fridge (both dry and liquid yeast). Any leftover dry yeast can be kept in an airtight container or zip-top bag in the freezer and liquid yeast can be kept in a small, sterilized canning jar in the refrigerator.
Want a Shopping List?
Any questions? Comment below! And no fear: I’ll give you a detailed shopping list in this weekend’s assignment so you know exactly what to buy. If you want to get started now, here’s a peek:
Brew Better Beer: A Companion to Beer School
I love brewing beer so much, I wrote a book about it! Brew Better Beer (May 2015, Ten Speed Press) is a complementary guide to Beer School. Take a look for even more nerdy details about homebrewing, how to brew 5-gallon batches, and plenty of recipes for different beers.
→ Find it: Brew Better Beer by Emma Christensen
With The Kitchn’s Beer School, we’ll teach you how to brew your own beer at home — and brew it with confidence. In 20 lessons and 7 weekend assignments, we’ll get you set up with your own home brewery, walk you through your first brew day, show you how to bottle your beer, and then toast you on your first pint. Ready to brew your first beer? Join us!