

We Tried 9 Ways to Shuck Corn (and Really Get the Silk Off!) and Found a Clear Winner
Fresh sweet corn is one of the true highlights of summer. Sure, you can sometimes find “fresh” cobs year-round, shucked and packed under shrink wrap in the off-season — but there is no way that corn is as crisp, sweet, and juicy, with that deep corny richness, as a just-shucked summer ear.
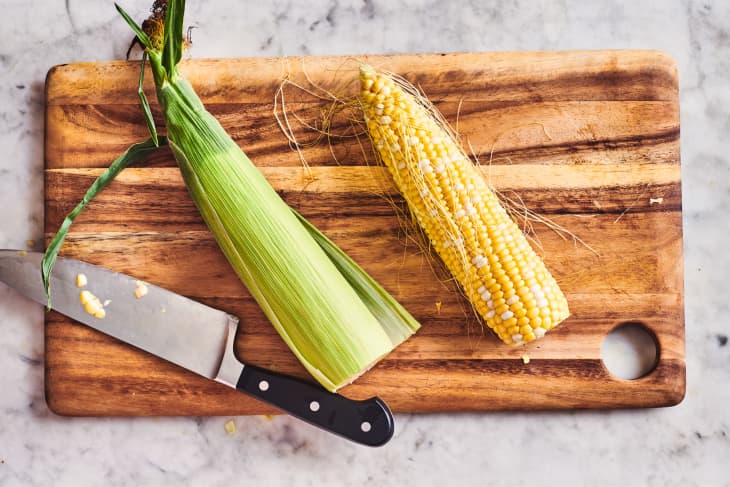
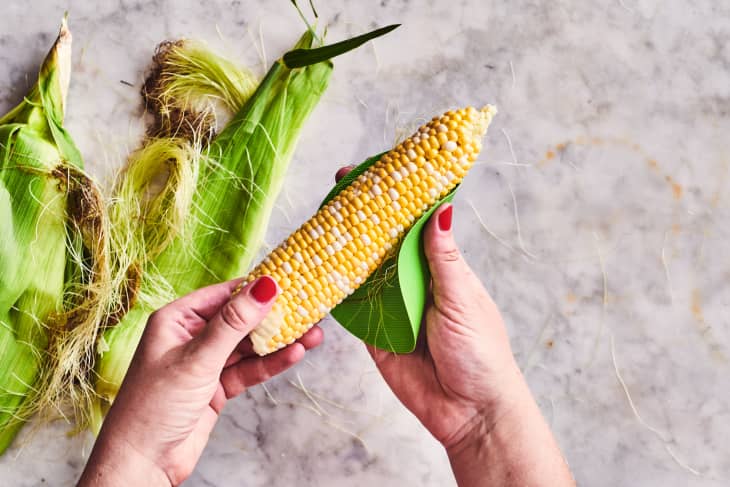
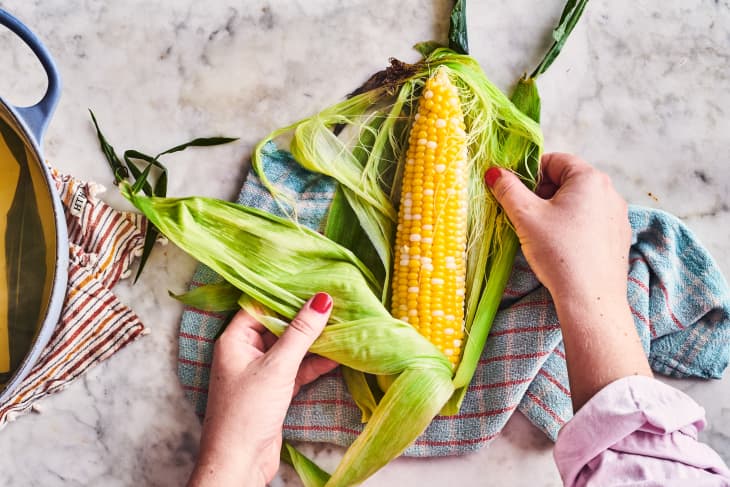
The flavor and texture rewards of buying whole corn on the cob and shucking it yourself are absolutely worth the little bit of mess involved. But those little hair-like silks can be a pain. They often seem practically glued onto each ear; sometimes you can’t even see them, they’re so far entrenched between the rows of kernels. But bite into a cob that hasn’t been well cleaned, and you’ll be reaching for floss immediately.
To figure out how to combat those pesky silks, we headed online to see what the internet had to say on the matter. In our search, we found nine distinct methods to test. After lots of shucking, boiling, scrubbing, and plucking, we found one method that rose above all the rest.
So, What’s the Best Way to Remove Corn Silk?
While we had some luck using boiling water or rubber gloves to clean our corn, no method was more effective than microwaving the entire ear. Then, we simply trimmed one end and peeled off the husk and silk in one fell swoop.
Read on to learn how to tackle the microwave challenge in your own kitchen, and to see how eight other methods stacked up.
A Few Notes About Methodology
Corn: I purchased two kinds of corn: bicolor ears from Whole Foods and semi-local Silver Queen corn from a farmstand. I wanted to see if one variety had more silk than the other, or if the silk from the different varieties behaved differently from each other. (I found no difference.)
Tests: For each method, I tested twice, using one corn cob from each variety.
Times: The time listed with each method is for one ear of corn. It represents the average of how long it took me to use the method on both — including any time spent shucking (I average 15 seconds per ear) or cooking.
Ratings: Each method is ranked on a scale of 1 to 10, with 10 representing perfection. The main factor affecting my ratings was how well the method removed the silk from the cob; ease or difficulty of the method, time, and cleanup were secondary factors.
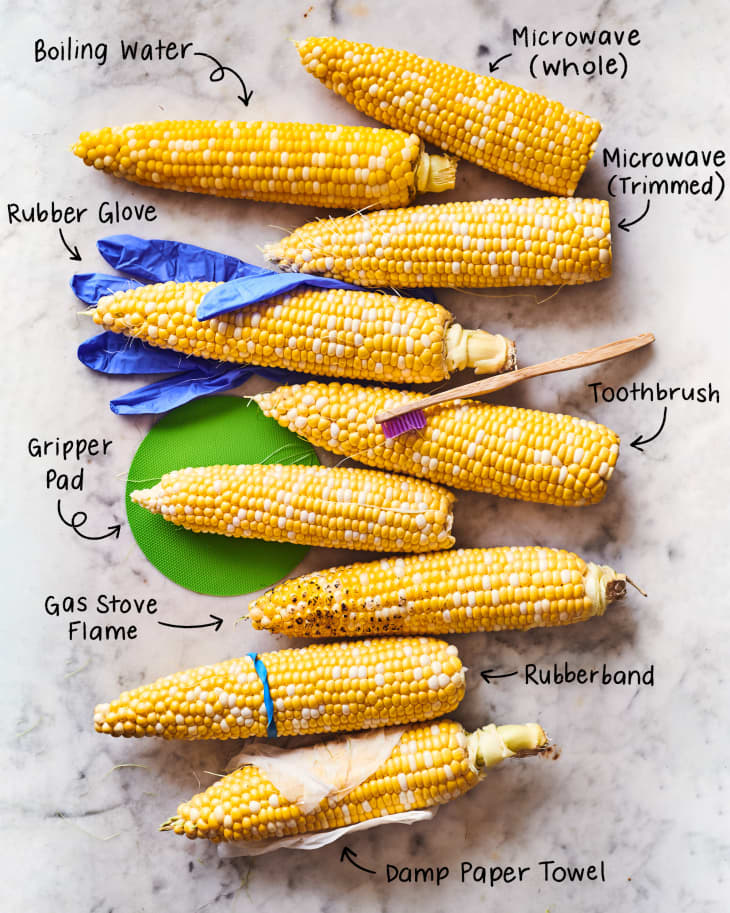
Corn Silk Removal Method: Microwave (Trimmed)
- Total time: 1 1/2 minutes per cob
- Rating: 1/10
About This Method: This technique from Cook’s Illustrated instructs you to trim off the stalk end from each of 3 to 4 cobs to just above the first row of kernels, then microwave the corn on full power for 30 to 60 seconds. (I went for 60.) After the brief stint in the microwave, you hold each ear by the top (uncut end) and shake up and down “until the cob slips free, leaving behind husk and silk.”
Results: After cooking on High in my 1100-watt microwave, the corn did not slip free. Even after many vigorous shakes, the husks held on tight. I shucked each ear to see what I’d find inside. Unfortunately, I discovered tons of silks still clinging to the corn, as much as with freshly shucked, un-microwaved corn. I did stray just a bit from the instructions in that I used only 2 corn cobs, but I doubt that made a difference. One minute of microwaving just wasn’t enough time to achieve the intended effect.
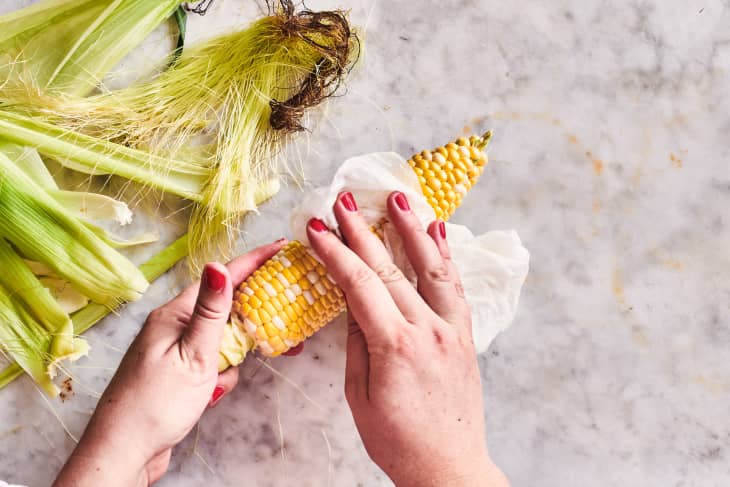
Corn Silk Removal Method: Damp Paper Towel
- Total time: 1 minute per cob
- Rating: 3/10
About This Method: The video from Howcast (on YouTube) shows a simple technique: Simply run a moistened paper towel over a shucked ear of corn to remove the silk.
Results: I found that the paper towel glided over the corn with very little friction, so there was nothing to grip onto that stubborn silk. I went over the corn many times and ended up rubbing so hard that I dislodged a few kernels. And the ear still wasn’t very clean.
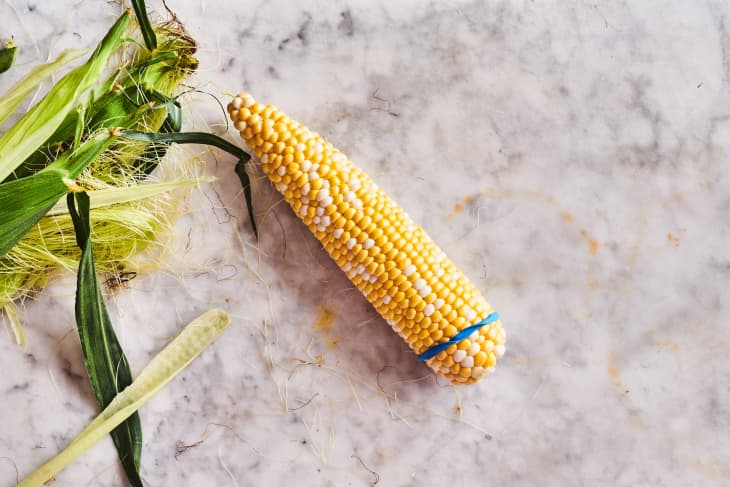
Corn Silk Removal Method: Rubber Band
- Total time: 45 seconds per cob
- Rating: 5/10
About This Method: Cuisine at Home describes an easy method wherein you wrap a large rubber band around your fingers and then rub a shucked ear of corn so that the “silk gets trapped in the rubber band, leaving behind a clean ear of corn.”
Results: Using a 1/2-inch-wide band and double-wrapping it over my index, middle, and ring fingers (as shown in the photo), I rubbed up and down the shucked corn. Not only did the rubber band not grip well onto the silk, but it also kept twisting and wanting to roll off of my hand as I went over the corn. The process was awkward and didn’t get the corn clean enough.
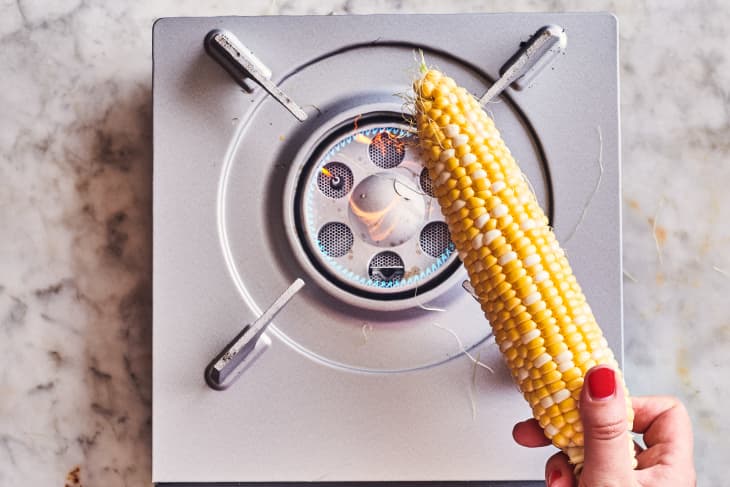
Corn Silk Removal Method: Gas Stove Flame
- Total time: about 1 minute per cob
- Rating: 6/10
About This Method: This intriguing technique from Fine Cooking involves passing an ear of shucked corn over a gas flame, turning to expose all sides to the flame. You’re told that you can hold small cobs with tongs to keep your fingers safely away from the fire; otherwise, you can hold the stem end of the cob as you rotate the corn. The silk gets blackened and can be easily wiped off with a kitchen towel.
Results: I turned my burner to medium-high and held each cob close to, if not touching, the flame as I turned and rotated the corn. I found it hard to get all the silks singed; those deeply embedded ones didn’t want to burn). Most, but not all, of the silk came off, and some fell to my stovetop as they burned (a minor cleaning chore worth noting).
Corn Silk Removal Method: Gripper Pad
- Total time: About 35 seconds per cob
- Rating: 7/10
About This Method: Lifehacker’s tip is to stroke a shucked ear of corn with a gripper pad —one of those round rubber pads you might reach for when opening a stubborn jar of pickles. They also state that a piece of “grippy shelf liner” will work if you don’t have a gripper pad.
Results: The corn did get pretty clean with just a few strands of silk remaining. But the gripper pad was a little awkward to wield. I had to apply a bit of pressure to get the silk to grip on, and that made the pad bunch up as I went over the corn. That’s not a huge deal, but there are other methods that simply work better.
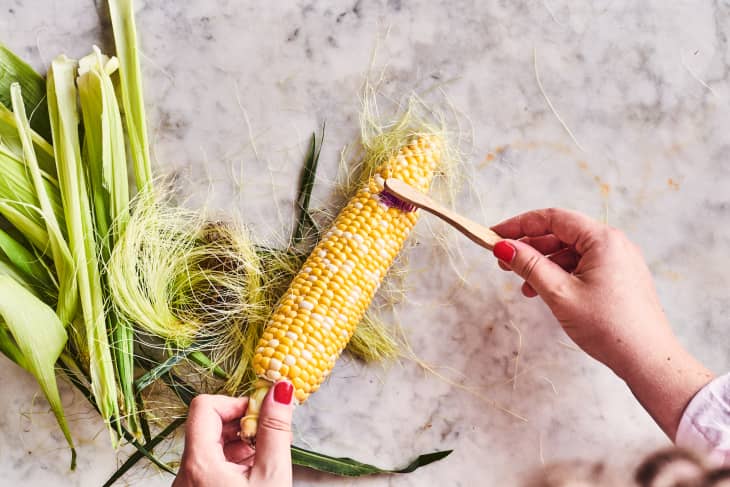
Corn Silk Removal Method: Toothbrush
- Total time: 45 seconds per cob
- Rating: 8/10
About This Method: A video from the Martha Stewart test kitchen shows how you can use a stiff-bristled brush — a vegetable brush or clean toothbrush — on a shucked ear of corn to dislodge and remove the silk.
Results: I went with a toothbrush and brushed up and down the corn cobs. The technique worked fairly well, but a few ornery silk strands remained — especially toward the top tapered end of the cob.
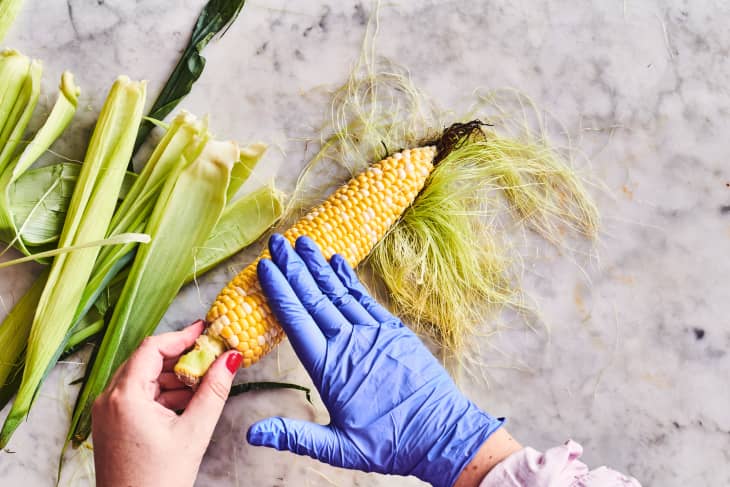
Corn Silk Removal Method: Rubber Glove
- Total time: 30 seconds per cob
- Rating: 8.5/10
About This Method: The instructions on the blog Frugally Blonde say that you can don a rubber glove (examples of gloves are provided) and run your hand over a shucked ear of corn to remove the silk.
Results: I started with a dishwashing glove — one of those thick, bright-yellow latex gloves you find near the dishwashing soap. I thought it would be super-grippy, but it provided very little friction. I switched to a latex-free “exam glove,” the type you find in the pharmacy and that many cooks keep on hand for prepping beets or hot chiles. It was easy to use because it wasn’t just an extension of my hand — it WAS my hand. And it worked much better than the dishwashing glove, removing most (but not quite all) of the silk with ease.
Corn Silk Removal Method: Boiling Water
- Total time: 16 1/2 minutes for 1 cob (add just 15 seconds for each additional cob up to 4 or 6 cobs)
- Rating: 9/10
About This Method: To test this method, I followed the instructions from a Food & Wine video: Submerge whole, untrimmed, unshucked ears of corn in a large pot of lightly salted boiling water, cover the pot, and cook for 5 to 8 minutes. Cool the corn just until you can handle it, and shuck it — the silk should come off easily with the husk.
Results: I cooked the corn for 5 minutes, let it cool for 1 minute, and shucked it. As promised, the silk just fell right off, leaving perfectly clean, perfectly cooked, lightly seasoned corn. As fantastic as this method is, I docked it a point because it’s a bit time-consuming; it took 10 minutes for my water to come to a boil.

Corn Silk Removal Method: Microwave (Whole)
- Total time: 9 minutes 15 seconds for 2 cobs
- Rating: 10/10
About This Method: You’ll find lots of Internet sources for this method, but none more charming from this YouTube video from host Ken. He demonstrates microwaving 2 whole, unshucked ears of corn for 8 minutes, then carefully (because they’re hot) trimming off the stem ends, holding the corn at the top tapered end, and shaking the ear free of the husk and silk.
Results: Each ear was completely, amazingly clean, with no hint of silk strands in sight. The method takes ridiculously little effort and is successful every time. And it’s fun to watch the corn slide out from the outer husk, emerging picture-perfect clean. The corn is crisp and nicely cooked, and before you scoff that maybe you’d like to grill your corn, get this: You can! If you prefer a little char flavor, simply brush with butter or oil and grill over high heat for a few minutes. The corn will still be deliciously crisp and wonderfully free of those annoying wispy strands.
Final Thoughts
To get the corn completely clean of silk, you need to cook it with the silk and husk intact; steaming or boiling is the key to loosening those stubborn strands. You can’t beat the ease and convenience of Ken’s microwave method. If you don’t have a microwave, though (I have several friends who don’t), the boiling method is a great option for you. And if you want completely raw corn for a salad? Simply reach for some household items (glove, toothbrush) for help.