

We Tried 6 Methods for Preventing a Bundt Cake from Sticking to the Pan and the Winner Was Pure Magic
Layer cakes are great, but I don’t always have the time or patience for baking multiple cakes and fillings, then frosting and decorating the treat. But I almost always have time for a Bundt cake. Thanks to a plethora of fancy pans, you can whip up a batter, bake it off, and turn out a beautifully sculpted cake that only needs a drizzle of glaze or a dusting of powdered sugar to make it memorable. It’s the ultimate low-effort, high-reward dessert — when all goes according to plan.
The moment of Bundt cake truth comes when it’s time to release the cake from the pan. If you’ve ever made a Bundt cake, you know what I’m talking about. You have a beautifully golden cake that’s fluffy and brimming over the edges of the pan, but will it emerge intact? There is nothing more devastating than flipping the pan over and the cake being stuck tight. That’s when the shaking and the tapping begin. Sometimes those tactics work; other times, the bottom half of the cake comes out with a plop, leaving the top half in the pan (or the cake comes out with cracks, torn edges, or patchy coloring).
In an effort to beat the Bundt cake blues, I took to the internet and found six popular methods for ensuring that your Bundt comes out in one beautiful piece. After baking an unhealthy amount of cake and covering myself — and my kitchen counter — in an array of fats and flours, I found one foolproof method.
A Few Notes About Methodology
Methods: I didn’t test greasing the pan with butter or dusting with all-purpose flour. It was unanimously agreed, from my internet search, that the milk solids in butter act like glue, causing the cake batter to stick to the pan. Dusting the Bundt pan with flour can leave a floury residue on your baked cake, which doesn’t look great and can add a raw flour flavor. All of the pans were greased right before adding the batter to prevent the grease from pooling at the bottom of the pan.
Cake: For the sake of ease and consistency, I used boxed yellow cake mix for each method tested.
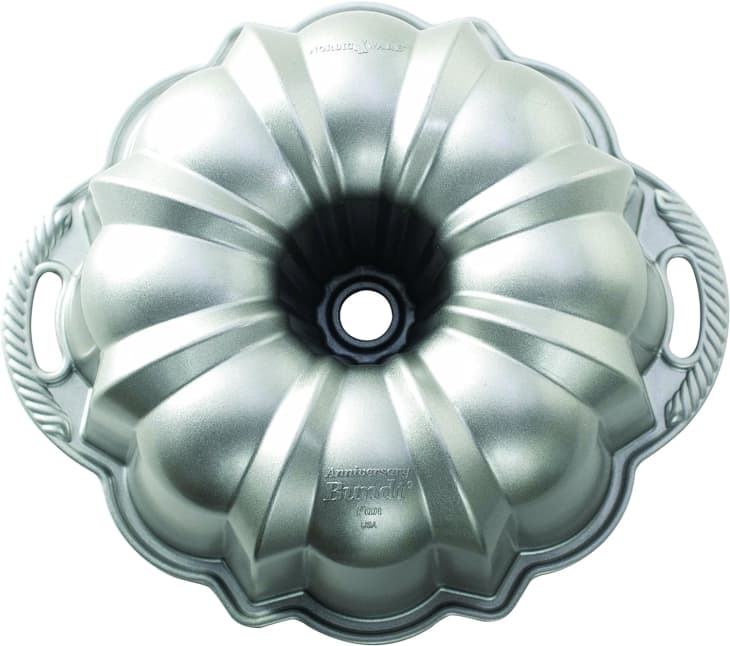
Pan: For every test, I used the same Nordic Ware Anniversary Bundt Pan.
Time: The time listed in each method includes the time it took to prepare the cake release and apply it to the pan.
Ratings: Each method is rated on a scale of 1 to 10. The ratings were based on ease, cake release success (did the cake stick, tear, or crumble?), cake color (did the greasing method alter the cake’s color?), texture (did the greasing method add unwanted texture to the cake?), and taste (did the greasing method alter the flavor of the cake?).
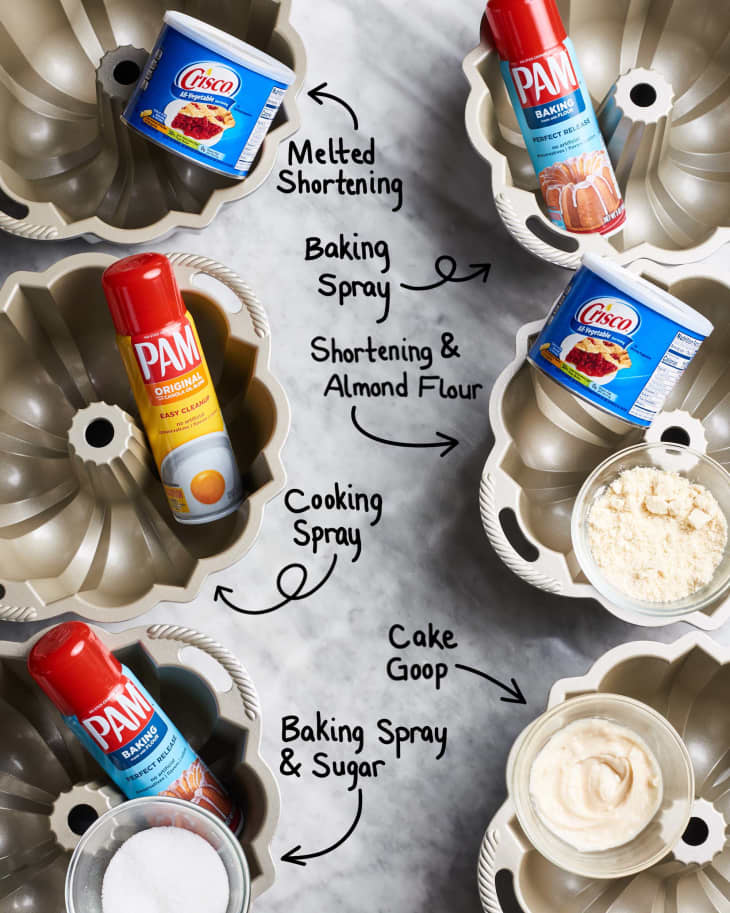
Bundt Release Method: Melted Shortening
- Timing: 1 minute
- Rating: 4/10
About this method: Tessa at Handle the Heat likes to grease her Bundt pan with melted shortening that she generously applies with a silicone pastry brush. As a bonus trick, once the cake has baked, she lets it rest in the pan for five minutes, then inverts it onto a cooling rack and lets it rest for another five minutes before removing the cake from the pan.
Results: This method yielded a beautiful dark-golden brown cake, but the cake didn’t want to come out of the pan. I’m not sure if the extra 10 minutes cooling in the pan contributed to the cake sticking or the silicone brush didn’t get into all the crevices of the pan like a bristle brush would, but the cake split in the middle — separating the top from the bottom. After some choice words, I was able to piece the two halves back together, but the goal of this test was to get a whole cake … not two halves. To be fair, Tessa offers a disclaimer at the top of her Bundt post that acknowledges that everyone’s baking environment is different (your oven, your pan, your kitchen temperature, the weather that day), so if you find a method that works for you, stick with it (pun intended!). For me, this wasn’t the winning method, but it might work in your kitchen.

Bundt Release Method: Cooking Spray
- Timing: 30 seconds
- Rating: 6/10
About this method: Hummingbird High’s pan release method is as easy as it gets. She suggests generously spraying the pan with cooking spray. “When I say a lot, I *mean* A LOT,” she says. “When done prepping the pan, you are going to be uncomfortable with the amount of cooking spray in the pan.” She also recommends using a cooking spray made from a fat that’s liquid at room temperature (think: canola- or vegetable oil-based sprays).
Results: The cake didn’t have a chance of sticking to the pan, but unfortunately no good deed goes unpunished. The excess baking spray baked more quickly than the batter and burnt onto the exterior of the cake, creating dark edges. Additionally, the overly generous amount of spray gave the cake a fatty, burnt taste.
Bundt Release Method: Baking Spray and Sugar
- Timing: 30 to 60 seconds
- Rating: 7/10
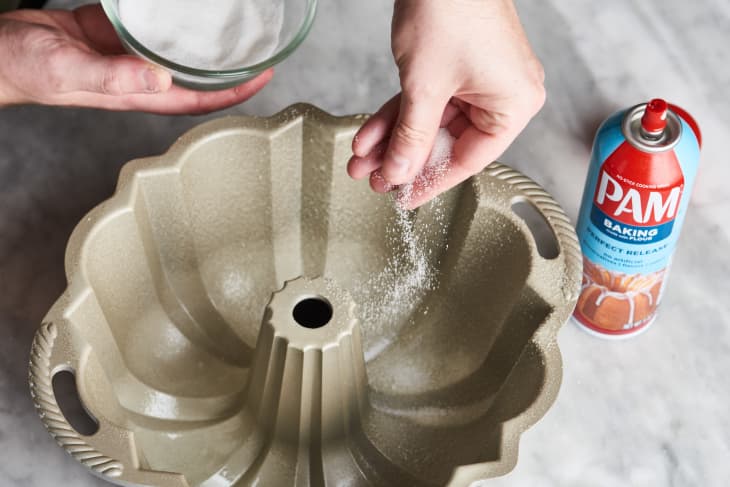
About this method: Adding an additional barrier between the cake and the pan with a coating of flour, nut flour, or cocoa powder (if baking a chocolate cake) are popular pan release methods. But Baking Kneads suggests another option: granulated sugar. I followed Baking Kneads’ suggestion and sprayed the pan with a baking spray that contains flour, then coated the pan with granulated sugar, including the center tube.
Results: Knowing the sugar would caramelize and possibly stick to the pan if I let the cake cool too long, I released the cake only a minute after it came out of the oven. Even in that short amount of time the cake got a little stuck. After a few taps, I had to use my kitchen torch to reheat the pan and melt the sugar to encourage the cake to release. (For those without a kitchen torch, you could stick the cake back in the warm oven for a minute or two to melt the sugar.) The cake still tore in a few spots, but not completely — more like flaps of cake that fell back into their spot. The sugar gave the cake a beautiful sheen, but did change the texture. A slice of warm cake had a little crunch, while the completely cooled cake had a caramelized sugar crack. The additional sugar also gave the cake a sweeter taste. Coating the pan evenly with sugar was also a little tricky. I had to tap the pan a few times on the counter while rolling and tilting it in some creative angles to make sure I got the sides and the center tube covered. I think this method works for a specific type of cake — like a brown sugar cake where you want a shiny, slightly caramelized exterior and nothing else as garnish.
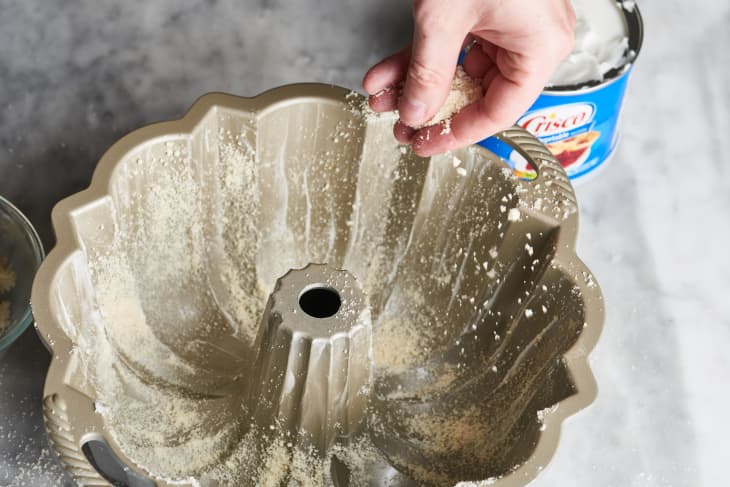
Bundt Release Method: Shortening and Almond Flour
- Timing: 30 to 60 seconds
- Rating: 7/10
About this method: King Arthur Baking Company suggests greasing your Bundt pan with nonstick vegetable oil spray or softened shortening and spreading it with a pastry brush to get the fat into every nook and cranny. For an extra barrier between cake and pan, King Arthur also suggests coating your pan with nut flour, taking extra care to coat the center tube. For this test, I chose softened shortening and almond flour.
Results: The cake released immediately from the pan with ease. The biggest issue with this method is the appearance and texture of the cake. Instead of an even, golden-brown exterior, the cake is splotchy from where the almond flour either baked or didn’t bake at all. The cake had an almost ombré look, similar to what happens when you coat the pan with all-purpose flour. The parts of the cake where the almond flour baked developed a crunchy exterior, which competed with the fluffy cake. The cake also had a lot of crater-like specks throughout, where the heavy almond flour sunk into the cake, leaving holes instead of a smooth surface.
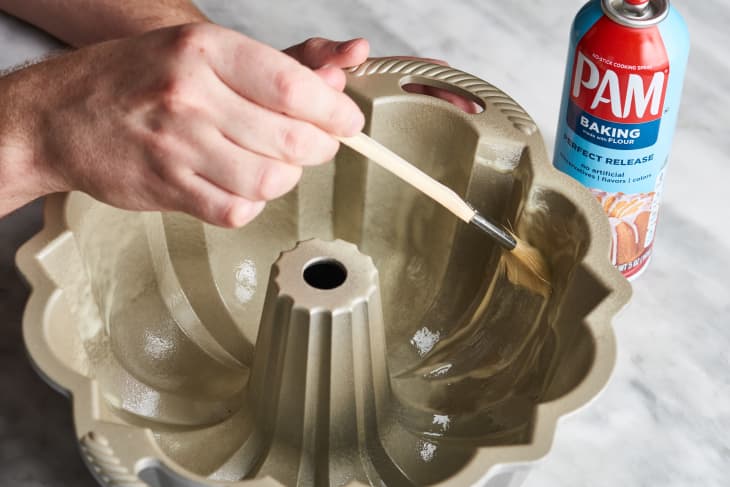
Bundt Release Method: Baking Spray
- Timing: 30 seconds
- Rating: 8/10
About this method: Since I was using a Nordic Ware pan for this test, I figured I should test the company’s cake release method, too. They suggest using a baking spray that contains flour and spreading it over the pan with a pastry brush. The benefit of a baking spray with flour is it’s the best of both pan-release worlds — fat and flour all in one — without having to twist your arms and potentially cover the kitchen floor with flour. Plus, according to Nordic Ware, using a cooking spray that doesn’t contain flour can damage nonstick pans.
Results: The release was smooth, but unfortunately some areas of the cake did stick to the pan. There were no big chucks or visible cracks, but the fine outer layer of the cake stuck in places, which gave the cake a patchy, uneven look. This isn’t a bad method to use, but if you’re a perfectionist (like me) who’s going for an even, golden-brown exterior, there’s a more foolproof method.
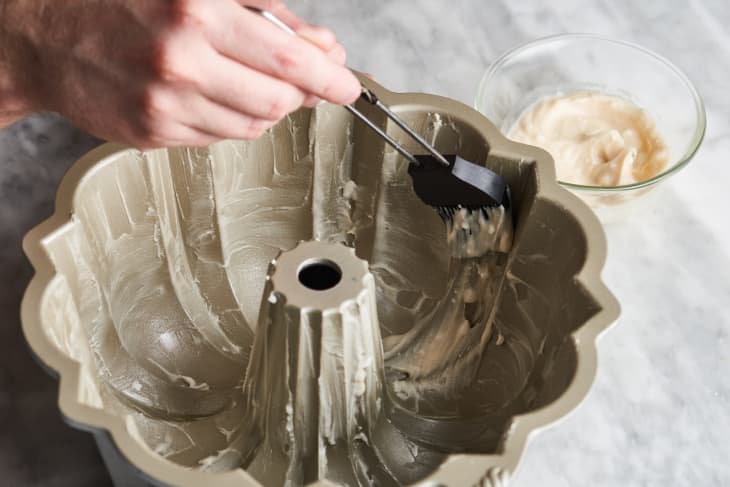
Bundt Release Method: Cake Goop
- Timing: 2 minutes
- Rating: 10/10
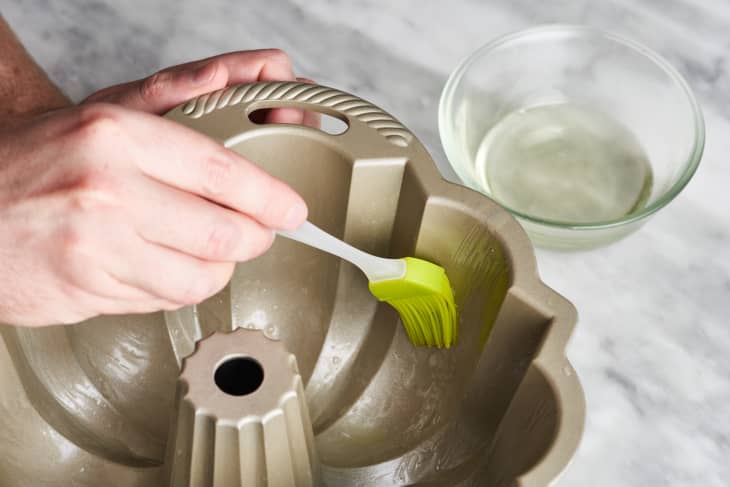
About this method: Some of my favorite bakers, including Edd Kimber, The Boy Who Bakes, and Jocelyn Delk Adams of Grandbaby Cakes swear by cake goop, the DIY pan release paste. Edd says since switching to cake goop a few years ago, he hasn’t had a single cake stick and Jocelyn recently reminded us all of the power of goop on her Instagram page. To make cake goop, beat together equal parts (by volume) all-purpose flour, vegetable oil, and shortening until combined and store the mixture in an airtight container in the fridge. To use, spread the cake goop in the pan using a pastry brush, coating the pan with an even layer.
Results: The hype is right! This method is fail-proof and leaves no grease or discoloration on your cake. The cake slid right out of the pan and was evenly golden-brown, structurally sound, and beautifully sculpted. You do have to spend a bit of time making the goop, but once you have a batch you can stash it in the fridge for future bakes. This method is a clear winner and has convinced me to join Team Cake Goop for all future Bundt baking.