
Recipe: Rustic Honey and Almond Naked Cake

Serves12 to 18
Makes1 (9-inch) layer cake
Looking for a baking project that screams spring? This stunning honeycomb almond cake requires just enough of your attention to get you in the baking zone without becoming overwhelming. It’s a great cake for pro-bakers and intrepid beginners alike, thanks to its mix of classic techniques with minimalist styling. If you’re in charge of dessert for a spring shower, birthday party, or afternoon tea, consider this rustic naked cake for the special occasion.
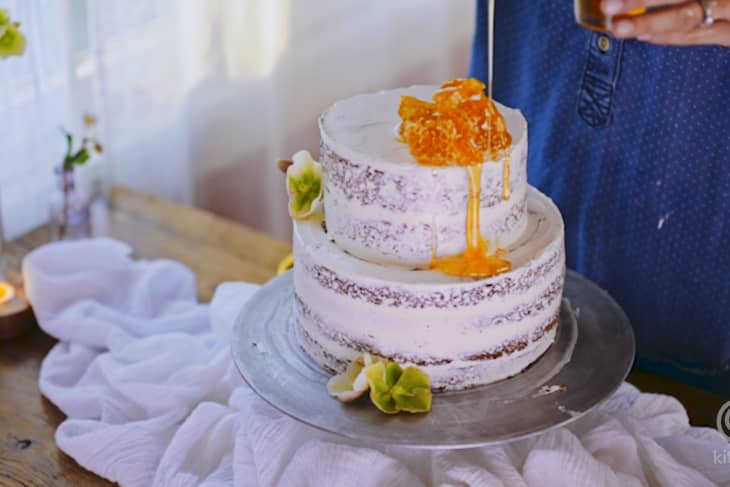
Made with almond meal, yogurt, and honey, this cake is intensely moist and fragrant, so you don’t need much more than a few elegant swipes of Swiss buttercream for the frosting. Follow the lead in the video and apply the frosting, naked-style, letting some of the cake’s edges peek through. To finish, top this cake with a pile of beautiful honeycombs — ask you favorite local beekeeper about purchasing some — and a generous drizzle of honey. Berries and fresh flowers are also lovely additions.
Make a 2-Tiered Cake
The recipe below makes a four-layer, single-tiered cake. If you want to make a two-tiered cake as shown in the video, see Recipe Notes below for instructions on making the additional smaller top layer.
Rustic Honey and Almond Naked Cake
Makes 1 (9-inch) layer cake
Serves 12 to 18
Nutritional Info
Ingredients
For the cake layers:
- 2 cups
all-purpose flour
- 1 cup
almond meal
- 1 tablespoon
baking soda
- 3
sticks (1 1/2 cups) unsalted butter, at room temperature, plus more for coating the pans
- 1 cup
granulated sugar
- 1/2 cup
honey
- 4
large eggs
- 1 1/2 cups
plain whole-milk yogurt
- 1 teaspoon
kosher salt
- 1 teaspoon
vanilla extract
For the Swiss meringue buttercream:
- 3 to 4
large egg whites
- 3/4 cup
granulated sugar
- 3 sticks
(1 1/2 cups) unsalted butter, at room temperature
- 1/2 cup
honey
- 2 teaspoons
vanilla extract
For decorating (optional):
Honeycomb
Honey
Fresh flowers
Fresh berries
Instructions
Make the cake:
Arrange a rack in the middle of the oven and heat to 350°F. Coat 2 (8- or 9-inch) round cake pans with butter, then line the bottom of each with a parchment paper round; set aside.
Place the flour, almond meal, baking soda, and baking powder in a large bowl and whisk until combined; set aside.
Place the butter, sugar, and honey in the bowl of a stand mixer fitted with the paddle attachment. (Alternatively, use an electric hand mixer and large bowl.) Beat on medium speed until light and fluffy, about 2 minutes.
Beat in the eggs one at a time, waiting until each is fully incorporated before adding the next. Beat in the yogurt, salt, and vanilla until combined. Stop the mixer and scrape down the sides with a rubber spatula. Return the mixer to low speed and gradually add the flour mixture until just combined.
Divide the batter evenly between the cake pans. Bake until the top bounces back when you gently press it, or a toothpick comes out clean when inserted into the center of the cake, 45 to 55 minutes.
Place the pans on a wire rack and let sit until cool enough to handle, about 20 minutes. Run a thin knife around the edges of the cake to loosen, flip the cakes out, remove the parchment paper, then place right-side up back on the rack to cool completely before filling and frosting.
Make the buttercream:
Fill a large saucepan halfway with water and bring to a simmer over medium-high heat. Reduce the heat to low. Place the egg whites (use 4 if you are making a 2-tier cake, otherwise 3 is enough) and sugar in the bowl of a stand mixer or large heatproof bowl. Fit the bowl over the saucepan and whisk constantly over the simmering water until the sugar is completely dissolved and the mixture is the temperature of a warm bath, 4 to 5 minutes.
Place the bowl onto the stand mixer fitted with the whisk attachment. (Alternatively, use an electric hand mixer.) Beat on medium speed for 1 minute. Increase the speed to high and beat until stiff peaks form and the bowl is no longer warm to the touch, 4 to 5 minutes more.
Reduce the mixer to low speed and add the butter a few tablespoons at a time. Once all of the butter is added, increase the speed to medium and beat until smooth, 3 to 4 minutes. There will be a moment where you think everything is wrong. The frosting will look curdled, but just keep going. It will all work out! Beat in the honey and vanilla.
Assemble and decorate the cake:
If the cakes are not level, use a serrated knife to trim the tops. Cut each cake in half horizontally so that you now have 4 layers.
Place 1 of the cakes on a cake or serving plate. Spread about 1/3 cup of frosting on the top of the cake. Top with a second cake layer and repeat with spreading the frosting. Top with a third cake layer and repeat with spreading the frosting. Top with the fourth and final cake layer.
Coat the top and sides of the cake with a thin layer of frosting as a crumb coat. Refrigerate for 15 to 20 minutes to let the frosting set. Frost the outside of the cake with the remaining frosting. Decorate with honeycomb, flowers, fresh berries, and a drizzle of honey if desired.
Recipe Notes
For a 2-tier cake as shown in the video: Make an additional batch of cake batter and bake in 2 (6-inch) round cake pans (you will have extra batter left that can be baked into cupcakes). Cool and level each cake. Stack the 2 layers with 1/4 cup of frosting in between, then frost the outside like the larger bottom layer and chill. Stack this tier on top of the frosted larger tier.
Make ahead: The cake layers can be baked ahead. Do not level or split the cakes. Wrap each one tightly in plastic wrap and store at room temperature for 1 day, or in the freezer for up to 1 week. Defrost before using.
Storage: The assembled cake can be covered in plastic wrap and stored at room temperature for up to 3 days or in the refrigerator for up to 1 week. It will taste best the day it is made.
Credits: Emily Petrick is a West Coast-based baker and food stylist. She is a Cordon Bleu graduate and worked at several prestigious Los Angeles bakeries before starting her own business. She is happiest when she is experimenting and making a mess in her kitchen. You can see more of her work on her website.