
How To Make Stir-Fry Freezer Meals


I lived off packaged stir-fry dinners from the freezer section for the better part of my 20s. As easy as it is to throw together a spur of the moment stir-fry dinner, there were many nights when all I wanted to do was open a package, dump it in a pan, and have dinner ready — and let’s be honest, there are still plenty of nights like these.
I stopped buying those frozen meals when I lost my love for the gloppy, overly-sweet sauces (and some of their unpronounceable ingredients), but since we’ve been talking about stocking our freezers with ready-made meals this month, I got to thinking: Could I make my own frozen stir-fry meal? The answer is a solid yes!
I’ll be honest — I really wasn’t sure this was going to work. Food companies have powerful chillers to instantly freeze food, vacuum sealers to protect it from freezer burn, and teams of researchers to nail down the perfect process, plus all those unpronounceable ingredients to ensure perfect flavor and texture in the finished dish.
Turns out that you don’t need all that. All you need is your home freezer, a sheet pan, some freezer containers, and the patience to get it all done. The final, cooked dish is easy, surprisingly tasty, and definitely hits the spot — it’s none the worse for its time in the freezer, and it takes only 10 to 15 minutes to prepare for serving. Even the chicken is tender and flavorful! Granted, this stir-fry can’t really compare to one made fresh, but for something that requires zero thought to warm up at the end of a long day, I give this a standing ovation.
I used a very basic stir-fry here, more or less following our beginner stir-fry recipe. I poached the chicken and sliced it before freezing, and then chopped the vegetables and froze them raw. Freezing these ingredients in a single layer on a sheet pan before transferring them to freezer containers ensures that they freeze individually instead of in a solid block — this makes it much easier cook them quickly and evenly down the road. I also prepped a few servings of rice and the stir-fry sauce itself.
Basically, you get everything you need for dinner in one neat package. Open, dump in pan, dinner is served. Awesome.
I’m sure there are some skeptical raised eyebrows and questions out there. Let me address what I think will be some of the main ones:
Why Bother?
Prepping these freezer stir-fry meals is no small undertaking. A lot of work goes into making just a few of these pre-packaged meals. Honestly, it’s really not worth it if you’re only making one or two just to have for dinners later in the week.
However, it is very much worth it for the following situations:
- If you’re anticipating a busy period ahead, like a new baby, final exams, or long hours at work
- If you want to help a friend prepare for a busy period ahead, like a new baby, final exams, or long hours at work.
- If you want to stock the freezer for a son, daughter, or other loved one cooking on their own.
I love that these stir-fry dinners are something different than the usual heavy, cheese-laden casseroles that we normally pass around in times like this. They’re easy for people with even the most rudimentary kitchen skills to warm up for dinner, and these freezer dinners actually taste good. You can swap out the ingredients in either the stir-fry or the sauce to add some variety or cater to someone’s particular food loves.

So Much Packaging! Is That Really Necessary?
Part of what makes both store-bought frozen stir-fry dinners and this homemade version work so well is that the individual components are kept separate and are then reheated in a specific order. This ensures that everything finishes at the same time and nothing gets overcooked. Dry chicken and soggy vegetables are no one’s idea of a good dinner.
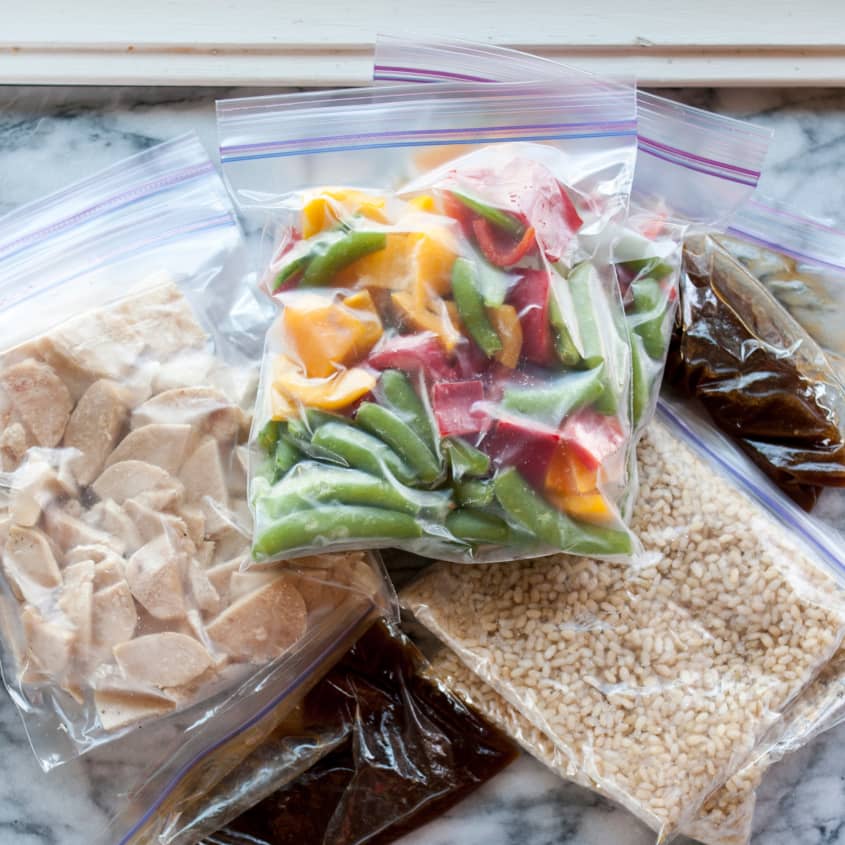
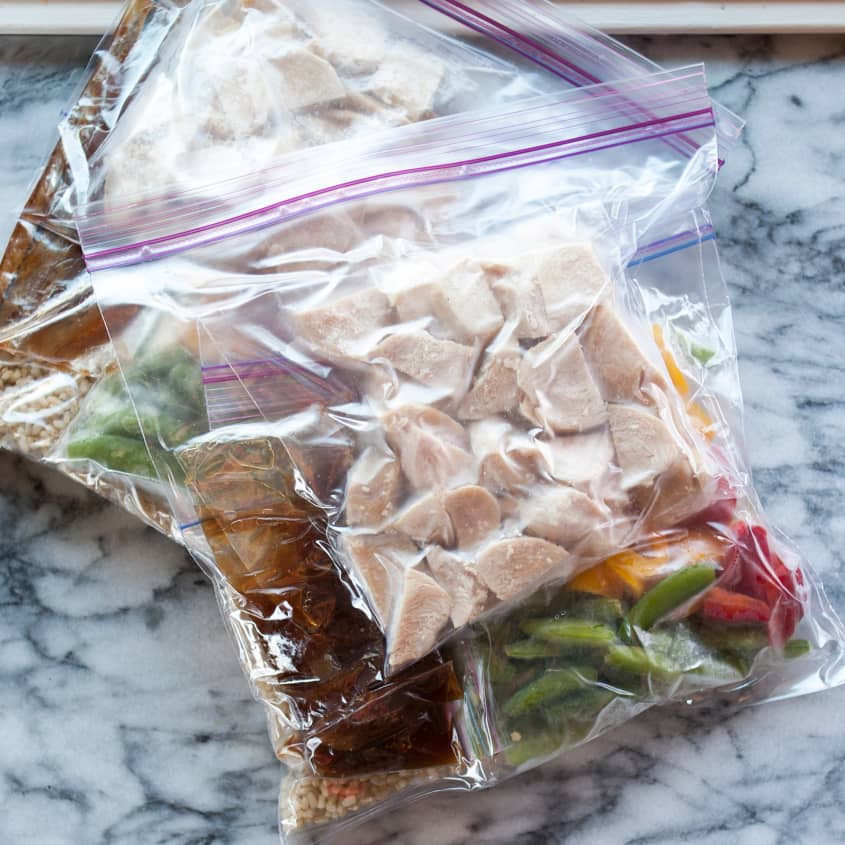
So, yes, you’ll have much better success with these dinners if you package everything separately. I like to use plastic freezer bags because it’s easy to press out most of the air (which helps slow down freezer burn) and they take up less space in the freezer — the individual ingredients go in small bags and then they all get packed into a big gallon-sized bag to make the meal easy to grab. I don’t use that many plastic bags in general and I also re-use all my plastic bags until they literally fall apart, so I feel ok about using them here. If you prefer and have the space in your freezer, you can definitely use small storage containers made of glass or plastic and either tie them together or pack them into a larger container.
You can also vacuum-seal the ingredients in their own bags — this is actually ideal if your planning to freeze the dinner for more than a month or two.
Can I Replace the Chicken/Peppers/Peas/Sauce with Something Else?
Yes! This is more about technique than recipe. You might start with the recipe I give below, but then you can certainly branch out into your favorite vegetables, proteins, and other ingredients.
I feel confident that you can use this technique with chicken, pork, beef, or even seafood. You’ll need to adjust the initial cooking time and possibly the technique — use whatever method you prefer to cook the meat, but only cook it until it is barely done to avoid overcooking it later. You can also use tofu! I recommend baked tofu, though I feel that this will work with extra-firm tofu as well. Tofu does not need to be precooked.
For the vegetables, quick-cooking veggies are generally best, like peppers, snap peas, beans, and the like. Tougher vegetables, like broccoli, carrots, and asparagus, will do best if briefly blanched before freezing. They don’t need to be cooked through, but blanching helps retain the flavor and texture in these vegetables and gives them a head start when cooking the stir-fry. Take a look at this tutorial for more info:
How to Prepare Stir-Fry Freezer Meals
Serves 2
Nutritional Info
Ingredients
For the stir-fry base:
- 1/2 cup
uncooked white or brown rice
- 3/4 to 1 pound
chicken breasts or thighs (substitute pork, beef, or tofu)
- 2 cloves
garlic, smashed
- 1
bay leaf
- 1
bell pepper (or other vegetable, equal to 1 cup chopped)
- 1 cup
sugar snap peas (or other vegetable, equal to 1 cup chopped)
For the stir-fry sauce
- 2 tablespoons
soy sauce
- 2 tablespoons
dry sherry
- 2 tablespoons
water, chicken broth, or vegetable broth
- 2 tablespoons
brown sugar
- 1 tablespoon
rice wine vinegar
- 1 teaspoon
sesame oil
- 1 teaspoon
cornstarch, optional for a thicker sauce
To prepare the frozen meal:
2- to 4-quart pot
Chopping board
Chef's knife
Baking sheet
Parchment
Freezer bags or containers
To cook:
Bowls
Large skillet or wok (non-stick is ok)
Instructions
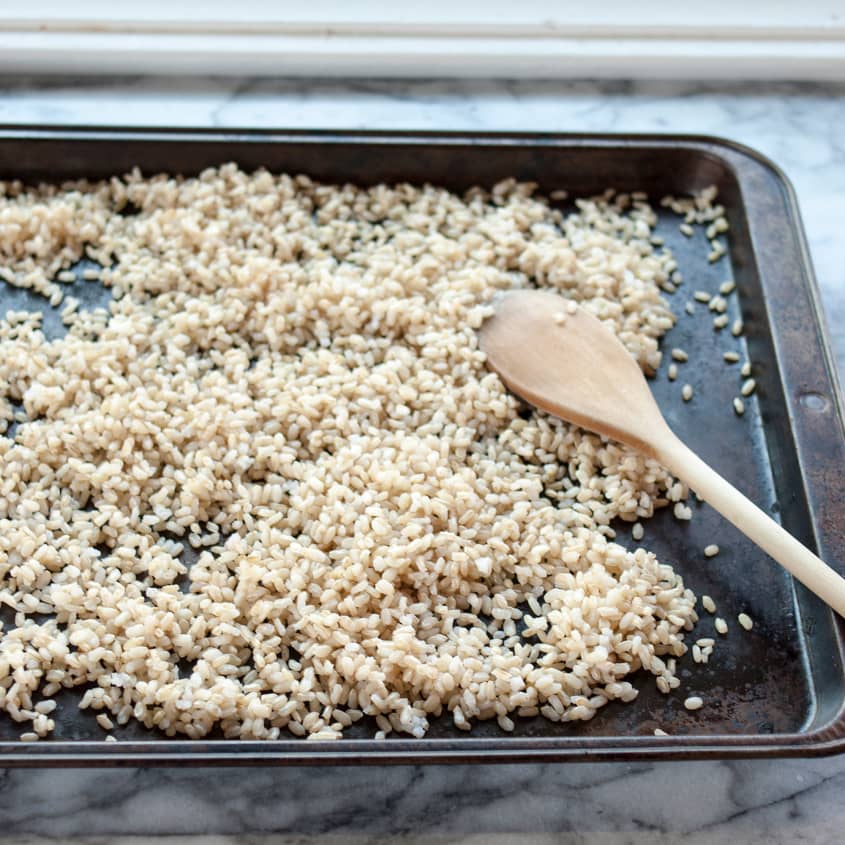
Prepare the rice: Prepare the rice according to its package directions, or follow this tutorial for How to Cook Rice on the Stovetop. When done, spread the rice on a baking sheet to cool, then transfer to freezer bag or container. Refrigerate until ready to freeze with the other ingredients.
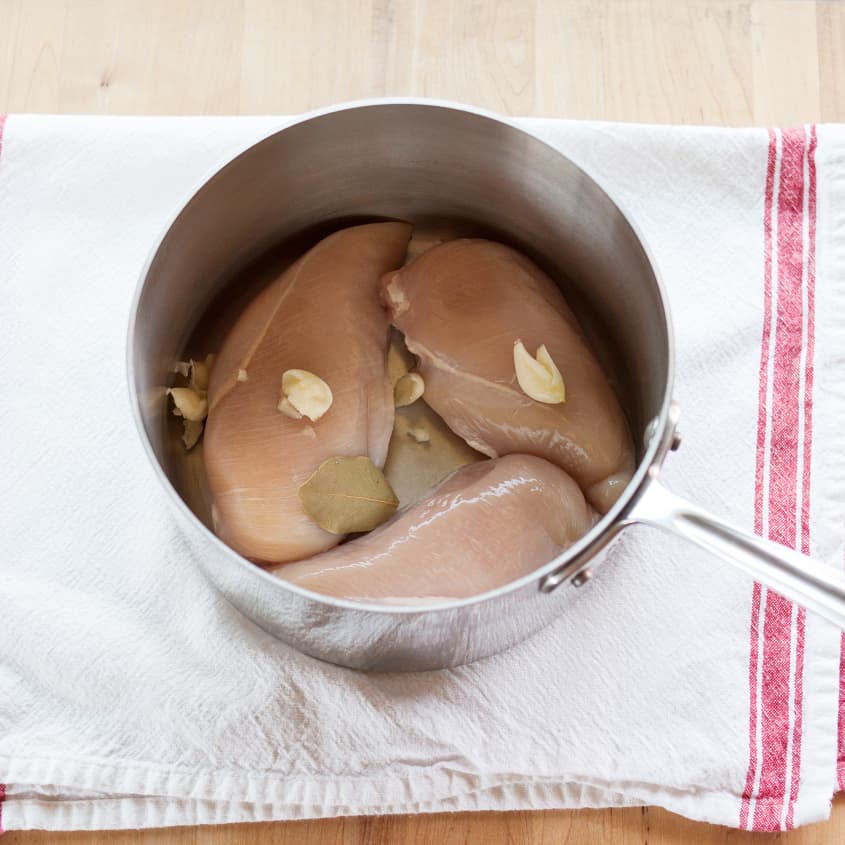
Poach the Chicken: Place the chicken in a pot and add the garlic and bay leaf. Cover the chicken with a few inches of water. Bring to a full boil over medium-high heat, then turn the heat to low, cover the pot, and let the chicken simmer until cooked through and the interior registers 165°F on an instant-read thermometer, 10 to 13 minutes depending on the thickness of the chicken.
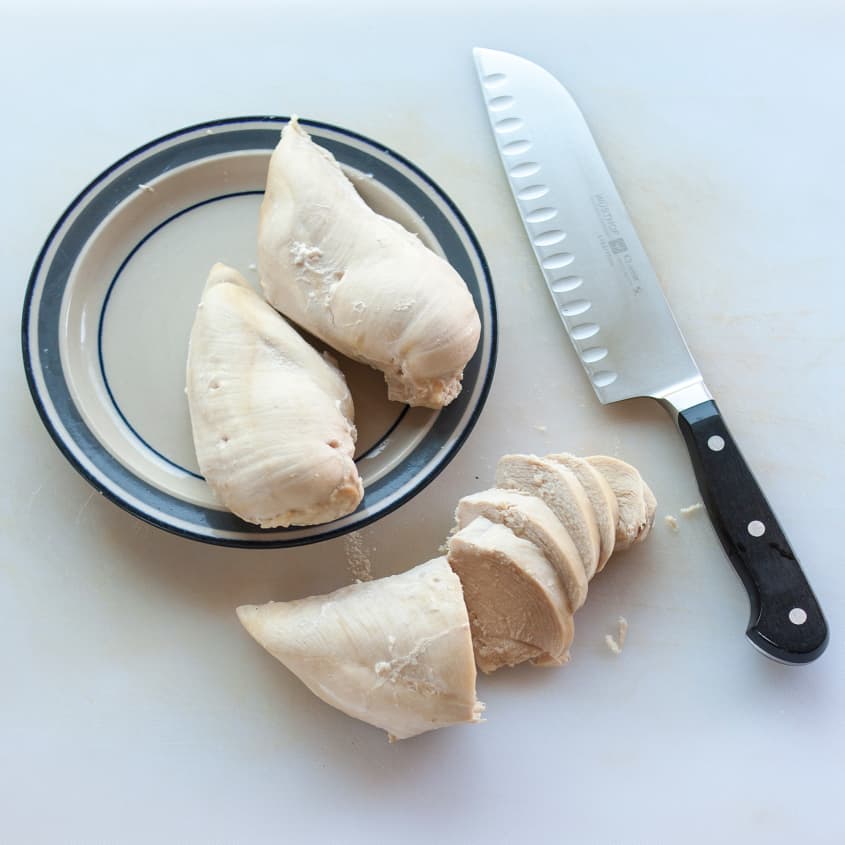
→ Pork or beef can also be poached in this manner. You can also cook the meat on the stovetop or grill — cook until just barely cooked through. Tofu does not need to be pre-cooked.Slice the Chicken: Cut the chicken into thick slices, then cut each slice into bite-sized pieces. Make sure that the pieces are as uniform in shape and thickness as possible.
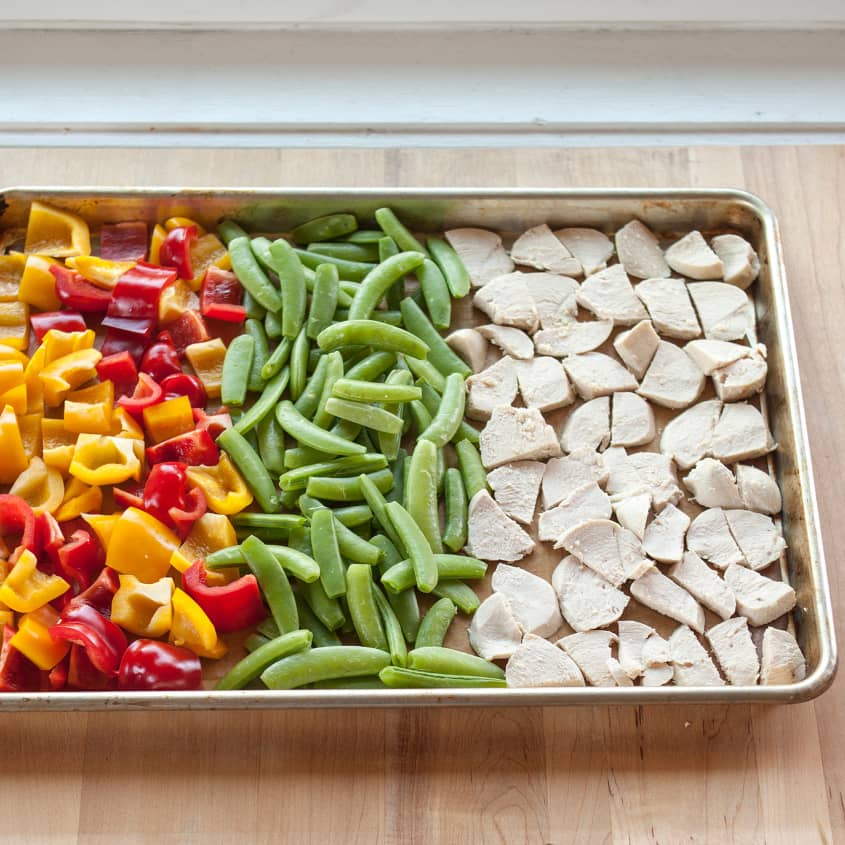
Transfer the Chicken to the Baking Sheet: Line the baking sheet with parchment and lay the chicken in a single layer over 1/3 of the baking sheet (leave room for the vegetables). Some overlapping is ok, but avoid big clumps of chicken. If needed, lay a second sheet of parchment over the first layer of chicken and lay the remaining chicken on top.
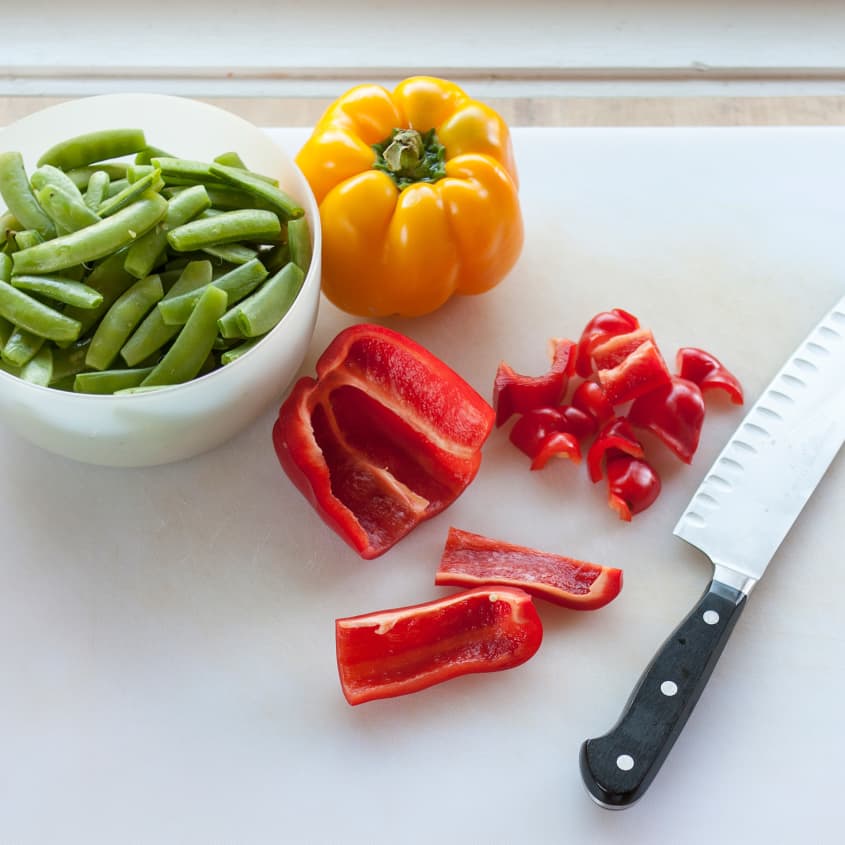
Prepare the Vegetables: Slice the pepper (or other vegetables) into bite-sized pieces. Trim the ends from the sugar snap peas.
Transfer the Vegetables to the Baking Sheet: Arrange the vegetables in a single layer over the remaining space on the baking sheet. Some overlapping is ok, but avoid big clumps. If needed, lay a second sheet of parchment over the first layer of vegetables and lay the remaining vegetables on top.
Freeze Until Solid: Freeze the vegetables and chicken until solid, at least 4 hours or overnight.
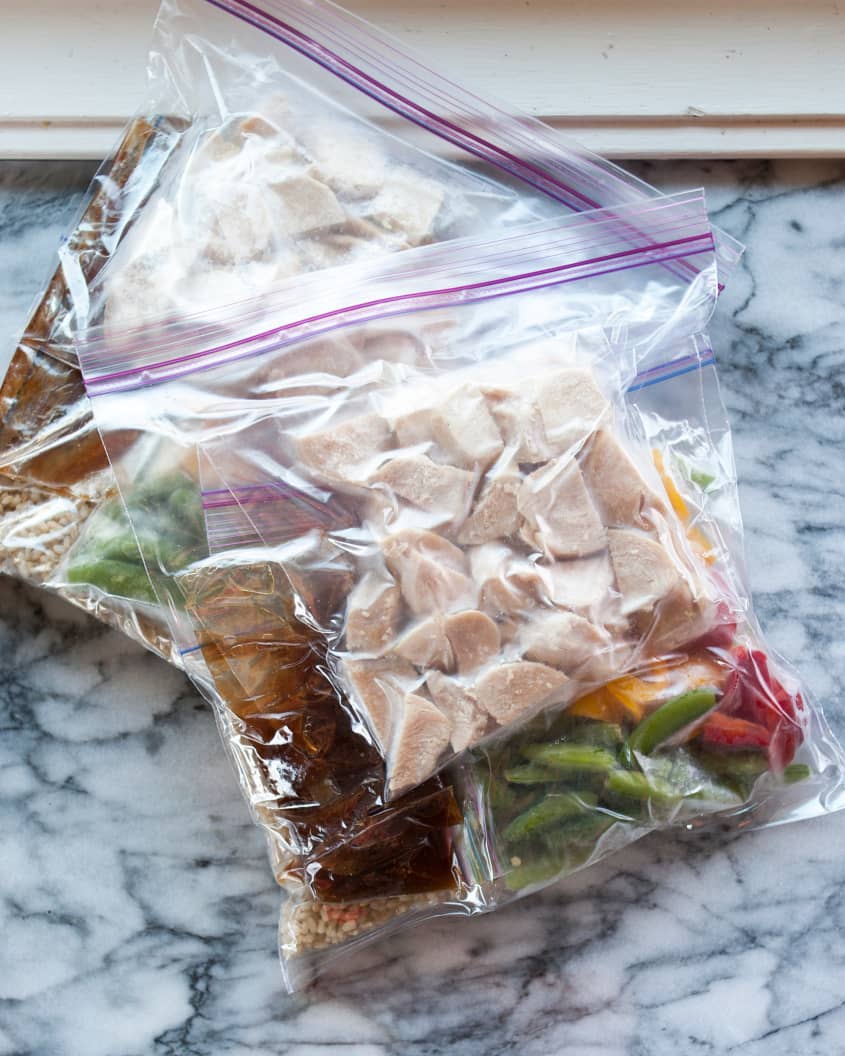
Package the Ingredients into Freezer Bags: Place the frozen chicken in one bag and the frozen vegetables in a second bag. Make sure to press as much air out of the bags as possible. Alternately, vacuum-seal the ingredients.
→ Tool Tip: If you don't have a vacuum-sealer, the best way to get the most air out of a plastic bag is to add the ingredients, partially close the top, then suck out the remaining air with a straw.Prepare the Sauce: Whisk together the ingredients for the sauce, then pour it into a freezer bag. Press out as much air as possible before closing and make sure the bag doesn't have any holes or leaks.
Package the Stir-Fry Dinner Together: Place the bags of chicken, vegetables, rice, and sauce in a large plastic bag or freezer container. Print or write out the Preparation Instructions (below) and place in the bag. Press out as much air as possible before sealing.
Freeze for Up to 3 Months: These freezer meals are best eaten with in a few months. Unless vacuum-sealed, the ingredients will gradually start to develop freezer burn.
Heat Up the Stir-Fry Meal for Dinner: Follow these instructions for assembling the final dish, which will take about 10 to 15 minutes.
Recipe Notes
To Heat Up & Serve the Frozen Stir-Fry Meal
- Defrost Sauce: Remove the stir-fry dinner from the freezer. Place the sauce in a bowl of hot tap water to thaw.
- Heat Rice: Transfer the rice to a microwave-safe container, cover loosely, and heat for 2 minutes. If not fully warmed, continue heating in 30 second bursts until warm. Keep covered and set aside. Alternatively, the frozen rice can be added to the skillet with the vegetables.
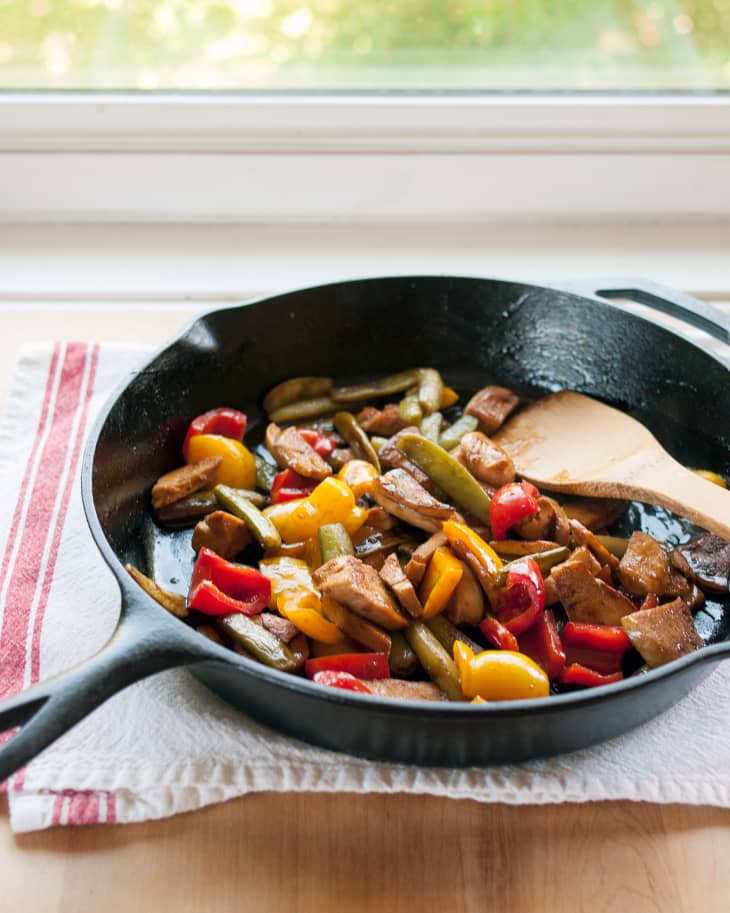
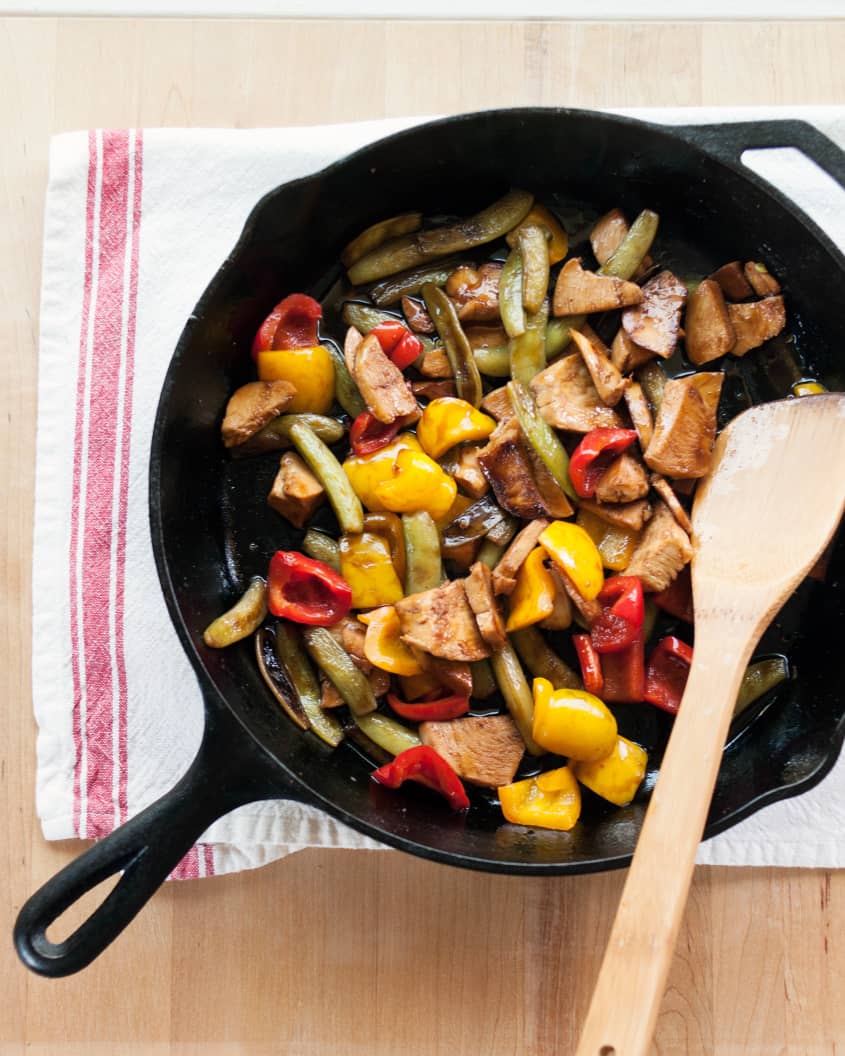
- Cook the Chicken: Warm 2 teaspoons of oil in a large skillet (like a cast-iron skillet) or a wok over medium-high heat. When the oil is warm, add the frozen chicken. Spread the chicken into a single layer and cook, stirring occasionally, until the chicken develops golden spots and is warmed through, 4 to 6 minutes.
- Add the Vegetables: Add the frozen vegetables to the skillet with the chicken. Cook, stirring occasionally, until the vegetables are hot and crisp-tender, 3 to 5 minutes.
- Mix with the Sauce: Pour the warmed sauce over the chicken and vegetables. Stir until the sauce is thickened and coats all the ingredients, about 1 minute.
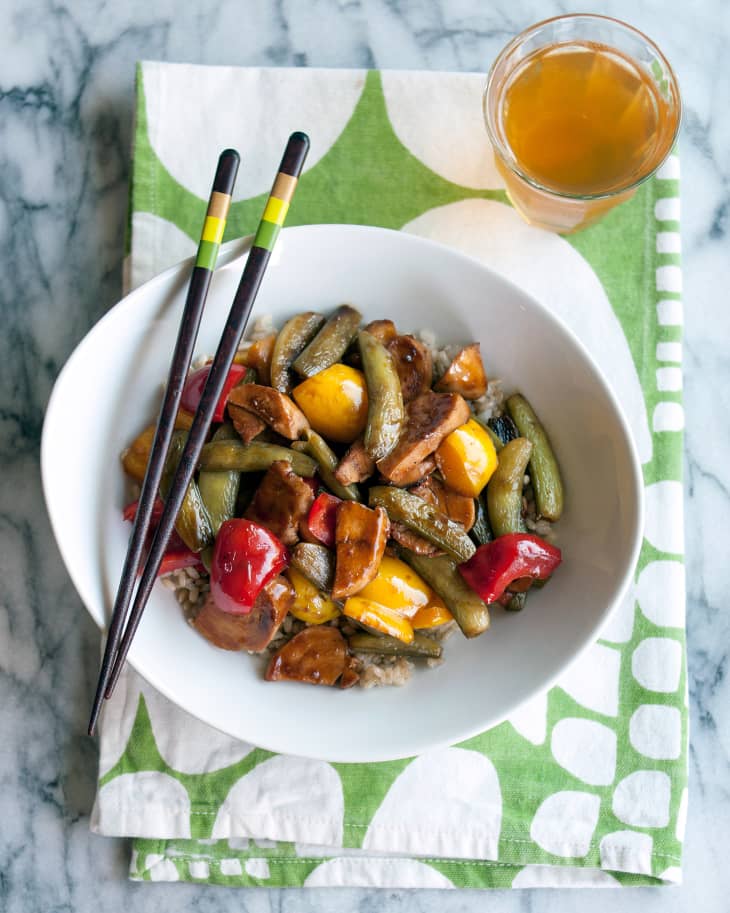
- Serve: Serve the stir-fry over rice. Leftovers will keep refrigerated for up to a week.
This recipe was originally published August 2013.
Want more smart tutorials for getting things done around the home?
See more How To posts
We’re looking for great examples of your own household intelligence too!
Submit your own tutorials or ideas here!