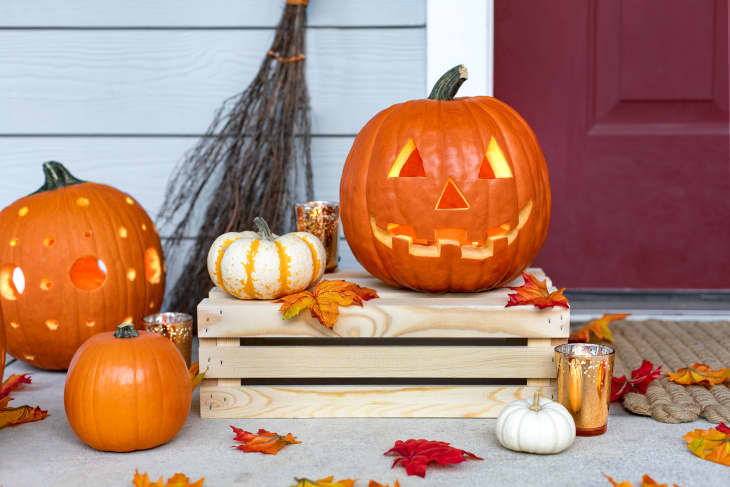
How To Carve a Pumpkin for Halloween: The Easiest Method
Learning how to carve a pumpkin isn’t rocket science, but it’s still wise to have a game plan. Before you lop off the top of that pumpkin and grab a handful of gooey squash guts, take a look through our basic guide to carving the best Halloween pumpkin. Follow these steps and you’ll end up with a cute and classic jack-o’-lantern with easy, no-fuss cleanup afterwards.
How To Pick The Right Pumpkin To Carve
You want your pumpkin to last through Halloween and beyond, right? This starts with the kind of pumpkin you pick out. You’ll want a pumpkin that’s sturdy and firm, most importantly. Get more tips for picking the best pumpkin for carving (and to make your pumpkin last longer once carved).
How To Set Up Pumpkin-Carving Workspace
First rule of pumpkin carving: Do it somewhere you don’t mind getting messy, ideally outdoors. Line your work surface (a sturdy table or the ground) with something you’ll throw away later — like butcher paper, newsprint, or flattened brown paper grocery bags.
If using the latter, simply cut down one side of the grocery bag, then cut off the base of the bag so you have a big rectangle of brown paper. Layer a few of these on the table and you’re good to go.
The Tools You Need To Carve a Pumpkin
Once you’ve got your work surface ready, it’s time to assemble the proper tools. You can totally get a pumpkin carving kit from your local drugstore, supermarket, or Halloween pop-up shop. Or you can use a couple tools from your kitchen. Just make sure you have everything you need at the ready so you don’t have to traipse back through your kitchen with pumpkin-gut-covered hands.
Don’t Forget a Pen and Two Bowls
In addition to your carving tools, you’ll need a pen for drawing your design onto the pumpkin, and couple big bowls — one for the seeds (the best part of pumpkin carving!) and one for the rest of the pumpkin goo and throwaway bits leftover from carving. And that’s about it, really!
How To Carve a Pumpkin, Step By Step
What You Need
- 1 medium-sized pumpkin (or as many as you want to carve)
- Brown paper grocery bags, newsprint, or butcher paper
- Sharpie or other permanent marker
- Pumpkin carving kit (including a scraper, carving knife, and a wire modeling tool) or a serrated knife, ladle, and an X-ACTO knife
- Two medium bowls (one for seeds, one for pumpkin guts)
- Kitchen towel
- Tea light candle and long match or lighter with extended nozzle
Instructions
- Set up your workspace: Line a sturdy table with flattened grocery bags, newsprint, or butcher paper. Have your permanent marker, carving tools, and bowls nearby.
- Draw your design: After you’ve determined the best side of your pumpkin for a face, use the permanent marker to sketch out eyes, a nose, and a toothy grin.
- Draw your lid: Outline a circular lid around the pumpkin stem, about 5 to 6 inches in diameter. Add a notch in the back if you like — this makes it easier to line up.
- Cut out the pumpkin lid: With a slim pumpkin carving knife (the carving tool with a toothed blade like a mini-saw) or serrated knife, cut along the outline of your pumpkin lid. Make sure you slice through the pumpkin at a 45-degree inward angle, so you’ll be able to replace the lid without it falling in.
- Remove the pumpkin seeds: The seeds are all attached to the pumpkin and each other by thin strings. Grab the big bunches of seeds with your hands and place them in one of the bowls, to be cleaned later.
- Scoop out the insides of the pumpkin: Using a ladle or the scraper that came with your kit (or a metal spoon if you don’t have this tool), clean out the inside of the pumpkin until no stringy bits remain. Discard the pumpkin guts in the second bowl.
- Wipe off the pumpkin: Use the kitchen towel to wipe off the outside of the pumpkin so that it will be easier and safer to carve.
- Cut out the design: Make straight cuts into your pumpkin along the lines of your design, removing the pieces and discarding them in the refuse bowl.
- Clean up the details: Go back in and scrape out any stringy pieces or jagged lines with an X-ACTO knife or the wire tool from your carving kit. You can also scrape off the marker lines while you’re at it, though they won’t be visible in the darkness of night.
- Light your pumpkin: Insert a tea light candle in the bottom of your pumpkin. Use a long match or lighter to light the pumpkin and replace the lid. Tip: If you’re having trouble lighting the candle, try going through the mouth of the jack-o’-lantern instead of the top.
- Make roasted pumpkin seeds: Clean and dry the pumpkin seeds, then toss with oil, salt, and any desired seasonings, and roast in a low oven until golden brown. For more specific instructions see our tutorial: How To Roast Pumpkin and Squash Seeds.
