
Weekend Assignment: How To Brew Your First Batch of Beer

- Today’s assignment: Brew your beer!
- The Kitchn’s Beer School: 20 lessons, 7 assignments to brew your first 1-gallon batch of beer.
- Sign up & see all the assignments! The Kitchn’s Beer School
Today is brew day! Time to unpack your new fermentation bucket, take the yeast out of the fridge, and brew yourself a batch of beer. We’ve already gone over all the parts of the brew day — mash, sparge, boil, and cool down — now we just have to bring it all together in practice.
For today’s assignment, I have a quick reference guide to all the steps so you can easily follow along as you brew. Ready?
Brew Your First Batch of Beer
Here’s the thing about your first batch of beer — it’s your first batch of beer. There are parts that will feel very unfamiliar and you’ll probably wonder more than once if you’re doing right. That’s all totally normal. Do your best to just go with it and take the unfamiliar things in stride. With every batch you brew, these things will become more and more comfortable, and you’ll become more and more confident that you are, indeed, doing it right.
Share Your Brew Day with Us!
If you make a mistake here or there today, that’s totally fine. Aim for the board, don’t worry about the bull’s-eye. There’s enough margin for error in this whole process that you can make a few user errors and still end up with pretty great beer.
If you’d like to brush up before you dive in, take a quick look back through the last few days of lessons.
Review the Stages of the Brew Day
- Hour 1: Mash the Grains
- Hour 2: Sparge the Mash
- Hour 3: The Hop Boil
- Hour 4: Pitch the Yeast
A Few Key Notes for a Successful Brew Day
- Set aside 4 to 5 hours: Once you start the brew day, you’re locked in. This part of the brewing process doesn’t lend itself well to pauses or interruptions. Clear your afternoon so you don’t feel crunched for time.
- Double check all your ingredients and equipment: Much better to double check before you begin than to realize in the middle of your brew day that you forgot the yeast or the lid to your fermentation bucket!
- Take the yeast out of the fridge: If you’re working with liquid yeast, remember to take it out of the fridge before you start brewing so that it has time to warm up. If necessary, make sure to activate the yeast at this point, too. (Check the package instructions — if they don’t talk about activation, then you’re fine!)
- Pay attention to sanitation: Once you start cooling down the wort, sanitation is very important for a successful beer. You don’t have to turn your kitchen into a science lab’s clean room, but do pay attention to what you’re doing and be as thorough as you can. This said, an accidental slip-up doesn’t automatically mean your beer is ruined — just carry on and do the best you can.

How To Brew a 1-Gallon Batch of Beer
Makes 10 bottles
What You Need
Ingredients
→ Use any 1-gallon beer recipe following this method, or use our recipe here to make an Amber Ale!
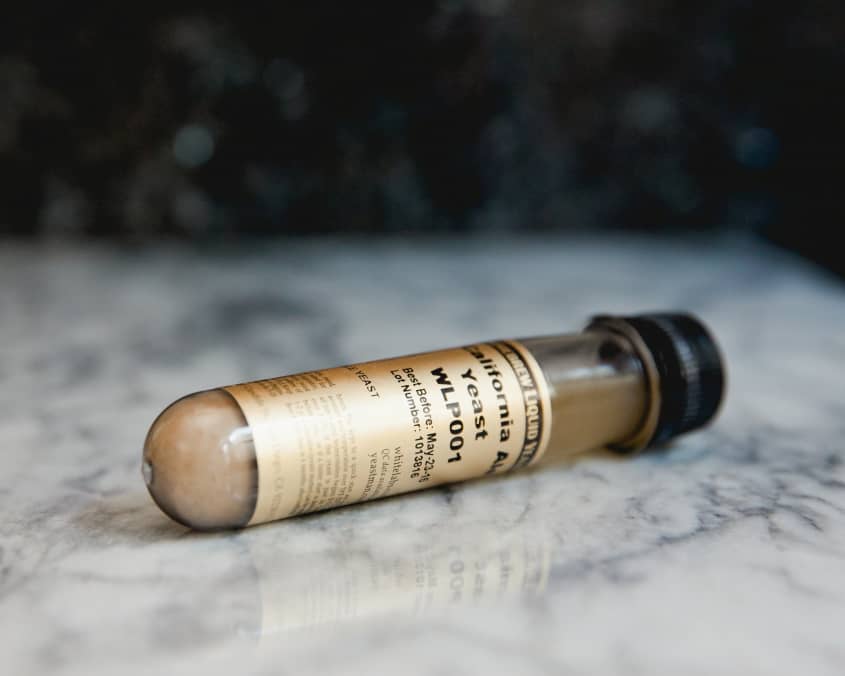
1/2 package White Labs California Ale yeast, Wyeast American Ale yeast, or equivalent
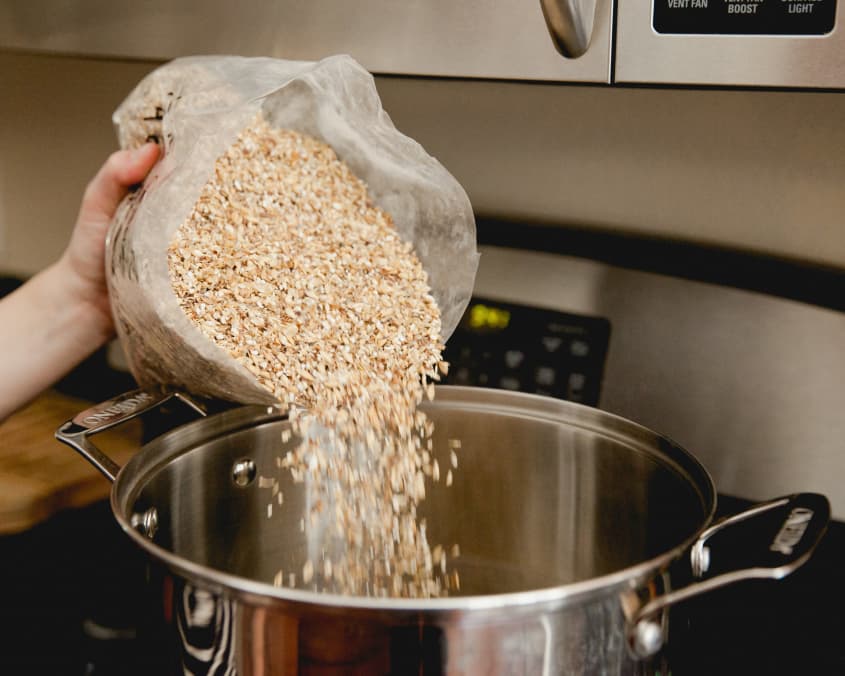
1 pound (454g) Pale ale malt, crushed
12 ounces (340g) Crystal/Caramel 20 malt, crushed
4 ounces (113g) Caramunic malt, crushed
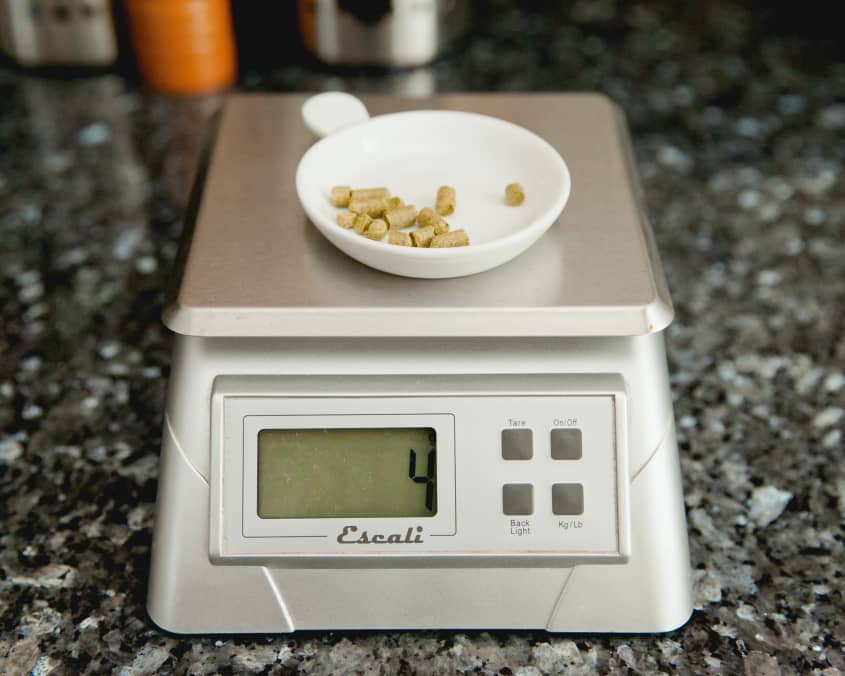
.15 ounce (4g) Cluster pellet hops (6.8% AA), for bittering
.15 ounce (4g) Cluster pellet hops (6.8% AA), for flavoring
1/4 teaspoon Irish moss
.15 ounce (4g) Cluster pellet hops (6.8% AA), for aroma
→ For a slightly hoppier variation of this amber ale, increase the hops to .20 ounce (5 1/2 grams) in each addition.
Equipment
2- to 3-gallon pot with a lid
Long-handled spoon or paddle
10-inch strainer or 5-quart colander
Small strainer
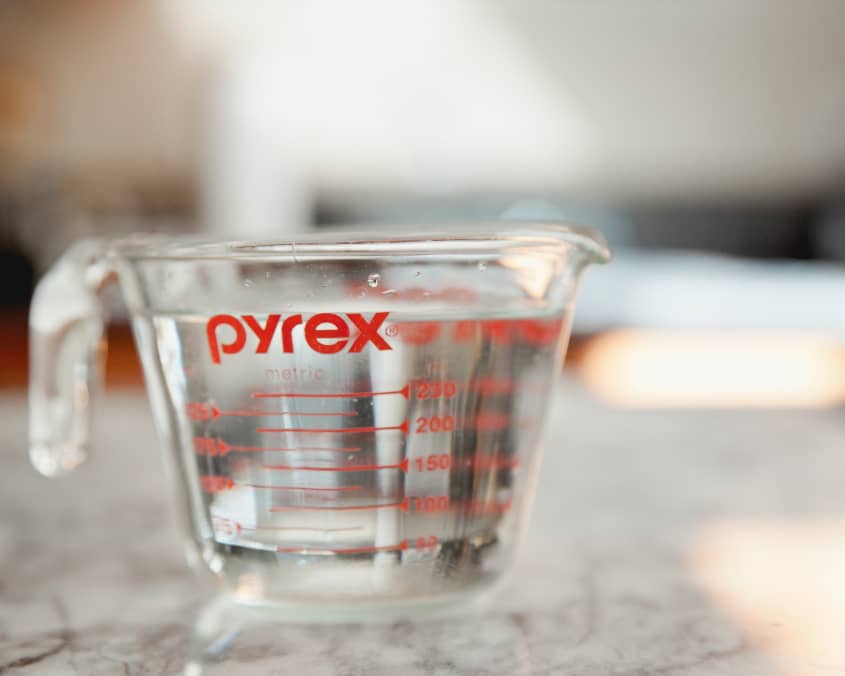
Measuring cup
Hydrometer and hydrometer tube
Whisk
2-gallon plastic bucket with lid
Airlock
Hour 1: Mash the Grains


→ See here for more details on this step.
- Warm liquid yeast on the counter: Remove liquid yeast from the fridge and set it on the counter to warm. Activate the yeast if necessary; check the package instructions.
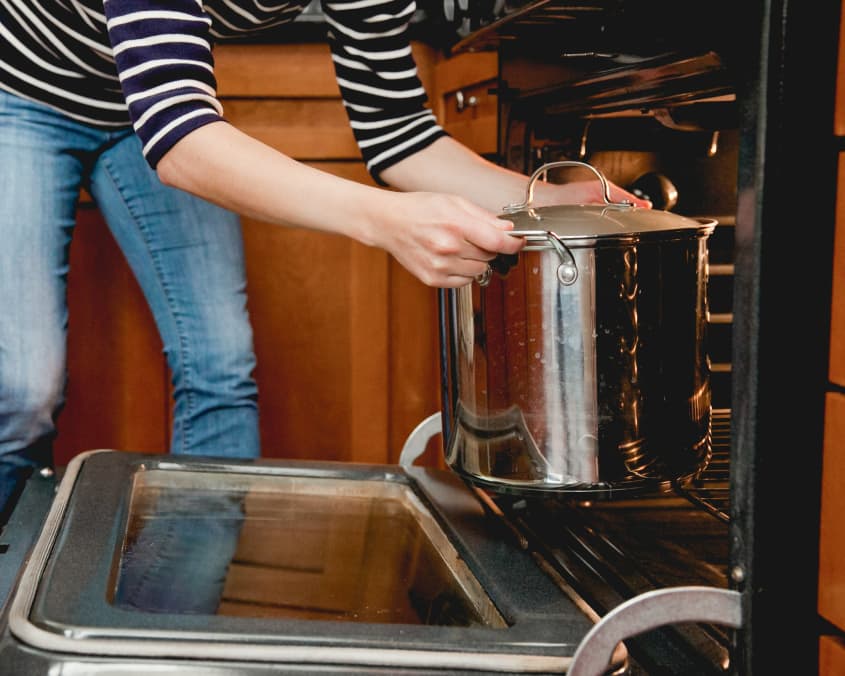
- Warm the oven: Warm the oven for 5 minutes, then turn it off.
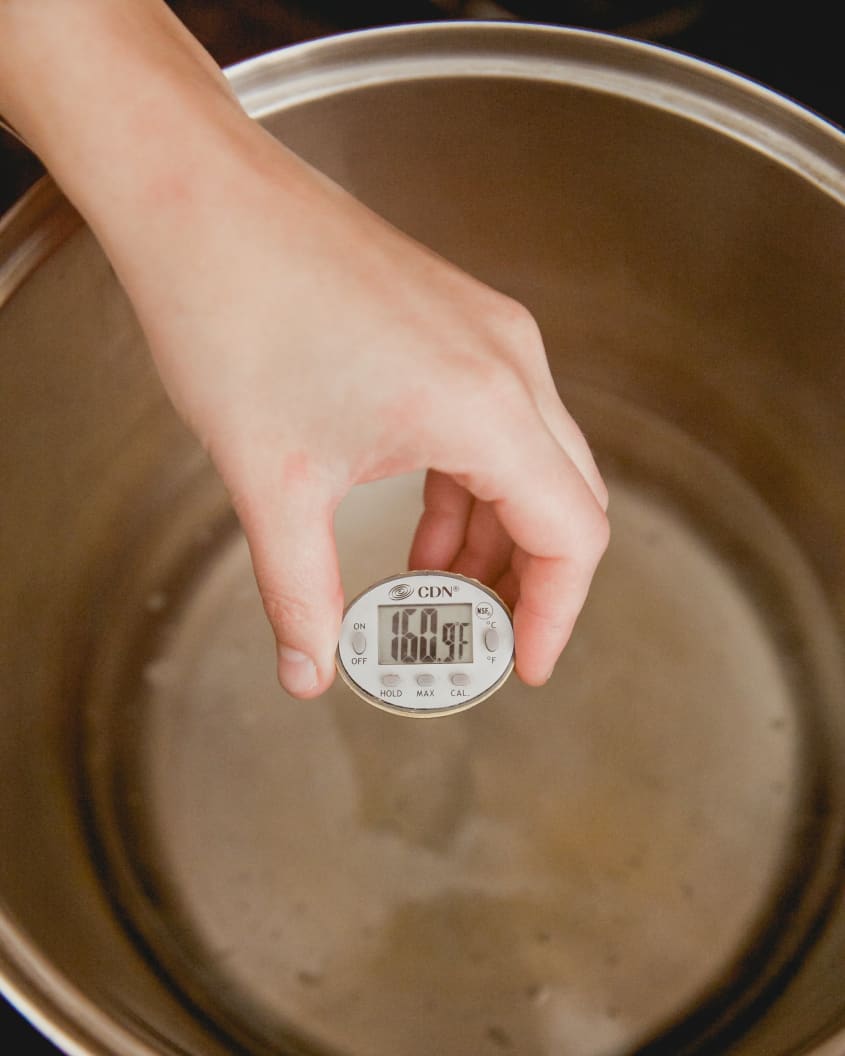
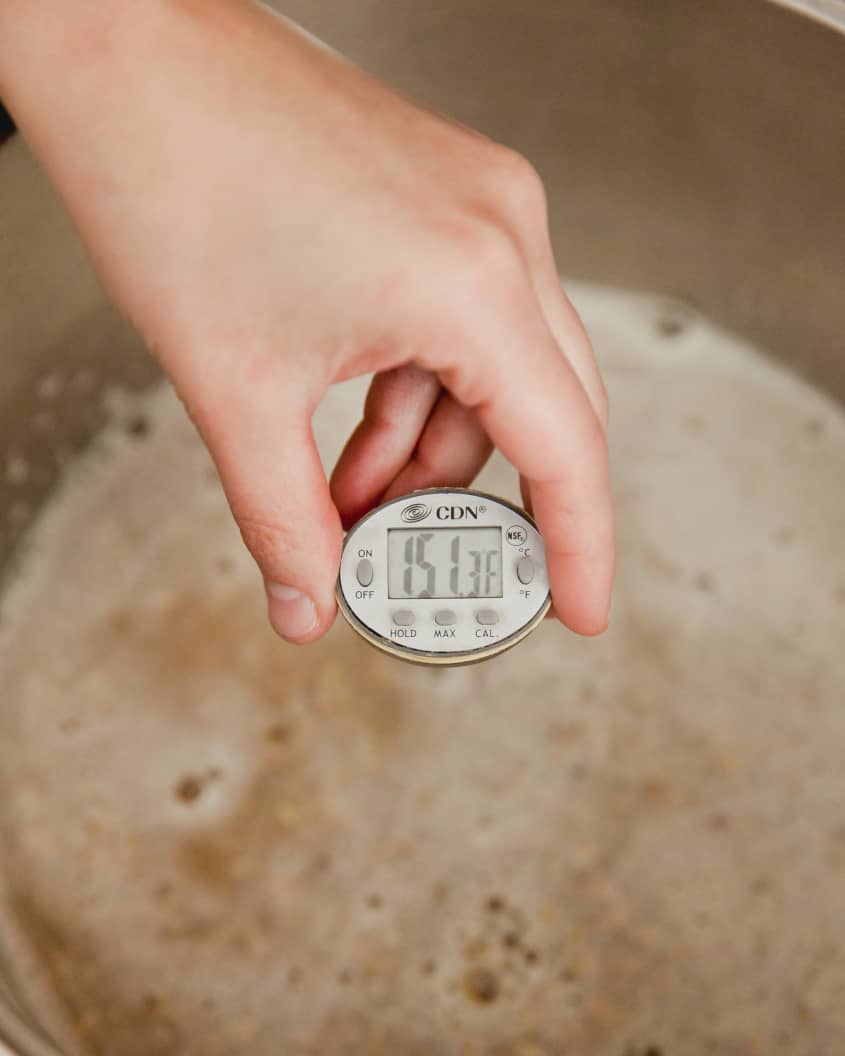
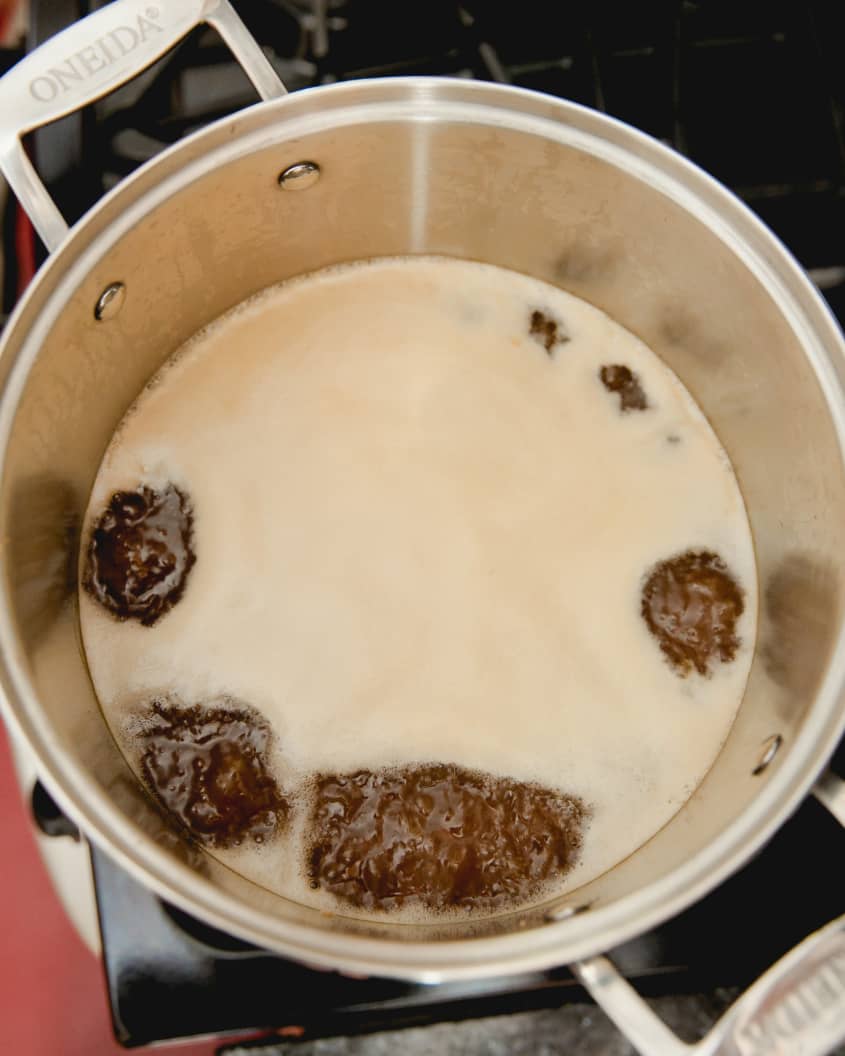
- Warm the water for the mash: Measure out 3 quarts of water (or 1 1/2 quarts for every pound of grains in your recipe) and pour it into the pot. Warm it over high heat on the stove until the water reaches 160°F.
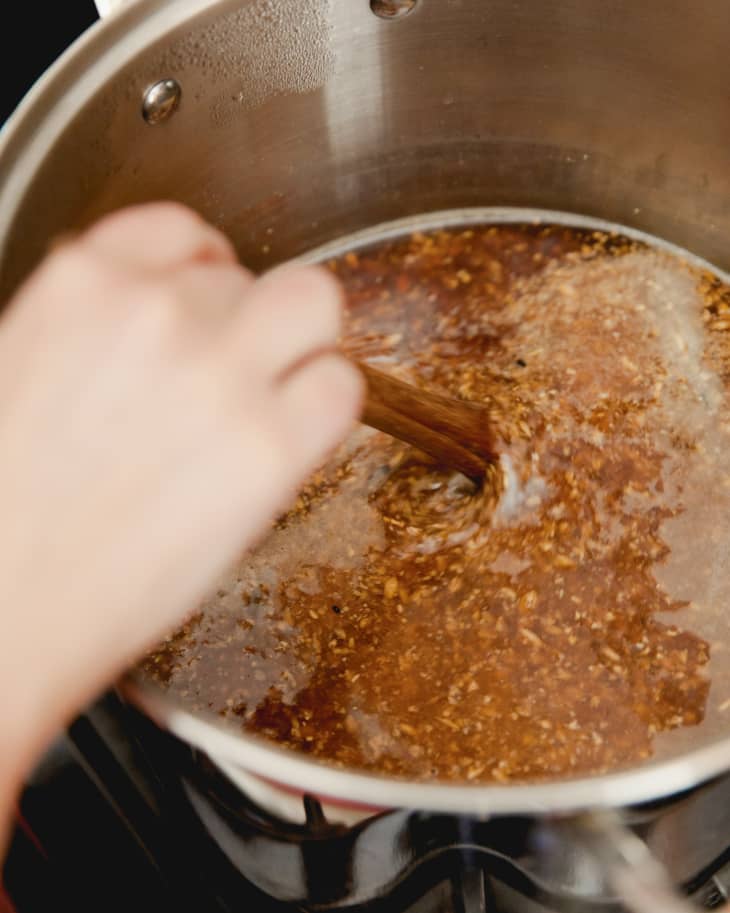
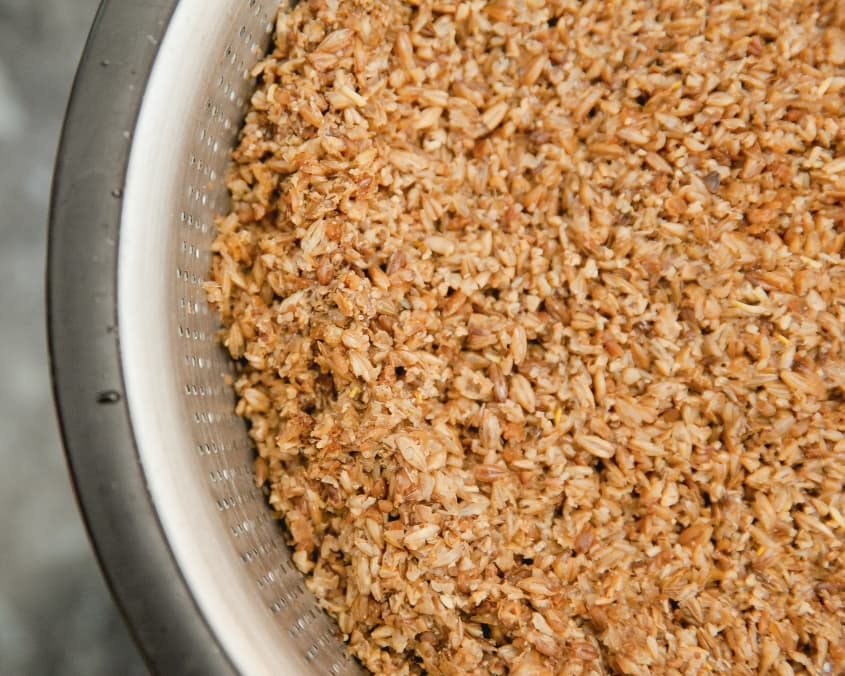
- Stir the grains into the water: Off the heat, pour all the crushed grains into the water and stir until you have a porridge-like consistency. Check the temperature — it should be 148°F to 153°F. If it’s a little warm, stir until the temperature drops below 153°F; if it’s a little cool, warm the mash over medium heat until it is above 148°F.
- Cover and place the mash in the oven for 1 hour: Check the mash every 15 minutes — stir it for a few seconds and then check the temperature. If it’s a little warm, stir until the temperature drops below 153°F; if it’s a little cool, warm the mash over medium heat until it is above 148°F.
- At the end of an hour, your mash is ready: If you struggled with high or low temperatures, continue mashing for another 15 to 30 minutes to make sure you’ve extracted everything you can from the grains.
Hour 2: Sparge the Mash
→ See here for more details on this step.
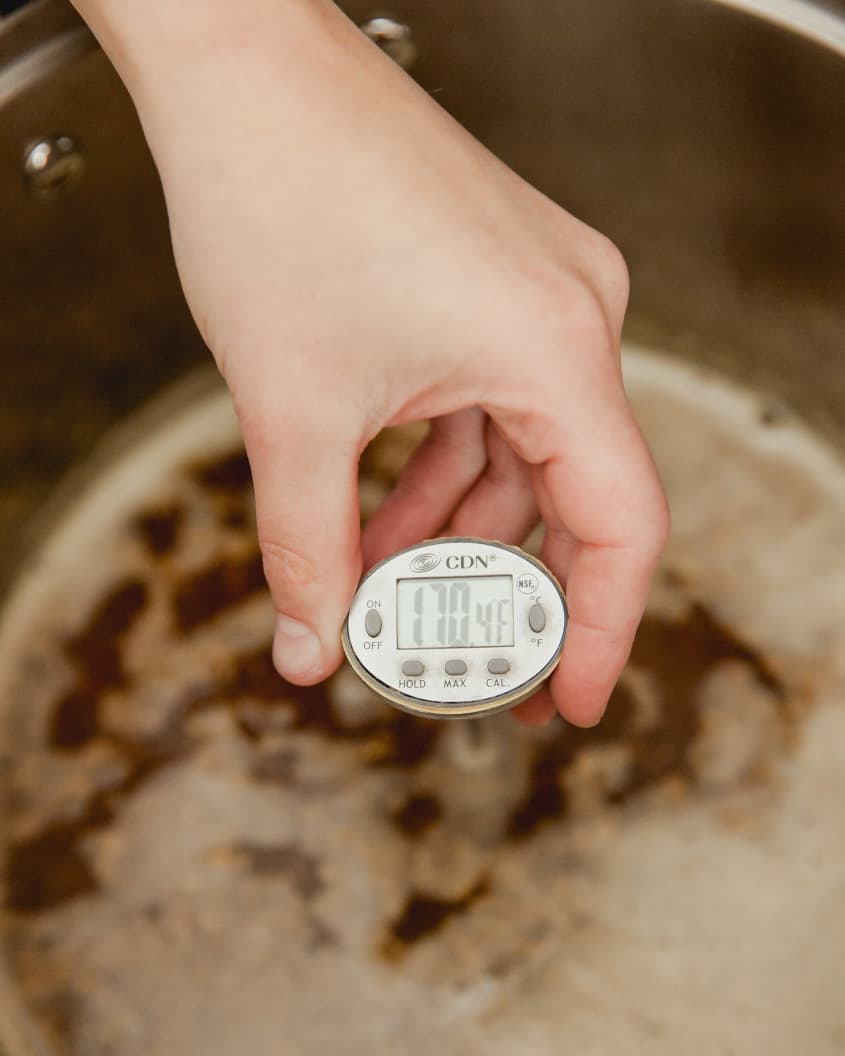
- Warm the mash to 170°F: This stops all enzymatic activity and loosens up the sugars in the water. Warm the mash over medium heat and stir for a few seconds before checking the temperature.
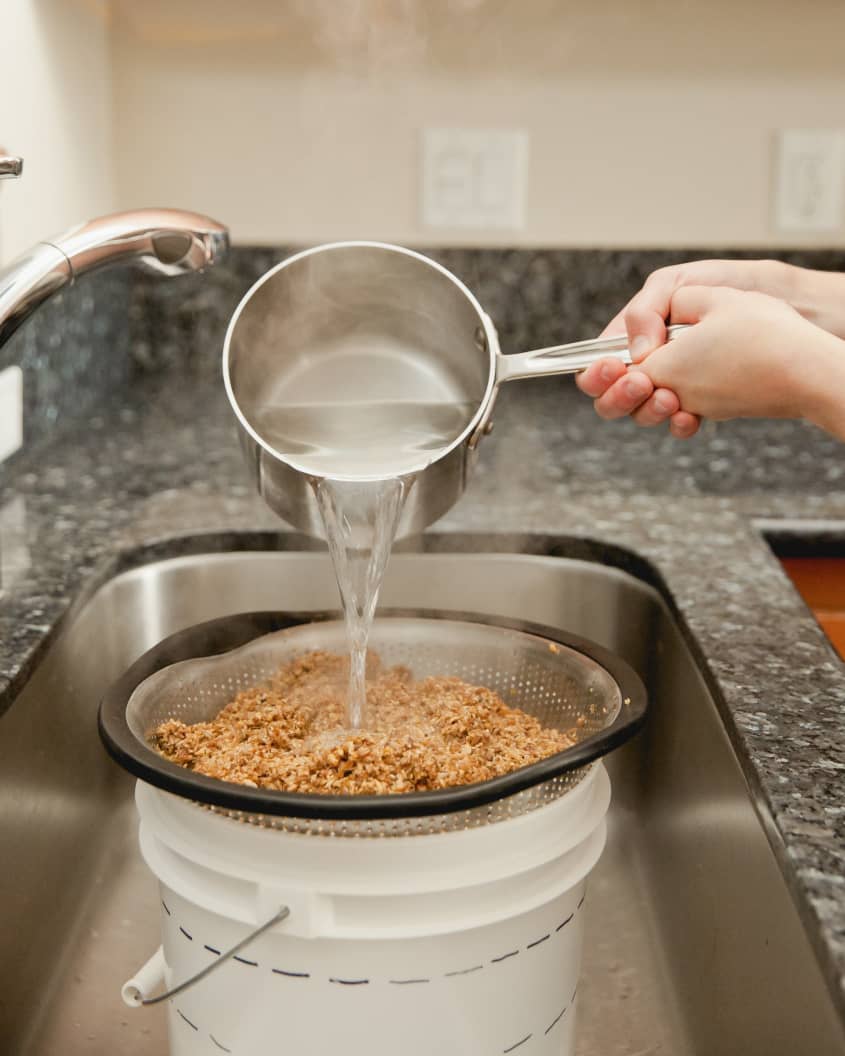
- Meanwhile, warm the sparge water: While the mash is heating, fill another few pots with water and heat them to 170°F over high heat. You’ll need about 1 gallon of sparge water, though the exact amount varies.
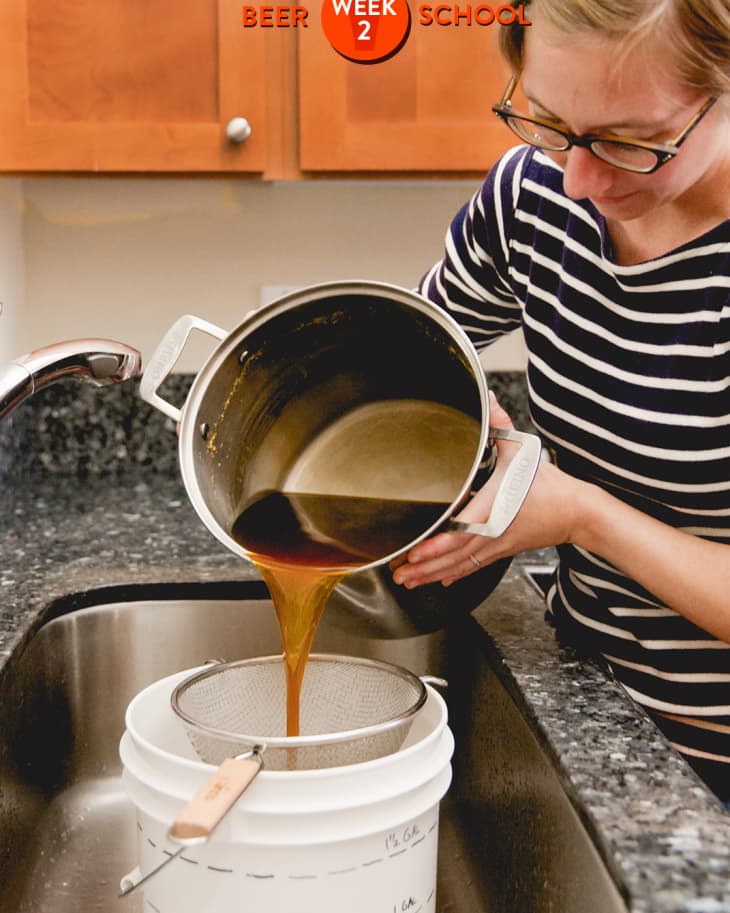
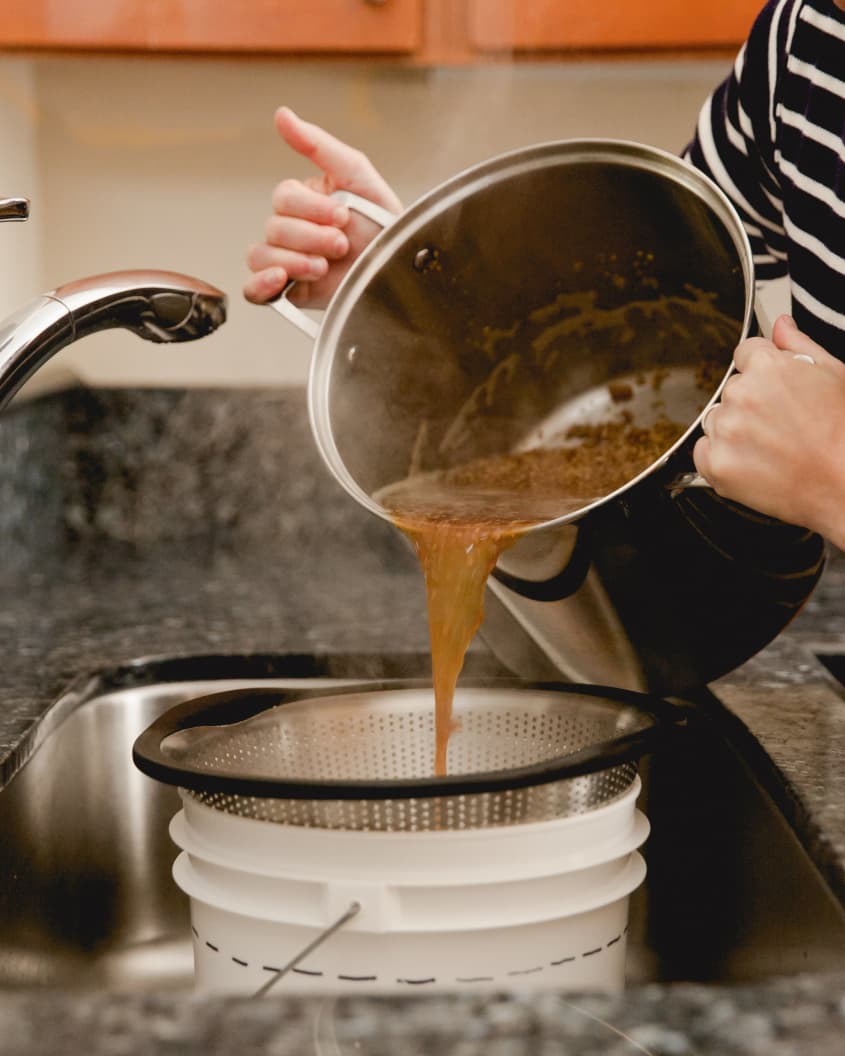
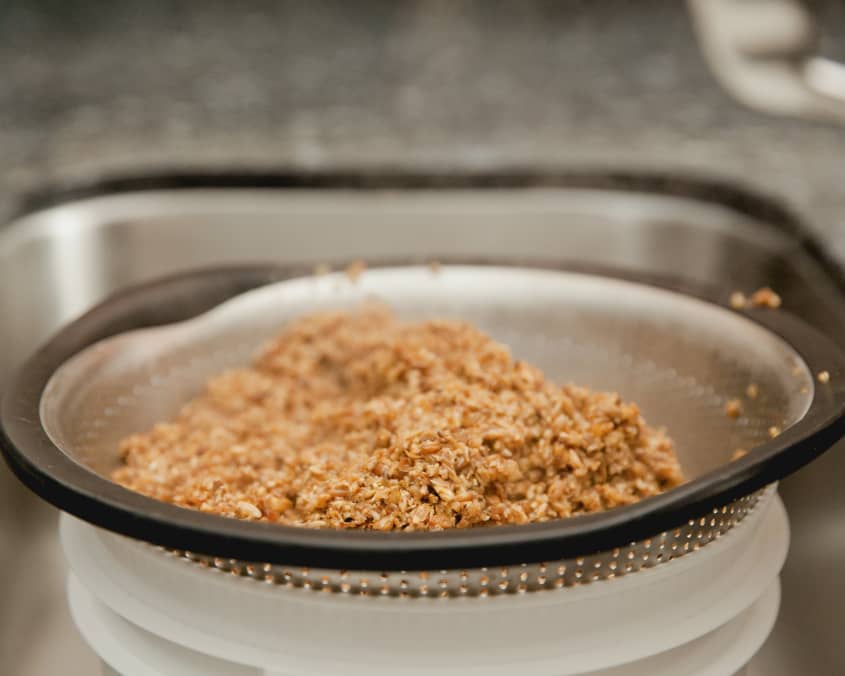
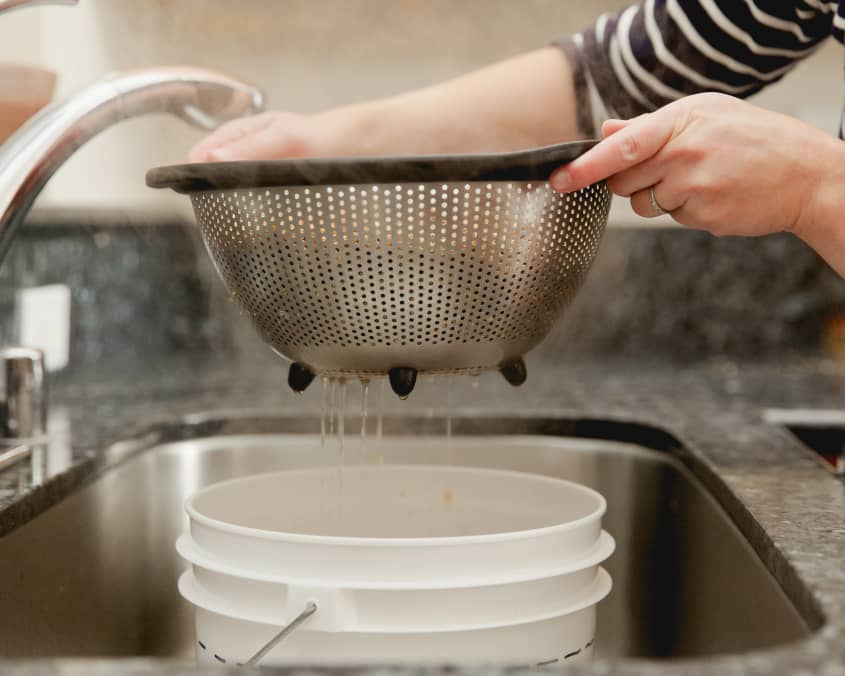
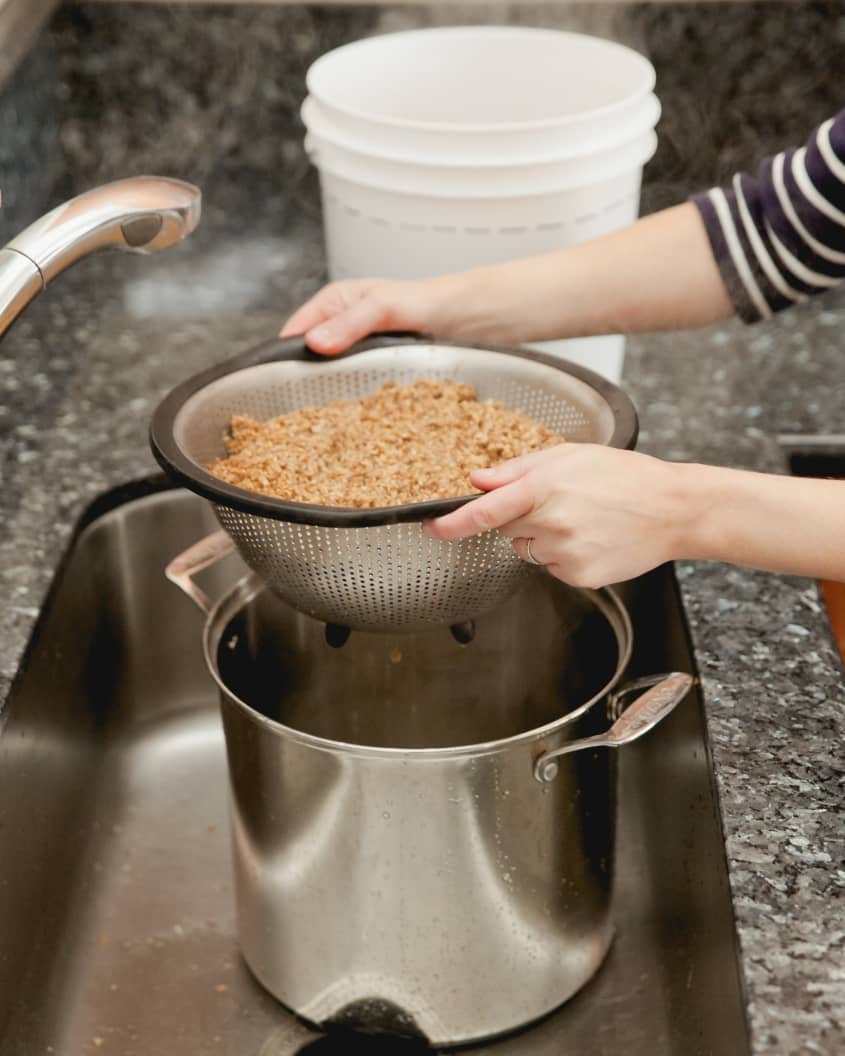
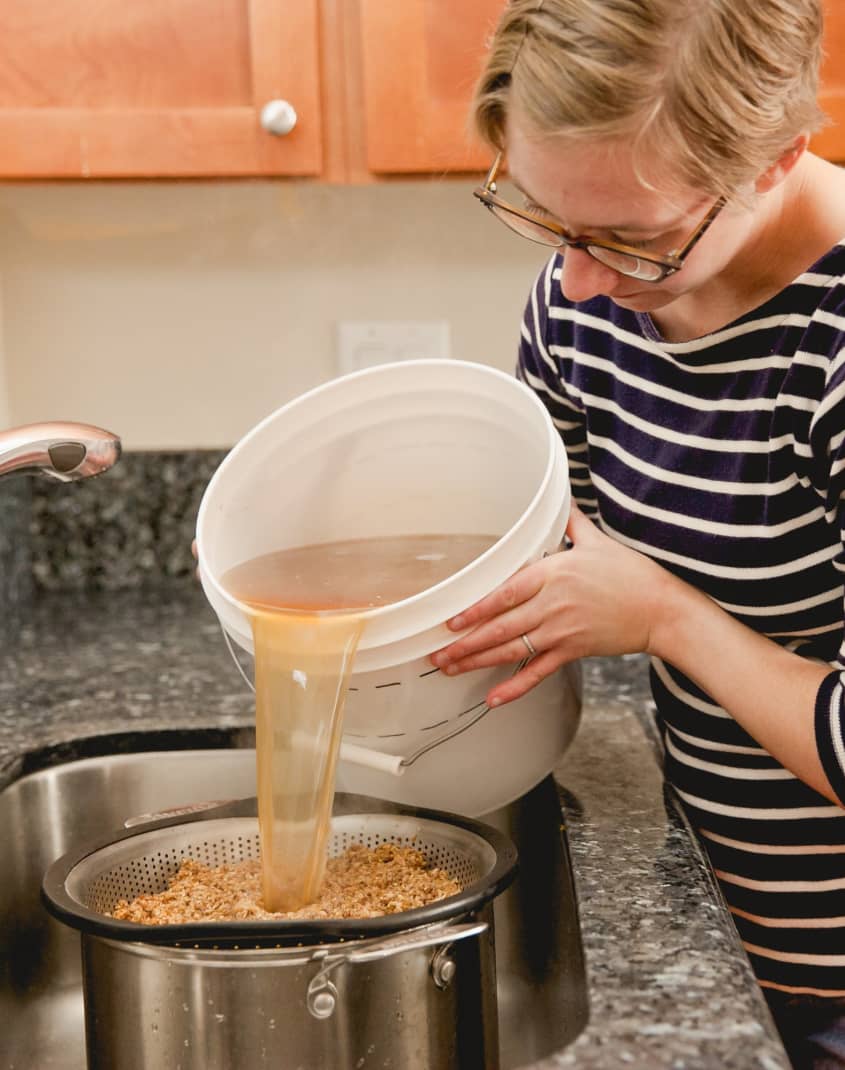
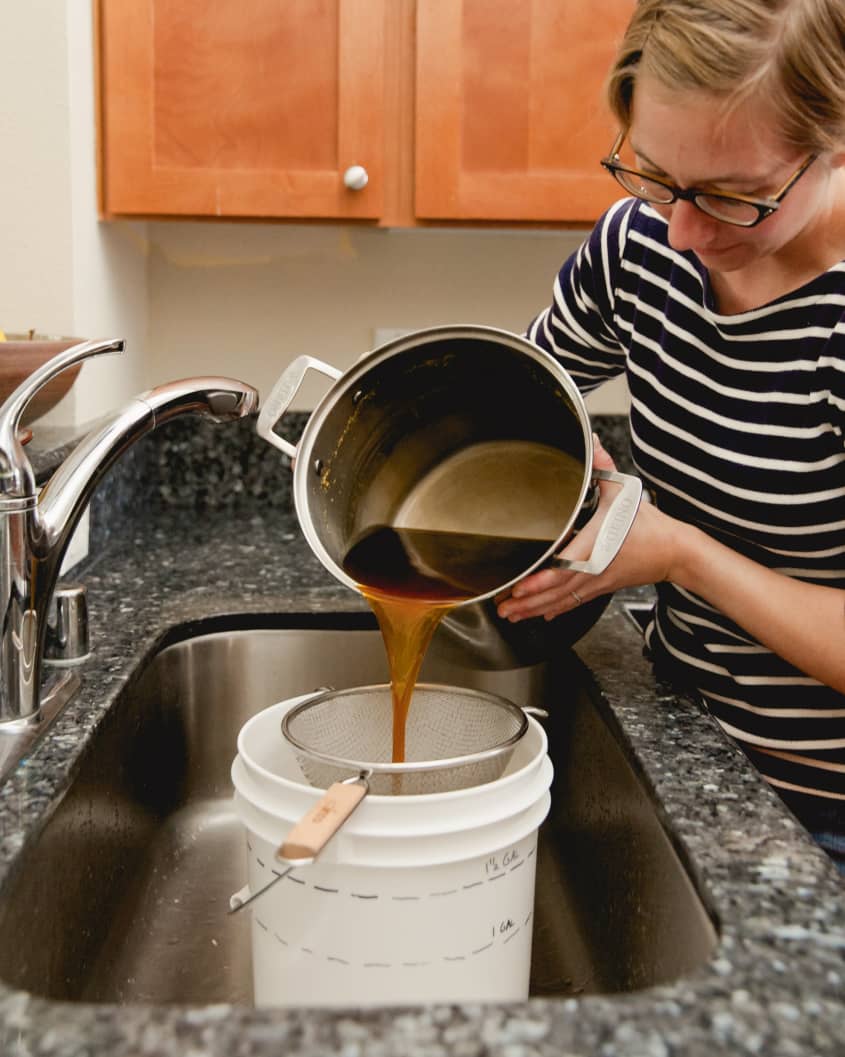
- Separate the wort from the grains: Place a large strainer over your fermentation bucket. Carefully pour the hot mash into the bucket — the grains will catch in the strainer and the wort will collect in the bottom of the bucket.
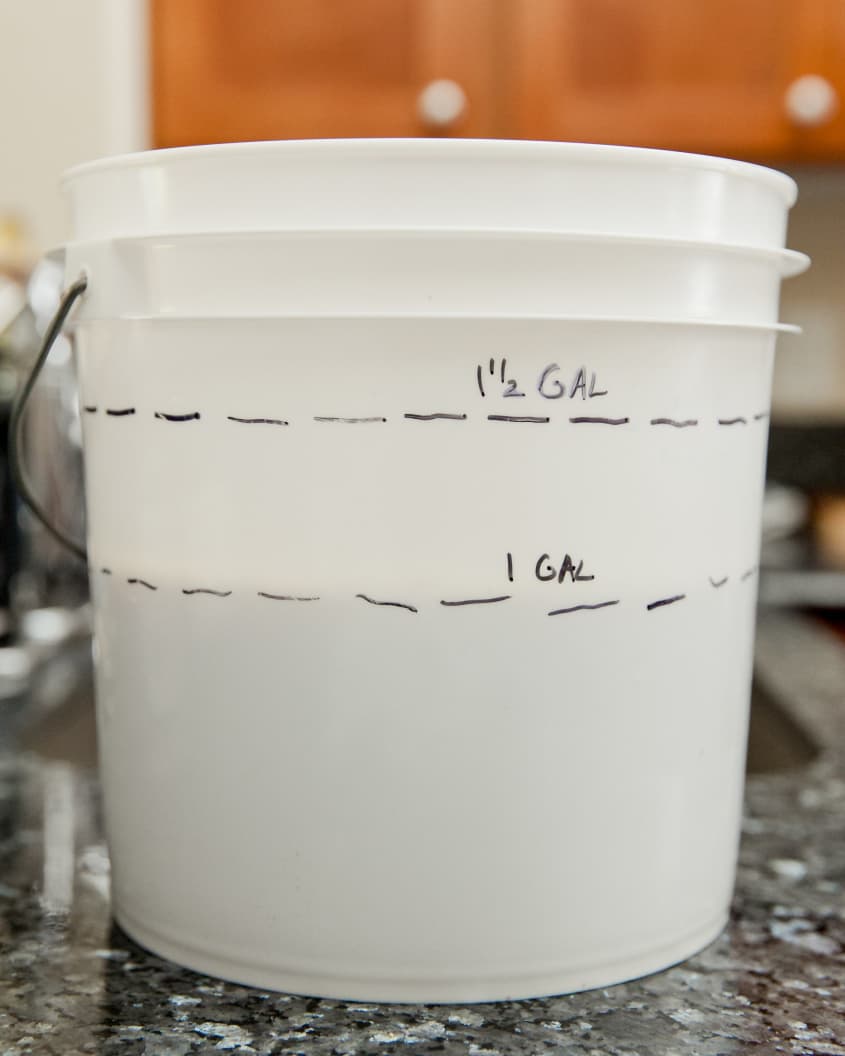
- Sparge the mash: Carefully pour the hot sparge water over the grains — pour slowly and try to rinse the grains evenly. Continue until you’ve collected 1 1/2 gallons of wort in the bucket.
- Recirculate the wort through the grains: Clean the brew pot and transfer the strainer of grains over to the pot. Pour the hot wort through the grains. Again, go slowly and try to rinse the grains evenly.
Hour 3: The Hop Boil


→ See here for more details on this step
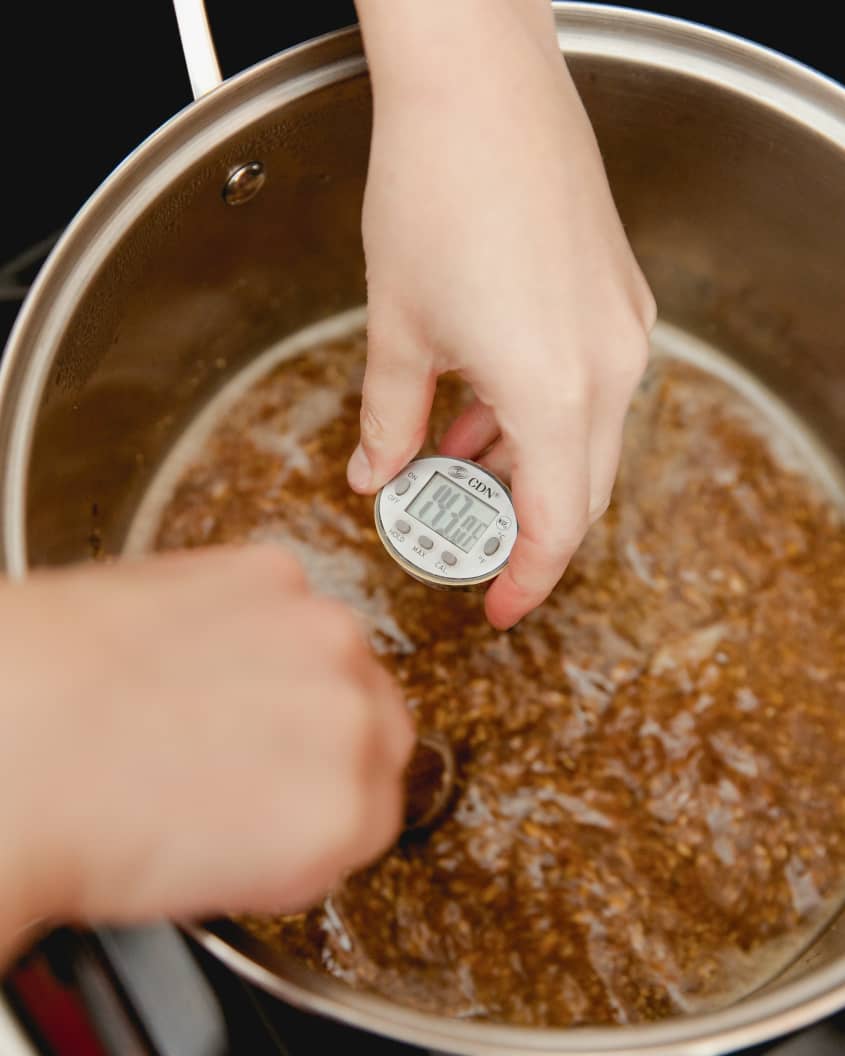
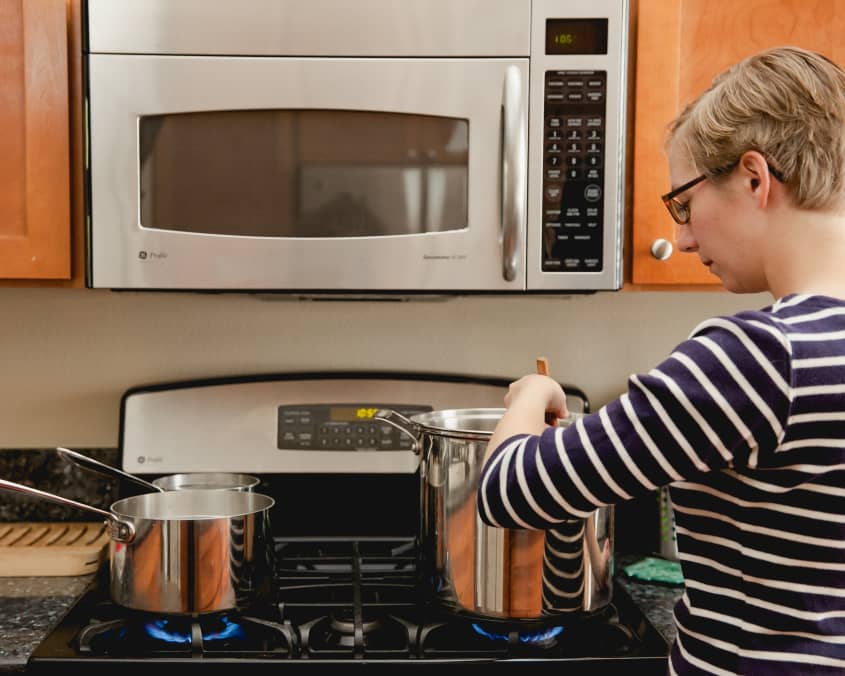
- Bring the wort to a boil: Transfer the pot with the wort to the stove and bring to a full, rolling boil over high heat.
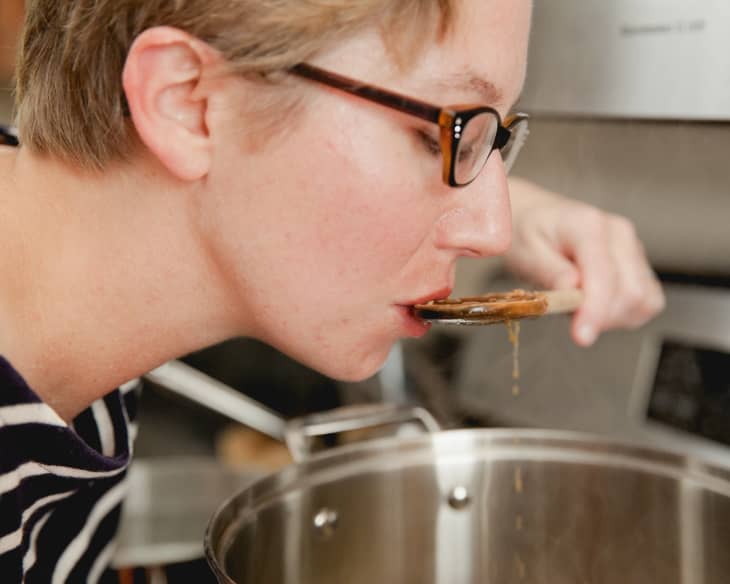
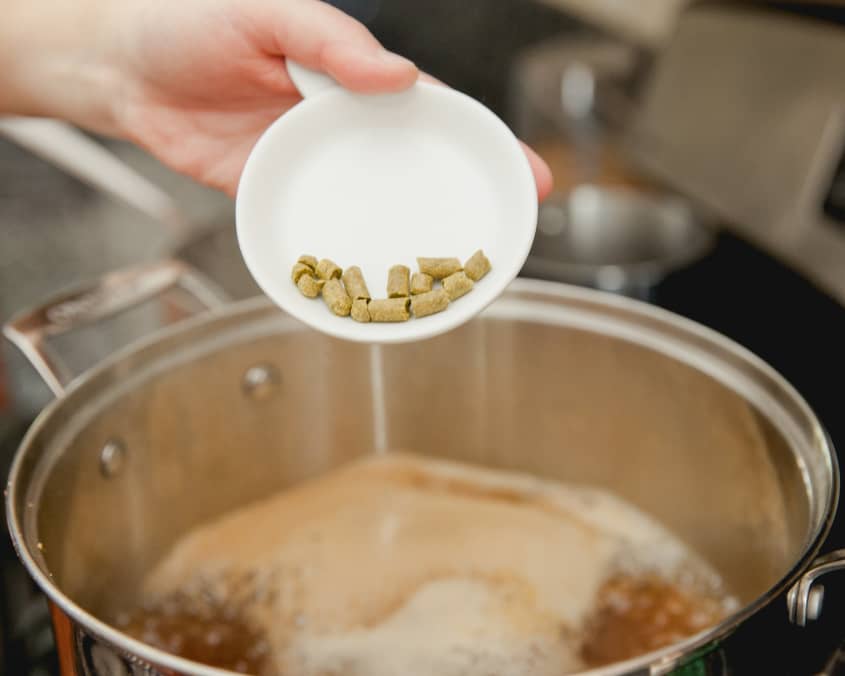
- Measure the hops: While you’re waiting for the wort to boil, measure out the hops and the Irish moss (if using), and keep them near the stove.
- Watch for the hot break: As the wort comes to a boil, creamy foam will collect on the surface. If your pot is a bit small (less than 3 gallons), keep a close eye on the wort so it doesn’t boil over at this point. Once the wort bubbles up through the foam and the foam starts dissolving back into the wort (the hot break), you can start adding hops.
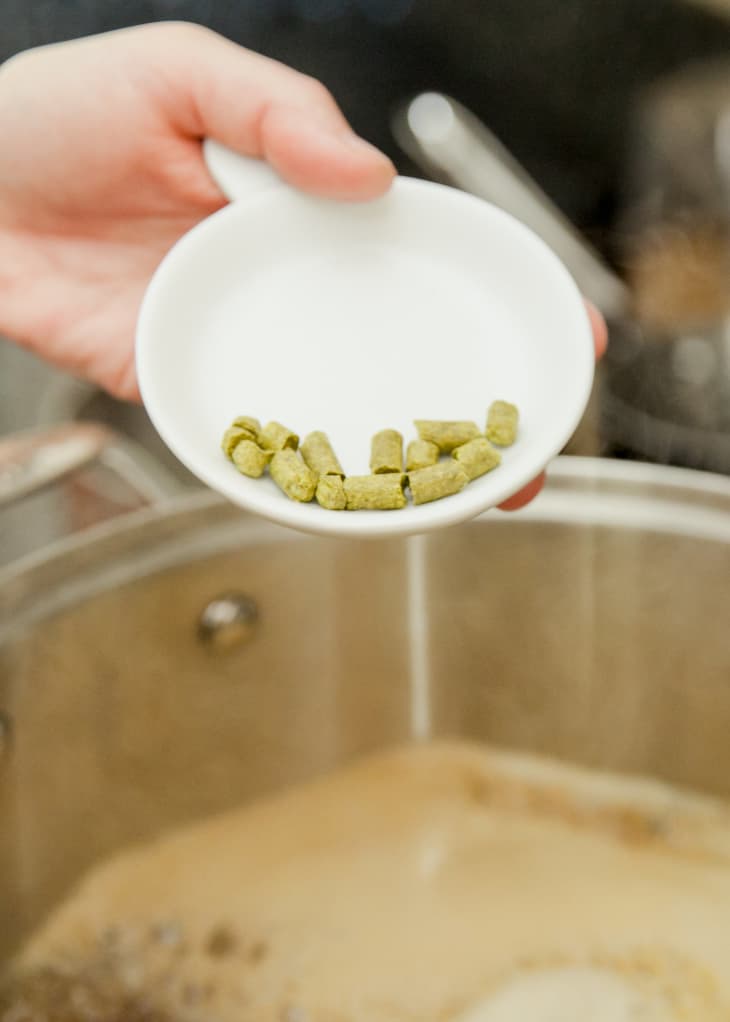
- Add the bittering hops: Once the wort is at a rolling boil, add the Cluster hops for bittering. Keep the wort at a rolling boil and leave the pot uncovered throughout the entire hop boil.
- Boil for 40 minutes, then add the flavoring hops and Irish moss: Set a timer for 40 minutes. When it goes off, add the Cluster hops for flavoring and the Irish moss.
- Boil for another 20 minutes, then add the aroma hops: Set a timer for 20 minutes and continue boiling the wort. When the timer goes off, add the Cluster hops for aroma and remove the pot from heat. (Total hop boil: 60 minutes.)
Hour 4: Pitch the Yeast


→ See here for more details on this step
- Begin chilling the wort: As soon as the hop boil is complete, transfer the pot of hot wort to your kitchen sink. Place the stopper in the sink and fill it up with cold tap water — be careful not to splash water in the pot. Add as much ice as you have to make a cold ice bath.
- Cool the wort to at least 75°F in 20 to 30 minutes: Change out the ice water as the ice melts and the water becomes warm. (If you had a lot of ice, you might not need to do this.) Occasionally, stir the wort with a sanitized spoon and check the temperature with a sanitized thermometer (see next step).
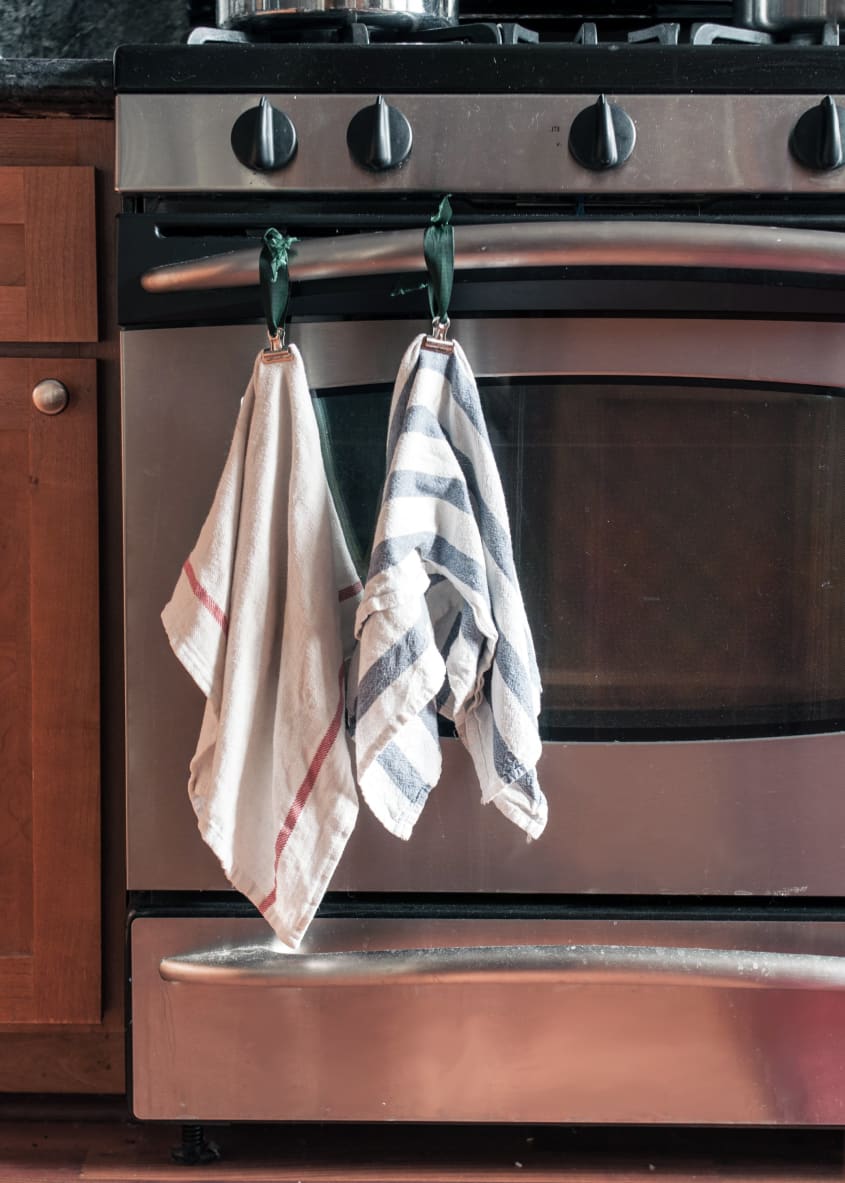
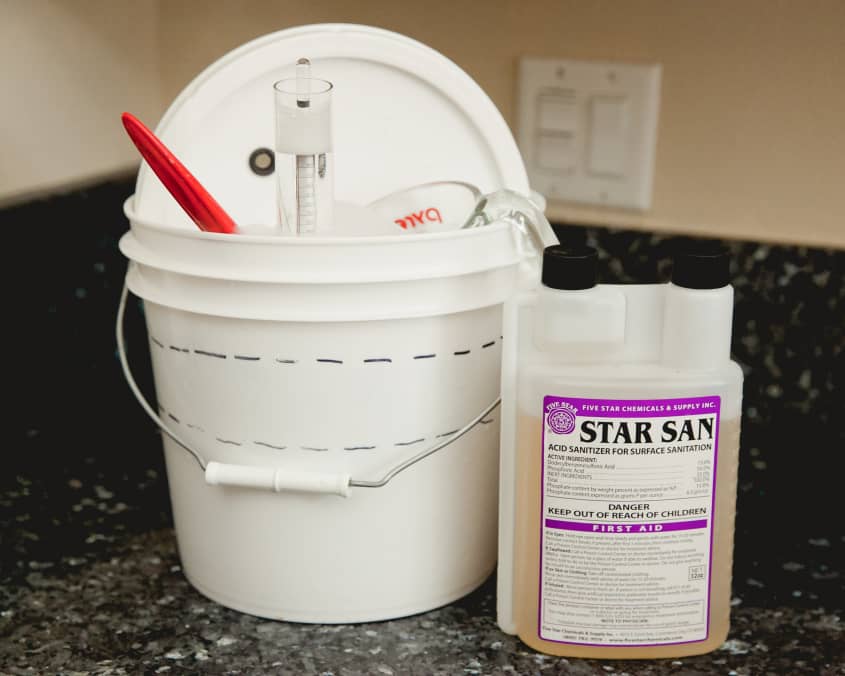
- Meanwhile, sanitize all your equipment: Fill your fermentation bucket with sanitizer and place its lid, the airlock, a small strainer, a measuring cup, the hydrometer, the hydrometer tube, and a whisk inside. Once sanitized (following the directions for your sanitizer), lay the equipment on clean dish towels. Save a little sanitizer solution in a separate container to use for any last-minute sanitizing (or re-sanitizing!) before pouring it out.
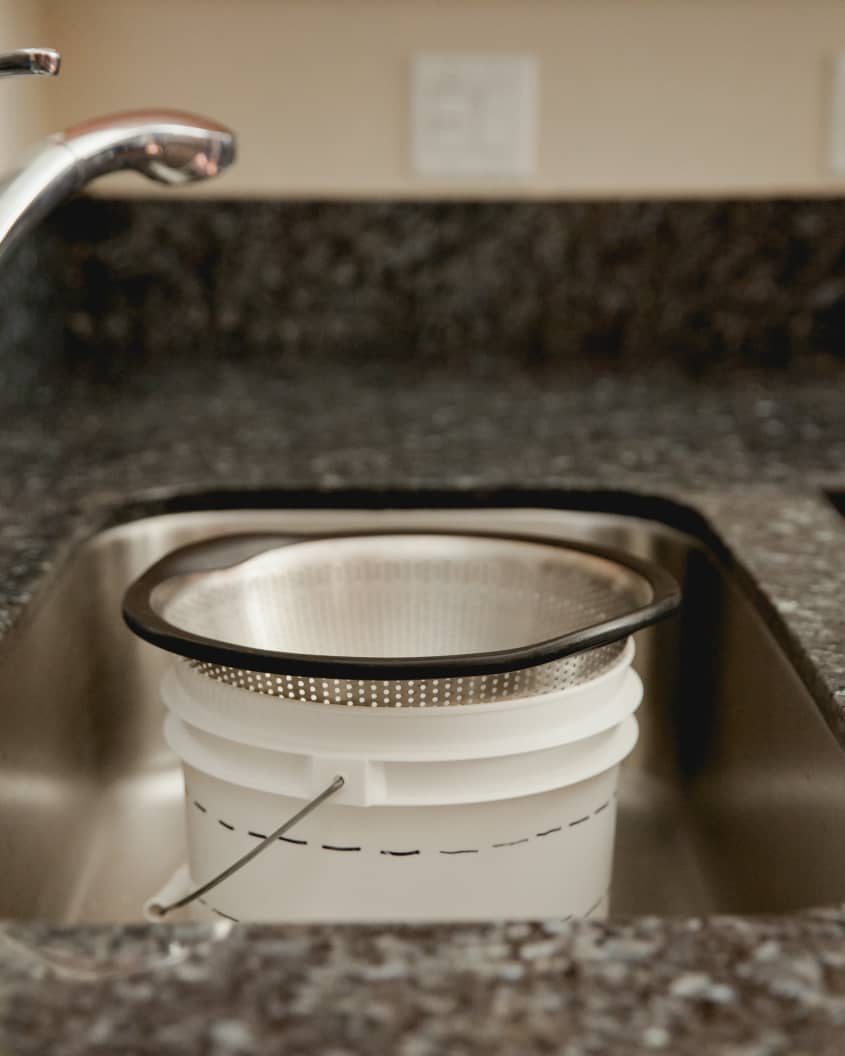
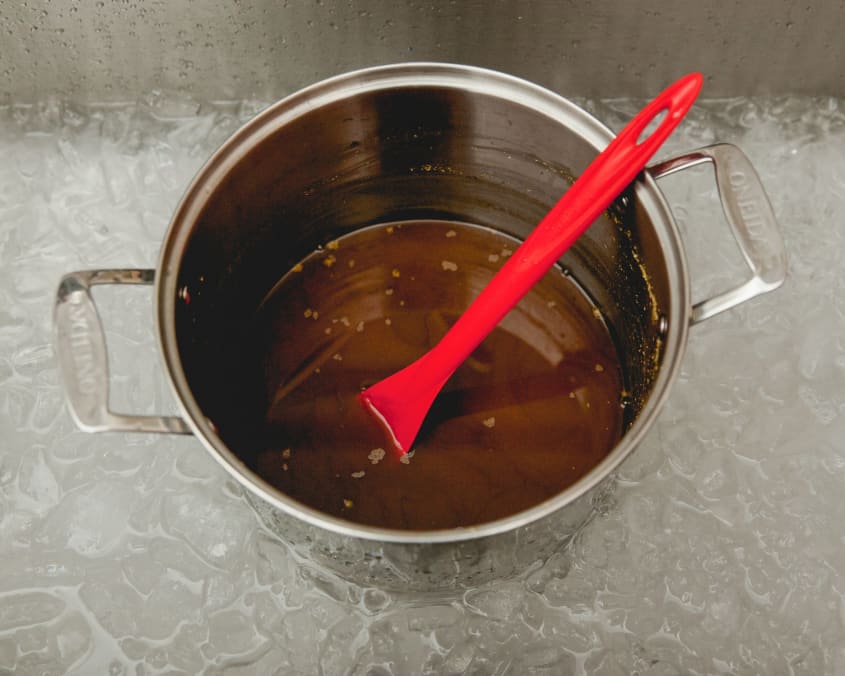
- Transfer the cooled wort to the fermentation bucket: Place a sanitized strainer over the sanitized fermentation bucket and pour the cooled wort through the strainer into the bucket. This filters out hop sediment and other solids.
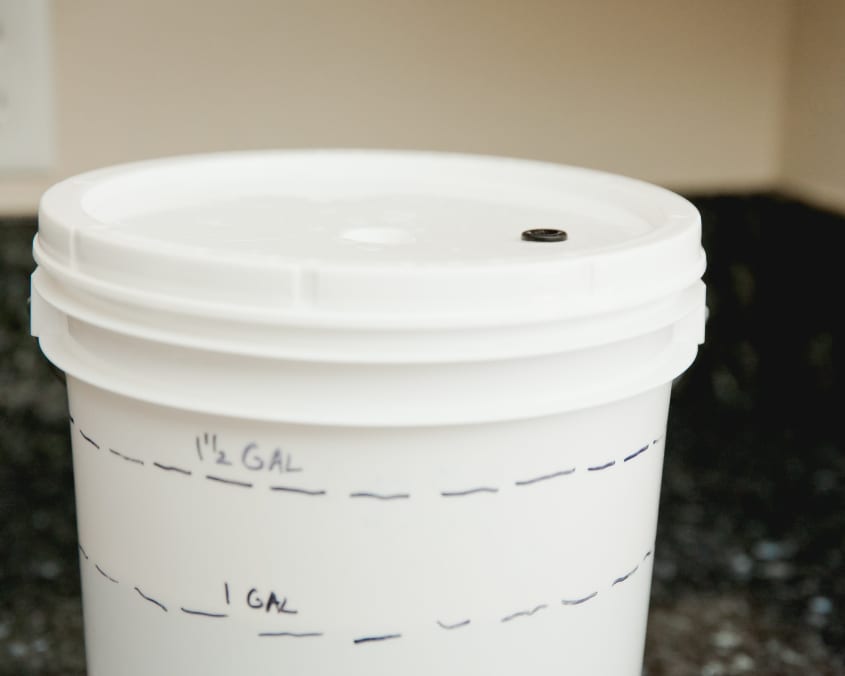
- Check the volume of your wort: Check the volume of your wort against the measurement markings on the side of the bucket. If you’re a little under a gallon, add tap water or filtered water as needed to make a gallon. (As long as your tap water is safe to drink, it’s sterile enough that there’s not much risk of introducing bad bacteria.) If your volume is a little over, don’t worry about it — either you started off the hop boil with slightly more wort than you needed or your wort wasn’t at a full boil for the full time. Your beer will be fine, but may have a slightly lower alcohol level than predicted.
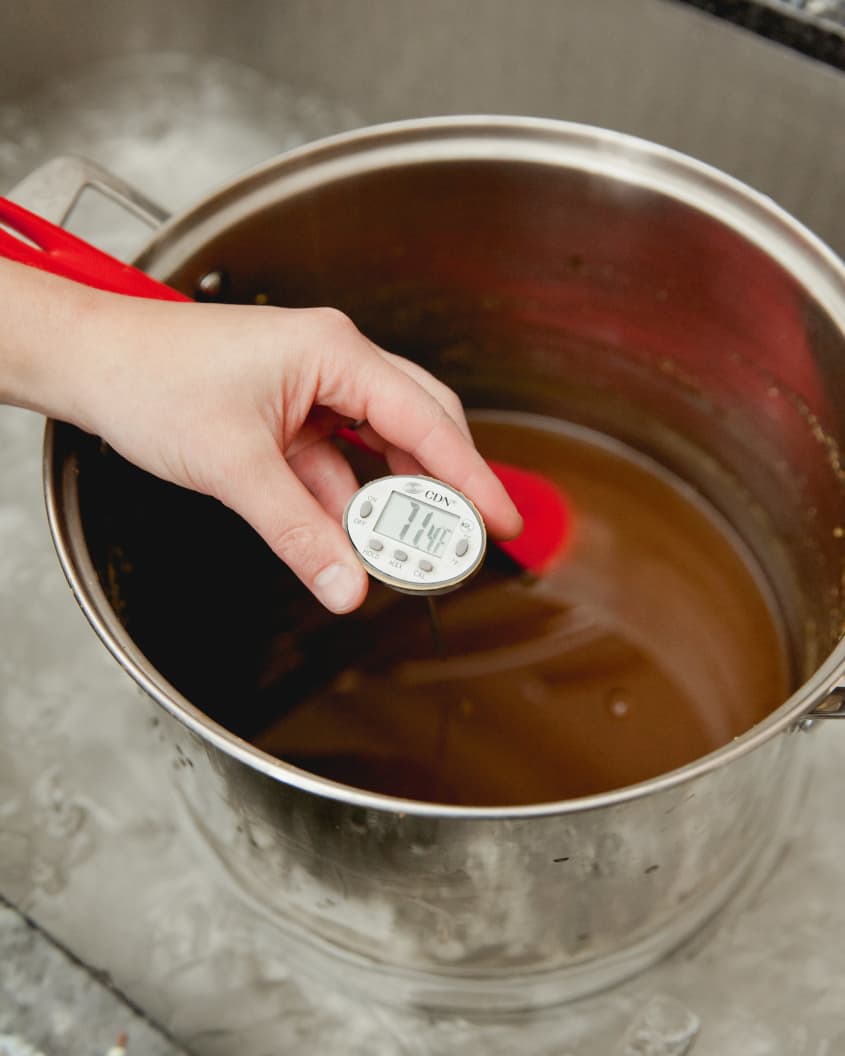
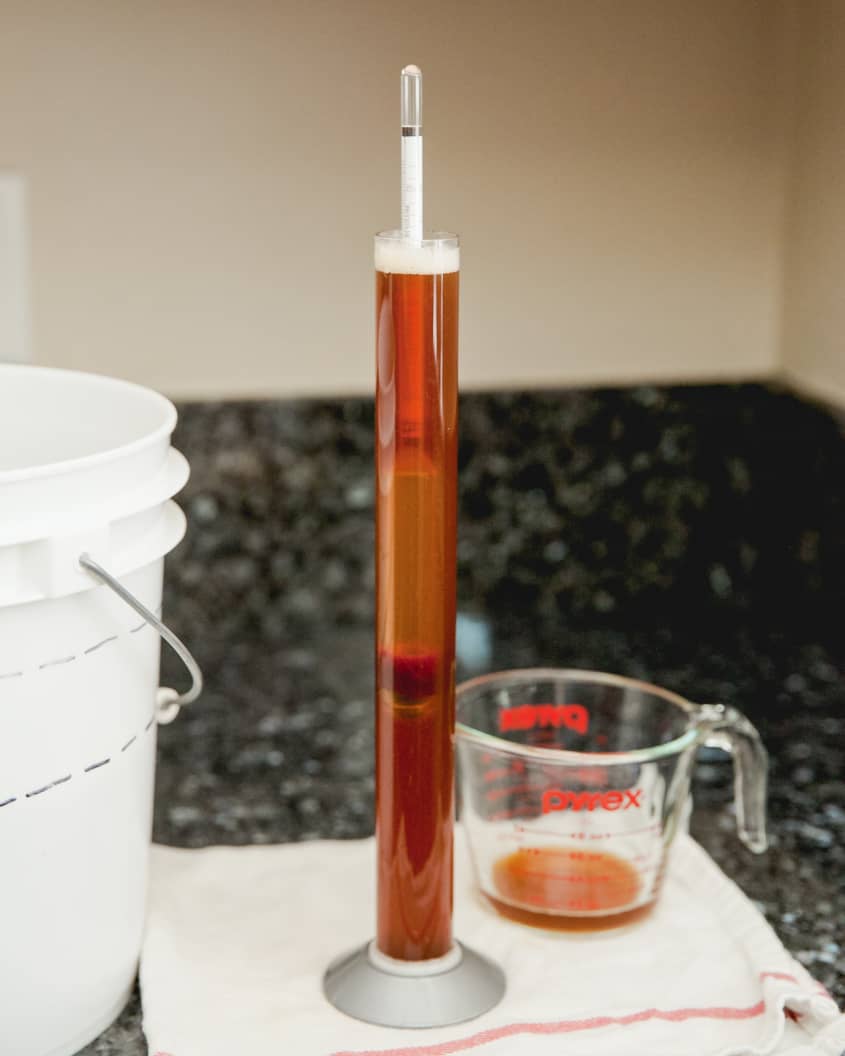
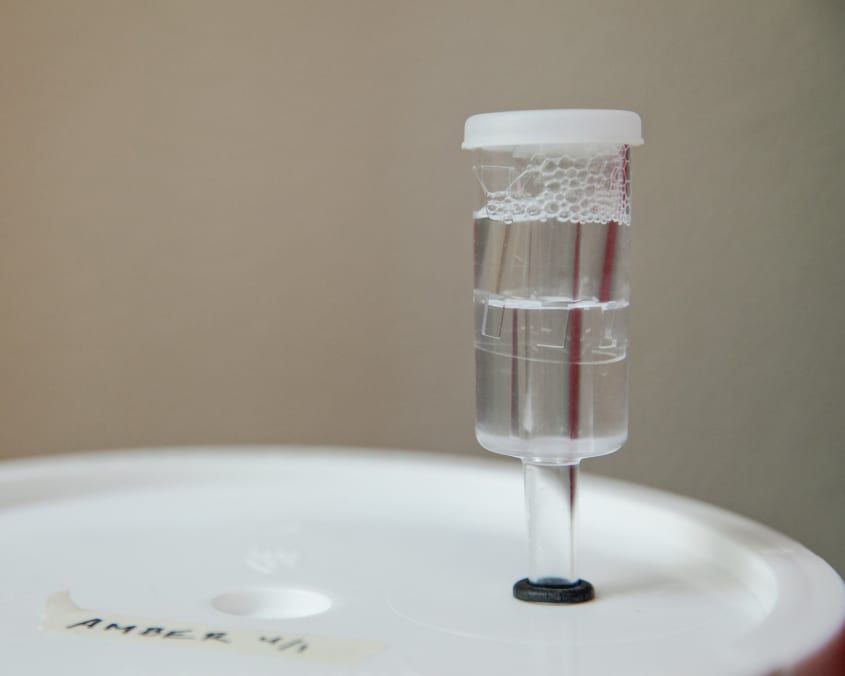
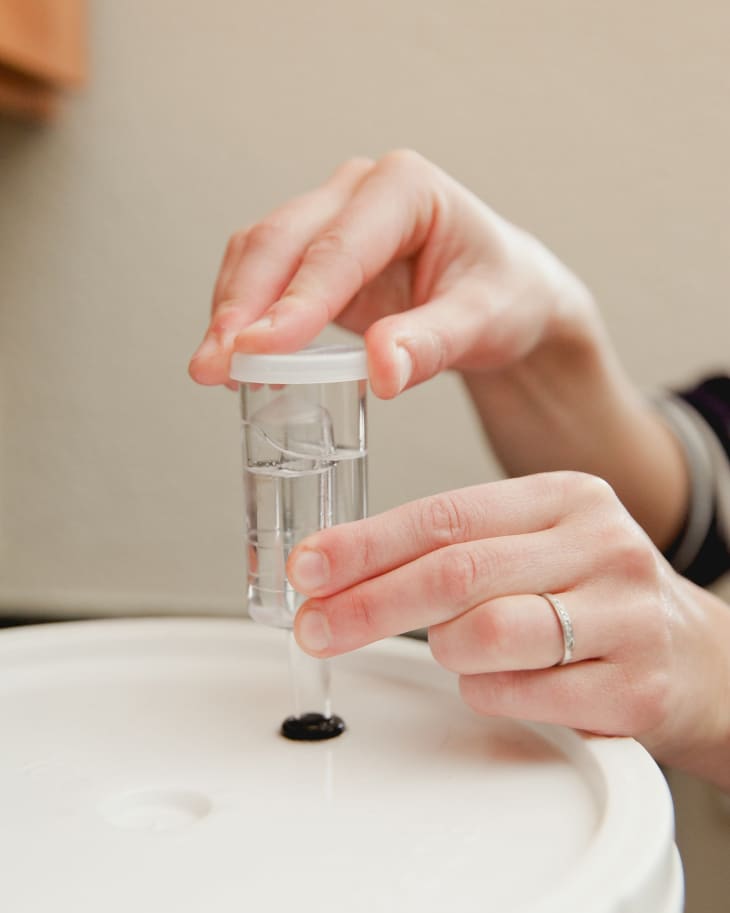
- Take a hydrometer reading: Scoop out a little wort with the sanitized measuring cup and pour it into the sanitized hydrometer tube. Float a sanitized hydrometer in the liquid. Look at where the liquid hits the hydrometer and record the number, adjusting for temperature if necessary. Your target original gravity for this amber ale is 1.051, but don’t worry too much if you don’t get this exact number. Pour the wort from the hydrometer tube back into the bucket.
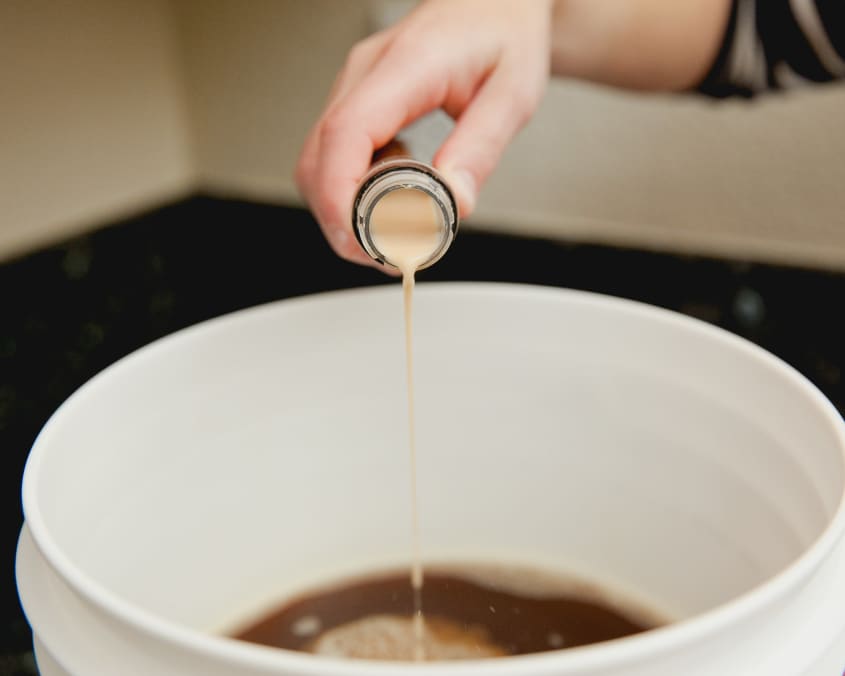
- Add the yeast to the wort: Pour the yeast into the wort. For these small 1-gallon batches, you only need to use half a package of yeast; the rest can be stored in a sterilized container in the fridge and used for another batch.
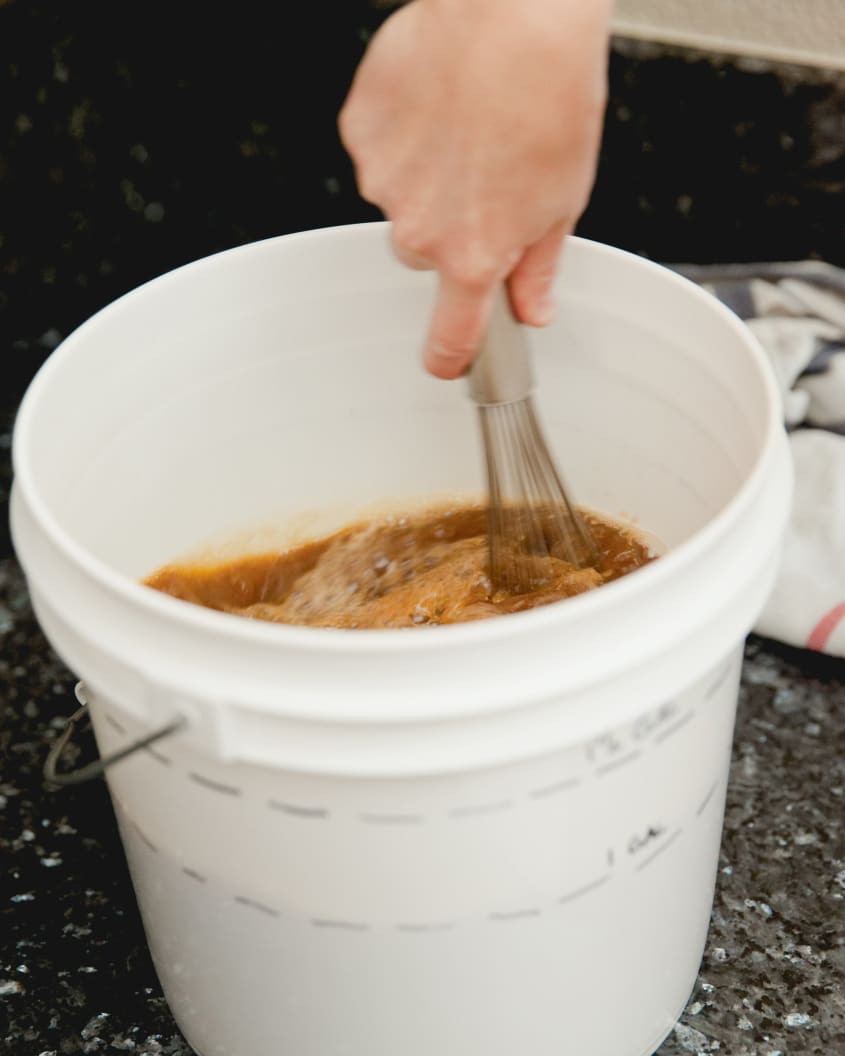
- Aerate the wort: The yeast need a little oxygen to get going, so vigorously whisk the wort with a sanitized whisk until it’s quite frothy.
- Snap on the lid: Make sure the lid is completely sealed all the way around. It should fit tightly to the bucket and won’t be very easy to remove.
- Add the airlock: Fill your sanitized airlock up to the “fill line” with water, sanitizer, or vodka. For 3-piece airlocks, insert the floater and cap; for bubbler airlocks, place the cap on top. Insert the airlock into the hole in the top of the lid. It should fit snugly with no gaps around the sides.
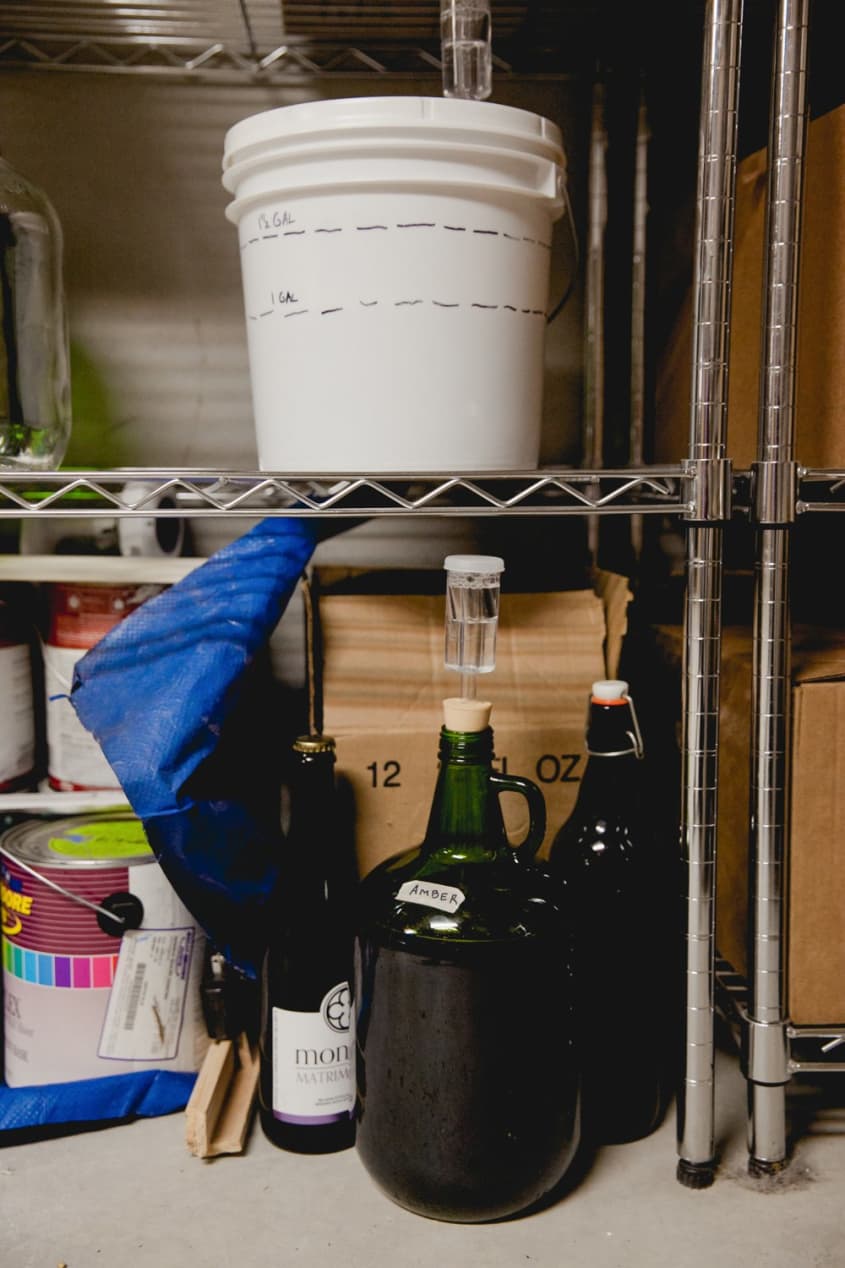
- Place the bucket somewhere out of the way and out of direct sunlight: You’re done! Now it’s up to the yeast to do their job and get fermentation going. Stash your bucket of wort somewhere out of the way and out of direct sunlight (you can throw a blanket over it if your apartment is sunny), but keep it somewhere you can keep an eye on it and make sure everything looks OK.
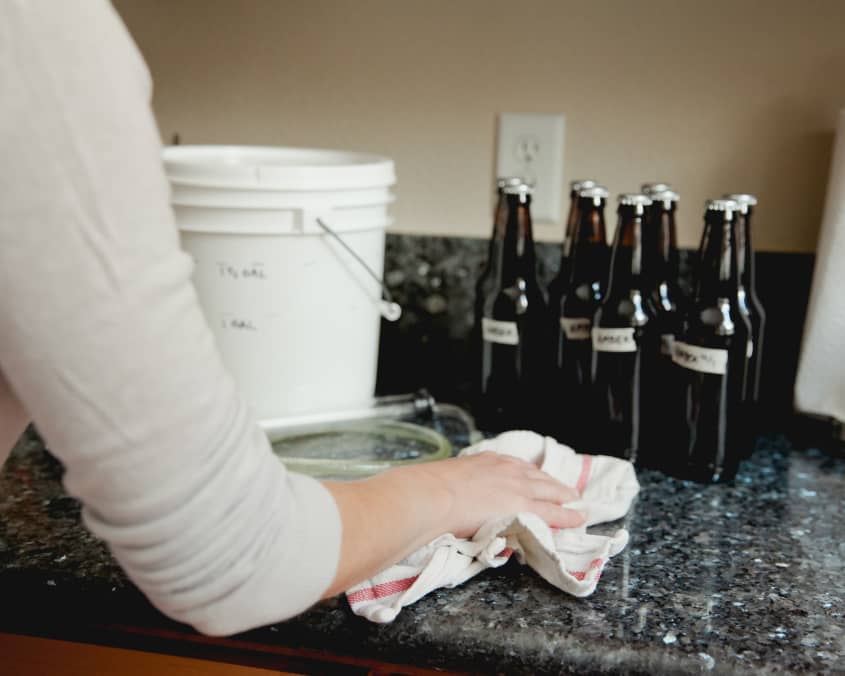
- Clean up the kitchen: Make this step a little happier for yourself and pour a beer while you’re scrubbing down the sticky counters. → In the next 24 hours, you should start seeing bubbles pop up through the airlock. This is a sure sign that fermentation is off and running. We’ll talk about what’s happening in the bucket and what to do if you don’t see any signs of fermentation in the next few lessons.
Troubleshooting
→ If you don’t see your particular problem here, check the links for each step (above) for more troubleshooting scenarios.
I can’t get the temperature of my mash to hold steady — it shoots up and then drops down. What gives?
The thick, porridge-like mash often develops hot spots, especially as the grains settle to the bottom of the pot or as the pot sits over a burner. Stir the mash gently for a few seconds before checking the temperature to be sure you’re getting an accurate reading. When warming the mash on the stovetop, only warm it for a minute at a time, then take it off the heat, stir, and check the temperature. It’s really easy to overshoot your temperature mark — warming it in intervals helps prevent this from happening.
My mash went over 153°F — is it OK?
Yes! As soon as you notice, stir the mash off the heat to bring it down below 153°F. You might end up with a slightly lower alcohol level and more malty flavors in your finished beer, but your beer will still ferment just fine.
The sparge is going really slowly.
Make sure your sparge water is warmed to 170°F — if it’s not quite hot enough, sparging goes more slowly. If the temperature is OK, it might be that your grains were crushed a little too finely, which is okay but makes sparging a pain — just carry on as best you can and remember to ask the clerk at your homebrew store to grind the grains more coarsely next time.
Recirculating the wort through the grains is going really slowly.
Most likely, your wort has cooled off a bit too much, which makes the liquid more thick and syrupy. The easiest thing to do is continue recirculating the wort, and then rinse the grains with a cup of very hot water to make sure no sugar is left behind — just extend the hop boil a few extra minutes to evaporate the added liquid. You could also just skip recirculating the wort through the grains; you’ll have some extra sediment in your wort, but it’s not a huge issue, overall.
My wort is about to boil over — help!
If your pot is on the smallish side (smaller than 12 quarts), the wort can easily foam up and boil over the side of the pot as it nears a full boil. Keep an eagle eye on the pot, and if it looks like it might boil over, quickly reduce the heat or remove the pot from heat until the foaming subsides. You can also try stirring the wort continuously or squirting water on the foam. Once the boiling wort has broken through and most of the foam has dissolved, the risk of boil-overs is much lower.
Oops, my wort boiled over — is my beer OK?
Boil-overs are a rite of homebrewing passage — welcome to the club! Just clean up the spill and carry on with the hop boil. You might end up with a little less wort at the end, but it’s fine to top it off with water.
My wort is taking forever to cool down.
It’s OK! Cooling it in 30 minutes is ideal, but if it’s taking longer, everything should be fine. Just be extra careful with all your sanitation.
I’m not sure if my sanitizer is actually sanitizing, or if I’m doing it correctly.
I find this tricky, too. Sanitized equipment doesn’t look different, and there’s no magic iPhone app that will confirm that sanitization has happened. You just have to trust it. Read the directions for your sanitizer carefully and do the best you can. As long as you’re making some attempt at sanitizing, that will generally be good enough — don’t let this keep you up at night.
I forgot to take my liquid yeast out of the fridge, and/or I forgot to activate it.
Ideally, you want the yeast and the wort to be about the same temperature — room temperature. Dry yeast can be used straight from the fridge, but liquid yeast needs some time to warm up. If you forgot to take it out of the fridge at the beginning of your brew day, take it out now and put it in a bowl of warm water, activating it if necessary (check the package directions). In the meantime, cover your wort with the lid to keep it protected.
I can’t figure out how to use my airlock!
If it’s an S-shaped bubbler airlock, all you need to do is fill it with water up to the “fill line,” cap it, and insert it in the lid of your bucket. If it’s a 3-piece airlock, fill the main piece with water to the “fill line,” then drop the smaller, cup-like piece inside so that it settles over the tube sticking up inside the airlock. Cap it and insert it into the lid of your bucket.
Brew Better Beer: A Companion to Beer School
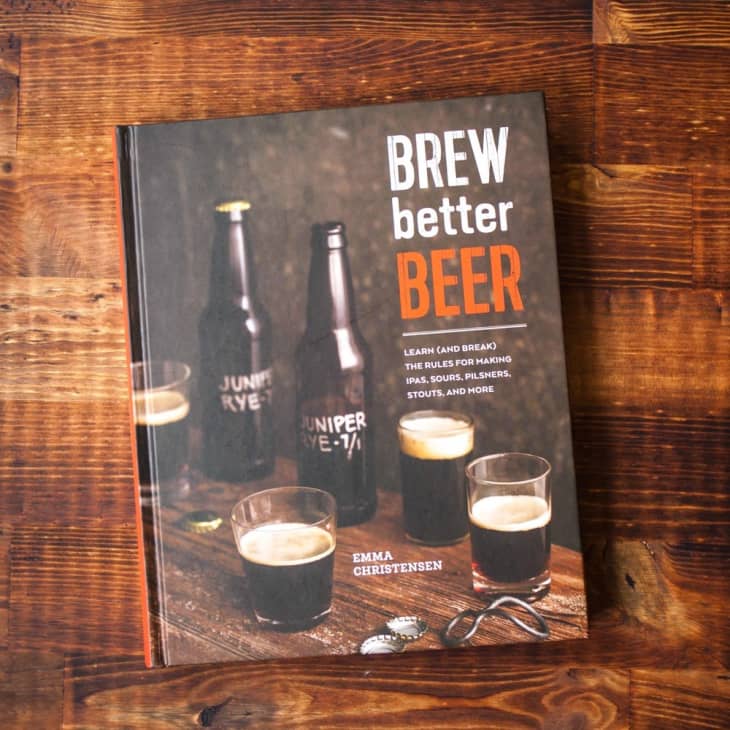
I love brewing beer so much, I wrote a book about it! Brew Better Beer (May 2015, Ten Speed Press) is a complementary guide to Beer School. Take a look for even more nerdy details about homebrewing, how to brew 5-gallon batches, and plenty of recipes for different beers.
→ Find it: Brew Better Beer by Emma Christensen
With The Kitchn’s Beer School, we’ll teach you how to brew your own beer at home — and brew it with confidence. In 20 lessons and 7 weekend assignments, we’ll get you set up with your own home brewery, walk you through your first brew day, show you how to bottle your beer, and then toast you on your first pint. Ready to brew your first beer? Join us!