
How To Make Creamy Nut Butter


Making creamy nut butter at home sounds as easy as throwing some nuts in a food processor or blender, and for the most part it is! But that doesn’t mean there isn’t some smart technique involved to ensure success. This process works for cashews, almonds, or peanuts, and results in slightly different textures depending on the nut or combination of nuts used. No matter what nut you use, get ready for a final product that delivers the toasty, creamy bite you crave.
Your Nut of Choice
This method works for peanuts, almonds, and cashews, since all three can be used to produce a satiny nut butter. If you want to go into the deep specifics of using peanuts, you can learn more with our lesson on how to make homemade peanut butter. Cashews produce the creamiest nut butter by far and can be used in combination with either almonds or peanuts to create an even smoother texture.
Read More: How To Make Homemade Peanut Butter
For the Love of Naked Nuts
For a nut butter to be smooth, the nuts can’t have any skin. Skins have a bitterness that can’t be ground away. Fortunately, obtaining nuts without skins isn’t too much trouble. Grocery stores and health food stores sell a variety of skinned nuts by the bag or in the bulk section. For almonds in particular, this has been a great help. Whole blanched almonds are clean and ready for grinding — no tedious prep required.

Toast the Nuts Oh-So Lightly
Although you can purchase cashews and peanuts roasted and pre-salted, it’s better to leave them for snacking rather than making nut butter. Instead look for raw, unsalted nuts so you can control the amount of salt and the amount of roasting. Some nuts, especially almonds, are available blanched and unsalted, which works great. When you toast and grind the nuts yourself, and then make the butter while the nuts are warm, even more natural oils and flavors release. That extra taste is worth finding the right starting ingredient.
The Power of Honey
Honey helps emulsify nut butters better than maple syrup, agave syrup, or thinner sweeteners. Cane syrup is a good alternative, but it can be costly and has a strong flavor. If you use a powerfully fragrant and highly flavorful honey, like buckwheat or chestnut or blueberry, it will also overtake the nut flavor. Be gentle in your choices and go with a clean and mild varietal. Many inexpensive honey blends work well here, as does clover, alfalfa, and orange blossom.

Embrace Emulsifying, Unctuous Fat
Nuts have a high proportion of fat, so adding more might seem counterintuitive. However, for a truly smooth and creamy nut butter, a secondary fat is necessary. The ideal choice is a fat that stays (relatively) solid at room temperature; you can’t add any liquid oil. One of the great things about modern cooking is how we have access to so many natural options. Coconut oil and palm oil (or shortening that has a mixture of both) are excellent sources of non-hydrogenated fats that work well in nut butters. Just remember that these are much more sensitive to heat than traditional shortening. While the mixture is processing, the butter might seem a bit thin from the sheer heat of the food processor blade’s rotating force. Fear not! As your nut butter comes to room temperature, it will set up a bit and become a smooth, spreadable butter.
Troubleshooting and Grinding Stages
Nuts can be a little mysterious, but the main mystery that concerns us for nut butters is the age of the nut. There is no good way to know that answer. You can look for the “best-by” date, but it’s a guideline at best. Older and younger nuts process differently, so coming up with an exact formula for a nut butter isn’t really possible. There are, however, some consistent stages that you need to look for at the beginning and end of the processing.
For those nuts that just don’t want to play nice, I’ve built in a stir, scrape, and add-the-last-bit-of-shortening stage as a troubleshooting problem-solver. It really helps with achieving consistent results.
Avoiding Burnout
Food processors, even top-of-the-line home models, can burn out, and simply shut off with jobs that are very long. Making nut butter is indeed a long task for a food processor, so I incorporate little breaks for the machine, which gives it and the mixture a chance to cool down. Adding the fat and sweetener to a super-hot batch of ground nuts inhibits your ability to judge when it’s smooth and melts the fats immediately. So to avoid machine fatigue and over- or under-seasoning, we just give the food processor a break.
If your machine is a bit old or not terribly powerful, you can certainly add a second five-minute break at the four-minute mark in the second processing.
Keeping Nut Butters
Your nut butters should be kept in a covered container, refrigerated and brought back to room temperature before using. They will be best enjoyed within a week.


How To Make Creamy Nut Butter
Makes about 1 1/2 cups
Nutritional Info
Ingredients
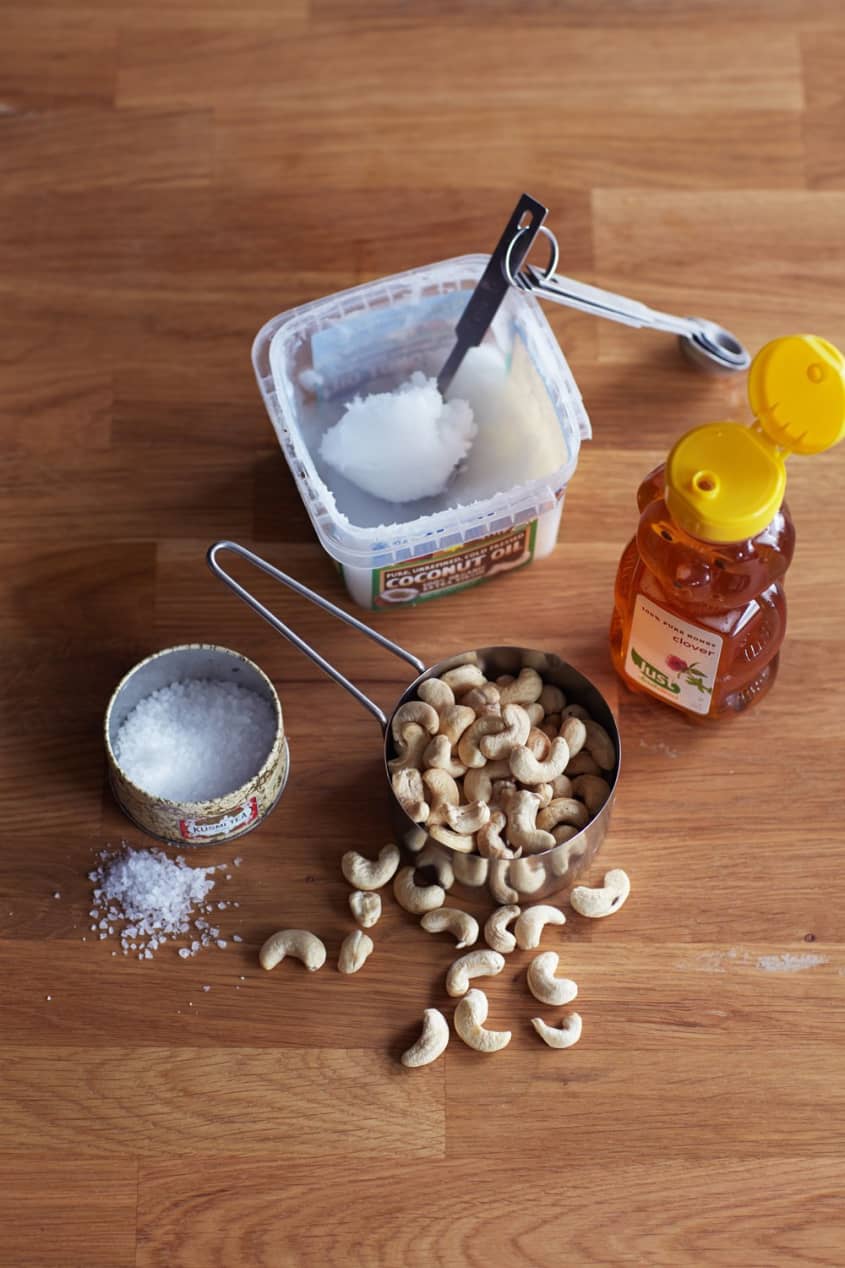
- 2 cups
shelled, skinless, unroasted, unsalted cashews, almonds, or peanuts
- 1 1/2 teaspoons
kosher salt, or more to taste
- 2 tablespoons
mild-flavored honey, or more to taste
- 5 tablespoons
coconut oil, palm oil, or non-hydrogenated shortening, divided
Equipment
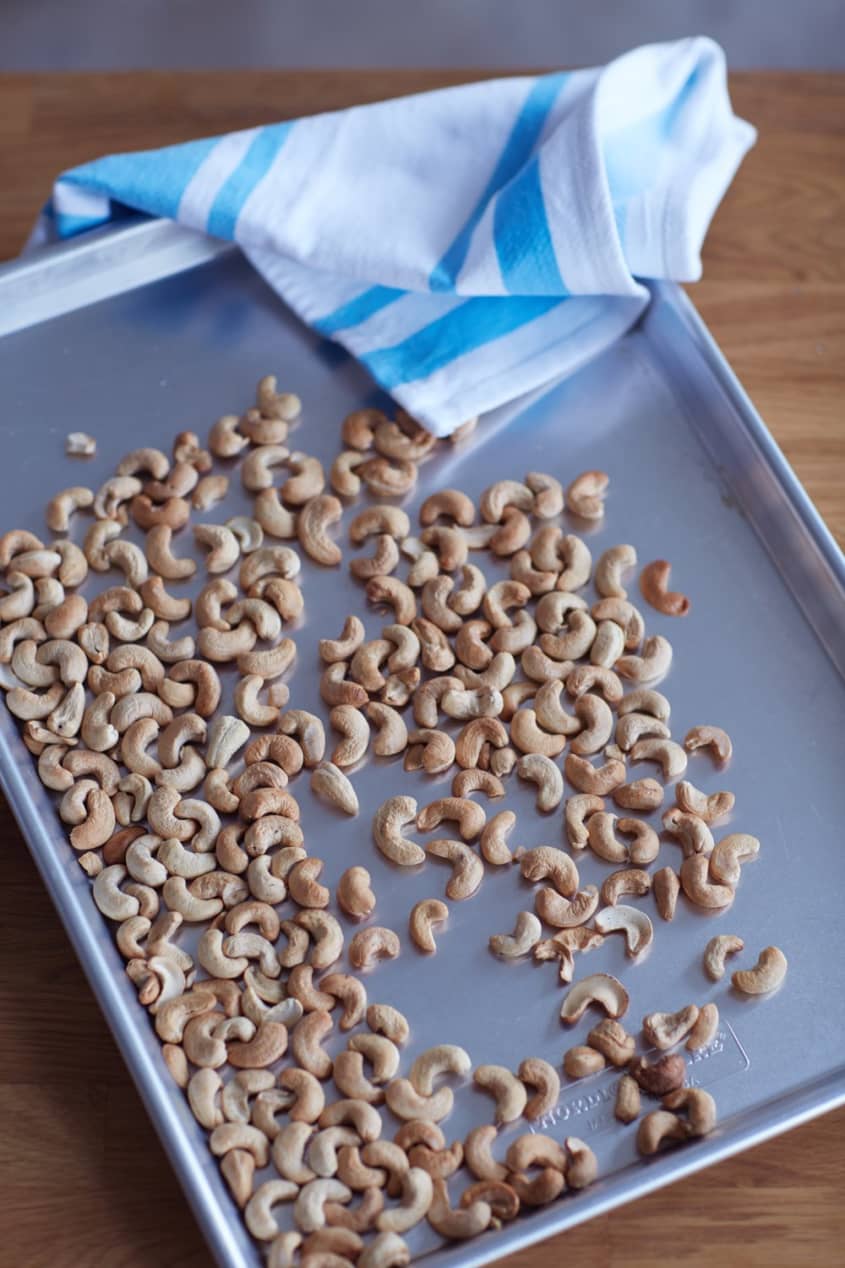
Rimmed baking sheet
Parchment paper
Kitchen towel
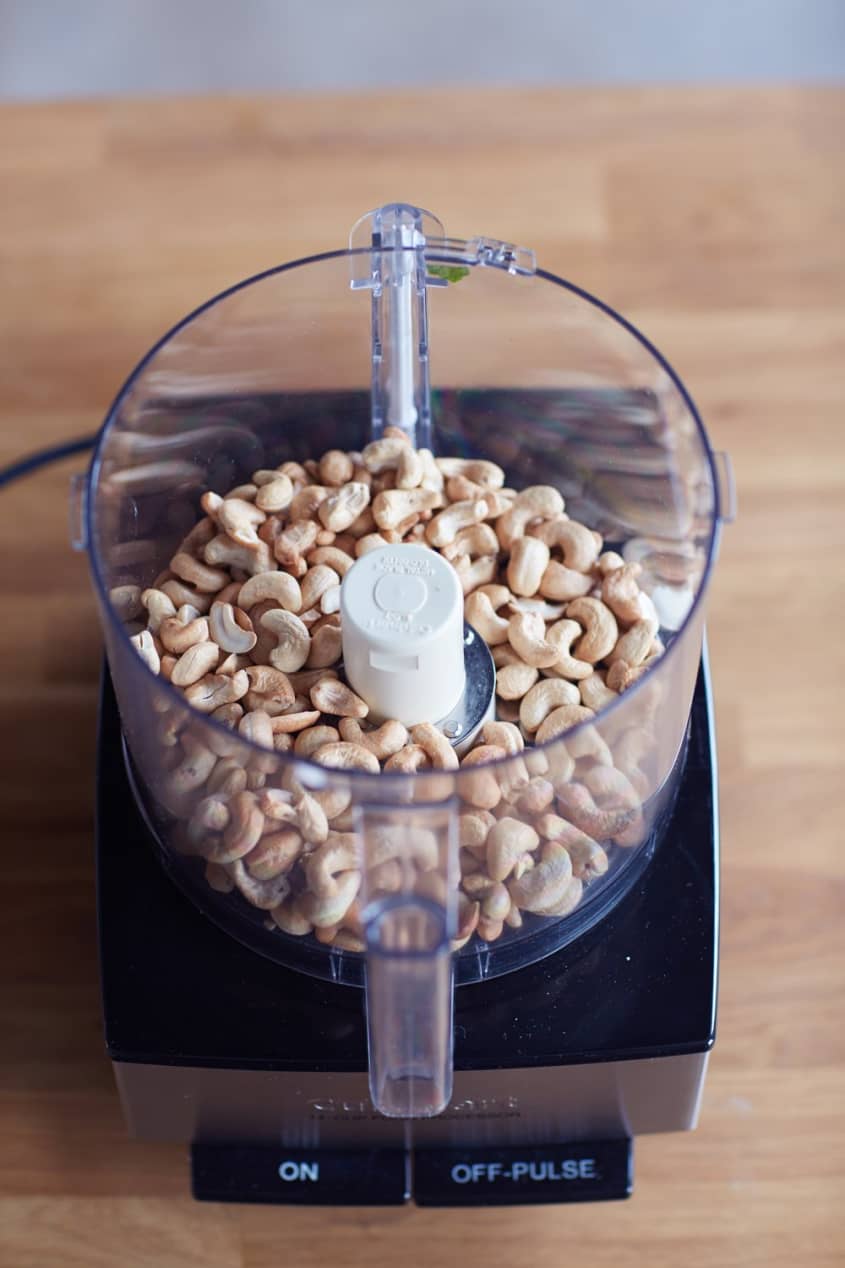
Food processor fitted with a metal blade
Silicone spatula
Mixing bowl
Storage container
Instructions
Roast the nuts: Preheat the oven to 350°F for peanuts and cashews and 325°F for almonds or Marcona almonds. Line a rimmed baking sheet with parchment paper. Spread the nuts on the sheet and roast for 10 minutes. Stir the nuts and toast for another 2 to 3 minutes until slightly brown and fragrant.
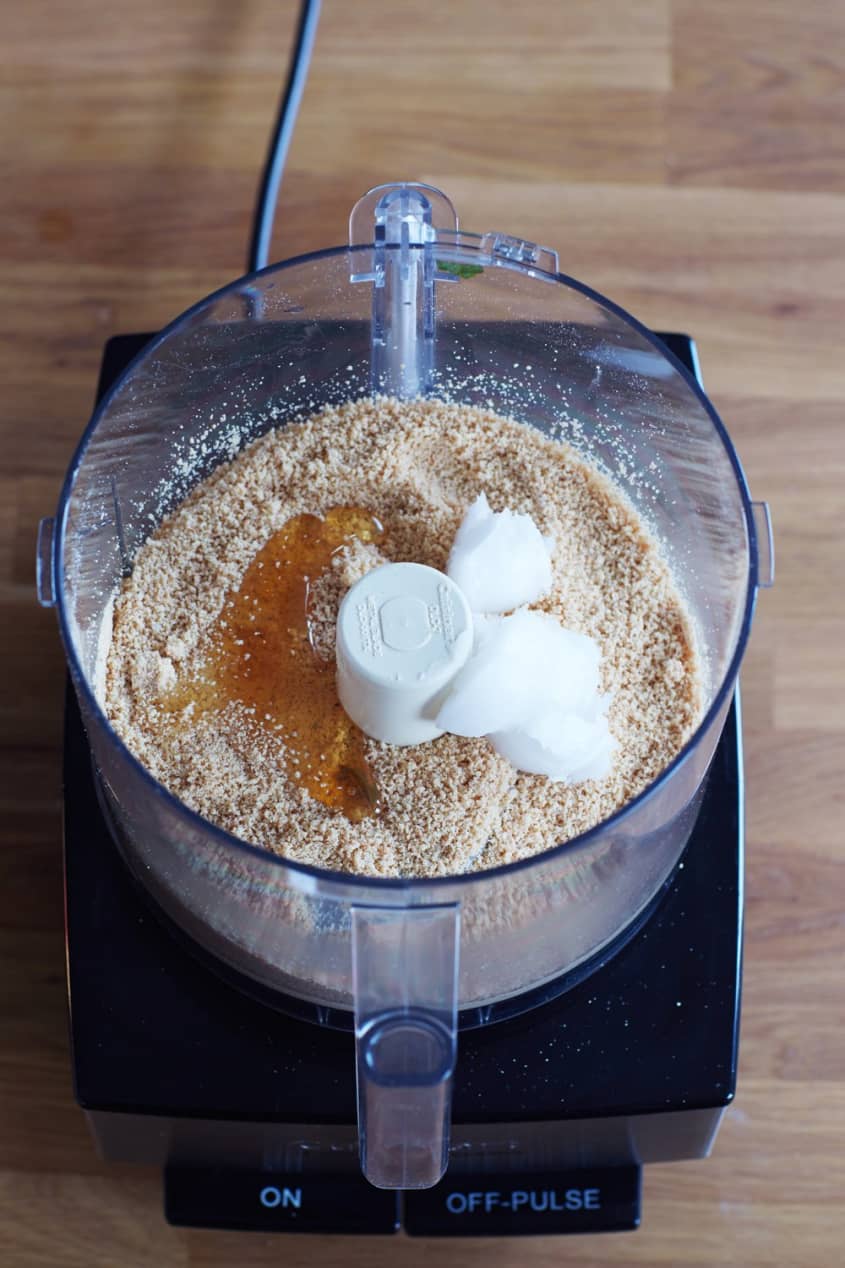
Grind the nuts: Pour the warm, roasted nuts into the bowl of a food processor fitted with a metal blade and add the salt. Process 1 to 3 minutes or until crumbs form.
Cool time: Wait 10 minutes for the machine and the ground nuts to completely cool down.
Add the honey and oil: Add 2 tablespoons honey, and 4 tablespoons coconut oil or shortening.
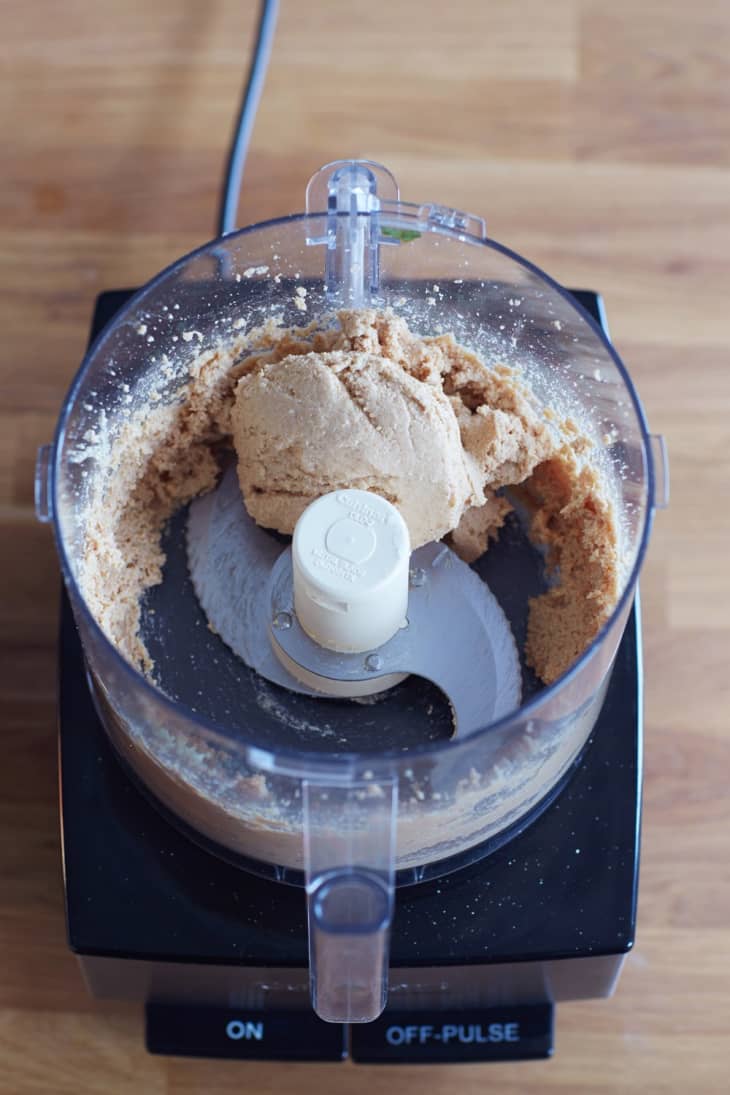
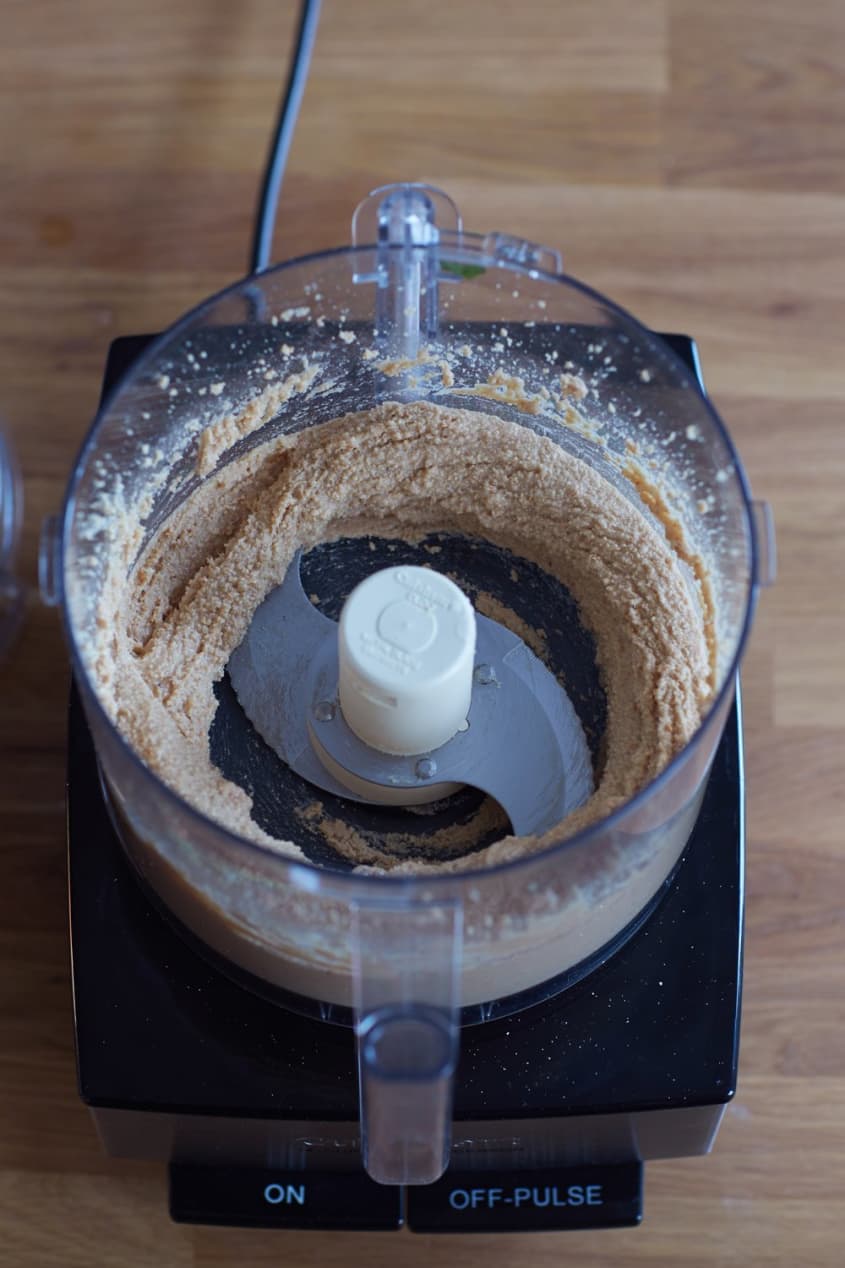
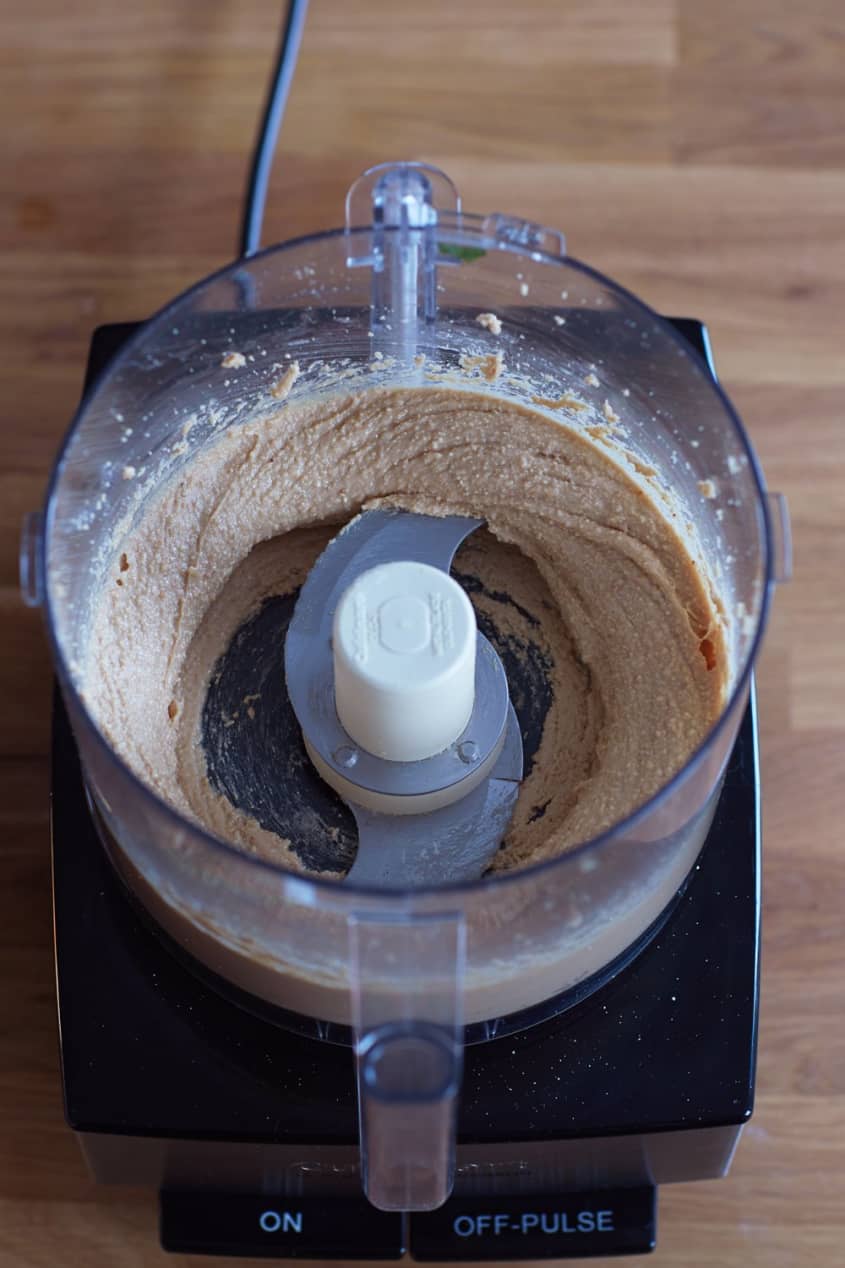
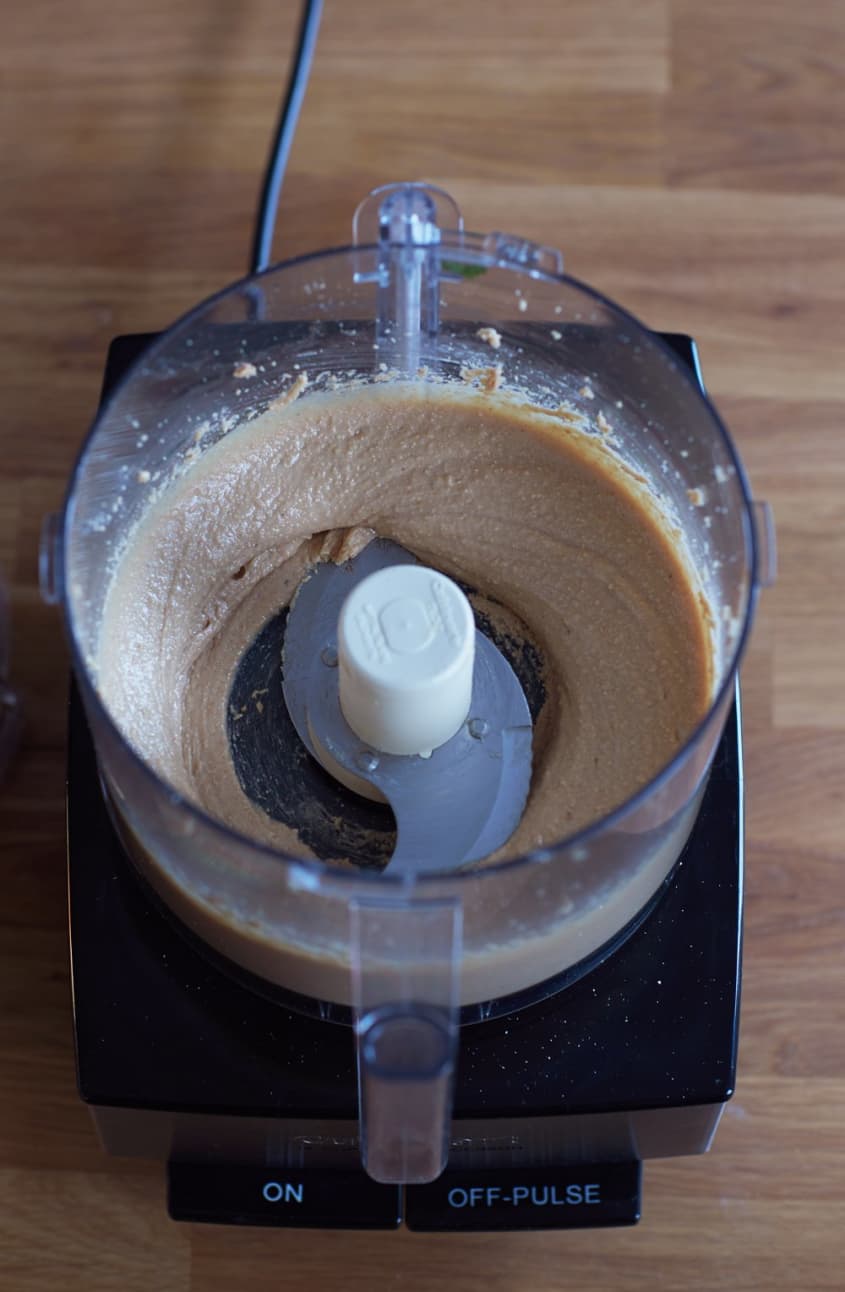
Process again: Process for another 5 to 10 minutes. Time isn't as important as texture in this case, so look for the nut butter to go through a few stages. First the mixture will seize a bit and clump, and then go from sandy, to clumping into a soft ball, to a final stage of smooth and creamy on the top with a gritty bottom.
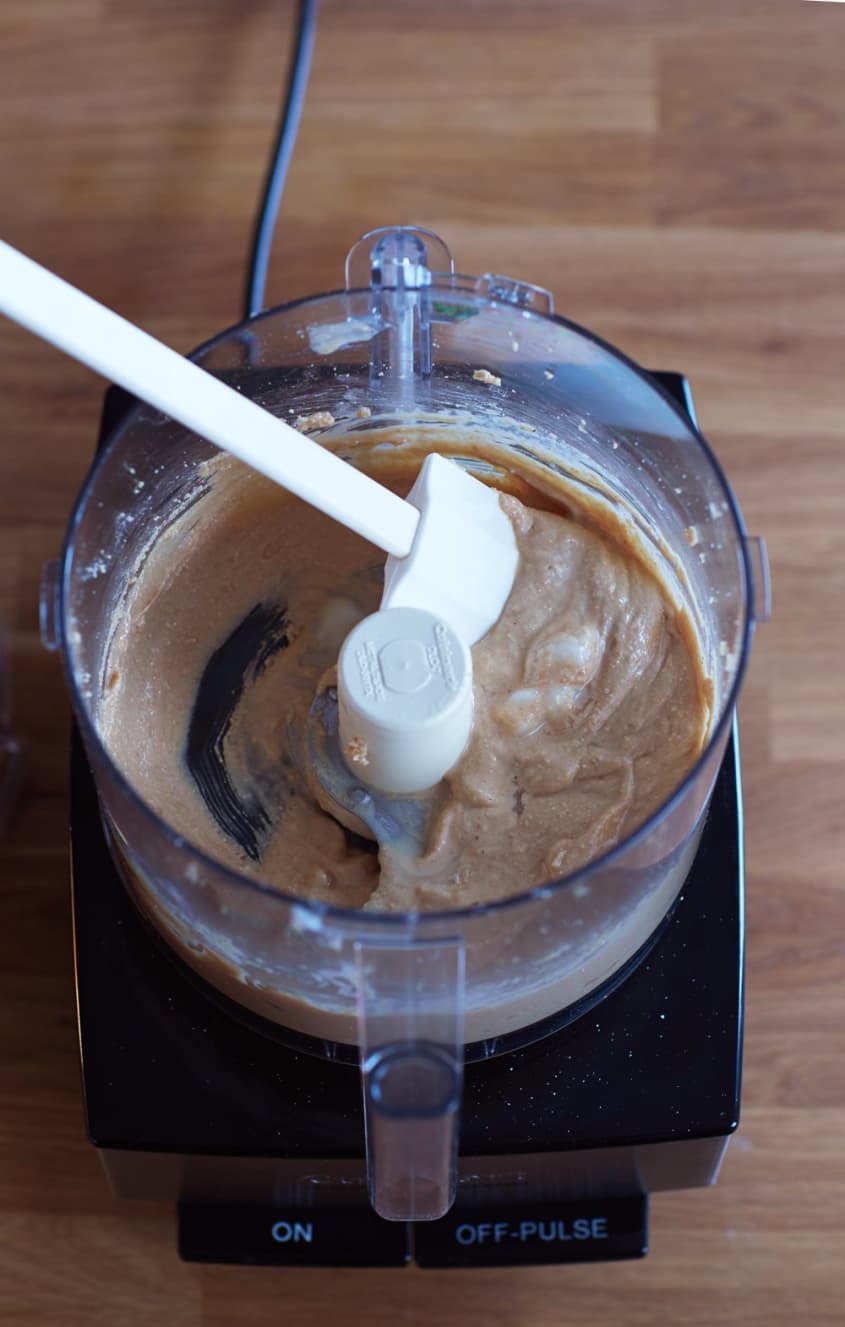
Stop the machine again and add the remaining oil: Turn the machine off and let stand for 5 minutes. Using a silicone spatula, stir the mixture, scraping the side and the bottom of the bowl, carefully moving the blade as necessary to get all the ground nuts. Add the remaining 1 tablespoon oil or shortening. Process until smooth, about 2 more minutes.
Adjust seasoning: Taste and add more honey or salt and blend until fully incorporated, about 1 minute.
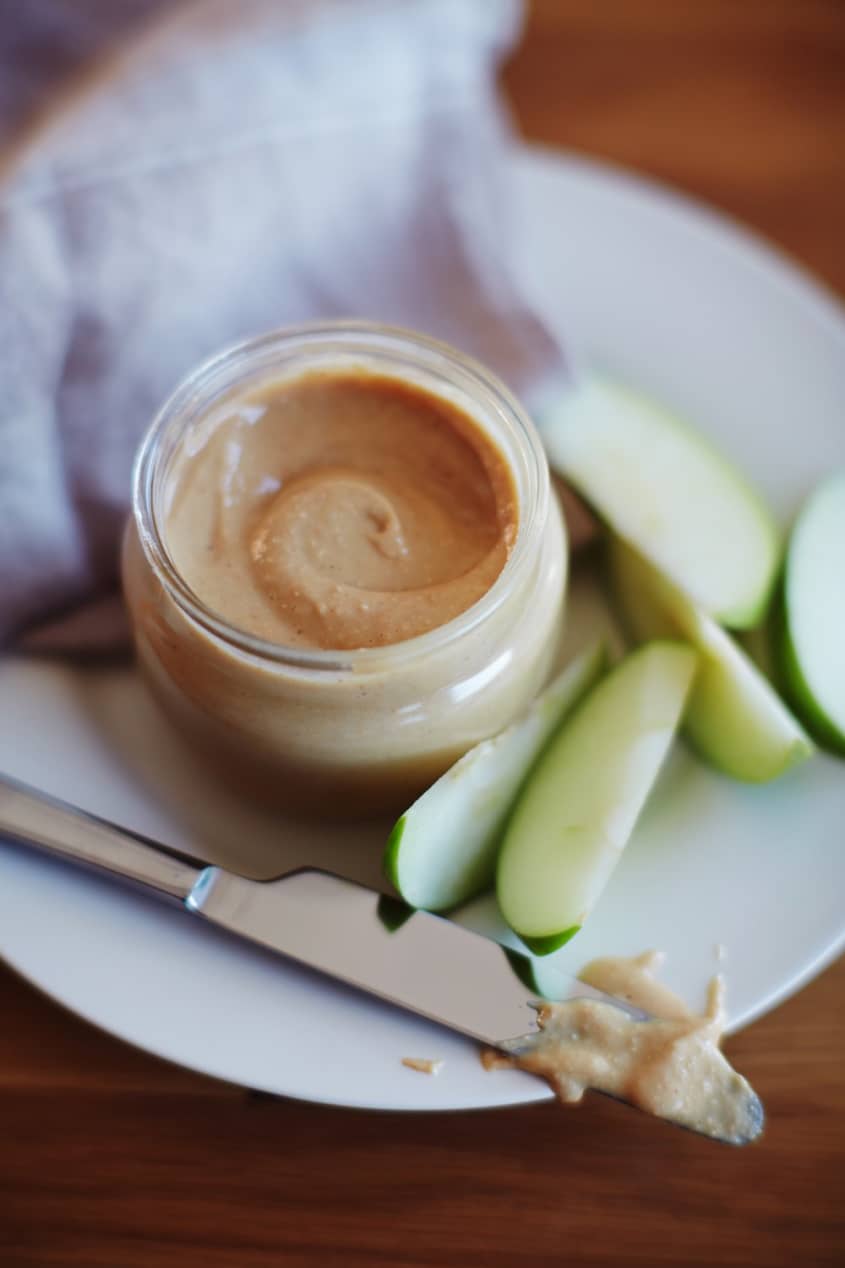
Finish the nut butter: Scoop the mixture into a mixing bowl and stir well. Let the nut butter come to room temperature. If you are not using it immediately, scoop it into a container with an airtight lid. Cover and refrigerate. It will last about 1 week. Bring to room temperature before using.