
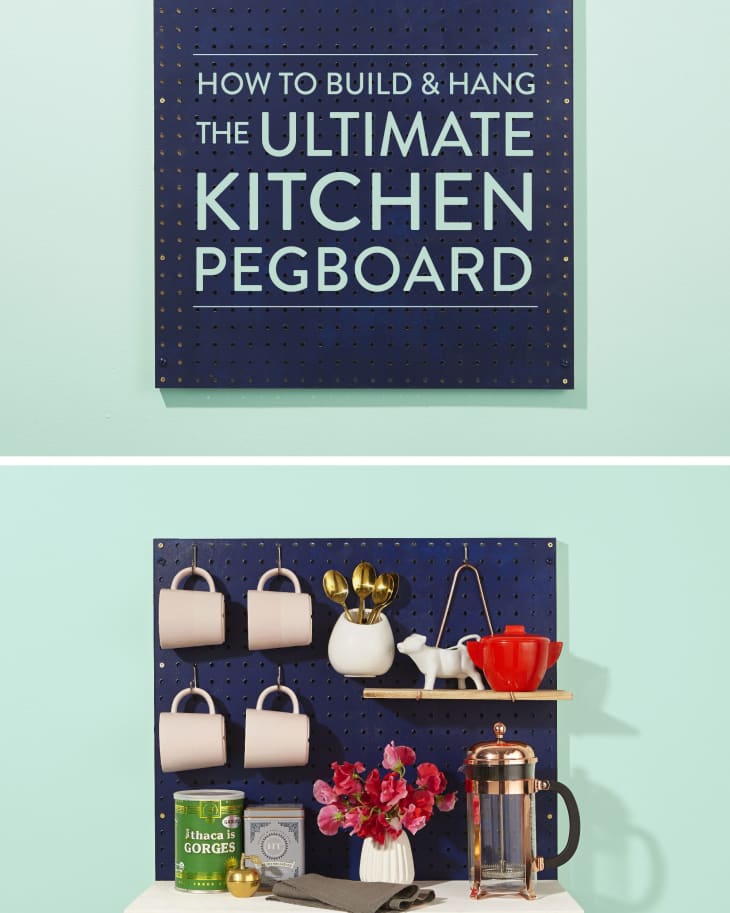
The Great Kitchen Pegboard: How to Build and Hang the Ultimate Kitchen Storage Solution

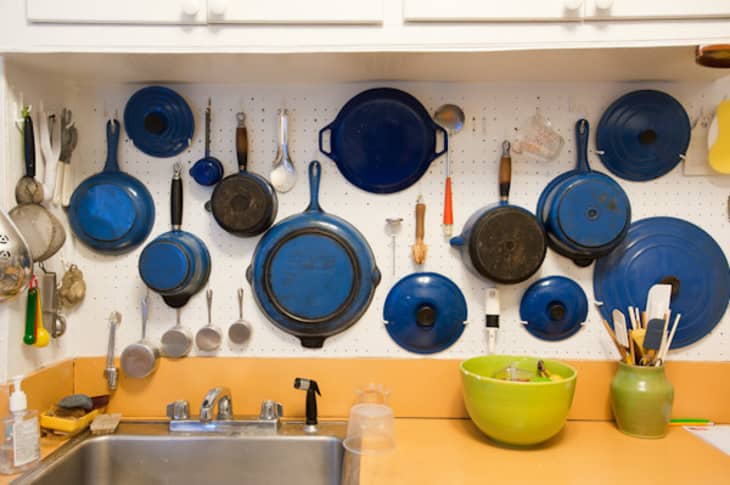
When it comes down to it, there may be no better storage solution in the world than a pegboard. Woodworkers and car folks love ’em for a garage, but we think they work even better in the kitchen. Don’t take our word for it, though; none other than the great Julia Child swore by a pegboard for hanging everything from copper pans to whisks (see hers here).
As you’ll see from us in the days to come, there’s no setup a pegboard can’t handle. A pegboard as a spice rack? Easy! A pegboard as a coffee station? Adorable! The possibilities are endless.
But before you set up your organizing strategy, you have to hang the basic pegboard, and that’s what we’ll show you how to do today.
The Great Kitchen Pegboard
The kitchen pegboard is a terrific example of using storage ideas from other parts of the house (usually a garage or laundry room) in the kitchen. Julia Child popularized this utilitarian solution in her kitchen — famously creating an entire wall of French copper pots hung with neat care on a pegboard.
Want to see some other ingenious ways of using a pegboard? Here are a few we’ve written about over the years — including one in Julia Child’s editor’s kitchen. The idea was certainly contagious, thanks to Julia.
- Judith Jones Makes an Omelet for One (to Share) – A tour of Julia Child’s editor’s kitchen, which is rich in pegboard inspiration.
- Leather Designer Steven Soria Uses a Pegboard For His Favorite Kitchen Tools
- In Case You Forgot, Kitchen Pegboards Are Pretty Awesome
- Place Your iPad Out Of Harm’s Way With a Pegboard
- 5 Smart, Fresh Ways to Use Pegboards in the Kitchen
- This Kitchen Pegboard Idea Is Too Good to Hide
- Can a Julia Child-Style Pegboard Work In My Kitchen?
Why Pegboards are Awesome
The kitchen pegboard is a great way to create storage in a space that would otherwise be wasted. Sometimes, a shelf won’t work on a wall (maybe it sticks out too much?) and that’s where a pegboard can step in. It’s also handy in small kitchens that don’t have a ton of cabinets or drawers. No matter why you want a pegboard in your kitchen, you’ll be happy to read this next part.
Is It Hard to Hang a Pegboard?
We don’t think so! As long as you have a wall (pick a wall, any wall!), you have the ability to hang a pegboard. You don’t even need special carpentry skills to hang one.
You just need a few basic tools, like a drill and a tape measure. Much of the work of cutting the pegboard and wood can be done by your local lumber or big box-hardware store, like Home Depot. Take them your equipment list, then come home and follow these easy instructions. Let’s get started!


How To Hang a Kitchen Pegboard
These instructions will give you a 2x2-foot wall-mounted pegboard.
Nutritional Info
Ingredients
Materials
- 1 2x4-foot
pegboard (cut in half)
- 1 6-foot
1x2 plank (cut into thirds)
- 4 brass
wood screws
- 4
wall anchors with matching screws
Equipment
Paint or clear polyurethane
Paint roller, tray, and brush
Wooden skewers
Drill
Tape measure
Level
Pencil
Instructions
Shop for your materials: All of the materials can be found at a hardware store or big box-home improvement store like Lowe's or Home Depot. Pre-drilled pegboard usually comes in 2x4-foot pieces. You can cut it in half for a smaller pegboard, as shown here, or mount the full piece. The wood plank you will buy will be for mounting the board so it will need to be cut into 2-foot pieces to line up with the sides of the pegboard.
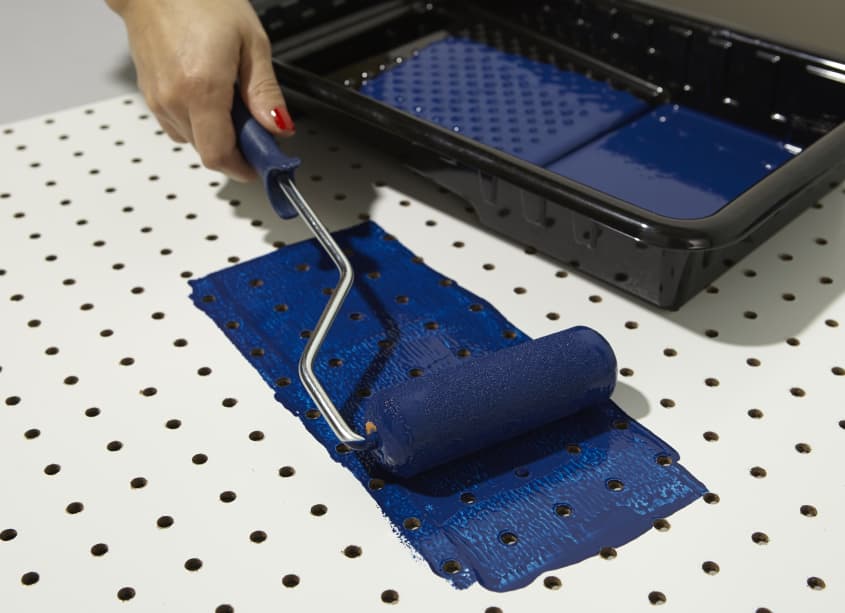
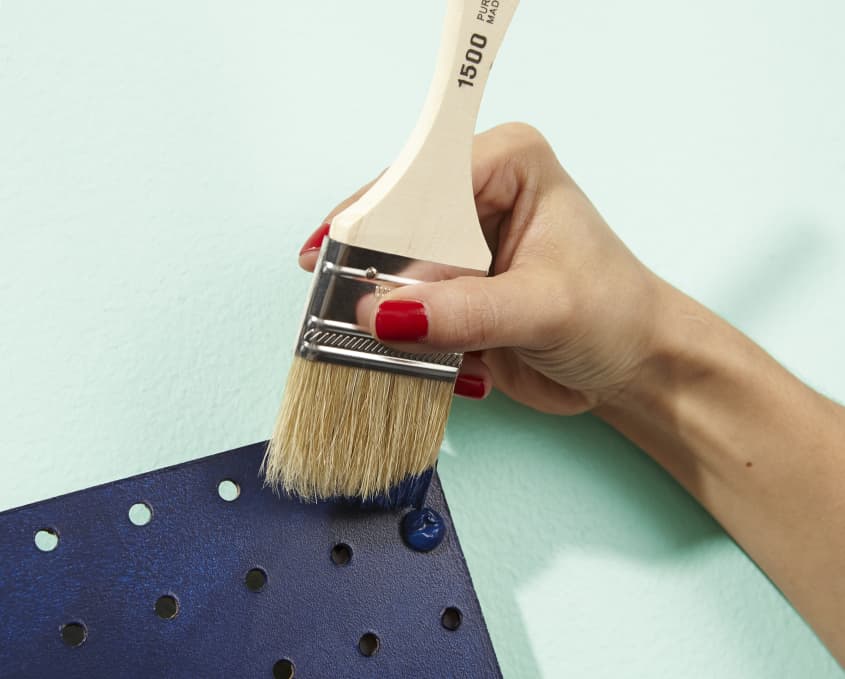
Paint your pegboard and the planks. Even if you want to leave your pegboard the natural kraft or white color you bought it in, you still want to paint it — front and back —with a clear polyurethane. This will seal it and prevent water from seeping in and ruing the hardboard. While you're painting, paint the top of each plank as well (you will be able to see through some of the holes when the board is in place). Use a wooden skewer to clear out any paint that collects in the holes. Let everything dry for at least 24 hours.
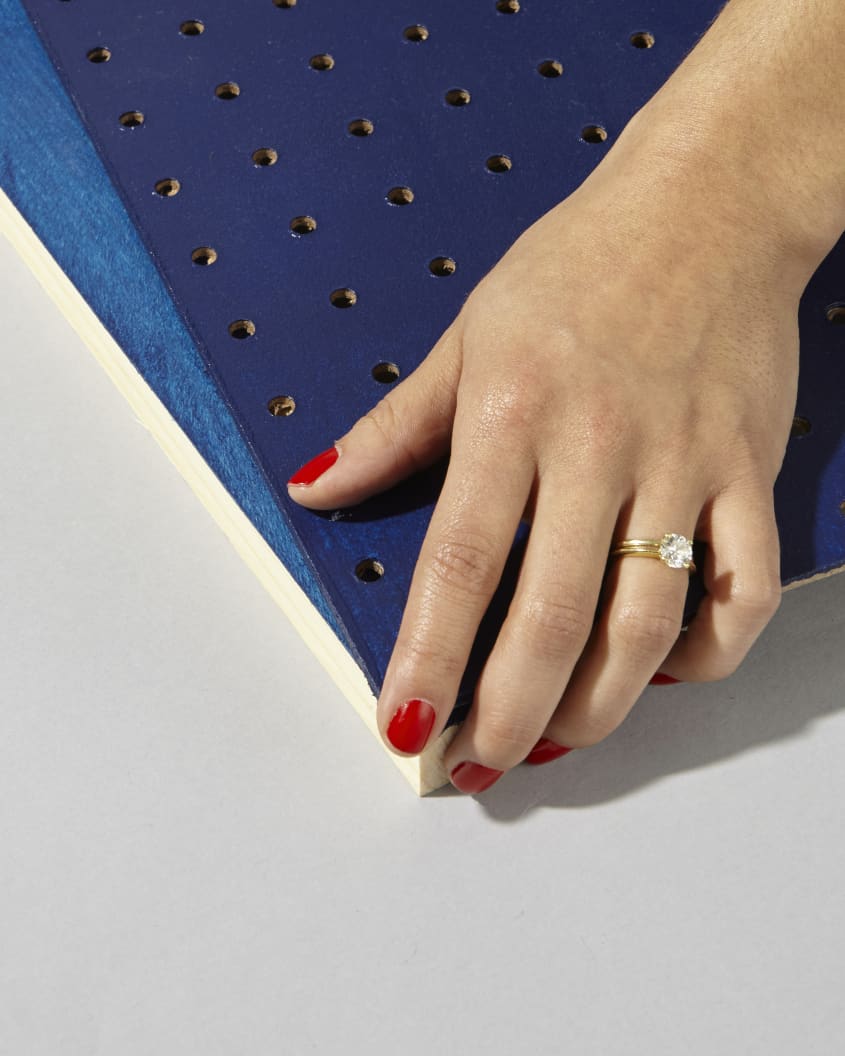
Line up the planks with pegboard. You'll need at least two planks (one for the left side and one for the right side) to run vertically down the back of your pegboard so that the edge of the plank is flush with the edge of your pegboard. These will add stability and be the anchor points for the wall. If your pegboard is larger than 2x2, consider adding another plank to the middle.
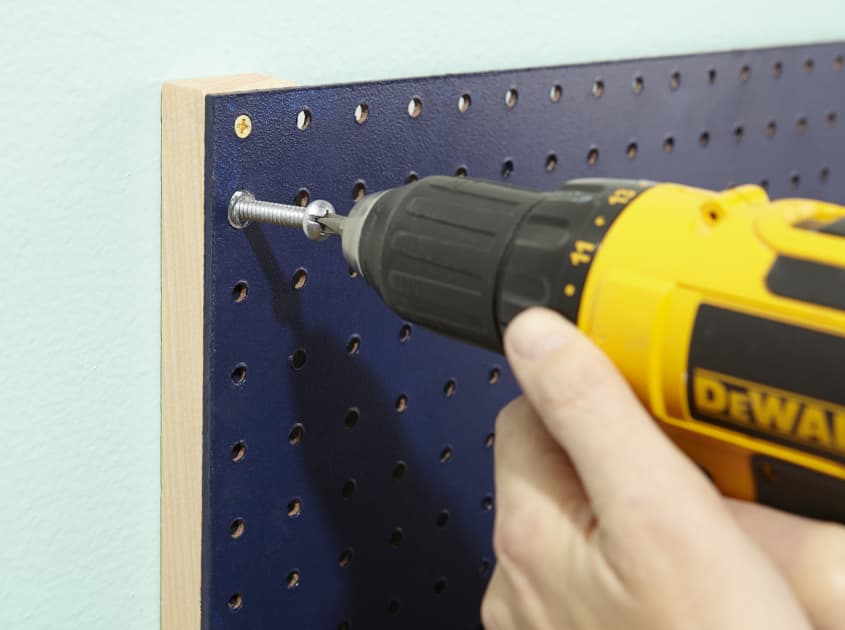
Attach the pegboard to the planks. Using your drill and two small brass wood screws per plank, attach the pegboard to the planks.
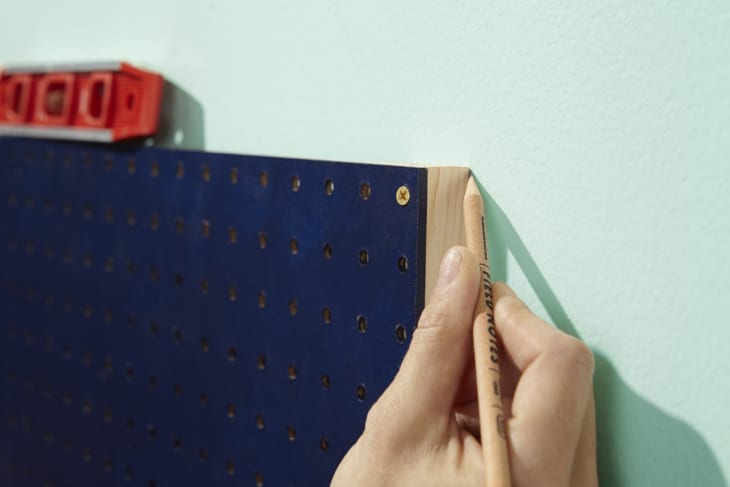
Mark where your pegboard will go. Hold your pegboard in place against the wall and, once you're satisfied with its location, mark the corners with a pencil.
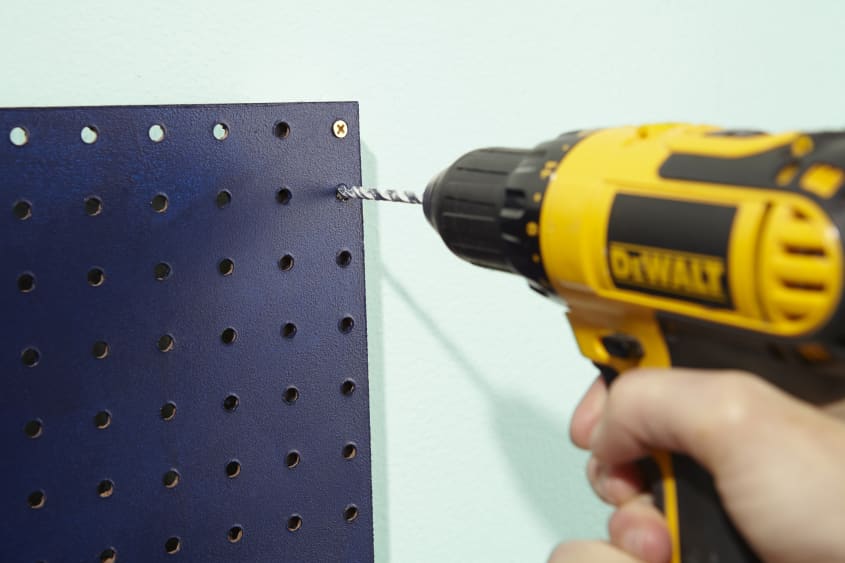
Drill holes through pegboard and into the wall. Enlist a friend to hold the pegboard in place while you drill four holes (one in each corner near the brass screw) through the pegboard and plank and into the wall.
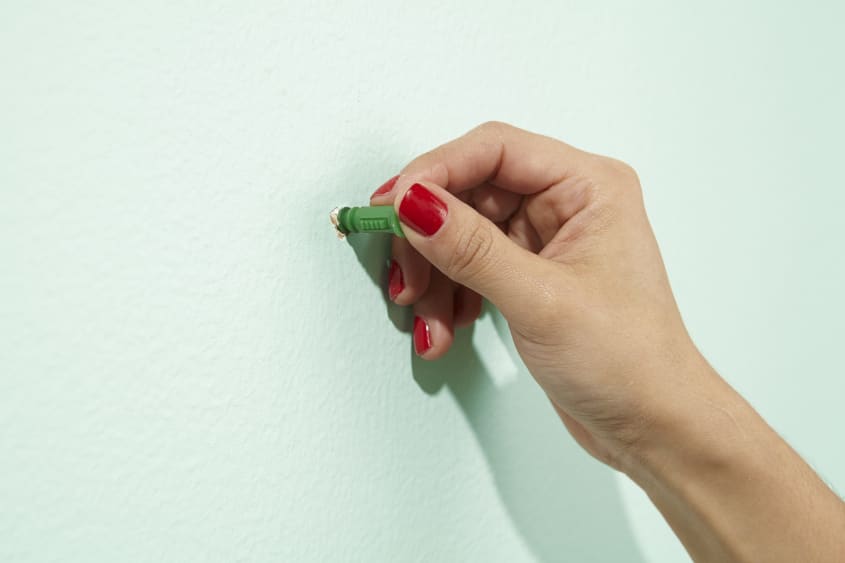
Put anchors into the wall. Once the holes are drilled, move the pegboard out of the way and push one anchor into each of the four holes.
Hang the pegboard. Get that friend to hold the pegboard again and then drill four screws through the board and into each anchor.
Do some touchups. Use more paint and a brush to cover up the heads to the screws that go into the anchor.
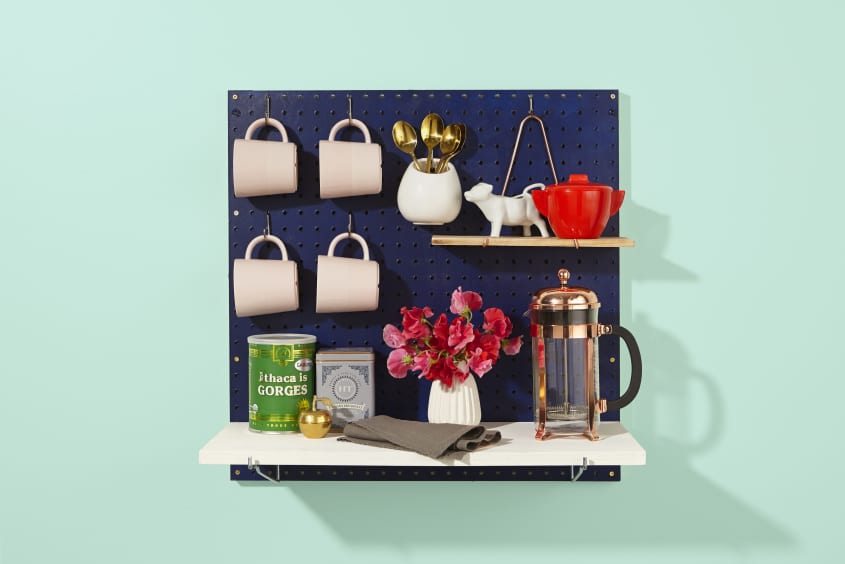
Organize and decorate. Now the fun part begins. Use hooks and brackets to hang shelves, baskets, and more.
Recipe Notes
If you require a custom size, you can have the hardware store cut it down for you.
This pegboard was 2x2. If you're hanging a larger pegboard, add a third wooden plank — with additional screws and anchors — to the middle of the board for added stability.
We used plastic wall anchors that can hold up to 20 pounds, but if you're hanging a larger pegboard or, say, a lot of cast iron you might want to use metal ones that can hold more weight.
The size of the hole (and drill bit) will depend on the size of your anchor and screws. You don't want the hole to be too big, because then the anchor won't be secure.
Also, be aware of what you're drilling into; drywall is easiest. If you're working with plaster or brick, you'll need a special drill bit.
More Pegboard Advice
- 5 Things to Know about Painting Pegboards for the Kitchen
10 Adorable Accessories for Your Kitchen Pegboard or Wall
Prop stylist: Carla Gonzalez-Hart