
Our Step-by-Step Guide to Making the Best Homemade Cannolis

This is it, you guys, the ultimate step-by-step for classic cannolis at home that is many batches of cannolis in the making.
Makes16 cannoli
Prep2 hours
Cook25 minutes

Cannolis are lovely little tubes of deliciousness. Their ultra-crisp amber shells give way to the most heavenly scented and delicately spiced ricotta filling. But finding a very good bakery cannoli can be harder than you think — especially if you move from a major metropolitan area to a small town, like I did, where most bakeries use pre-made, mass-produced cannoli shells. This year, I set out to make the very best cannoli shell I could at home — mostly driven by the longing for the super-crisp and classic shells I had in New York, New Jersey, and even in culinary school.
This is it, you guys: the ultimate step-by-step guide to making classic cannolis at home that has been many batches of cannolis in the making. This isn’t an easy shortcut version. It might require you to order some things online. You may need to bust out your pasta maker (or your biggest, baddest rolling pin). But it will yield the best possible homemade cannolis. Here’s everything you need to know about making cannolis at home, from shell to serving.
Tools You Need for Homemade Cannolis
Much of what you need you probably have on hand, but before we get started, let’s look at the tools you’ll need to make cannolis from scratch.
- Food processor: You can mix the cannoli dough by hand, but pulsing it together in a food processor makes the job much easier.
- Pasta roller (or sturdy rolling pin): A very thin layer of dough makes for the crispiest cannoli shell (which is your goal) and a pasta roller will do all the work of rolling for you. However, you can get away with a rolling pin, too.
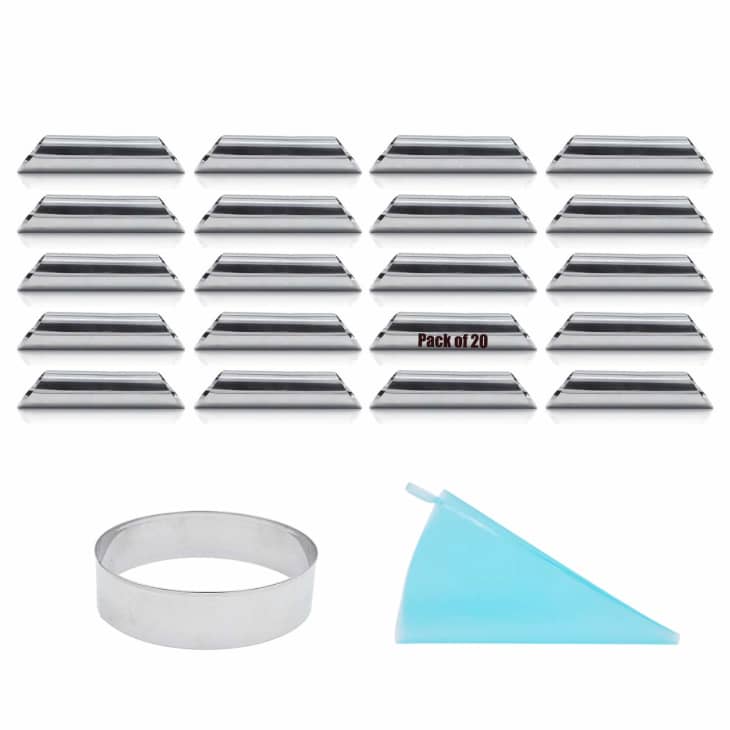
- Large circle cutter: If you buy cannoli molds, which I’d highly recommend, a large cutter usually comes with them. Otherwise, use the largest circle cutter in your nest circle cutter set.
- Cannoli molds: You can hack cannoli molds out of foil (more on that below) but cannoli molds are relatively inexpensive and last forever. Look for a set that has at least 18 molds.
- A deep-fry thermometer and Dutch oven: This is your basic deep-fry setup — a Dutch oven retains heat well and the thermometer keeps a read on the temperature. Make sure your pot is filled at least halfway (2 quarts for most pots) with vegetable or peanut oil — our two favorites for frying.
- A cooling setup: The cannoli shells need to sit on a cooling rack to keep them crisp. Set this rack over a paper towel-lined baking sheet for minimal cleanup.
Can I Skip the Molds and Hack Something at Home?
I recommend buying the molds above, but if you are hoping to make cannolis ASAP, then yes: You can fold double layers of foil into reasonably acceptable molds for one-time use. You’ll need nearly an entire roll of foil to make enough molds for this recipe, though. And if you go this route, you’ll need to be especially careful when removing the molds from the hot oil — more oil will collect in the foil molds than in traditional cannoli molds.
Homemade Cannoli Shells
Cannolis are really just two components: a crisp pastry shell and creamy ricotta filling. The shells — which must be wrapped around a cannoli mold and fried — are the most arduous piece of the cannoli puzzle. Not only are you making a pastry dough and shaping it into a tube, but you also need to keep your fingers crossed that the dough keeps its shape and stays closed during the deep-frying!
You can absolutely buy cannoli shells online — you’ll need about 16. I’ve even bought unfilled shells from the bakery at my grocery store. But frankly, decent shells are overpriced and the mediocre ones are not worthy of a delicious ricotta filling. Plus, you can buy cannoli molds for the price of one batch of empty shells.
The process of mixing the pastry dough is easy, but rolling it out, shaping it around the mold, and frying takes patience. I’ll walk you through the whole process below and in the recipe.
Easy Cannoli Filling
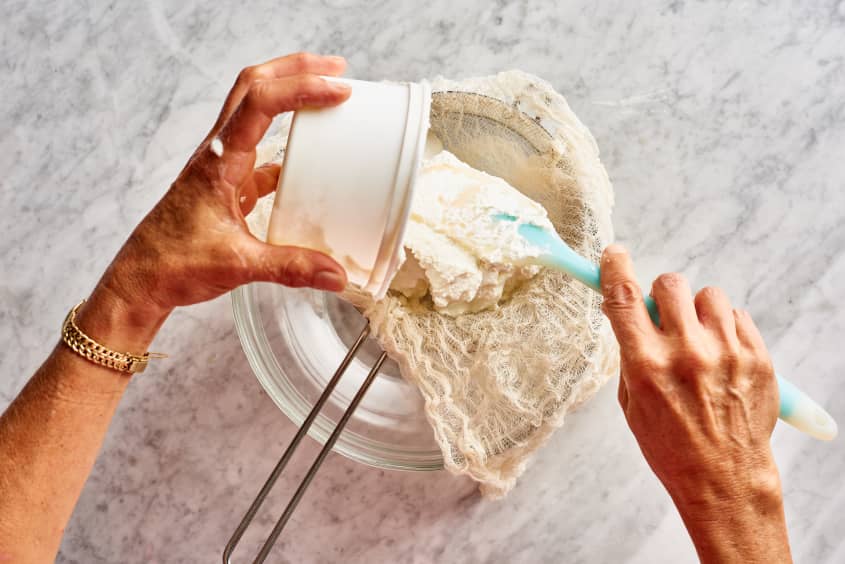
Cannoli filling, contrary to its complex crisp shells, is relatively easy. You want to grab some whole-milk ricotta — the best quality you can find will make a difference for this simple filling. If the ricotta is loose or very wet, you should drain the ricotta for at least one hour or overnight, which will keep the shells from getting soggy. After draining the ricotta, you’ll sweeten it with powdered sugar and add orange zest, cinnamon, and mini chocolate chips. It’s so good, you might be tempted to skip the cannoli shells altogether and eat it with a spoon.
Cannoli Secrets, Step by Step
- First drain the ricotta. Set a fine-mesh strainer over a bowl, line with cheesecloth, then dump the ricotta into the cheesecloth and let it drain while you make the cannoli shells, at a minimum.
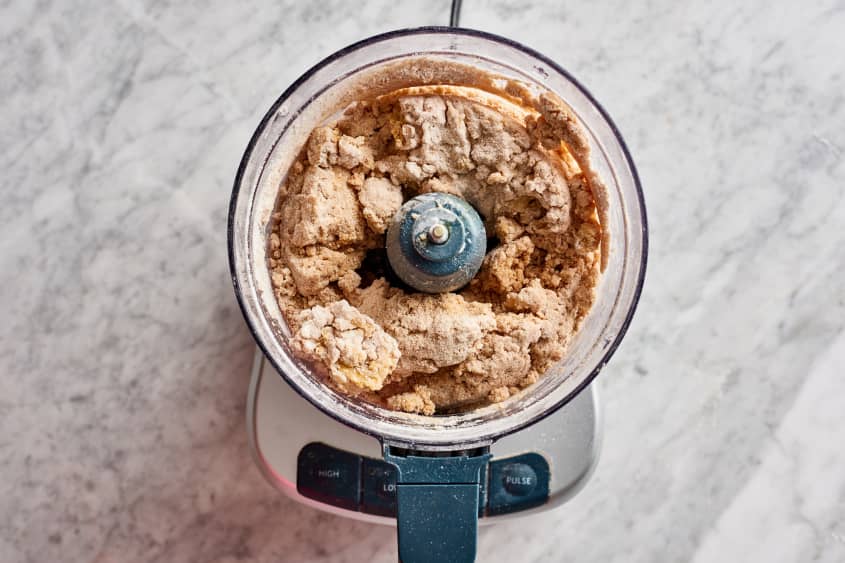
- Mix and rest the shell’s dough. You can make the cannoli dough in a food processor or by hand. Think of the this dough like a dressed-up pasta dough — avoiding over-mixing it, and rest it before rolling. You want a smooth, pliable dough before shaping.
- Make the filling while the dough rests. We’ve got an hour on our hands before the dough is ready for rolling, so now’s the time to make the filling and set up a fry station.
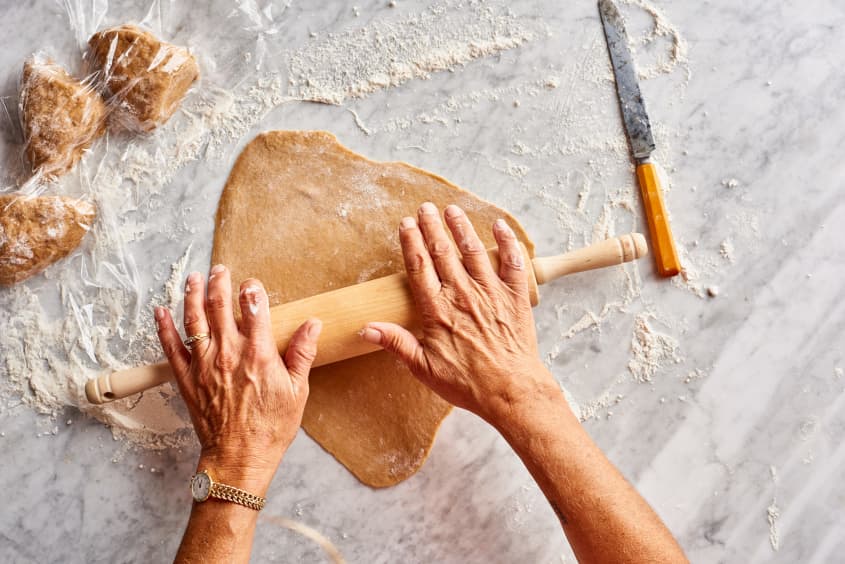
- Shape the cannoli tubes and fry ’em up. The cannoli dough needs to be rolled very thin. You can do this by hand, but if you’ve got a pasta roller at home, break it out and get it to work! After rolling and cutting the dough, make sure to puncture it with a fork and seal it with egg white. Both steps will ensure the dough doesn’t puff up and fall off the mold in the fry oil.
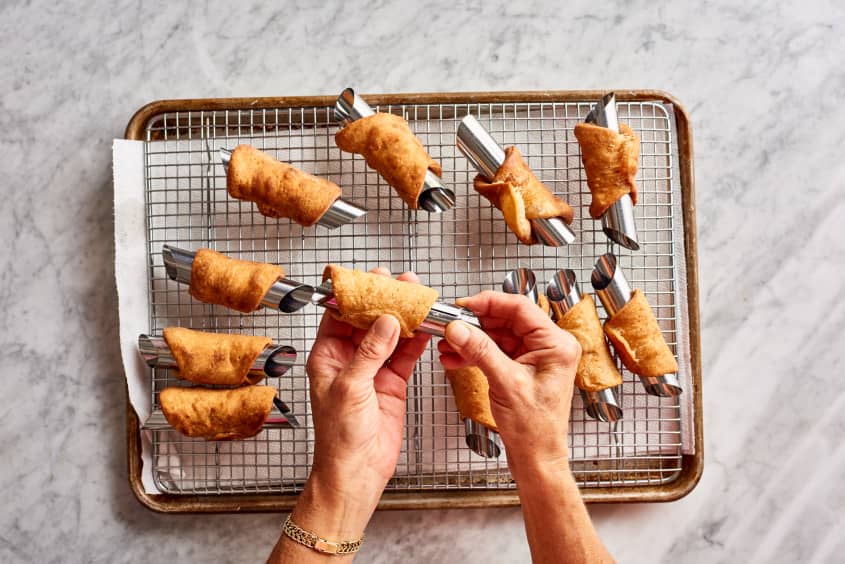
- Cool the shells before filling. The shells should drain and cool on a cooling rack before you attempt to remove the molds. You can also fry the shells in advance, and store them at room temperature in an airtight container for several days.
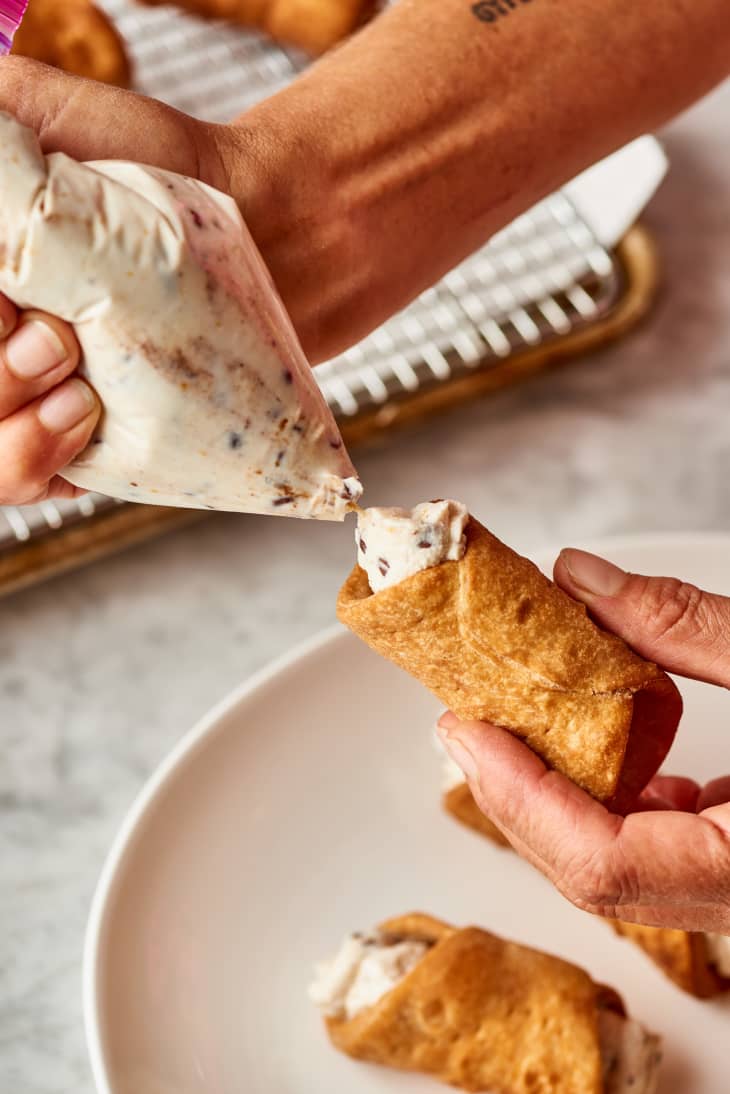
Filling and Serving Cannolis
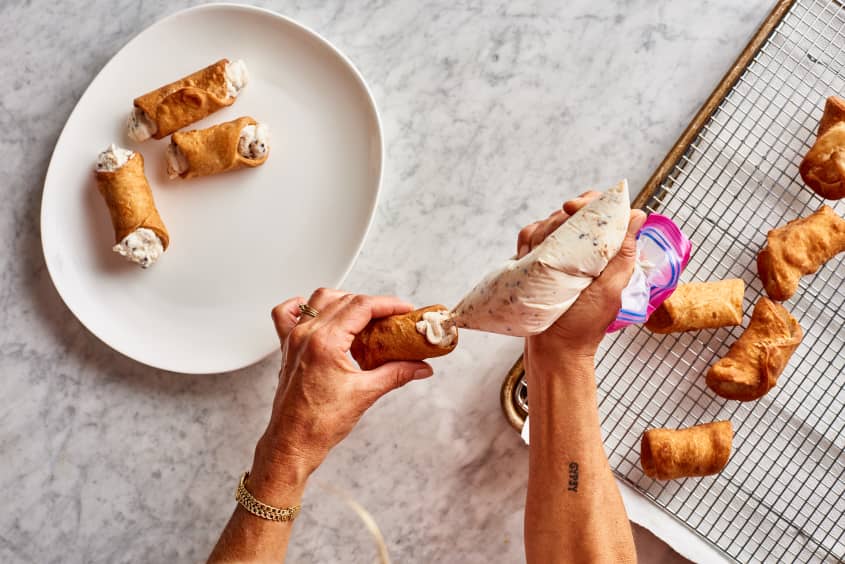
To ensure the shells stay crisp, fill the shells as close to serving as possible. I’ve been in at least one bakery that fills their cannoli to order, which you could easily do for a celebration or just for yourself. If you’re using a zip-top bag as a makeshift pastry bag, you want to fill half the cannoli from one side, then turn the pastry and fill the other end. This will prevent filling from building up in the middle of pastry and potentially bursting the seam.
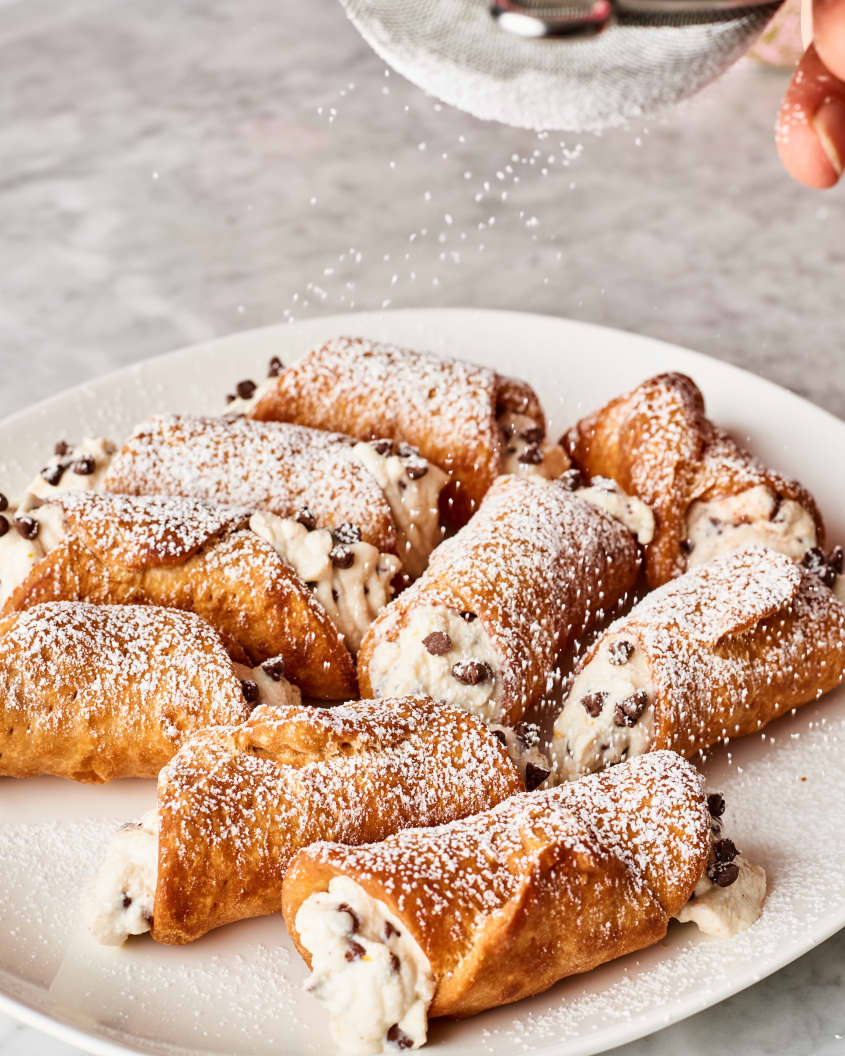
As for garnish, a dusting of powdered sugar is plenty, but you can also dip the filled ends in leftover mini chips for that extra, better-than-the-bakery touch.
Cannoli Recipe
This is it, you guys, the ultimate step-by-step for classic cannolis at home that is many batches of cannolis in the making.
Prep time 2 hours
Cook time 25 minutes
Makes 16 cannoli
Nutritional Info
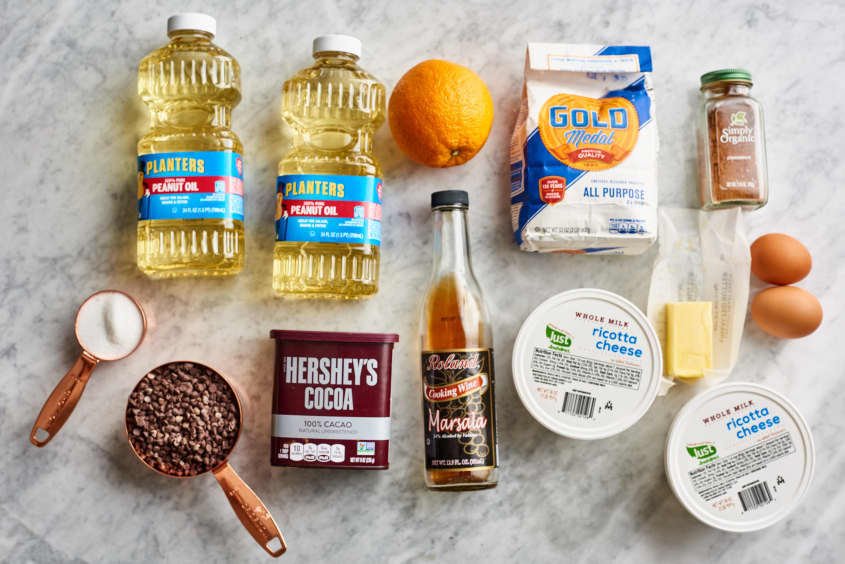
Ingredients
For the cannoli filling:
- 4 cups
whole milk ricotta cheese
- 1 1/2 cups
powdered sugar, plus more for serving
- 2 teaspoons
finely grated orange zest
- 1 teaspoon
ground cinnamon
- 1 cup
mini chocolate chips, plus more for garnish
For the cannoli shells:
- 3 cups
all-purpose flour, plus more for dusting
- 1/4 cup
granulated sugar
- 1 teaspoon
unsweetened cocoa power
- 1/2 teaspoon
ground cinnamon
- 1/2 teaspoon
kosher salt
- 4 tablespoons
cold unsalted butter, cut into small pieces
- 1/2 cup
cold dry white wine, such as marsala or pinot grigio
- 1
large egg, lightly beaten
- 1
large egg yolk
- 2 quarts
peanut or vegetable oil, for frying
- 1
large egg white
Equipment
Knife
Cutting board
Rimmed baking sheet
Food processor
Mixing bowls
Pasta roller or rolling pin
Cannoli molds and cutter
Tongs
Deep-fry thermometer
Dutch oven
Wire rack
Fork
Pastry brush
Paper towels
Instructions
Drain the ricotta for the filling. Line a fine-mesh strainer with cheesecloth or a coffee filter and set it over a bowl. Pour the ricotta into the strainer, refrigerate, and let drain for at least 1 hour or overnight.
Make the cannoli shell dough. Place the flour, sugar, cocoa, cinnamon, and salt in a food processor fitted with the blade attachment. Scatter the butter over the dry ingredients and pulse until it resembles small pebbles. Add the wine, egg, and egg yolk, and pulse until the dough just barely begins to hold together. Transfer the dough to a floured surface and knead until smooth, 3 to 4 minutes.
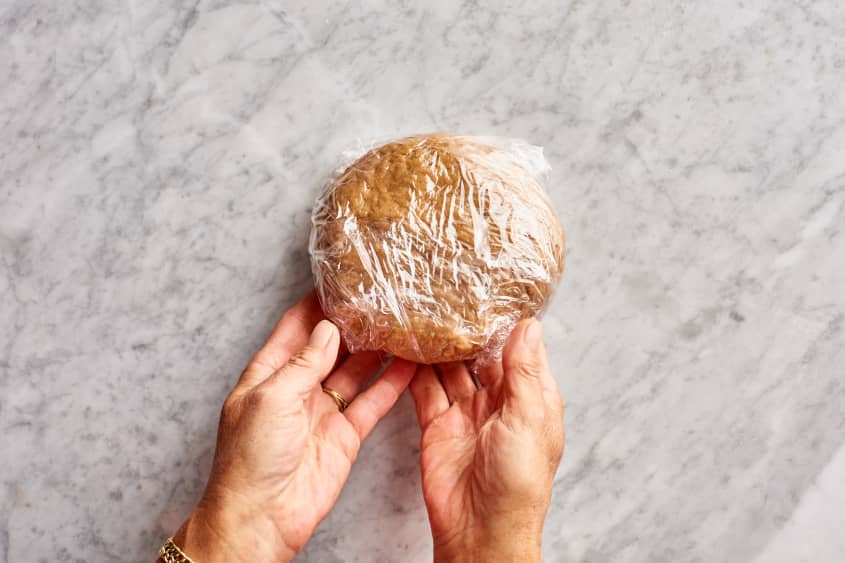
Rest the cannoli dough for 1 hour. Wrap the dough in plastic wrap and let it rest at room temperature for 1 hour. Meanwhile, make the cannoli filling.
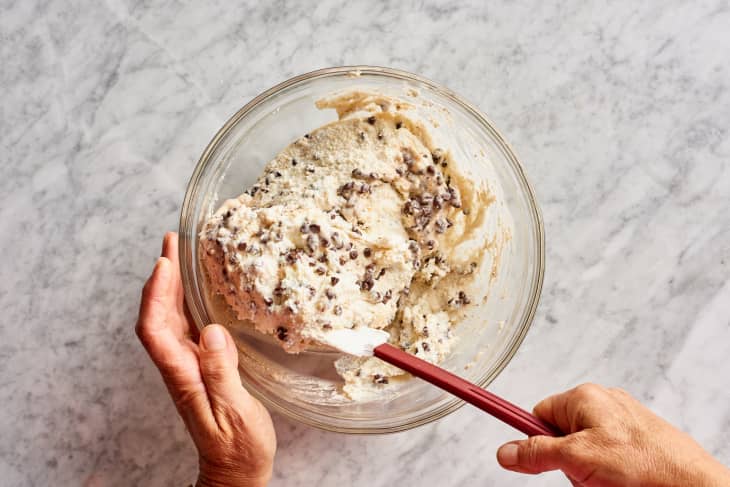
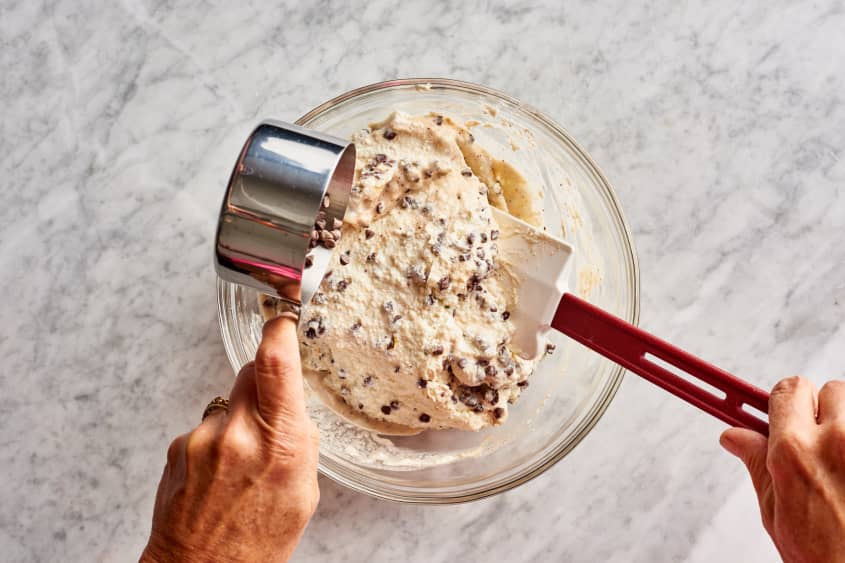
Make the ricotta filling. Place the drained ricotta, powdered sugar, orange zest, and cinnamon in a large bowl and gently mix with a rubber spatula until well combined. Add the mini chocolate chips and mix to evenly distribute. Refrigerate while rolling and frying the cannoli shells.
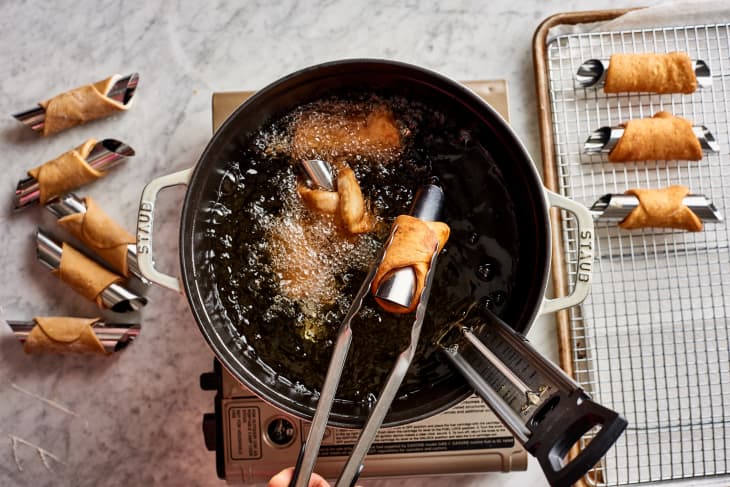
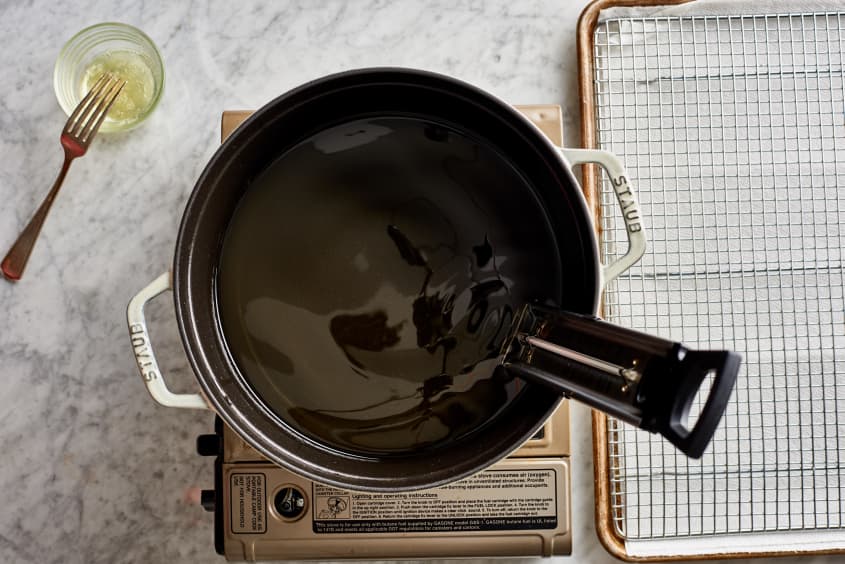
Prepare to shape and fry the cannoli shells. Place the oil in a large, heavy pot — a Dutch oven works well for this — and attach a deep-fry thermometer. Heat over medium-high heat until the oil is 350°F. Meanwhile, place the egg white in a small bowl and lightly beat with a fork. Line a baking sheet with paper towels and fit a cooling rack over it. Roll out the cannoli dough.
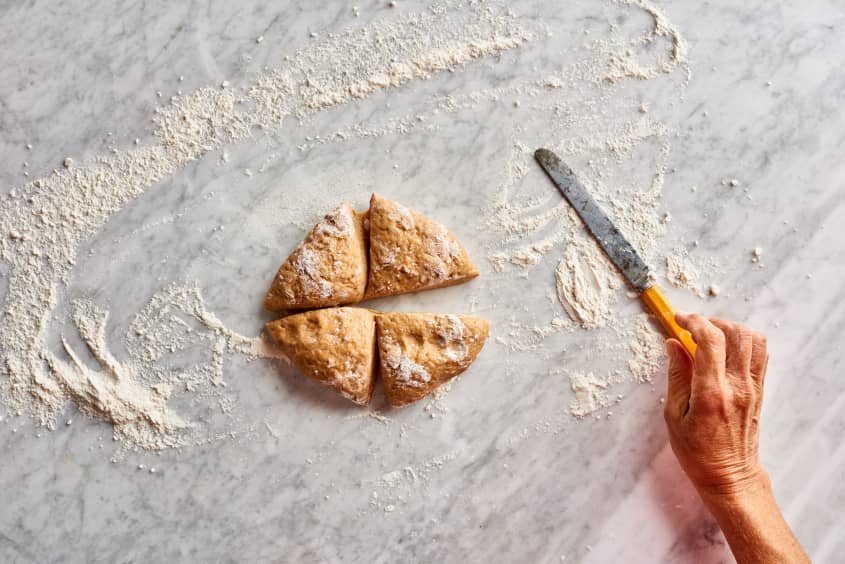
Roll out the cannoli dough. Divided the cannoli dough in 4 pieces. Roll and cut 1 piece at a time, keeping the remaining dough covered so that it doesn't dry out. Dust a work surface with flour, then use a rolling pin to roll the dough out until 1/8-inch thick. (Alternatively, you can use a pasta roller to roll the dough into a thin, even sheet, working from 1 to 5 on the machine’s dial.)
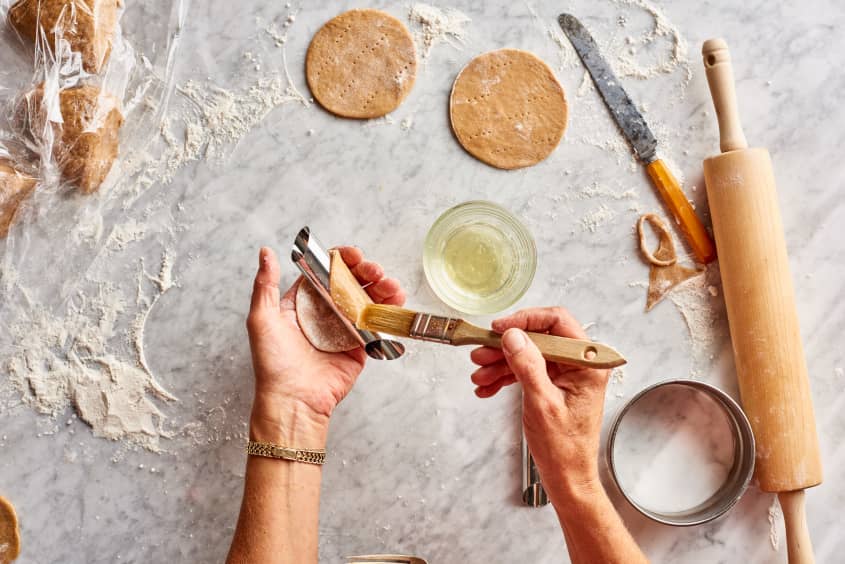
Cut and dock the dough rounds. Use a 4 to 5-inch round cutter to cut rounds from the sheet of dough. Use a fork to “dock” and poke holes in each round on both sides (this prevents large bubbles that will slip the dough off the cannoli molds).
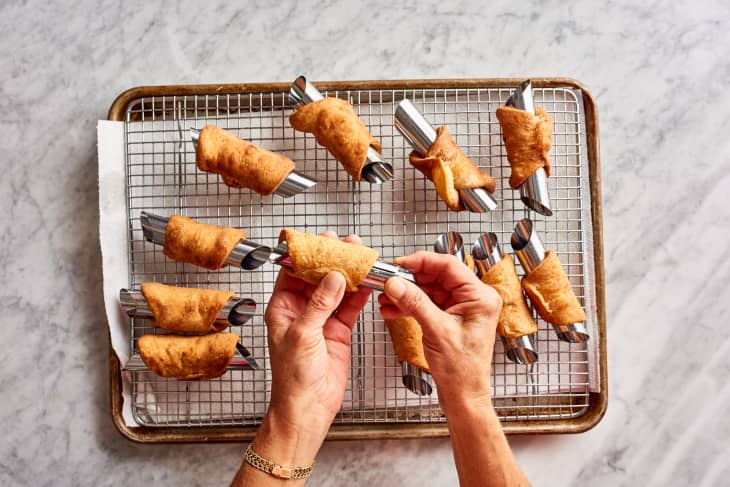
Wrap the dough around the molds. Wrap one round of dough loosely around a cannoli mold. Brush one end of the dough with egg white, pull the other end around the mold until it overlaps slightly, and press down to seal. Repeat rolling, cutting, and wrapping the remaining dough, gathering the scraps of dough and re-rolling as needed, until you have 16 shells.
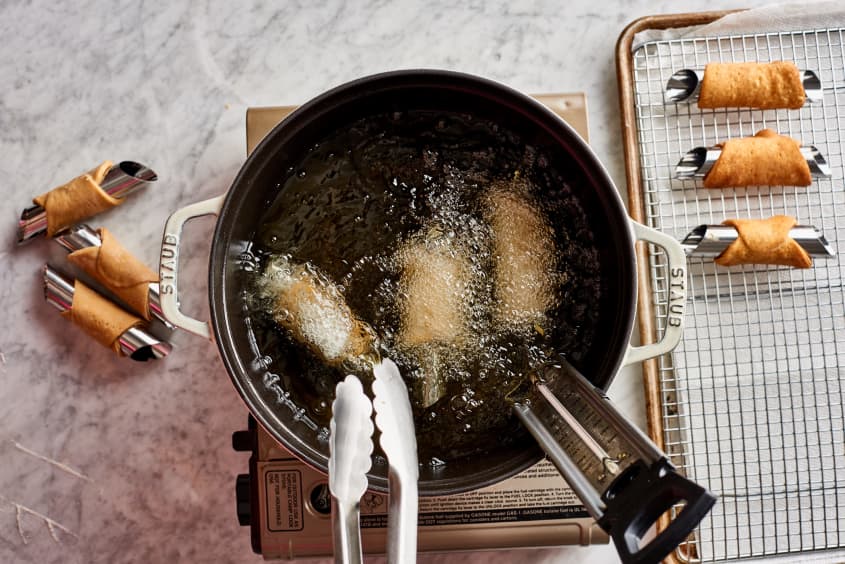
Fry the cannoli shells. Fry in batches of 4 to 5, adjusting the heat as needed to maintain an oil temperature of about 350°F. Using tongs, carefully lower the cannoli shells on their molds into the oil. Fry, turning as needed, until evenly golden brown, 2 to 3 minutes. Remove the shells to the cooling rack.
Cool the shells completely before filling. When the shells are cool enough to handle (about 10 minutes), remove the molds: Gently squeeze a mold together to release the shell, then slip the shell off. Cool the shells completely before storing or filling. Fried shells can be stored in an airtight container at room temperature for a few weeks.
Fill the cannoli shells just before serving. When ready to fill and serve the cannolis, transfer the filling into a pastry bag or zip-top bag and cut a 1/2-inch diameter piece off the end/corner. Insert the tip into one end of a shell and pipe the filling in, filling it halfway, then pipe the rest in from the other end. Dip the ends with the filling into more mini chocolate chips, if desired, and dust the filled cannolis with powdered sugar before serving.
Recipe Notes
Homemade cannoli molds: You can make aluminum foil cannoli molds. Stack 2 (7x11-inch) sheets of aluminum foil on top of each other and position with a long side closer to you. Fold into thirds lengthwise. Fold in half from left to right, then in half again from top to bottom, until you have a small rectangle that's about 2x5-inches. Gently roll or press it into a tube shape to create 1 mold. You may need a whole roll of foil to make enough molds, or just make 4 molds and shape and fry in batches.
Purchased cannoli shells: This recipe makes enough filling for 18 regular sized cannoli shells, which you can order online or find in your grocery store’s bakery department.
At Kitchn, we know how important it is to find recipes that are worth your time. That’s why every tutorial — like this one — features recipes that have been tried and tested by our team of developers and at-home cooks from across the country. Questions or feedback for us? Say hello: recipes@thekitchn.com.