
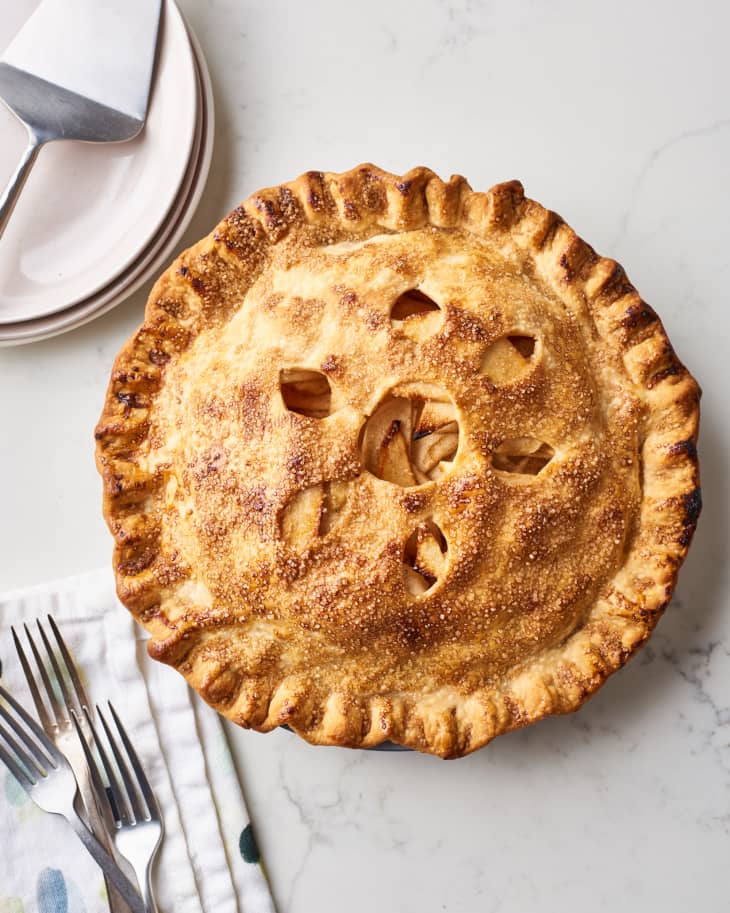
How To Make the Easiest Apple Pie

An easy, foolproof recipe for when you want a warm slice of apple pie as soon as possible.
Serves8
Prep25 minutes
Cook55 minutes to 1 hour
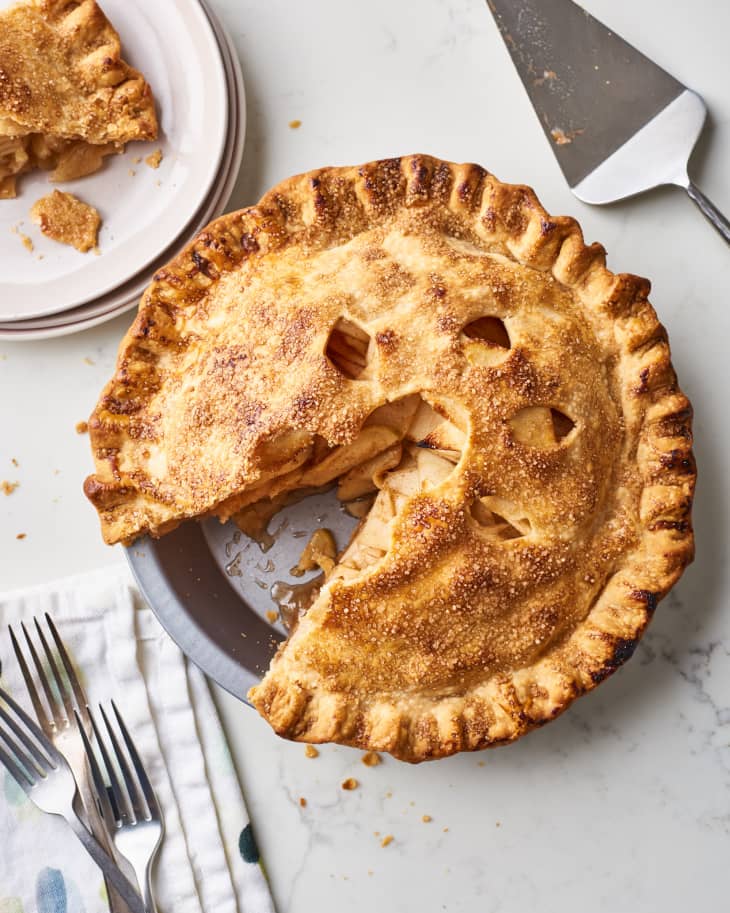
Really good apple pie can — and should — be easy to make. After all, part of the appeal of apple pie is its simplicity: Warmly spiced apples are baked until tender in a crisp, buttery crust. That’s it.
These days, however, apple pie recipes can read more like flight instructions. And while dedicating an entire weekend to baking can be fun, sometimes you just want something quick and fail-proof.
This is that apple pie. It doesn’t involve special ingredients. We encourage you, in fact, to use a store-bought crust. The filling is just five ingredients, most of which are probably in your kitchen. But there are a couple of smart moves that — without adding much extra time — will result in a pie that you’re also really excited to eat. So think of it as the smartest easiest apple pie recipe, and as warm, yummy, and perfectly sliceable as they come.
What Makes This Easy Apple Pie So Smart
Here’s my promise: This apple pie doesn’t have a single ingredient it doesn’t need, and doesn’t get wildly complex. However, a few smart steps are going to make for a better pie. You can make it in under two hours (excluding cooling time) and it’s guaranteed to perfume your whole house and make the ideal dessert for a fall dinner with friends.

The Best Apples for Apple Pie
Apple pie is the perfect vessel for using up whatever random variety of apples you got from the market or while apple picking. In fact, a combination of sweet and tart apples makes for a more balanced pie filling. Granny Smith and Jonagold are ideal tart apples for baking, while Pink Lady, Gala, and Honey Crisp are sweet. All of these varieties also keep their shape as they bake.
Read more: The 5 Best Apples for Baking
Keys Steps for an Easy (and Perfect) Apple Pie
Toss the apples with sugar, then drain. After peeling and slicing your apples, you want to toss them with sugar and set them aside to soften and drain. This step makes the apples more tender and prevents a soggy crust. But it’s faster than pre-cooking them on the stove, and they also maintain their shape. You can discard the liquid they release, or save it for cocktail-making (or take a cue from Alton Brown and reduce the liquid to use as a glaze). After draining, toss the apples with cinnamon, cornstarch, and a pinch of cardamom.
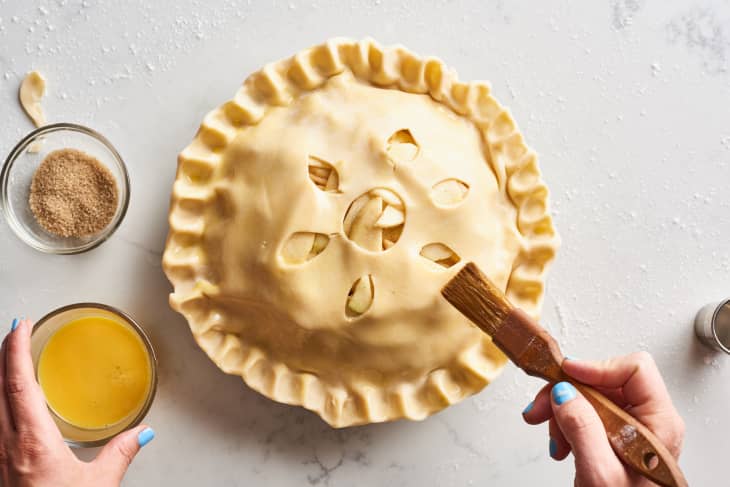
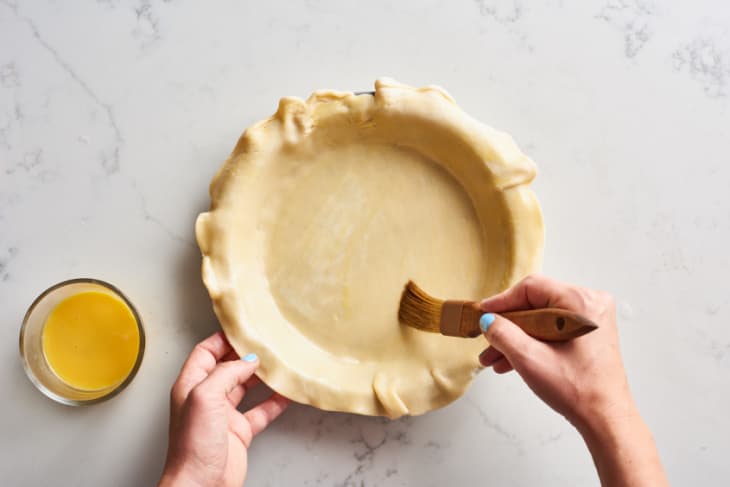
Brush the inside of the crust with egg wash. You’re probably familiar with egg wash as a way to make the exterior of your baked goods more golden and a bit shiny, but adding a layer of egg wash to the interior of the pie crust before filling it creates a protective layer that will keep the apple’s juices from destroying your crust. Speaking of crust, store-bought crust really is ideal here. These are Kitchn’s favorite pie crusts from the store.
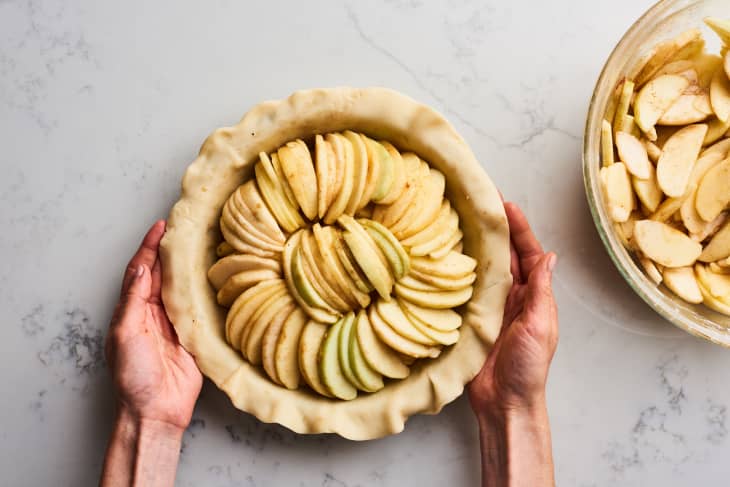
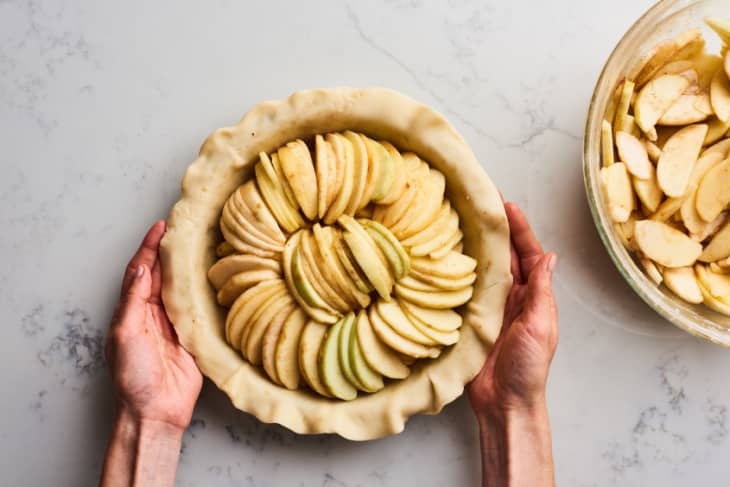
Layer the apples inside the crust. Instead of dumping the apples in, spend a few minutes laying and stacking the apple slices. It seems fussy, but it’s actually ingenious: This will help you avoid large gaps, which means you’re less likely to get a shrunken filling and domed crust. Keep layering until the apples are slightly taller than the pie pan.
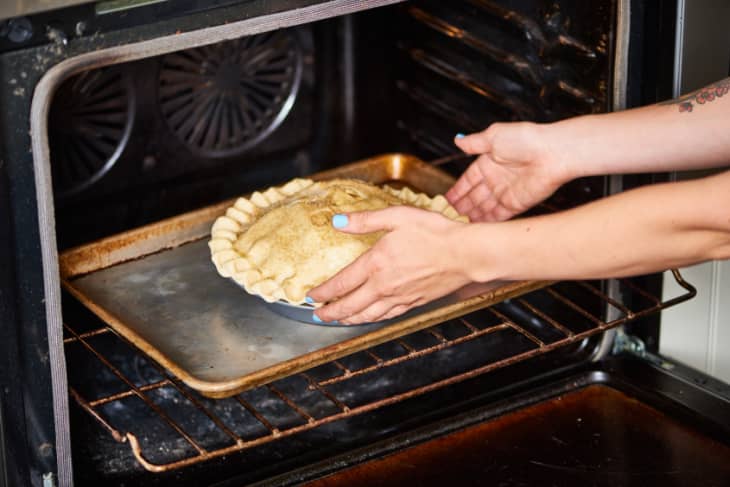
Bake your pie on a preheated baking sheet. Jumpstart the baking process by preheating a baking sheet, then slide your pie onto it to bake. This makes the bottom crust extra crisp and helps speed up the baking process.
Cooling and Storing Apple Pie
The hardest part of pie baking (for me, anyway) is waiting for the pie to cool completely before slicing. The cooler your pie is, the cleaner your slices will be. Warm apple pie with ice cream is amazing, though, so if that’s your goal, you still might want to give this pie at least an hour to cool (it’ll be plenty warm, even then). Leftover apple pie keeps well in the fridge for up to three days.
Apple Pie
An easy, foolproof recipe for when you want a warm slice of apple pie as soon as possible.
Prep time 25 minutes
Cook time 55 minutes to 1 hour
Serves 8
Nutritional Info
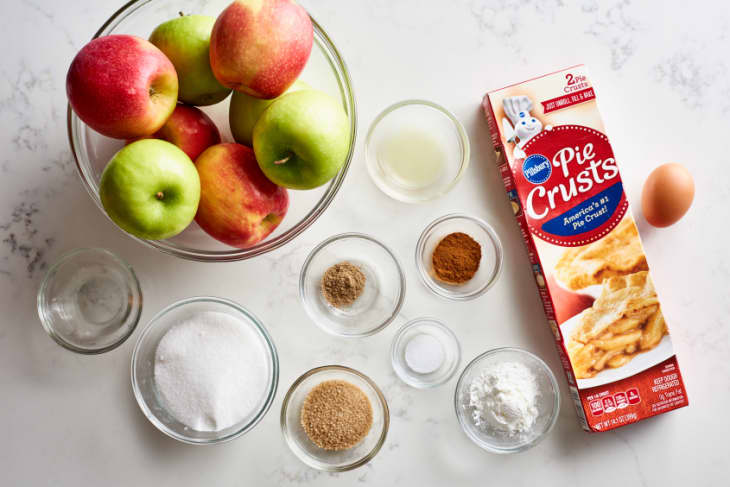
Ingredients
For the filling:
- 4 pounds
large apples — a mixture of tart apples, such as Granny Smith, and sweeter apples, such as Pink Lady, works well
- 3/4 cup
granulated sugar
- 2 tablespoons
cornstarch
- 1 tablespoon
freshly squeezed lemon juice
- 1 teaspoon
ground cinnamon
- 1/4 teaspoon
ground cardamom
- 1/4 teaspoon
kosher salt
For the pie:
- 1 (14- to 16-ounce) package
prepared pie crusts, thawed if frozen
- 1
large egg
- 1 teaspoon
water
- 1 tablespoon
coarse sugar, such as demerara
Equipment
9-inch standard pie pan
Fork
Measuring cups and spoons
Large mixing bowl
Paring knife
Instructions
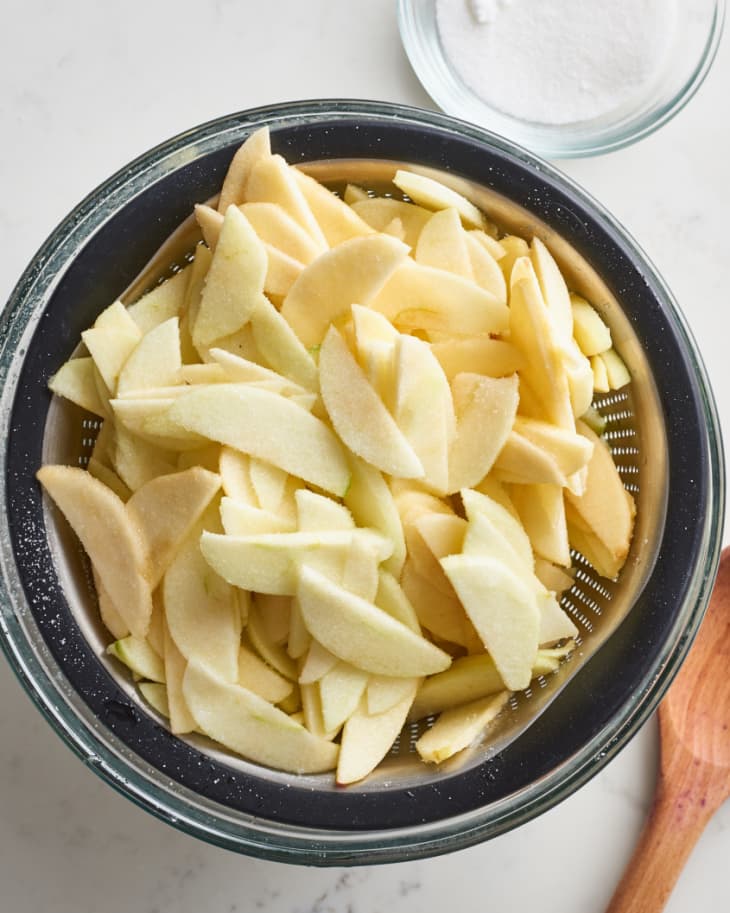
Peel and slice the apples. Peel the apples. Cut off large sections of the apple around the core, then slice each section into 1/4-inch thick half-moons. You need about 3 pounds of apple slices, or about 8 cups.
Toss the apples with the sugar and set aside to drain. Transfer the apples to a large bowl, sprinkle with the granulated sugar, and toss to combine, making sure there are no pockets of sugar in the bottom of the bowl. Transfer the sugar-coated apples to a colander, set the colander in the bowl, and set aside while preparing the dough and the rest of the ingredients, about 30 minutes.
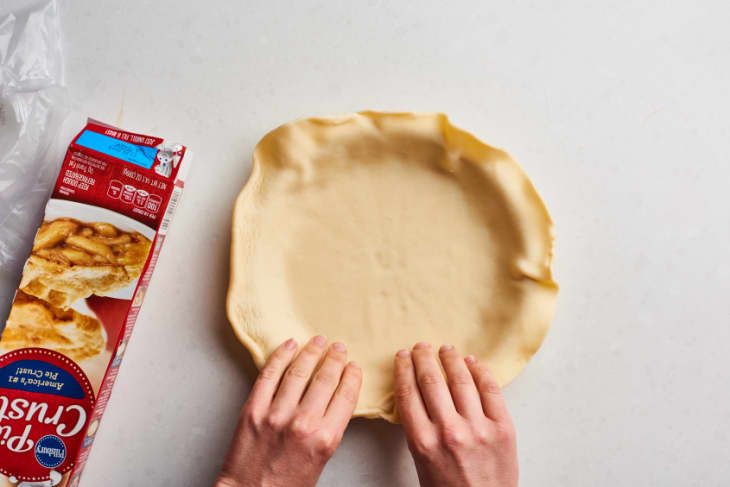
Heat the oven to 400ºF and prepare the pie dough. Arrange a rack in the middle of the oven and heat the oven to 400°F. Place a baking sheet in the oven while it is heating. Unroll one of the pie doughs and transfer to a 9-inch standard pie pan. Press the dough into the bottom and up the sides of the pie plate, being careful not to puncture the dough. Unroll the second pie dough onto a lightly floured work surface. Use a paring knife to make 5 to 6 large vent holes in this top crust. Transfer to a baking sheet. Refrigerate the pie shell and top crust while making the filling.
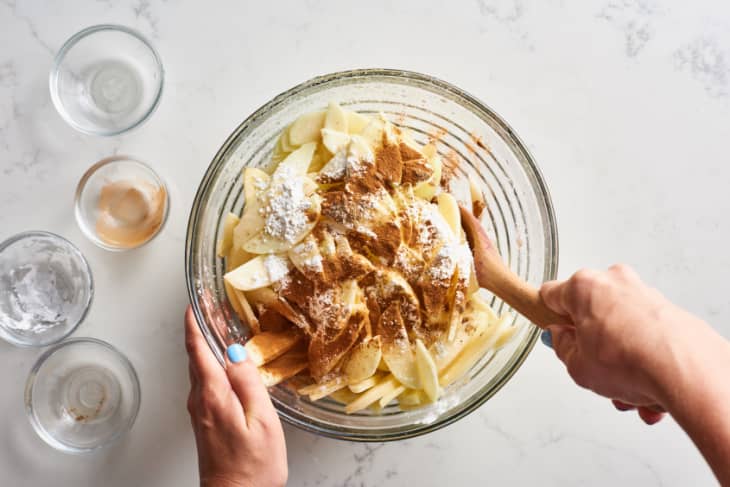
Coat the apples with the cornstarch and spices. Remove the colander from the bowl and pour off the accumulated liquid. Transfer the apples to the now-empty bowl. Add the cornstarch, lemon juice, cinnamon, cardamom, and salt. Toss by hand to coat.
Egg wash the pie shell. Whisk together the egg and water with a fork in small bowl to make an egg wash. Brush the inside of the pie crust with some of the wash to coat.
Layer the apples in the bottom crust. Instead of dumping the apples into the crust, spend a few minutes laying and stacking the apple slices into the bottom pie crust. Don’t worry about making things perfectly level, but avoid large gaps and you’re less likely to get a shrunken filling and domed crust. The apples will be slightly taller than the pie pan. Discard any liquid left in the bottom of the bowl.
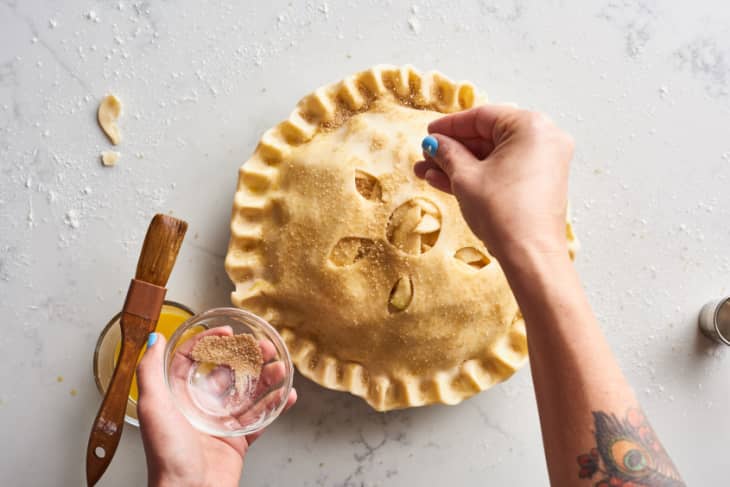
Seal the top and bottom crusts. Lift the vented crust onto the filling and lightly press it down onto the apples. Pinch the edges of the pie dough to seal the top and bottom crusts together using your fingers or the tines of a fork.
Brush the top crust with egg wash and sprinkle with sugar. Brush the top and edges of the pie with egg wash and sprinkle with the coarse sugar.
Bake the pie 40 to 45 minutes. Bake the pie on the preheated baking sheet until the filling is bubbling, 40 to 45 minutes. If the edges of the pie crust are browning too quickly, cover the edges with foil during the last 10 minutes of baking.
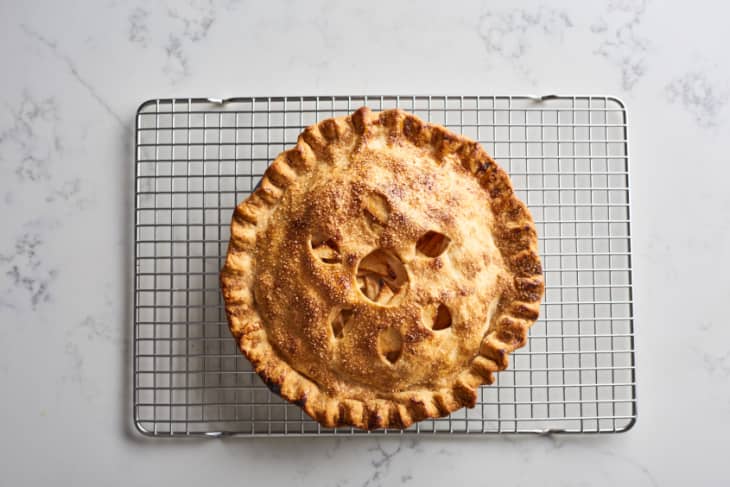
Cool before slicing. Transfer the baked pie to a wire cooling rack and cool completely before slicing, about 4 hours.
Recipe Notes
Storage: Leftover pie can be refrigerated up to 3 days.