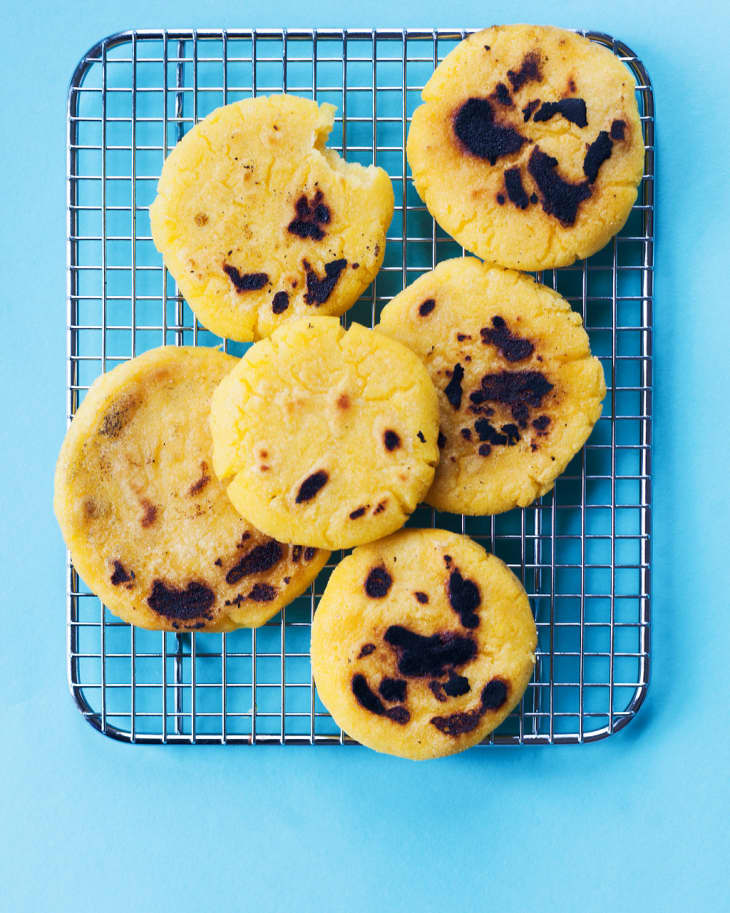
How To Make Arepas

To say that arepas are a simple corn pocket that can fried, boiled, baked, or stuffed is too basic a description for this regional specialty that typifies Colombian and Venezuelan cuisines. Arepas are not tortillas (although they hold the same cultural significance) and they are not bread (although they have as many iterations as the humble loaf).
Arepas are both a vehicle for eggs, roasted meats, vegetables, and cheeses, and a meal in themselves. They can be cooked as many ways as they can be eaten. So consider this an entry-level arepa — master it and then begin experimenting with its versatility.
Arepa Flour
Traditional arepa dough is made by soaking dried corn and then mashing the soaked corn in a special mortar and pestle called a pilón. Modern arepas can be made with a special masa flour, masarepa, specific to arepas. Masarepa is not the same thing as masa harina (which you may be familiar with if you’ve ever made tortillas or tamales). Masarepa is typically easy to find in Latin markets, or you can order it online. Goya and PAN are popular brands, and both come in yellow or white. You can use either, although white is more popular.
The masarepa is made into a supple dough with just a small amount of water and oil. You can adjust the dough slightly as you are mixing it, adding a little more water or flour as needed until the dough holds together. Resting the dough for 10 minutes before shaping gives the flour time to absorb the water, which will make it easier to shape and cook faster.
How Do You Say Arepa? Arepa is pronounced ay-ray-pah.
Griddle
While arepas can be baked, fried, or grilled, the most traditional method is to cook them on a large, flat griddle called a budare. A cast iron griddle or cast iron pan will mimic a budare at home. A nonstick pan or electric skillet works as well, but you won’t get the same tasty char on the crust of the arepas. Temperature control is critical when cooking arepas, as you want to ensure that the interior cooks at the same time as the exterior. Shaping the arepas into an even thickness will also ensure even cooking.
How to Serve Arepas
Arepas are incredibly versatile. While typically eaten as a meal for breakfast or dinner, they can also be enjoyed as a snack or side to lunch. A slick of butter atop a fresh arepa is heaven, but they can also be split and filled with everything from cheese to braised meats.
Leftover arepas reheat extremely well. Store cooked arepas in an airtight container or zip-top bag at room temperature and reheat in a warm oven or toaster oven to serve.
How To Make Arepas
Makes 8
Nutritional Info
Ingredients
- 2 cups
warm water, plus more as needed
- 1 tablespoon
vegetable oil, plus more for the pan
- 1 teaspoon
fine salt
- 2 cups
arepa flour, also known as masarepa
Equipment
Mixing bowl
Measuring cups
Measuring spoons
Cast iron or electric griddle
Instructions
Mix the dough: Place the 2 cups water, 1 tablespoon oil, and salt in a medium bowl and stir until the salt dissolves. Gradually add the arepa flour, mixing continuously to avoid lumps. Mix for 1 additional minute. The dough should hold together when pressed. Add 1 tablespoon water as needed to wet the dough if it's dry.
Rest the dough: Cover the bowl with a towel or plastic wrap and rest the dough for 10 minutes.
Divide and shape: Divide the dough into 8 pieces. Shape each piece into a 1/2 inch-thick disc.
Griddle: Heat a cast iron griddle over medium-high heat or heat an electric griddle to medium. Brush lightly with oil and add the arepas. Cook for 5 to 6 minutes per side until the arepas are golden brown, charred in spots, and cooked through.
Split: Remove the arepas to a wire cooling rack and let cool about 10 minutes. If you'd like to fill the arepas, split them in half with a serrated knife.
Fill: Stuff with the filling of your choice and enjoy.
Recipe Notes
Storage: Cooked arepas can be stored at room temperature in an airtight container for up to 5 days. Reheat in an oven for best results.
