
How To Grill the Best Corn on the Cob

Serves4
Prep5 minutes
Cook20 minutes
It’s summer, which means that not only is your grill hot, but corn is also finally juicy and sweet. The two need to meet. While I’d like to tell you it’s as simple as throwing the cobs on the hot grill and letting the two mingle, there is some work that must be done to get the corn and its husk ready for the grill. Get to know which corn to buy, steps for grilling, and the essentials to achieve a grilled corn perfection.
The Essentials for Grilled Corn Perfection
Grilling corn seems like a basic enough task, yet most grillers cannot agree on the best method. Here we break down why we don’t soak the husk, and how removing some of the husk helps the corn cook and later peel off. We also share a tiny trick for getting some nice blackening on the kernels if you’re into that smoky, charred flavor.
What We’ll Cover
- What corn to buy and what to look for
- How to prep the husk for grilling
- How to grill corn
- How to serve corn
The Best Corn for Grilling
For grilled corn, you want the freshest corn possible. Ideally it’s corn that’s at peak season and picked as close to grilling as possible. The color of the kernels matters little, but you want ears that smell sweet, are firm when pressed, and free of blackened tassels, that’s the ideal. Otherwise, just pick up what works for you.
What About Soaking or Brining the Corn?
Brining or soaking the ears in water before grilling is thought to season and also plump the corn. There are two problems with those theories, though: In order to take on any salt from the brine, ears would have to soak for several days, at which point you’re losing valuable sweetness as the ears age. Secondly, if you’re buying fresh juicy corn, you cannot make it any juicier. While soaking may benefit older or off-season ears, it has no added value for fresh summer corn.
More on brining: An Important Tip for Great Grilled Corn
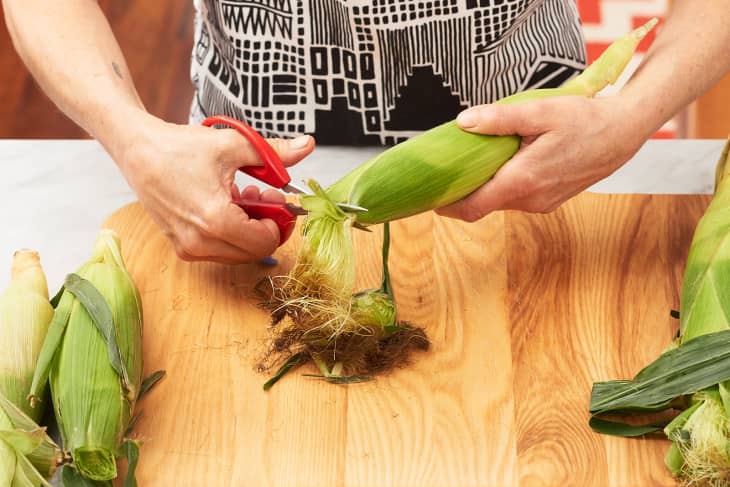
Remove Some of the Husk for Easy Grilling
Yes, you can throw the whole corn cob, husks and all, directly on the grill. Some people swear by this technique, but sometimes the husk catches fire and burns the corn’s tips. Instead, mindfully trim the stalk’s tassels and peel back a few layers of the husk, so the grill can get to work faster on the corn.
Leaving some of the husk intact prevents the corn from drying out on the grill and effectively steams the corn. It also makes peeling and getting rid of the silk easier.
Want some char? Simply pull back a one- or two-inch section of the cob and grill that section of the ears last.
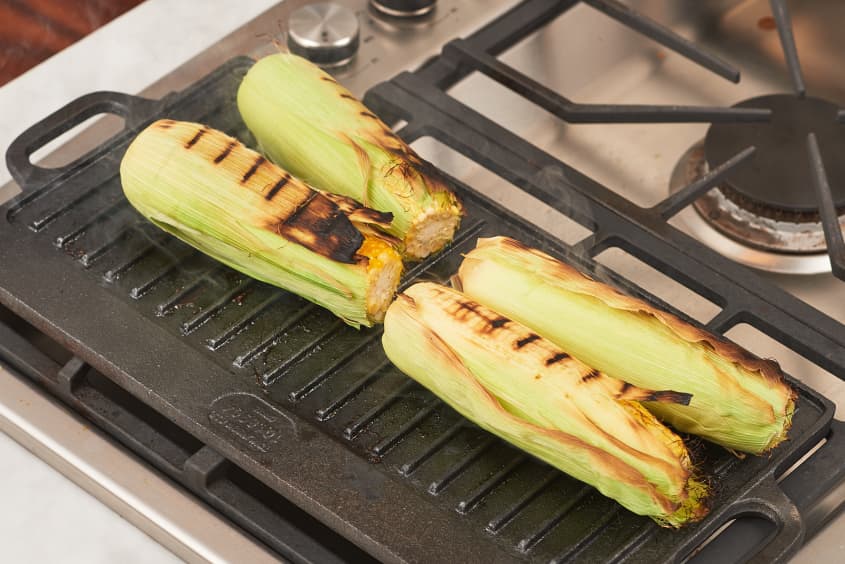
How to Actually Grill the Corn
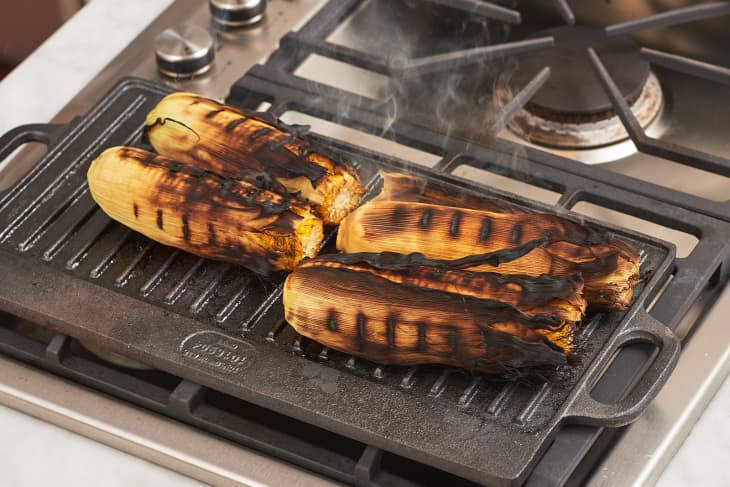
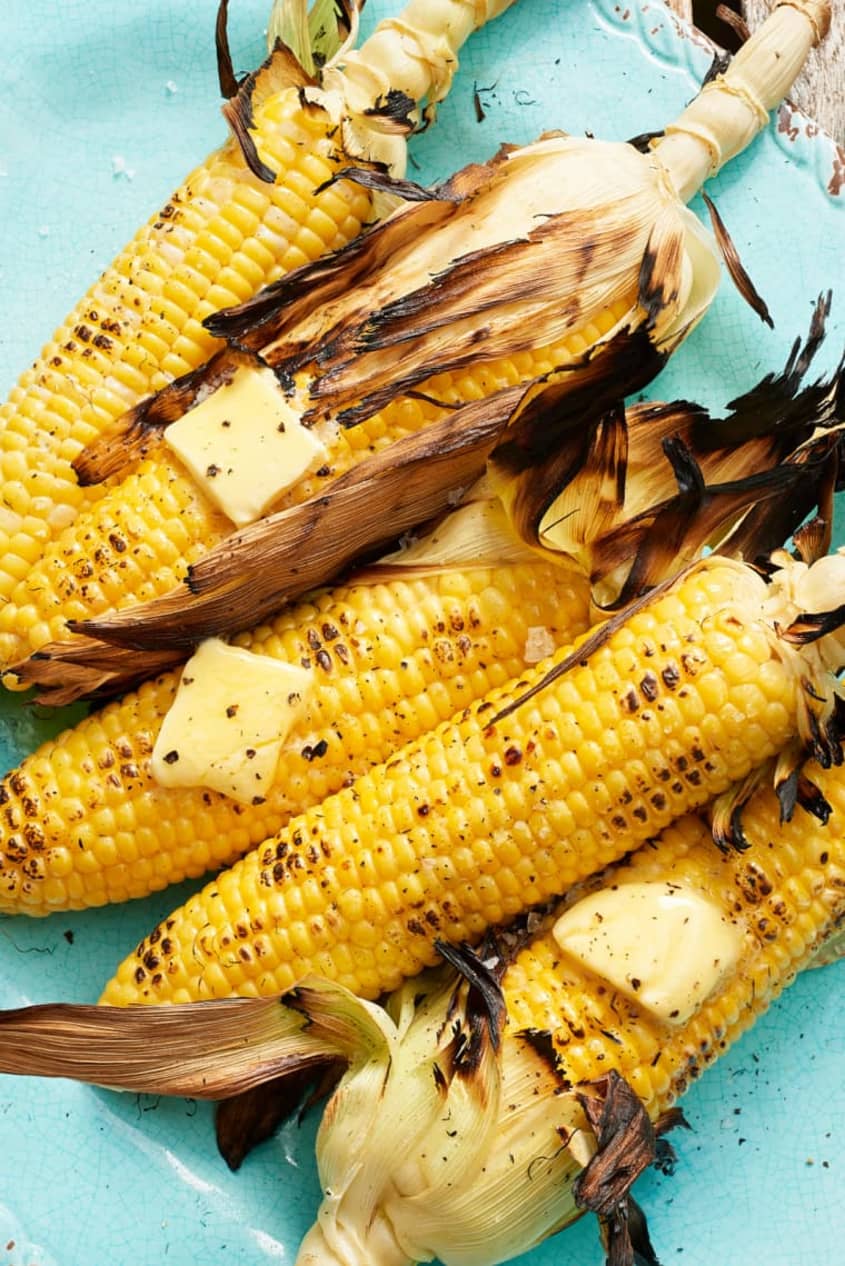
Grilling the corn over direct heat gives the corn ideal doneness. Much like throwing whole cobs into a campfire, the direct heat works with the husk to steam the corn to perfection. The husk is going to blacken and burn while the corn cooks, but don’t worry — this makes removing the husks even easier.
How Do I Know When It Is Done?
Finished corn will turn bright yellow and become more opaque than fresh. Some areas will char as the husk and silk burn away. Covered, fresh cobs take about 15 minutes to cook, depending on your particular grill.
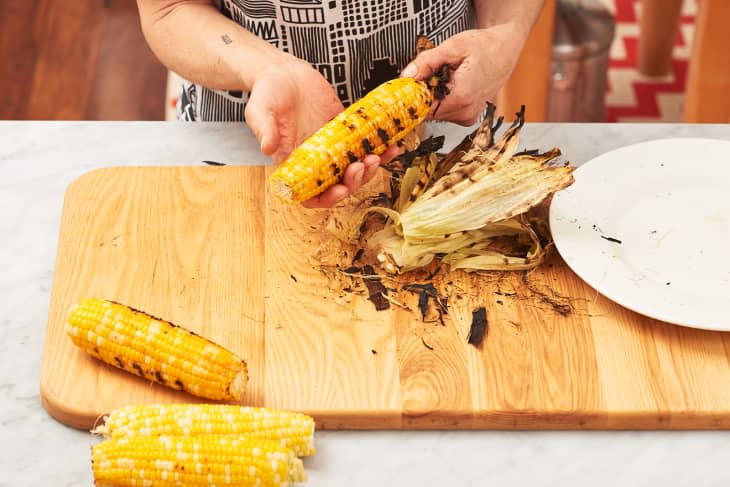
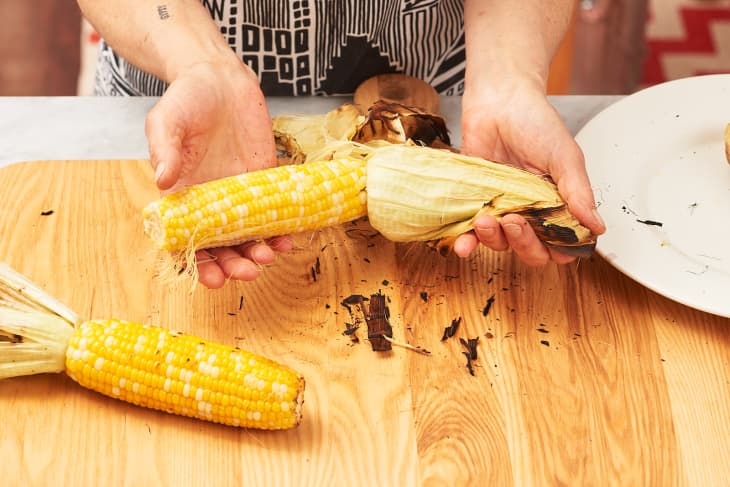
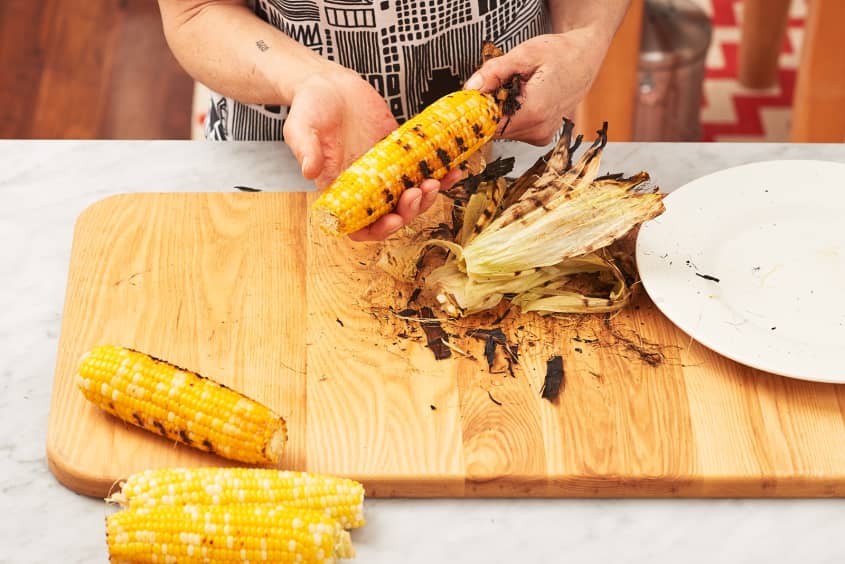
How to Husk and Serve Grilled Corn
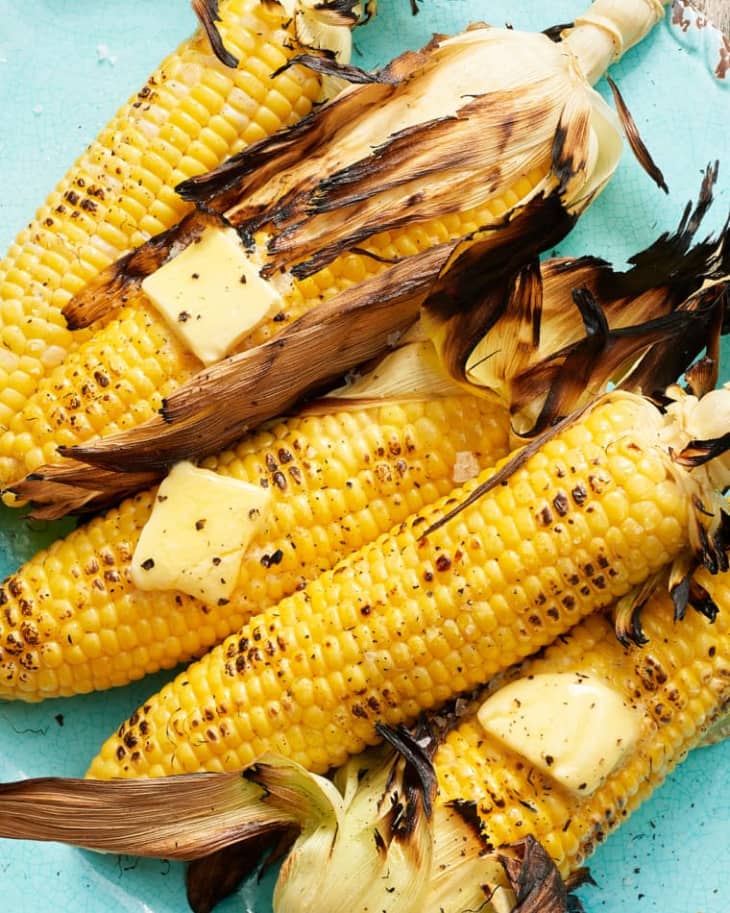
When finished, you’ll have ears of corn with varying degrees of husk and silk clinging to golden, lightly charred corn and you’ll probably be wondering how the heck to husk it. Remove the ears from the grill and cool for five minutes. Then you should be able to easily pull back the husks and silk. Use a clean kitchen towel to wipe away any unwanted silk or charred husk flakes.
Personally I think butter and salt are the only toppings you need. Try to serve the corn immediately for the most satisfying results. There are also other toppings that make your grilled corn even better. As such, Mexican grilled corn is always a hit.
Get the tip: How To Shuck Corn Quickly & Cleanly


How To Grill the Best Corn on the Cob
Prep time 5 minutes
Cook time 20 minutes
Serves 4
Nutritional Info
Ingredients
- 4 or more
ears corn, in their husks
Butter and salt, for serving (optional)
Equipment
Gas or charcoal grill
Kitchen shears
Serrated knife
Long tongs
Instructions
Heat the grill. Prepare an indoor or outdoor grill for high, direct heat.
Prepare the corn. Trim the silk from the top of each ear to prevent it from catching fire and burning. Peel away the first layer of husks and remove the stalk end using a serrated knife to expose the bottom of the ear. This will make it easier to slide the ear of the husk, post grilling. (Optional: Peel back a 1-inch section to expose the kernels and char some of the corn.)
Grill the corn for 15 to 20 minutes. Place the corn on the grill, cover, and cook for 5 minutes. Uncover, turn the corn, and cook 5 minutes more. Repeat, turning at 5-minute intervals, until the husks are have grill marks on all sides and the exposed kernels are charred, 15 to 20 minutes of total grilling.
Cool the corn. Remove the ears from the grill and cool for 5 minutes. Then you should be able to easily pull back the husks and silk. Serve with butter and salt.
Recipe Notes
Storage: Leftover corn can be stored in an airtight container in the refrigerator for up to 4 days.