
How To Build a Diagonal Drawer Organizer

Kitchn readers (hey, that’s you!) love this old post we have about organizing drawers diagonally, and for good reason: Working on the diagonal, instead of right angles, can give you much more flexibility on how you use the space inside your drawers. It’s that sort of aha moment that you’re surprised you didn’t think of earlier.
And while you can absolutely buy one that’s already made, you might have an usually narrow (or wide) drawer that could benefit from a more bespoke organizer. Which is where this post comes in: Here’s how you can make one yourself.
Why You Should Make Your Own Diagonal Drawer Organizers
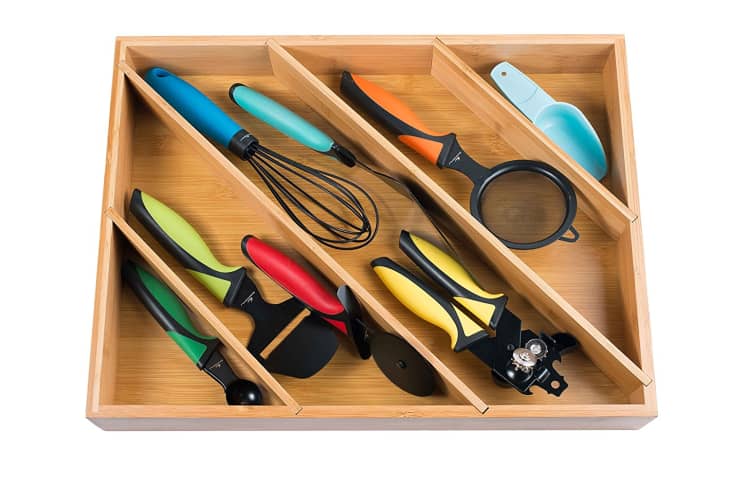
Again, you can certainly buy a diagonal drawer organizer that’s already made (like the one above!). You just have to buy it and slide it in. The only issue is that your drawer basically has to be the exact same size as the organizer. If your drawer is too small, it won’t fit, obviously. If your drawer is much bigger, then you end up wasting an awkward amount of space.
Buy: Diagonal Space Saving Bamboo Drawer, $24.99
You can also work with a special dealer (the one in our popular post is from Diamond Cabinets), although that’s not particularly cheap. Or, you can make one yourself! You don’t even have to be all that handy to make one! And you can customize one to fit your space, based on what you need to store. Here’s what to do.
How To Make a Diagonal Drawer Organizer
What You Need
- Damp rag or microfiber cloth
- Tape measure
- Pencil, pen, or marker
- Craft board
- Saw and miter box
- Sandpaper
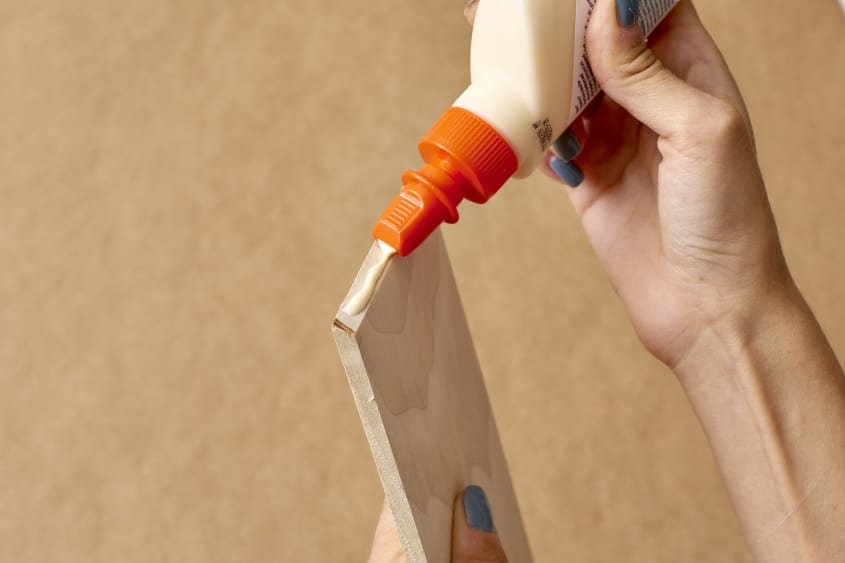
- Wood glue
- Drawer liner
- Scissors
Instructions
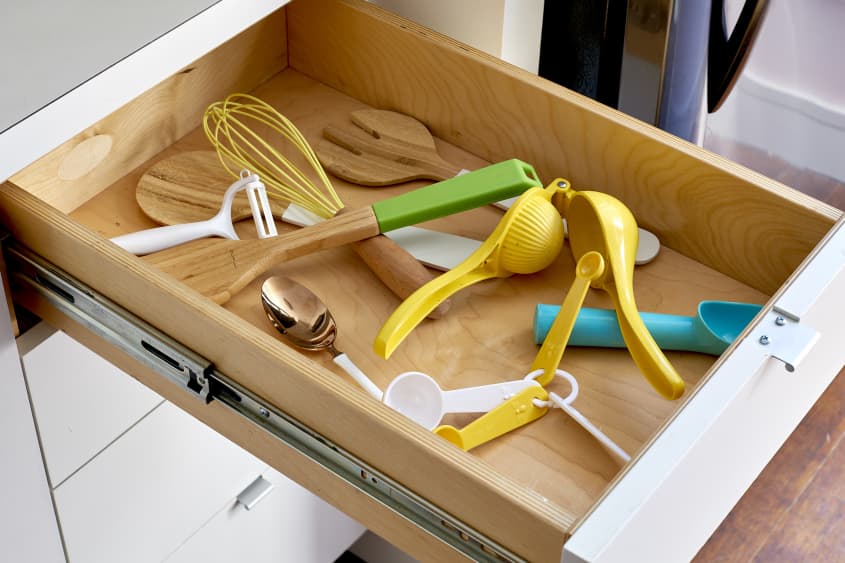
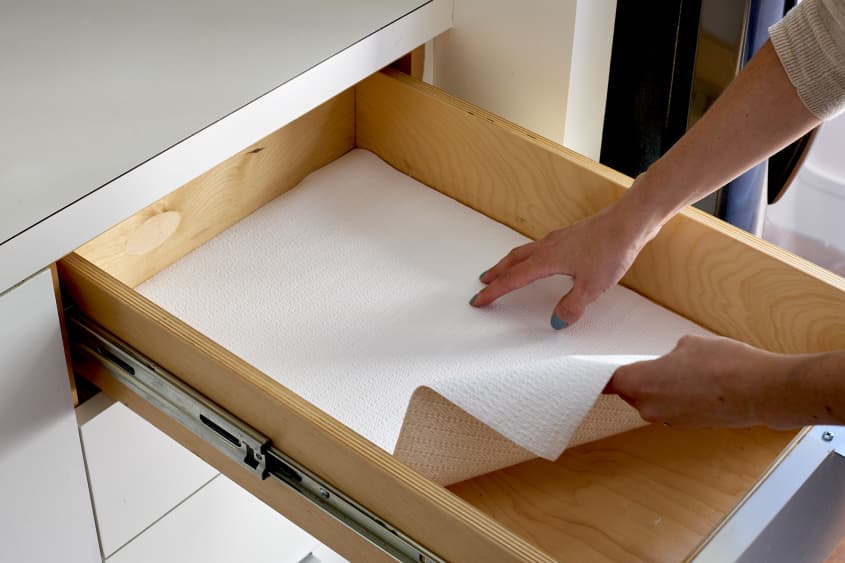
- Empty your drawer: Take everything out of the drawer and wipe it clean with a damp rag or microfiber cloth.
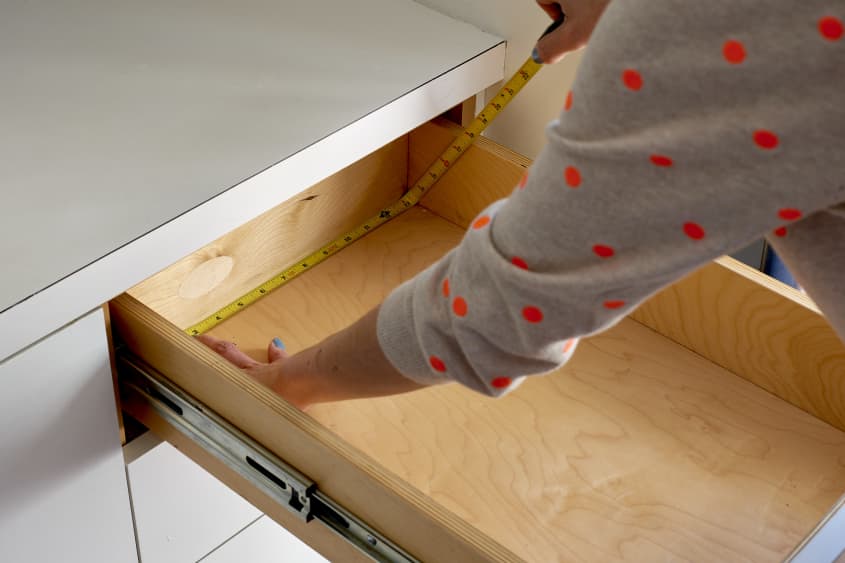
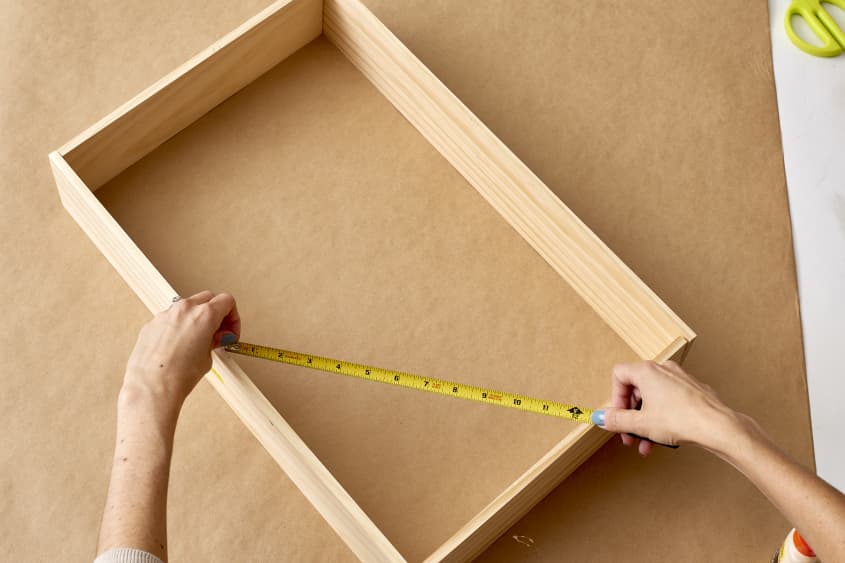
- Measure the inside of the drawer: Measure the width and length of your drawer. We recommend subtracting a little less than 1/4 inch from each measurement to give yourself some wiggle room. Measure twice!
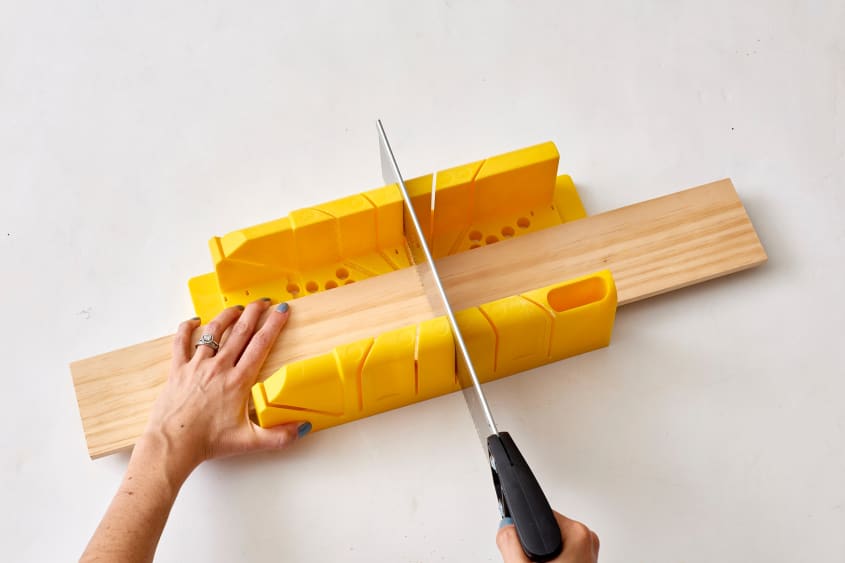
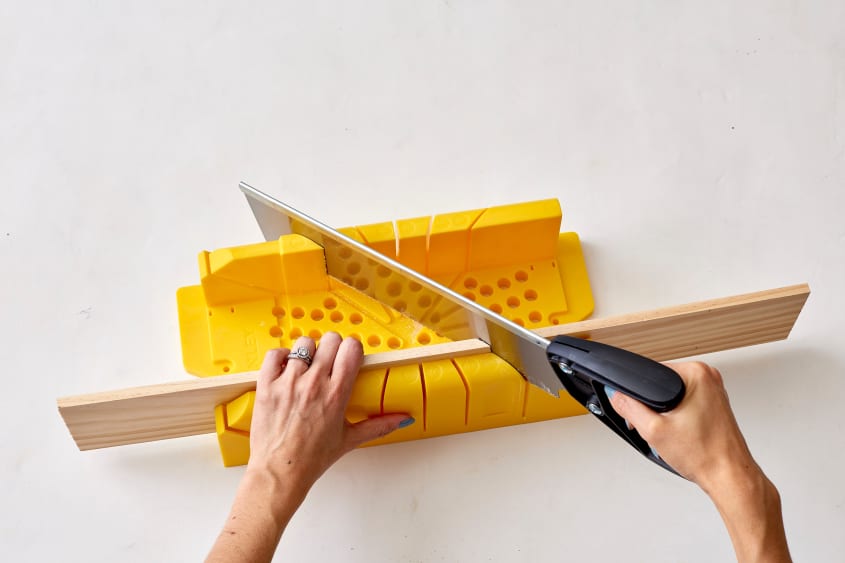
- Cut the pieces for the organizer frame: Mark where you’ll need to trim the pieces for the frame and then use your saw to cut them down to size. You can use a miter box if you need help cutting a straight line.
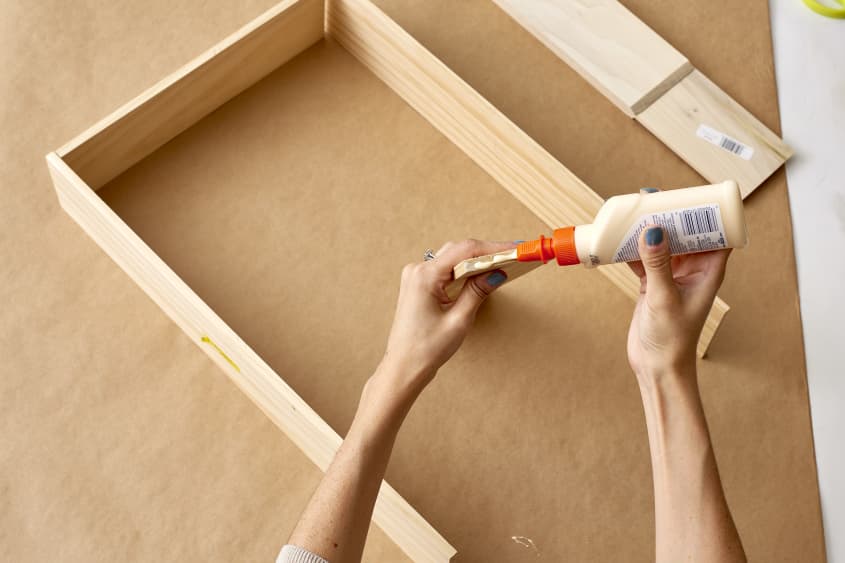
- Glue the frame together: Using wood glue, assemble the frame so that the pieces are at 90-degree angles. Set the frame aside to dry. Tip: Putting down some newspaper or kraft paper on your workspace isn’t a terrible idea.
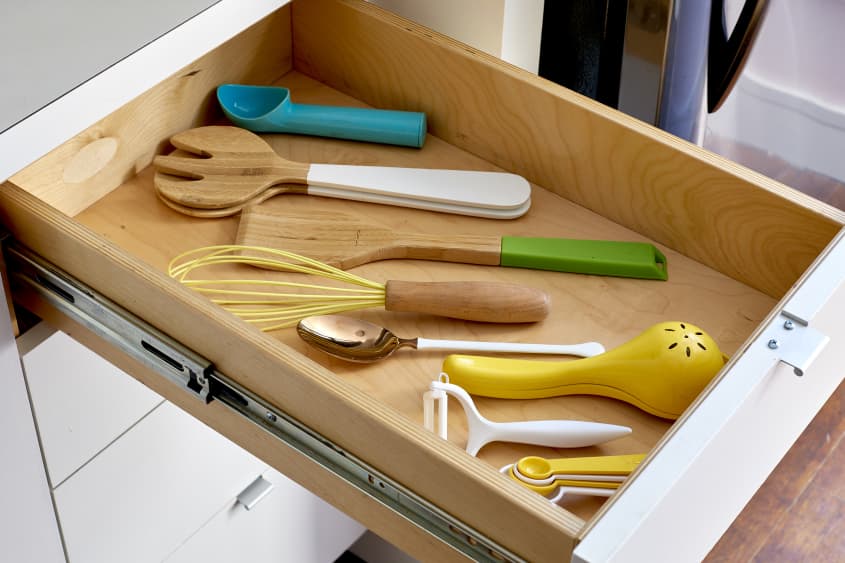
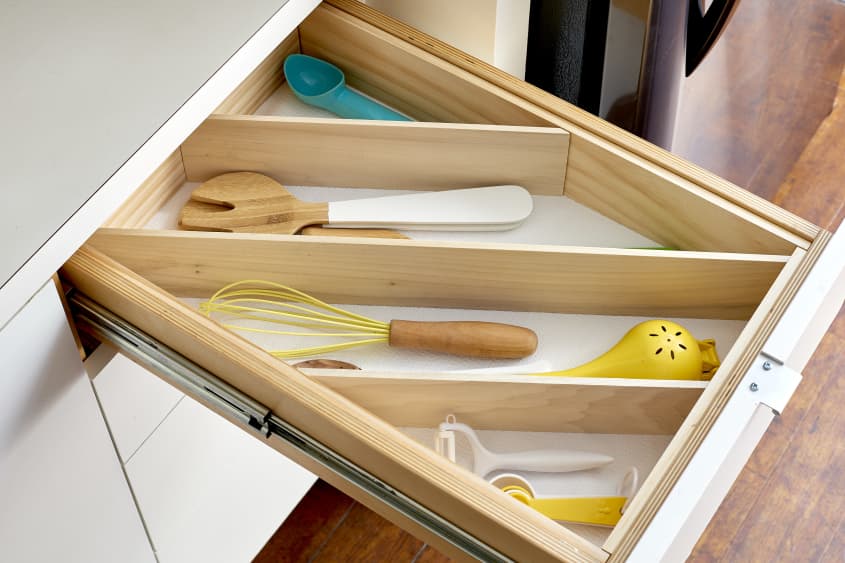
- Plan out your utensils: In the drawer, group utensils by size (length-wise) or put like with like. Using these groupings, figure out where you’d like your diagonal dividers to go. There’s no wrong answer here.
- Measure and mark your diagonal pieces: Now that you know how many dividers you want and where they should go, measure the distance for them on your frame and mark the pieces where you need to cut.
- Cut the diagonal pieces: Using the saw and miter box, cut each of your pieces to size. Note: You need the miter box because you need the pieces to be cut at a 45-degree angle. This way, the pieces will sit flat against the frame once they’re in place.
- Glue the dividers into place: Place your diagonal pieces in position to make sure everything fits as planned. You may need to trim or sand them. If they’re good, glue the pieces into place and set the whole thing aside to dry.
- Line the drawer: Cut a piece of drawer liner to size and place it on the bottom of your empty drawer.
- Organize that drawer: Once the glue on your organizer has dried, slide it into your drawer and get to organizing.
Notes
- We built a frame so that we could remove the dividers if needed. If you don’t see your organization needs changing any time down the line, you can simply glue the diagonal pieces directly to the sides of the drawer.
- If you’re not comfortable using a saw or mitre box, the helpful staff at your local hardware store might be able to cut the pieces for you.
- We used 3/8-inch-thick craft board, which we got at a local hardware store. Plan on getting four pieces for the frame (one for each side) and one piece per divider.