
How to Bottle Beer at Home

If there’s anything better than sharing beers with friends, it’s making beer with friends! For my recent All-American Beer Bottling Party, I invited a bunch of friends over for what is arguably the most fun part of the brewing process: bottling the beer. This is the moment when all the hard work of making the beer and waiting for it to ferment finally comes to fruition — and at the end of the day you have beer. Real beer! Bottled and (nearly) ready to drink. Here’s how!
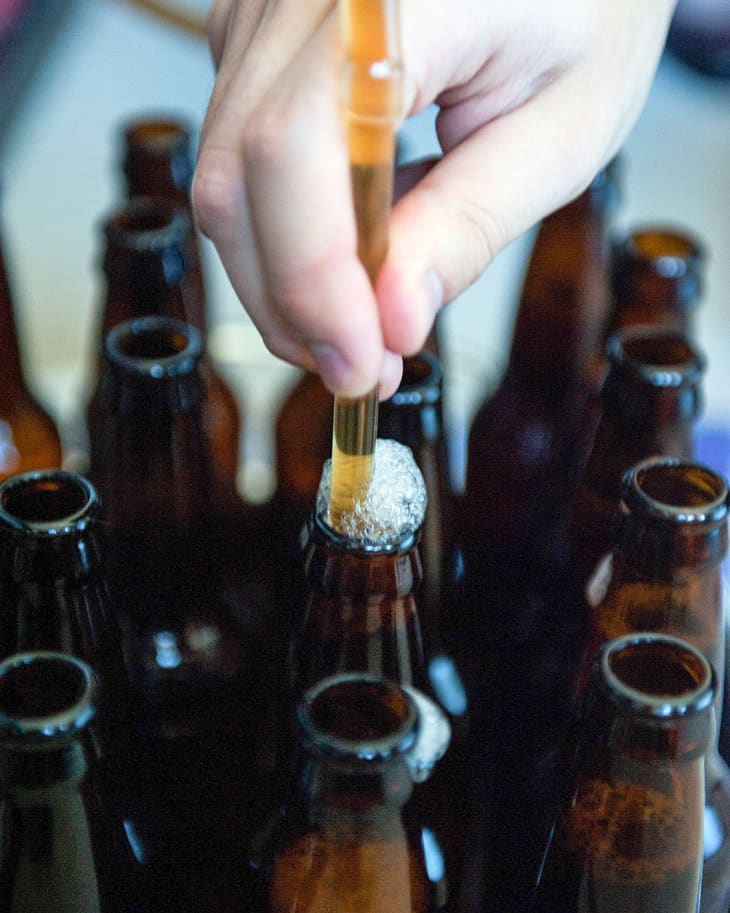
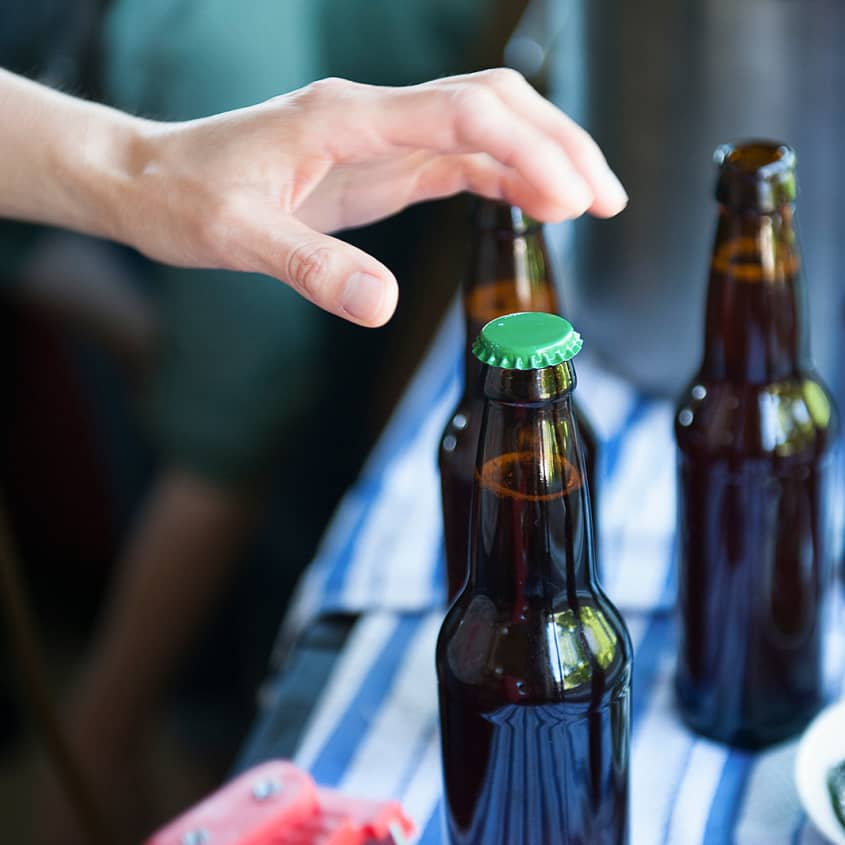
Putting on the bottle caps on the bottles of beer
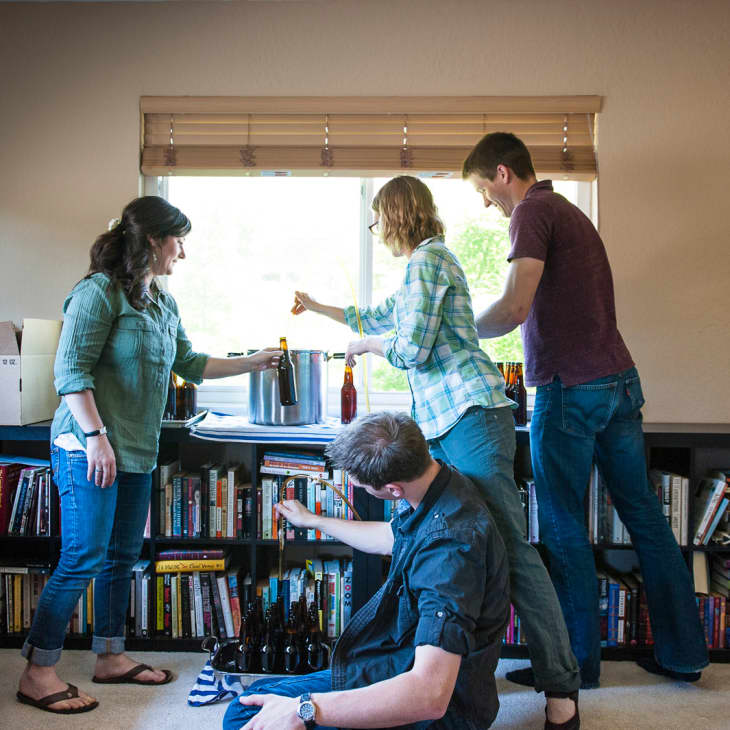
Everyone working together to bottle the beer — a real life “Little Red Hen” moment!
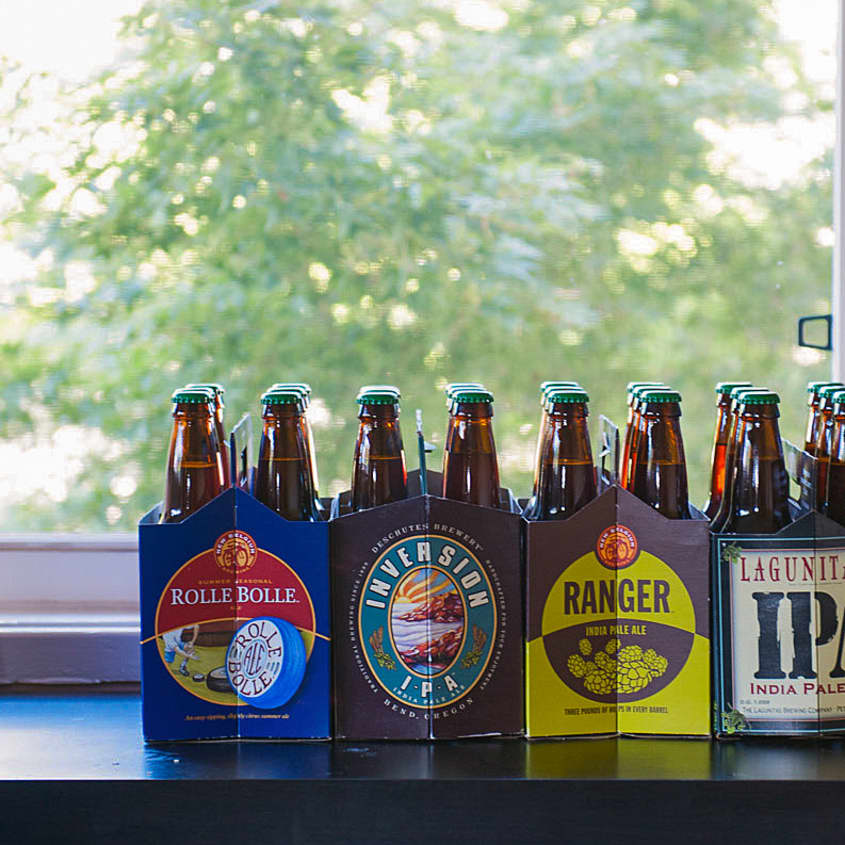
At my party, we bottled a big 5-gallon batch of amber ale — a riff on the recipe in my book True Brews. I had brewed the beer a few weeks earlier, and by the day of the party, it had finished fermenting and was ready to be bottled. Many hands definitely made light work here! We were able to bottle the entire batch in about 20 minutes. (But don’t worry, you can certainly bottle by yourself or with just two people — it just takes a little longer without several people working together!)
There are three basic steps to bottling beer at home: first, you mix the beer with a little sugar water, then you portion it into bottles, and finally, you attach the caps. It’s important to keep the bottles, the caps, and all the equipment sanitized to avoid infecting your hard-earned beer with something unsavory, and it’s also important to avoid splashing the beer, which can expose the beer to oxygen and give it bad flavors. Once capped, you stash the beer in a cupboard or closet for another two weeks to give it time to carbonate — waiting is the hardest part — and then it’s ready to drink!
The sugar water added in that first step is how we get fizzy, carbonated beer at home. In brewing terms, this step is called “priming” the beer, and the sugar is referred to as “priming sugar.” This gives the yeast one last snack inside the bottle — just enough to get the yeast to produce the carbon dioxide to carbonate the beer. This is a carefully calculated amount, so be sure to follow your recipe precisely. Too little sugar and your beer will taste flat; too much and you risk having too much carbonation build up inside the bottles, resulting in gushing beer when you open them or (worst case scenario) exploding bottles.
If my band of brewing newbies could bottle beer without a hitch, so can you! All you need is a batch of beer, a some clean bottles, and the desire for some homebrew.
→ Check Out the Book! True Brews: How to Craft Fermented Cider, Beer, Wine, Sake, Soda, Mead, Kefir, and Kombucha at Home by Emma Christensen
How to Bottle Beer at Home
Nutritional Info
Ingredients
- 1 batch
of finished homebrew
Corn sugar or other sugar, to carbonate (refer to type of sugar and amount listed in your recipe)
- Boiling water, to carbonate (refer to amount listed in your recipe)
Equipment
- Stockpot — one that's big enough to hold your entire batch of homebrew
- Sanitizing solution (see Recipe Notes)
- Clean beer bottles — 10 for a 1-gallon batch, 50 for a 5-gallon batch
- Bottle caps
- Siphon hose
- Hose clamp
- Racking cane
- Racking cane tip
- Bottle filler
- Hydrometer (optional)
- Thermometer (optional)
- Empty glass
- Roasting pan or other large tray
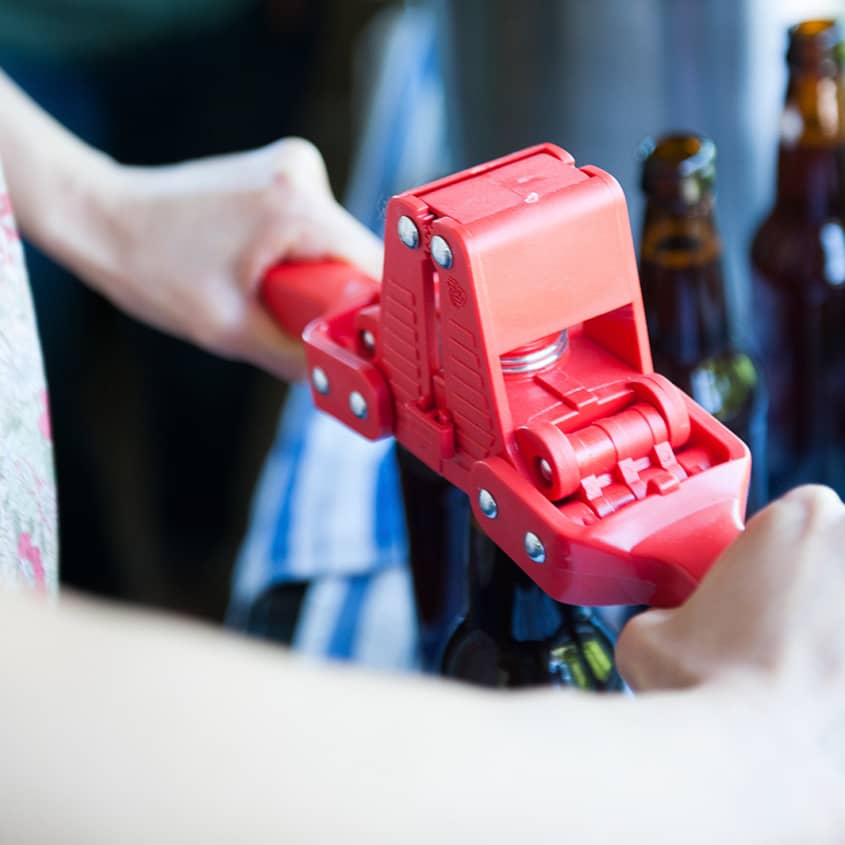
- Bottle capper
Instructions
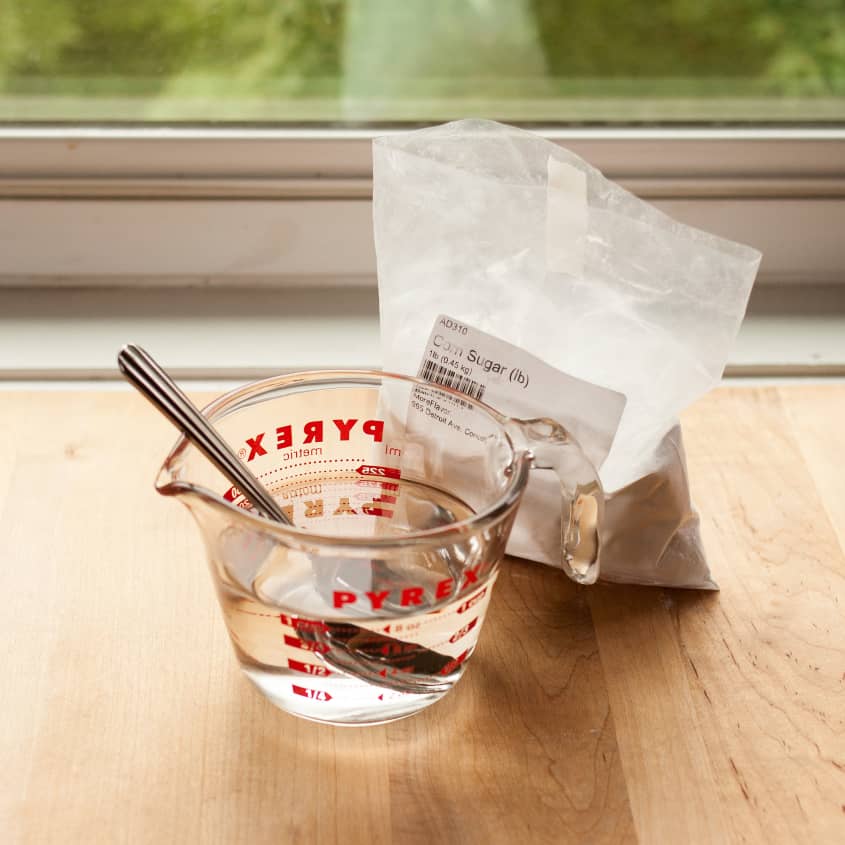
Make the sugar-water solution: Dissolve the sugar in the boiling water with a spoon and let it stand until room temperature.
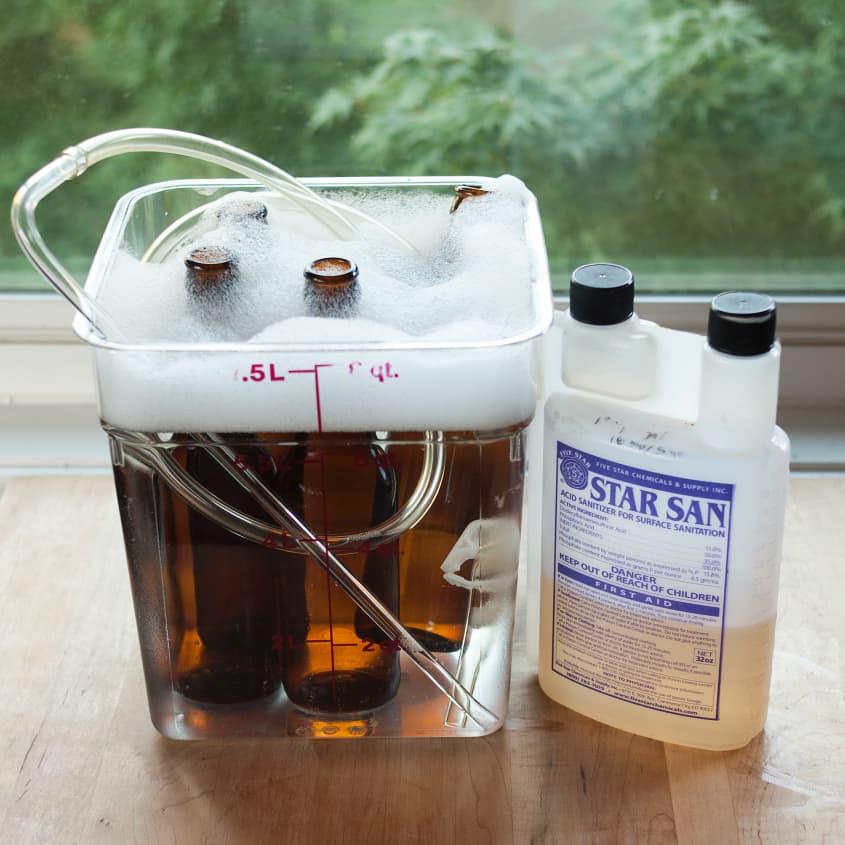
Sanitize the beer bottles and other equipment: While the sugar-water is cooling, sanitize the stockpot, all your bottles, the bottle caps, the siphon hose with hose clamp, the racking cane, its tip, the bottle filler, and the hydrometer and thermometer (if using). You can use the stockpot for sanitizing everything or use an extra fermentation bucket or second stockpot.
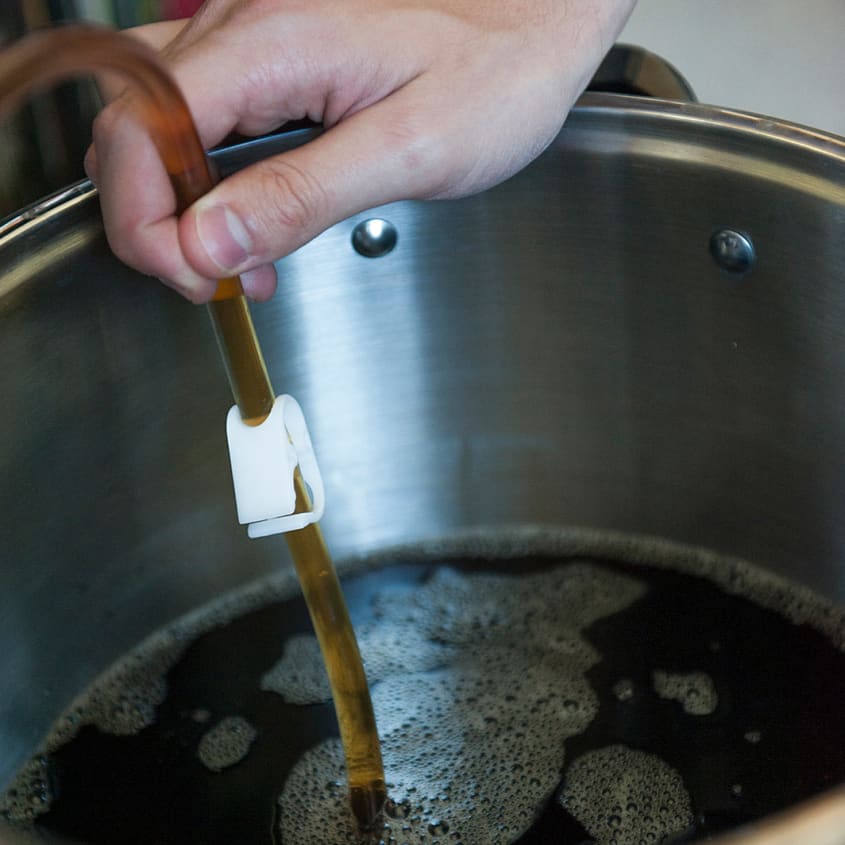
Pour the sugar-water into the stockpot: Once cool, pour the sugar-water into the stockpot.
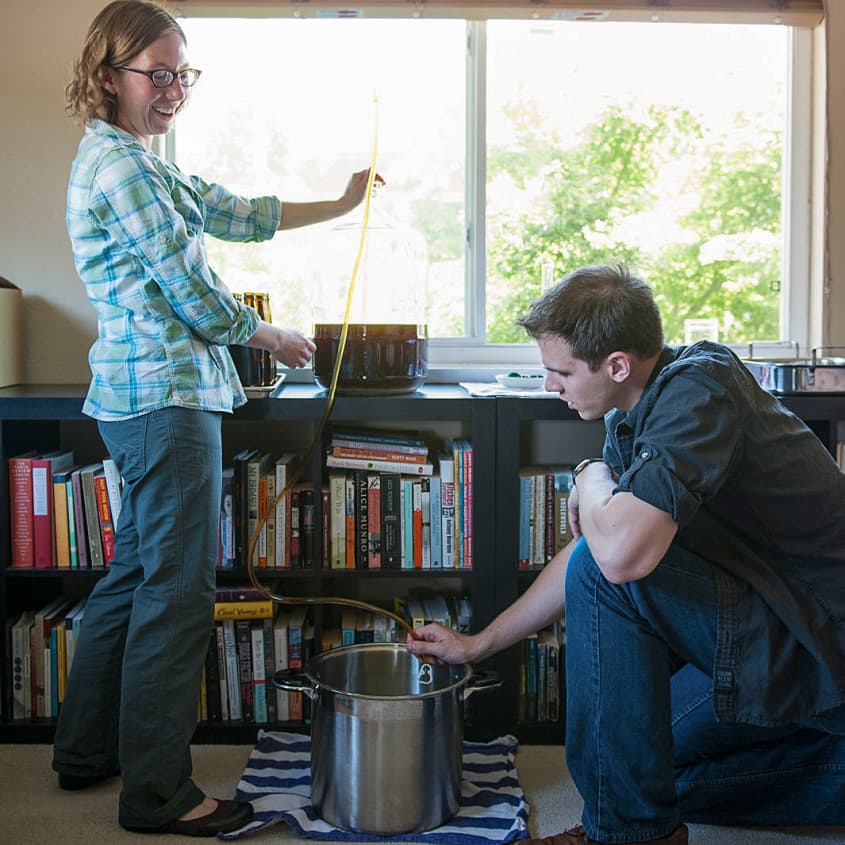
Create a siphon: Set the carboy with your beer on the counter and place the stockpot with sugar-water on a chair or on the floor below the carboy of beer. Set the empty glass next to the stockpot. Attach the siphon hose to the racking cane and slip the hose clamp over the loose end of the hose. Run fresh tap water through the hose until it flows smoothly out the end of the racking cane. Immediately clamp the hose shut to trap the water inside. Place the tip on the racking cane, then gently set the racking cane inside the carboy of beer, taking care to disturb the sediment (a.k.a. "trub") at the bottom of the carboy as little as possible. Point the hose toward the glass and release the hose clamp. Let the water flow out of the hose; when the first beer makes it through the hose, immediately clamp the hose shut again.
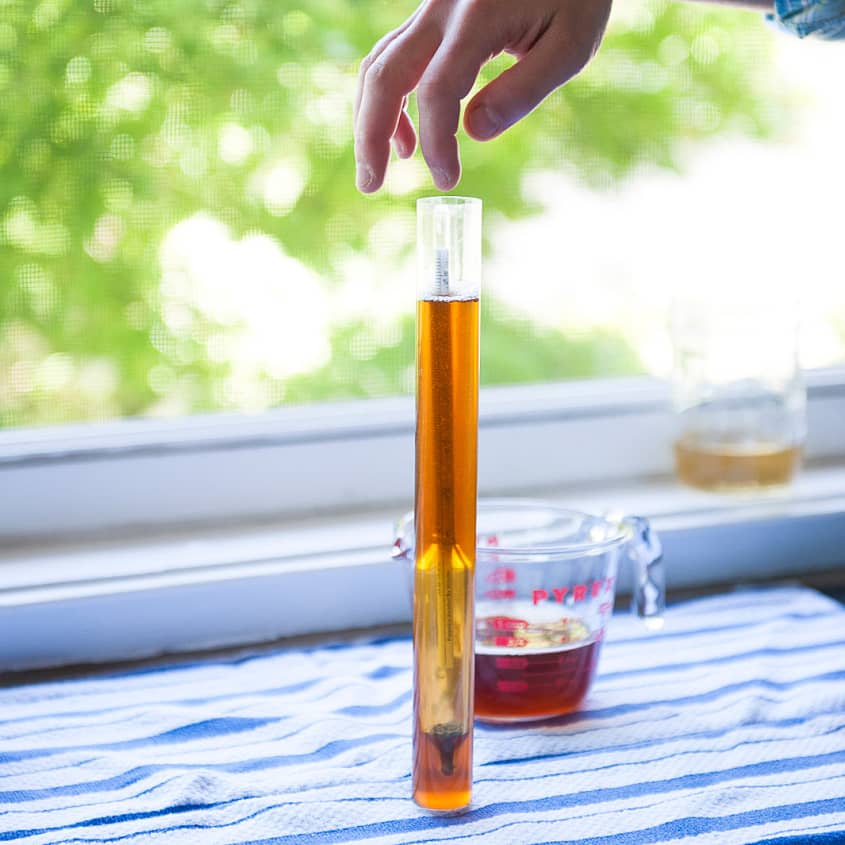
Take a hydrometer reading (optional): Taking a hydrometer reading at the beginning and end of brewing can help you calculate the alcohol content in your beer. If you took an initial hydrometer reading, take the second one now: siphon a little beer into the hydrometer tube and float the hydrometer inside. Record the gravity reading and the temperature of the beer. You can drink the beer or return it to the carboy. See Recipe Notes for more information on calculating alcohol content.
Mix the sugar-water and beer: Point the siphon hose to the stockpot with the sugar-water and release the clamp. Keep the tip of the hose just below the surface of the beer and try to splash the beer as little as possible as you siphon. Toward the end of siphoning, tilt the carboy to siphon as much beer as possible. Close the hose clamp and stop siphoning when you start to see sediment inside the siphon hose.
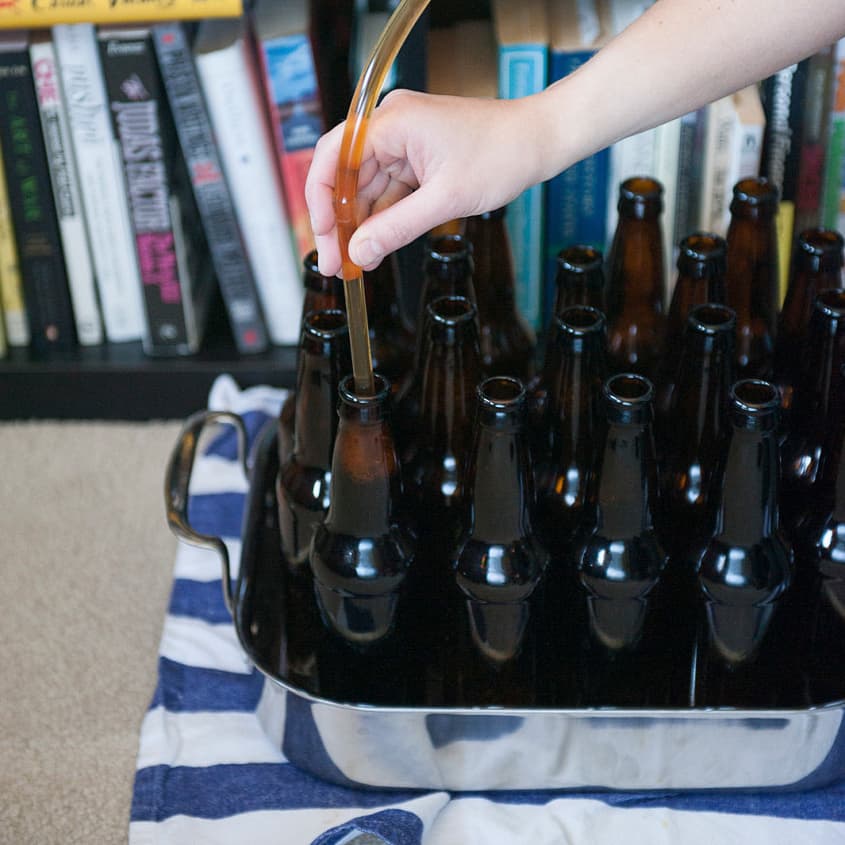
Siphon the beer into the bottles: Move the stockpot with the beer to the counter. Arrange your sanitized beer bottles inside a roasting pan (to keep them stable and contain any spills), and set the pan on a chair or the floor beneath the stockpot. Clean and re-sanitize your siphon hose, racking cane, and racking cane tip. Start the siphon as described in Step 4, but before beginning to bottle, attach the bottle filler to the open end of the siphon hose. Release the hose clamp and press the tip of the bottle filler against the bottom of the first bottle. This will open the valve at the tip of the bottle filler and start the flow of beer. When the beer reaches the very top of the bottle, lift up to stop the flow of beer; removing the bottle filler will also leave just the right amount of head room in the beer. Repeat until the beer is gone and all the bottles are filled.
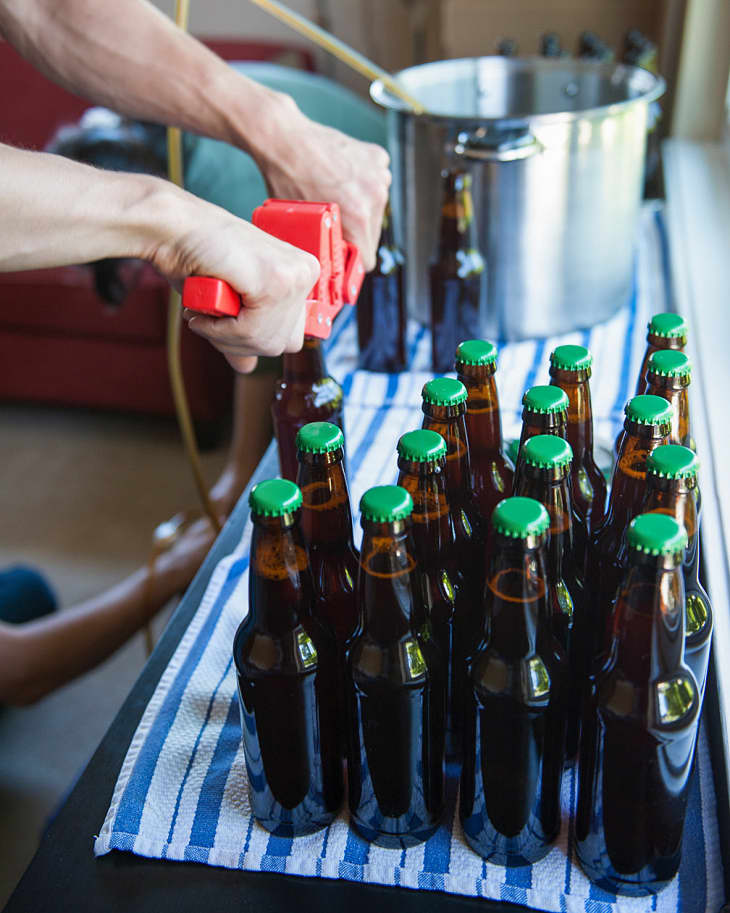
Cap the bottles: Set a cap on top of a bottle of beer. Align the capper over the cap and press down on the "wings" of the capper — this clamps the capper around the bottle and crimps the cap closed. Repeat with all of the bottles.
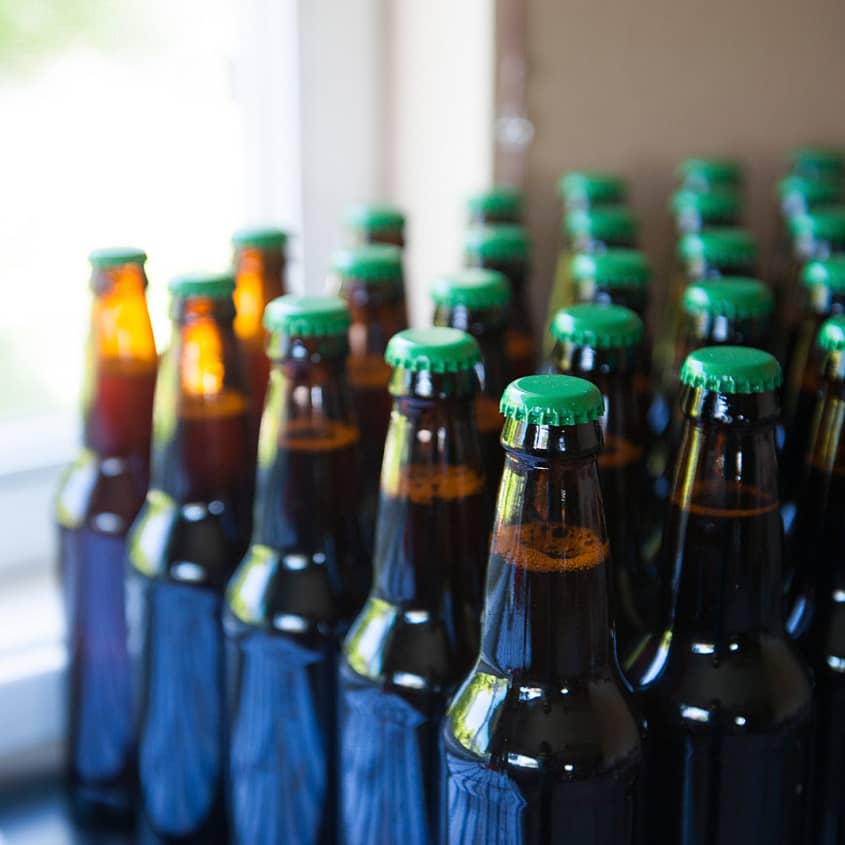
Let the beer sit for 2 weeks before drinking: Label all your beers with the name of the beer and the date, then place them inside a dark cupboard or closet for at least two weeks to carbonate. Homemade beer can also be stored for up to a year before the flavor starts to deteriorate. Refrigerate the bottles overnight before drinking.
Recipe Notes
Sanitizing Solution: I prefer using a product like StarSan for sanitizing equipment. You use 1 ounce per 5 gallons of water, and it sanitizes equipment in 1 minute (The suds are normal and aid in sanitizing your equipment!). You can buy StarSan at your local homebrew supply store or online at a place like Northern Brewer.
Calculating the Alcohol Percent: A hydrometer will help you measure the density of your beer, which changes as yeast eat the sugars in the beer. Take an initial reading just before pitching the yeast (original gravity, OG) and take a second reading just before bottling (final gravity, FG). Subtract the final gravity from the original gravity, multiply by 131.25, and you have your alcohol percent: (OG - FG) x 131.25 = ABV. Gravity readings are affected by the temperature of the beer, so be sure to take a temperature reading and adjust according to the temperature adjustment chart found here.
Want more smart tutorials for getting things done around the home?
See more How To posts
We’re looking for great examples of your own household intelligence too!
Submit your own tutorials or ideas here!
(Images: Sugar-Water Solution and Sanitizing Bottles by Emma Christensen, all others by Danielle Tsi)