
How To Install an IKEA GRUNDTAL Rail on a Tile Backsplash
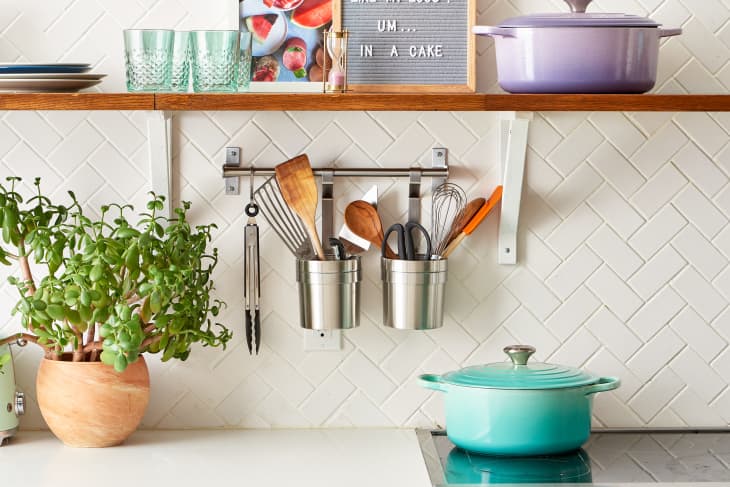
A kitchen rail is a super-stylish way to add storage to any kitchen. With roots in commercial and restaurant kitchens, this versatile tool is really limitless, as you can add on S-hooks for utensils or pots and pans, holsters for cutlery, mini shelves, and more. And IKEA’s GRUNDTAL rail system is one of the most versatile and affordable ones out there, available in classic stainless steel with a number of accessories to match.
The trickiest thing about installing the rail is not the rail itself, but being sure you have the right screws and hardware to get the rail into your backsplash or other surface. If you’re mounting it onto regular ol’ dry wall, you can just follow the directions from IKEA (although we suggest adding anchors!). But if you’re mounting it on ceramic tile, the most common backsplash, you need to be more careful.
Before starting this project, be sure you know that the tile is indeed ceramic, and that there’s drywall behind it. If you’re working with another material or are unsure, consult with your local hardware store for the correct materials. And if you’re in a rental, be sure to check with a landlord before starting the project, as this is a permanent change! Here’s what to do.
How To Install an IKEA GRUNDTAL Rail on a Tile Backsplash
What You Need
- GRUNDTAL rail and included hardware and allen wrench
- Level
- Pencil or dry-erase marker
- Painter’s tape
- Drill
- Carbide-tipped tile drill bit
- Drilling oil
- Scrap cloth
- Wall anchors with Phillips-head screws
- Drywall bit
- Hammer
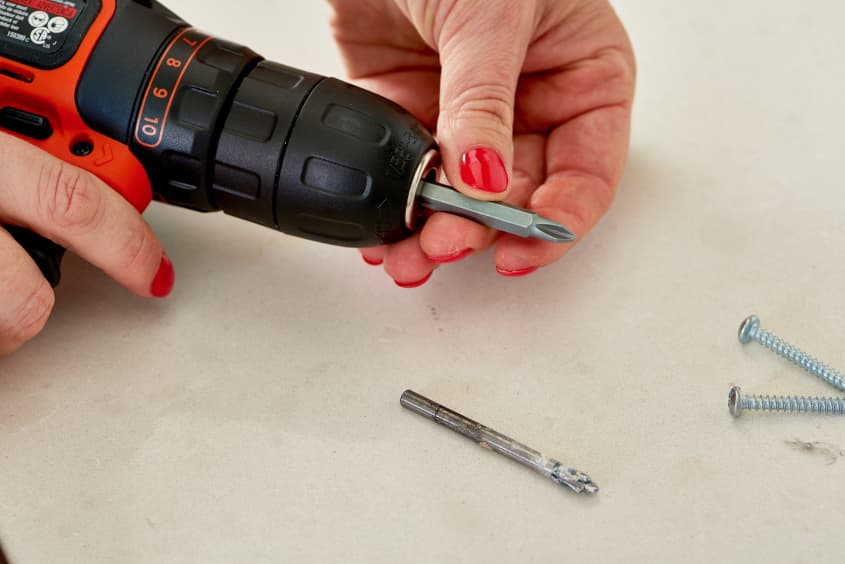
- Phillips head drill bit
Instructions
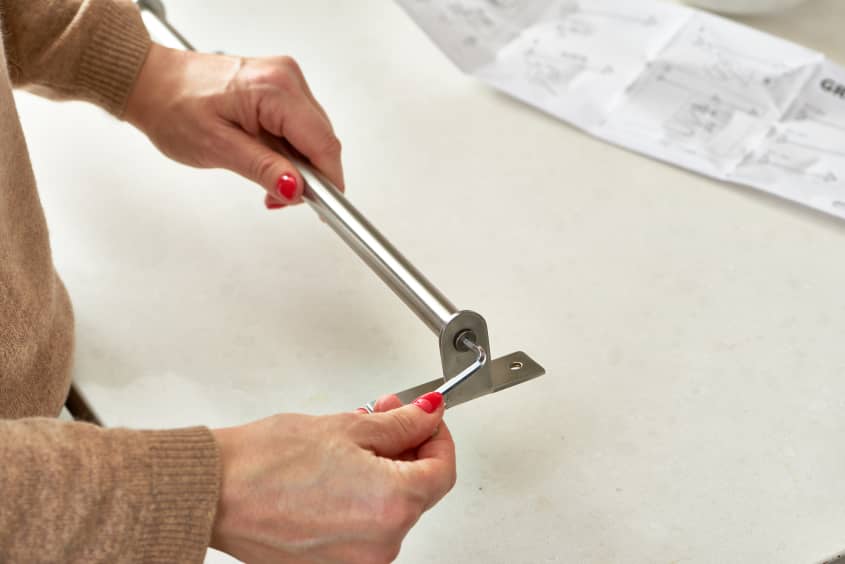
- Assemble the rail: Unpack your pieces. Then, connect the rail to the side brackets using the enclosed screws and the included allen wrench.
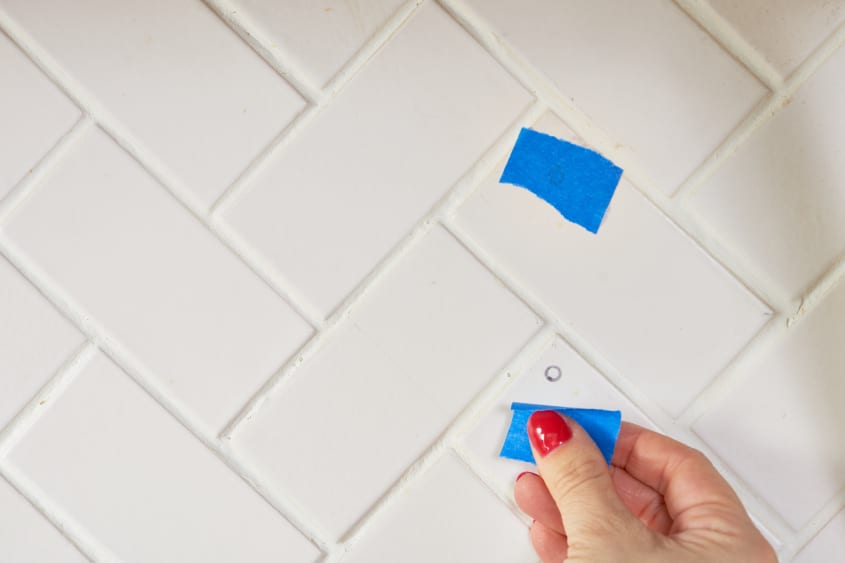
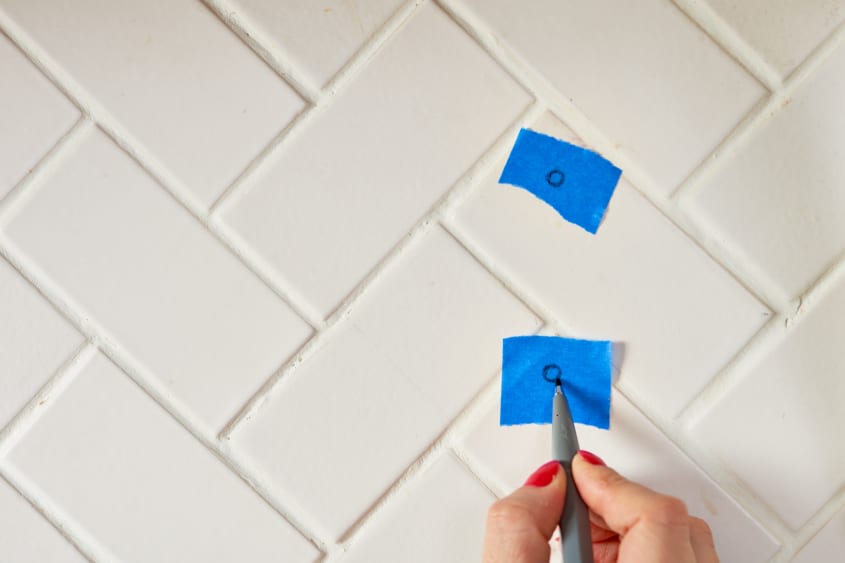
- Figure out where you need to drill: Position the rail where you’ll want it to go and use the level to make sure it’s perfectly straight. Mark the four screw holes with dry-erase marker.
- Cover the markings with pieces of painter’s tape: Use painter’s tape to tape over each hole.
- Mark the spots again: Measure and mark where you need to drill again. This may seem annoying but there’s no such thing as measuring too much and the tape will help protect the tile when it’s time to drill.
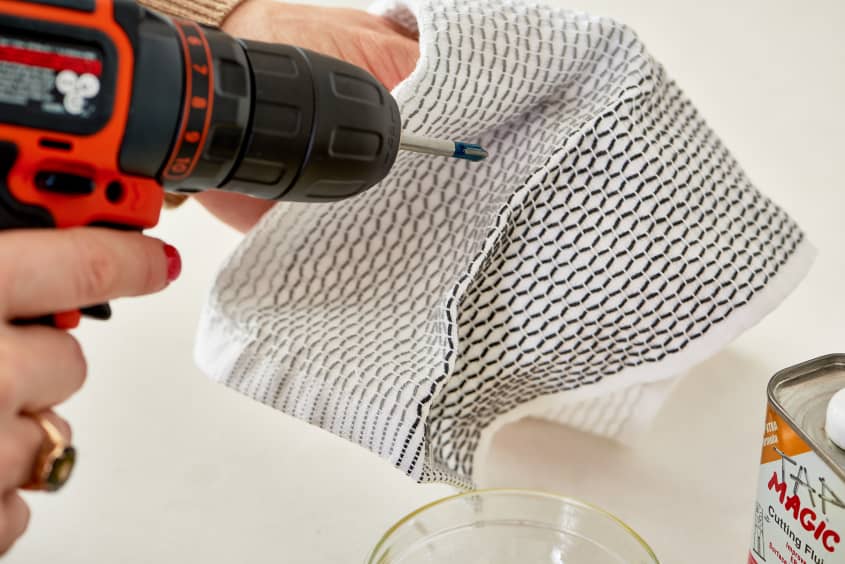
- Ready your drill bit: Dip a carbide-tipped drill bit in drilling oil and wipe off excess.
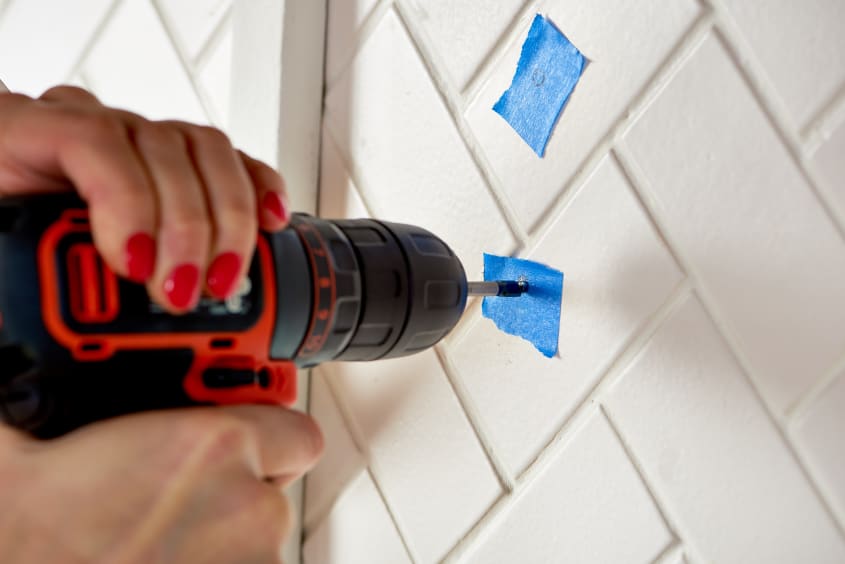
- Drill through the tile: Carefully drill a small hole into each mark. Drill just until you feel the resistance change — this will be the sign that the bit has reached the drywall behind the tile.
- Switch the drill bit: Switch the bit to a drywall bit to continue the hole. Repeat steps six and seven for all four holes.
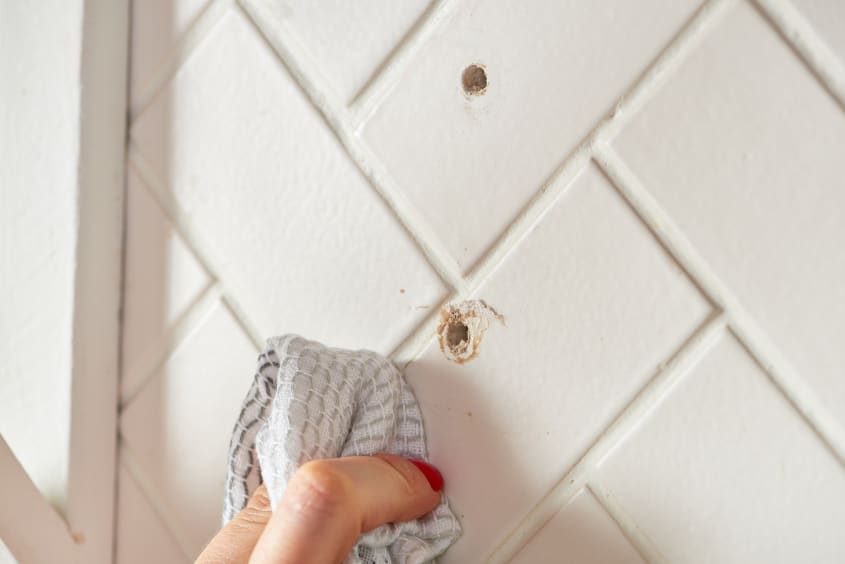
- Remove the tape: Remove the tape and wipe the tiles with a damp rag to remove any dust and leftover markings.
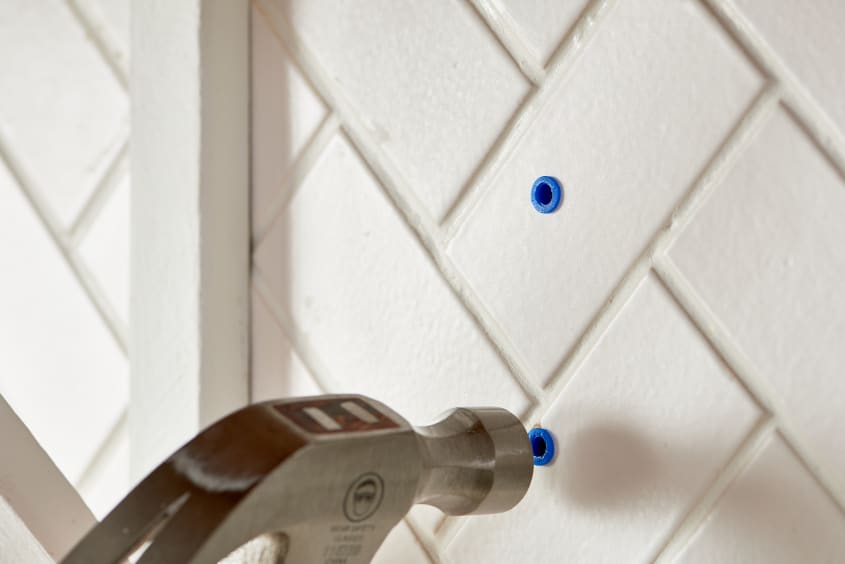
- Tap in the wall anchors: Use a hammer to gently tap in the wall anchors.
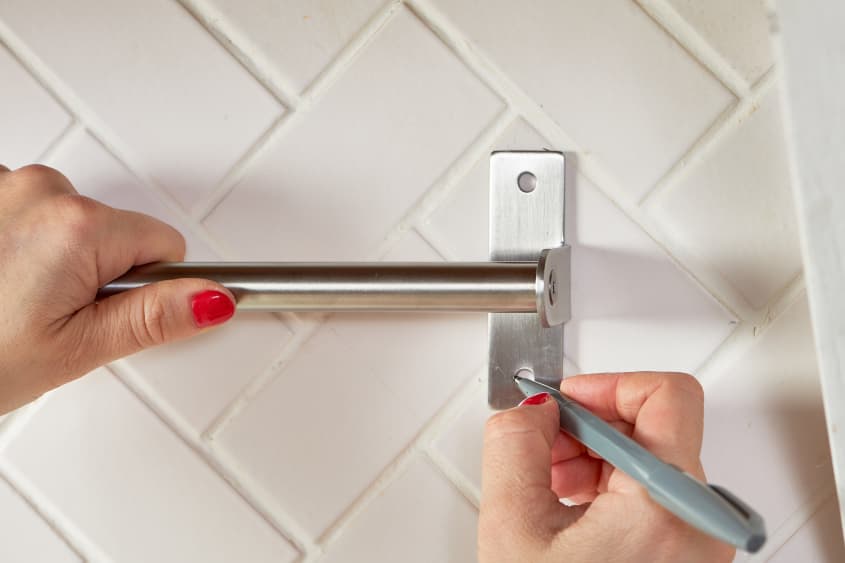
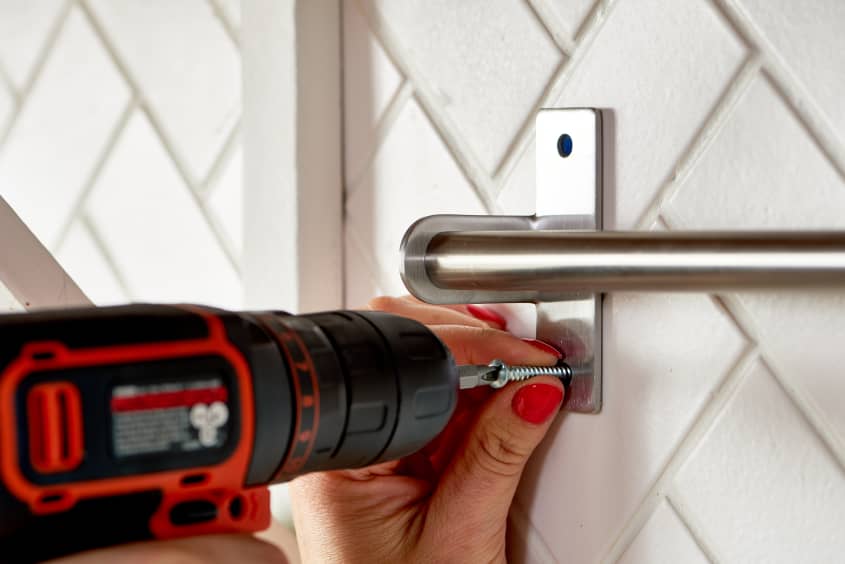
- Hang the rail: Position the rail and use the Phillips-head bit to attach the screws. Get all four screws into position before tightening them completely.
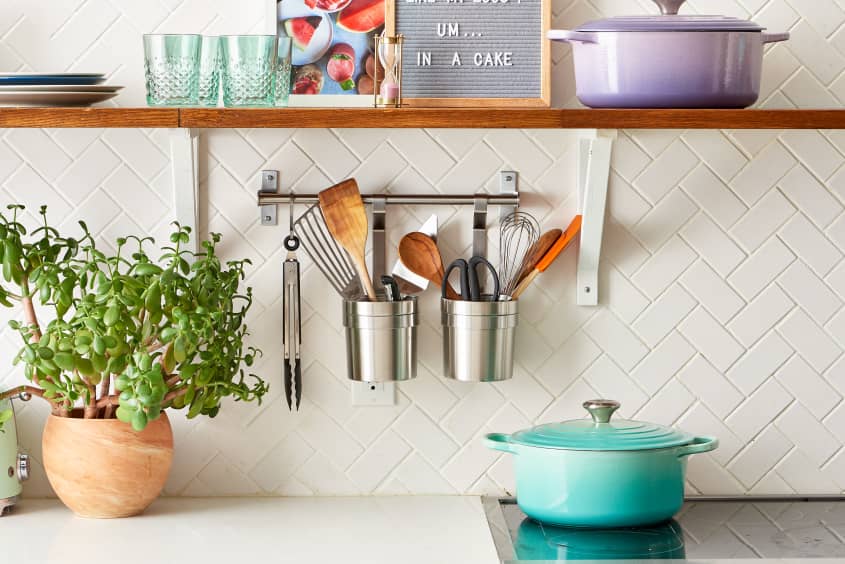
- Accessorize: Now comes the fun part! Add tools and decorative accents however you see fit!
Notes
- If you have extra tile laying around (say, in your basement or garage), it’s worth practicing before you get started on the actual wall. If you make a mistake or crack the tile on the wall, it will be hard to fix it!
- It’s also worth bringing the tile to the hardware store to get a staffer to help you pick out the perfect drill bit.