
How To Make DIY Jewelry Cleaner with Ingredients from Your Pantry
We all have those pieces of jewelry we love but know could use a little more care. You know the ones — you reach for them over and over again, and each time you wear them you think Wow, I really should clean these!
Recently, I had this very thought with one of my favorite bracelets — a charm bracelet that reminds me of major moments and milestones in my life. It means a lot to me, even though it’s not the shiniest piece I own — at least it wasn’t until recently.
The DIY Jewelry Cleaner Ingredients Hiding in Your Pantry
A couple of months ago, while testing out some conventional store-bought jewelry cleaners to remove the tarnish from my bracelet, I was highly disappointed in the results. My bracelet just wouldn’t come clean, despite the promised results on these packages. So naturally, I did what any budget-savvy woman would do: I hit up Google and researched all kinds of DIY ideas. The simplest method was one with the biggest fan group. It calls for three simple kitchen staples: Morton table salt (or any white table salt), baking soda, and aluminum foil.
How It Works
The gist is, you line a bowl (any material is supposedly fine) with a piece of foil, add hot water, the baking soda, and salt before letting your silver jewelry soak for anywhere from three to five minutes. And that’s it! All the tarnishes and stains are removed, thanks to science! The combination of ingredients creates a chemical reaction that removes tarnishes and stains from sterling silver jewelry and other silver-based jewelry. It’s not recommended for gold, gemstones, costume jewelry, or cheap metals that aren’t silver-based, so make sure you know what you’re working with.
The result? Beautiful, shiny, like-new sterling silver jewelry that shines and sparkles! I randomly brought this up to a family member and she told me she’s done this for more than 15 years with great results. Her anecdote gave me the confidence to try it, and it has worked time and time again.

How To Make DIY Jewelry Cleaner with Ingredients from Your Pantry
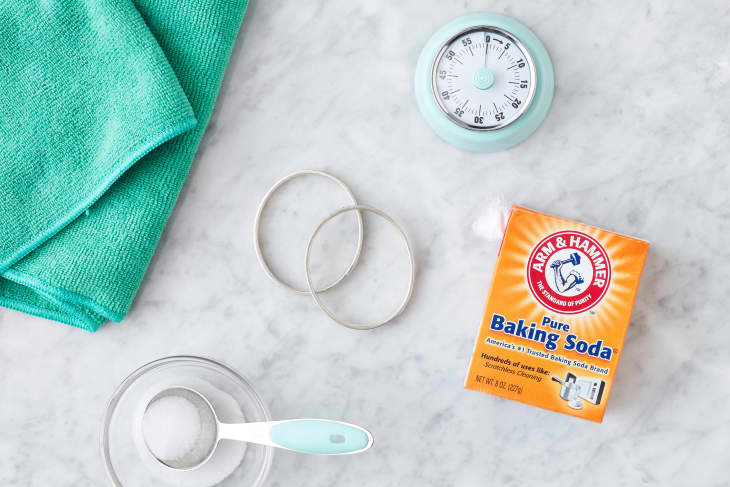
What You’ll Need
- Medium-sized bowl
- Aluminum foil
- Hot water
- Baking soda
- Morton table salt
- Silicone-tipped tongs
- Clean, dry cloth
Instructions:
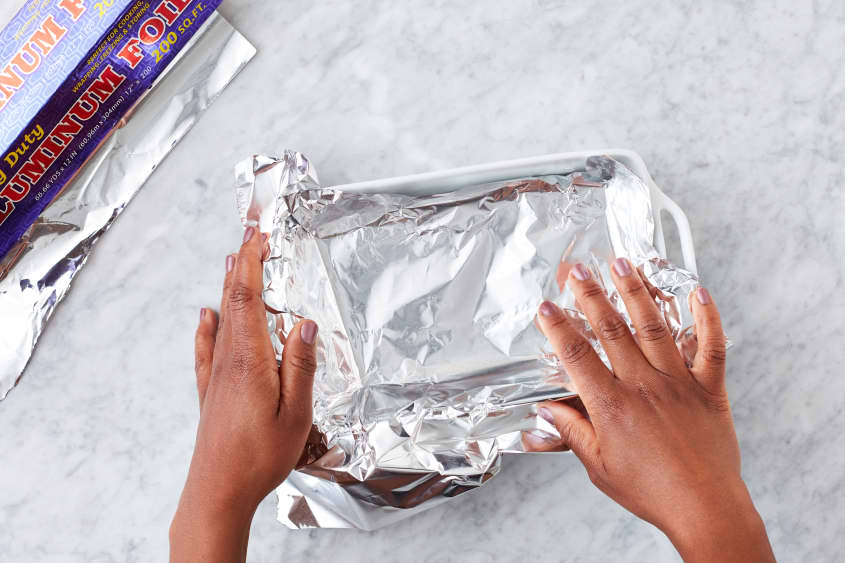
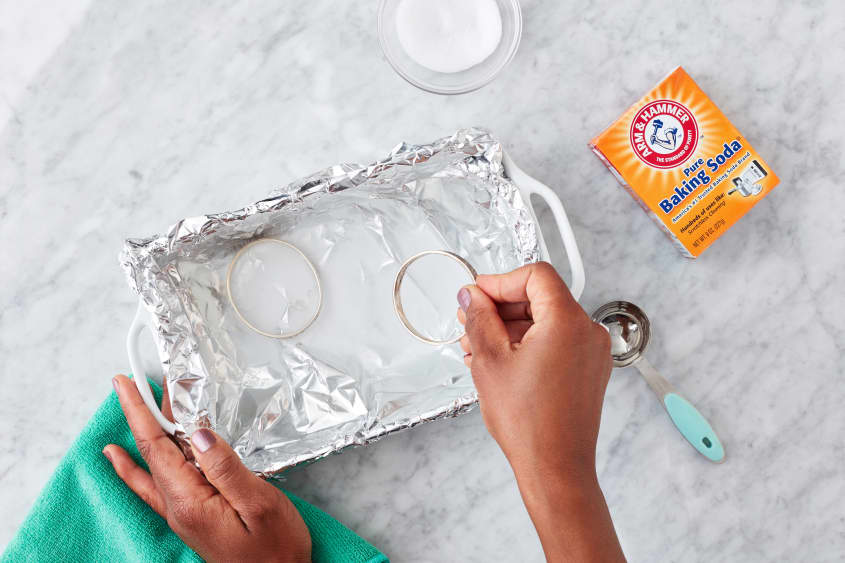
- Get your bowl ready: Line a medium-sized bowl (I used ceramic) with a sheet of aluminum foil large enough to cover the bottom and sides of the bowl.
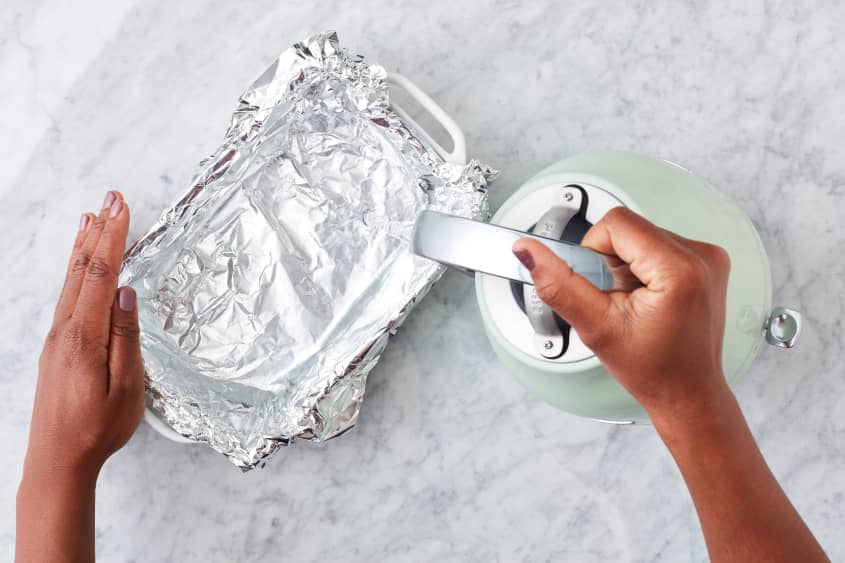
- Add hot water: Run some hot water until it’s steaming hot or boil some water in a kettle and add it to the lined bowl. The bowl should be at least halfway full (or at least full enough to cover the jewelry you’ll be soaking).
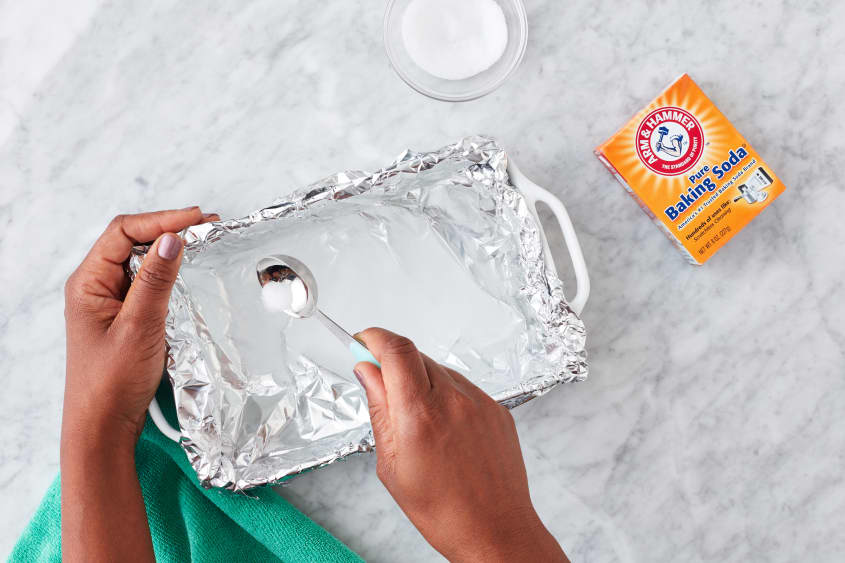
- Add the rest of the ingredients: Add 2 tablespoons of baking soda and 2 tablespoons of salt to the bowl with the hot water.
- Carefully drop your jewelry in: Add one piece at a time. If they’re small pieces (like rings), you can add several at a time, but do not let them touch). Let the jewelry soak for anywhere from 3 to 5 minutes. You’ll start to see the tarnishes begin to disappear. Don’t let the jewelry soak longer than 5 minutes.
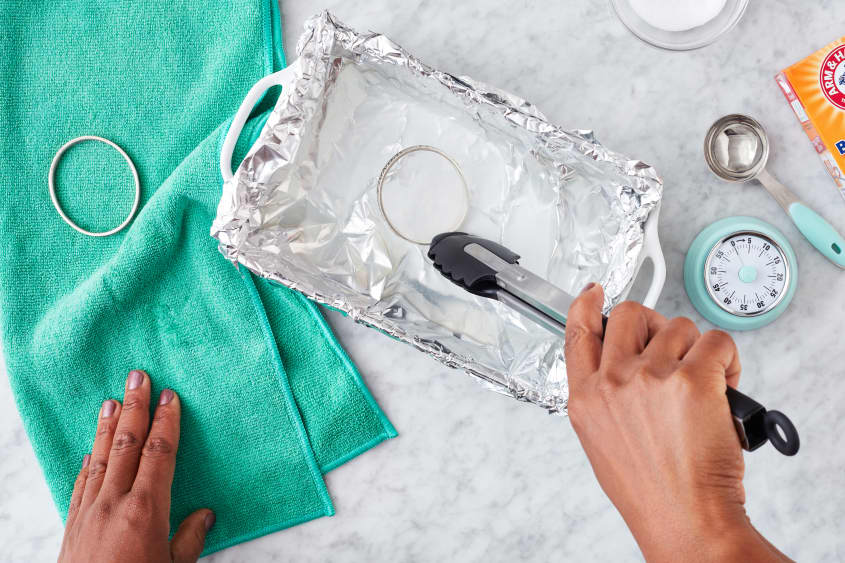
- Remove the jewelry: After the time has elapsed, carefully remove the jewelry (using silicone-tipped tongs) making sure not to scratch the pieces against the foil.
- Let dry: Do not rinse the jewelry. Just let it dry on a cloth or paper towel. Repeat until you’re finished with all your jewelry. If you’re soaking multiple pieces (more than three) start over with a fresh bowl and solution.
Notes
- This DIY cleaner works on silver-based jewelry. It is not recommended for gold, gemstones, or cheap costume jewelry. Sterling silver and other true silvers work best for this experiment.
- Heavily tarnished pieces may need a second soaking.
- If you’re looking to clean your silverware, test a small piece first before soaking your entire collection.
- The main benefit of this method is that you’re not using chemicals or products with ingredients you don’t recognize or trust. It’s also cheap, effective, and doesn’t take a long time to do. I haven’t found a drawback yet of this method yet and know it will be my go-to method for cleaning all my jewelry from now on.