
5 Things to Know About Cleaning Your Freezer’s Built-in Ice Maker

There’s nothing better on a hot summer day than filling a tall glass totally full of ice cubes, then splashing a little something on top — be it water, LaCroix, or something stronger — for a super-chilly refreshment. But if that ice has an odor, or leaves little scaly bits in your beverage? That certainly ruins the moment.
Especially in areas with hard water, minerals can stick to your appliance’s ice cube molds during the freezing cycle, eventually forming hard, scaly deposits in the ice maker. Eventually, those deposits can break down the nonstick coating in the ice molds and hurt ice production. And if you store something stinky in the freezer, the ice can absorb the smell — and even after the smell is gone, any old ice can contaminate the new ice, making stinky batch after stinky batch.
So you’ve gotta clean your ice maker. Don’t worry — it’s not that hard. Here’s what you need to know about the chore.
1. Yes, you actually have to do it.
Remember what I just said about those scaly deposits? You definitely don’t want that stuff (or anything else) in your ice! Clean your ice maker at least once a year, or more often if you have hard water. In addition, dump out the ice bin every few months to get rid of cubes that have absorbed odors.
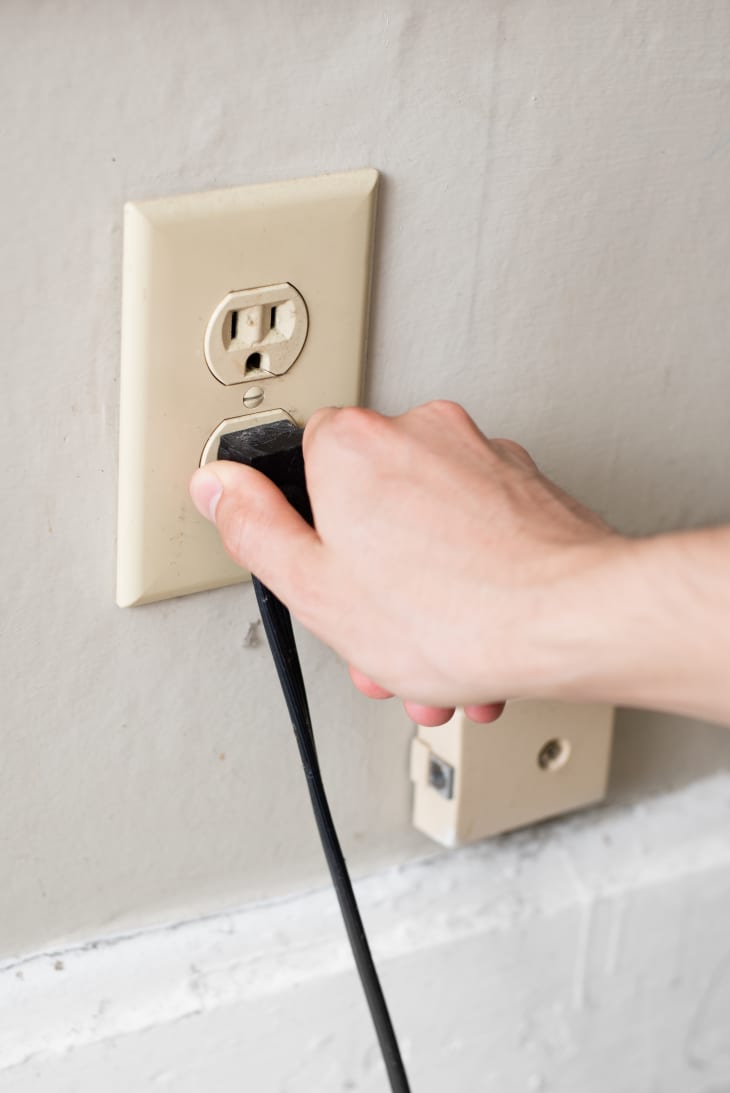
2. It’s important to unplug the appliance.
Don’t worry — the freezer won’t be unplugged for that long, and its contents won’t spoil. This is an important step because it means the machine won’t make ice while you’re working in there and it prevents dirt from getting into places it shouldn’t be.
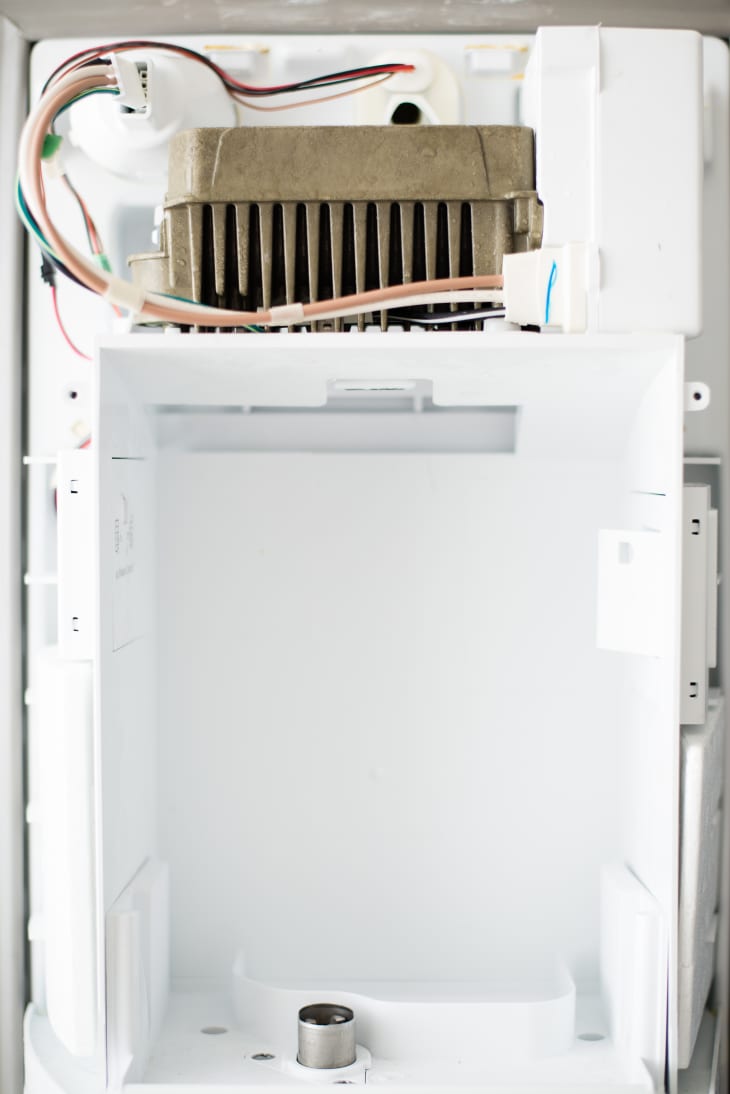
3. Take apart as much as you can.
If you have to bust out the screwdriver and remove some screws, do it. Take out the ice bin and pull out as much as you can — without going too far that you won’t be able to put it all back together. (Once the ice maker is out, you can plug the refrigerator back in.) The more you can access to clean, the better.
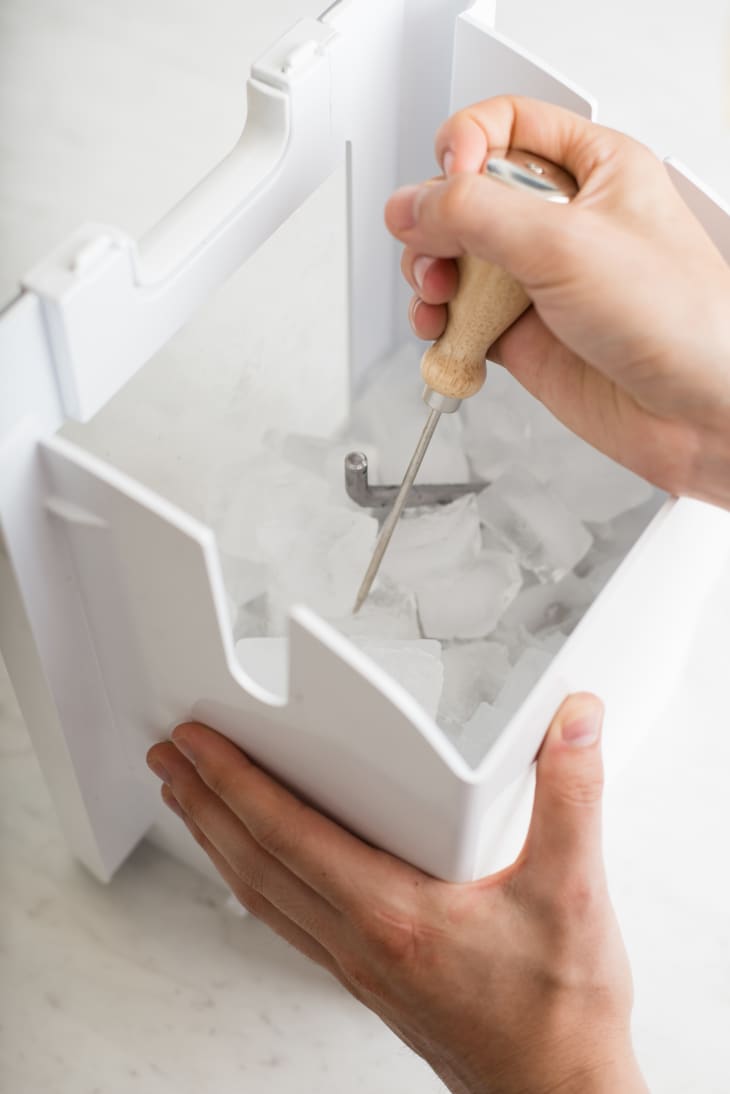
4. Give it all a good cleaning.
Use warm water and an ice pick, if necessary, to remove any built-up ice chips (but don’t use the ice pick or any sharp object on the ice mold or dispenser mechanism, because it could damage those parts). Then, use a dish rag or sponge and dish soap or a vinegar mixture (half vinegar, half water) to wipe down the ice bucket and exterior of the ice maker. You may need a toothbrush to reach inside the ice mold to brush away scaly water deposits. If you haven’t cleaned the ice maker in a while (or ever), you may want to disinfect it with some diluted bleach (1 tablespoon bleach to one gallon of water), too.
5. Make sure everything is dry before you put it back.
Allow the ice bin and all the parts you took out to dry completely before replacing them in the freezer. Why? Any leftover moisture could freeze and crack the bin or moving parts. When they’re ready, unplug the refrigerator again before you reinstall the ice maker and bin, then plug it in again when you’re done.
More on Cleaning Your Freezer
Special thanks to Kenmore for these tips.