
3 Golden Rules for Refreshing Dated Oak Cabinets (No Paint Required)

If you’re looking to refresh your kitchen, there’s one common piece of advice you’ll read over and over again: Paint your cabinets. And in a lot of cases, that is great advice! Painting over your kitchen cabinets can give them an entirely different look for the cost of painting supplies — a huge savings when compared to the expense of replacing cabinets altogether.
But there are plenty of reasons painting might be off the table. Maybe you’re a renter, or maybe you don’t have the time to invest in a full-on paint job. In those cases, you might be looking at your dated wood cabinets and thinking, what do I do?
Alexandra Gater, a DIYer and home decor YouTuber, has remade dozens of homes in the Toronto area for both renters and homeowners — and she’s dealt with her fair share of older kitchens and their dated wood cabinets. One of the most common types is oak, the 1990s and early 2000s standby. Where some DIYers might immediately whip out a paintbrush, Gater knows that there are ways to work with those cabinets that are a lot lower of a lift (and a lot more renter-friendly).
“The thing about oak cabinetry is that it is fairly neutral,” Gater says. “You may not be able to have the pink kitchen cabinetry of your dreams, for instance, but you do have an opportunity to create your own color scheme through the backsplash, hardware, and accessories throughout the rest of the kitchen.”
I spoke to Gater to learn how she would approach a dated oak cabinetry situation. Here are her three golden rules for making old cabinets look new again — no paint required.
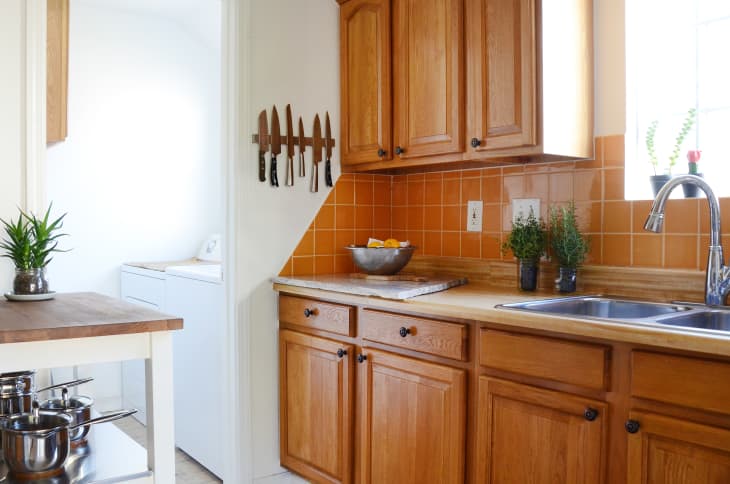
Take a good look at your backsplash.
If you’re hoping to take attention away from oak cabinetry that’s past its prime, then distraction is the name of the game. “Start by assessing your backsplash to find an opportunity to add interest there, whether through color or pattern,” she says.
Gater would find the words to describe your ideal kitchen, from “modern” to “traditional” and “bohemian” to “maximalist,” to help point you in the right direction. Keep in mind that if your existing backsplash tiles are plain, then chances are that they are fading into the background of your kitchen and allowing your cabinets to take central stage. On the flip side, if your backsplash is far too busy, then your oak cabinets may feel too boring and imposing. Gater says that there are countless peel-and-stick backsplashes to choose from, and finding an option that suits your tastes will help diffuse the oak-cabinet hold on your kitchen.
“I would recommend going wild,” she says. “Remember, this is your chance to really make a statement in your kitchen and not let the oak cabinets determine the style of the space. Let accessories determine the overall style instead.”
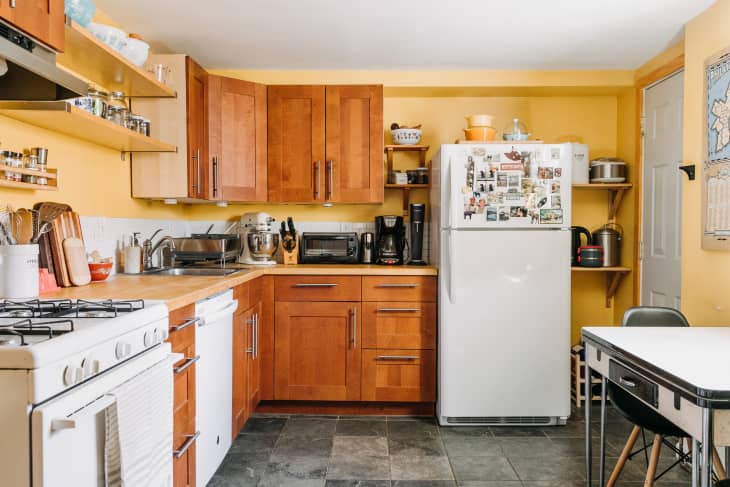
Next, use your backsplash selection to help with hardware.
Because your backsplash selection is set to be a clear representation of your style, continue to reference it in the rest of your DIY choices. The next step is to pick out hardware, which will inadvertently update your oak cabinetry with an on-trend detail.
“Once you lock in a dreamy, renter-friendly tile option, pull in colors from that to weave throughout the rest of the room,” Gater says.
Most of-the-moment colors — like sage and pink, or navy and lilac — look great beside equally popular brass hardware. If you decide to mimic marble with your backsplash, then any hardware finish would likely complement it. You could also mix and match styles for a cottagecore look, or bring in whimsical forms or coordinating colors for an unexpected twist. Whatever makes you smile!

Finally, bring in other accessories.
Gater usually wraps up her transformations on YouTube with “finishing touches,” which she does even in more utilitarian rooms like kitchens. This includes unfurling a soft rug underfoot, adding a pegboard for mugs and utensils, or arranging cookbooks and candles on ledges. She also never forgets to add art to the walls, and often accomplishes this task by printing out budget-friendly creations found on sites like Etsy and Society6.
But if all of these changes still don’t make you feel like the spotlight has been taken off your oak cabinetry, she has one more tip to recommend that doesn’t involve painting. “You could definitely sand down the cabinets, but doing this will likely alter the color of them, which is basically the same as painting,” she says. “You will also need to seal them (you can get a low-sheen option to reduce shine) so they are protected and cleanable.”
This post originally ran on Apartment Therapy. See it there: 3 Golden Rules for Refreshing Dated Oak Cabinets (No Paint Required)