
How To Make Dark Chocolate Snack Bites

I am one of those people who never travels more than five minutes from my house without packing some kind of snack. Just in case. I go through heavy rotations of granola bars, trail mix, and most recently, these dark chocolate bites. They’re the perfect little nosh to help me power through a train delay or restaurant wait list without turning into a hungry zombie.
Another Use for Your Ice Cube Tray
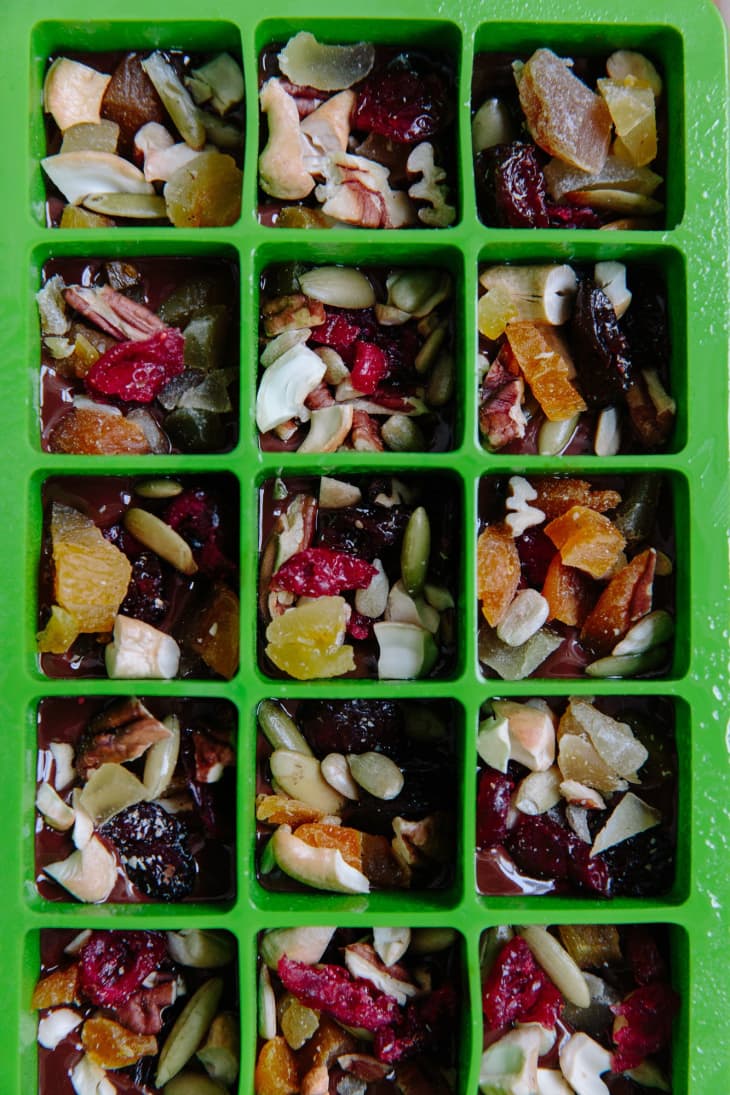
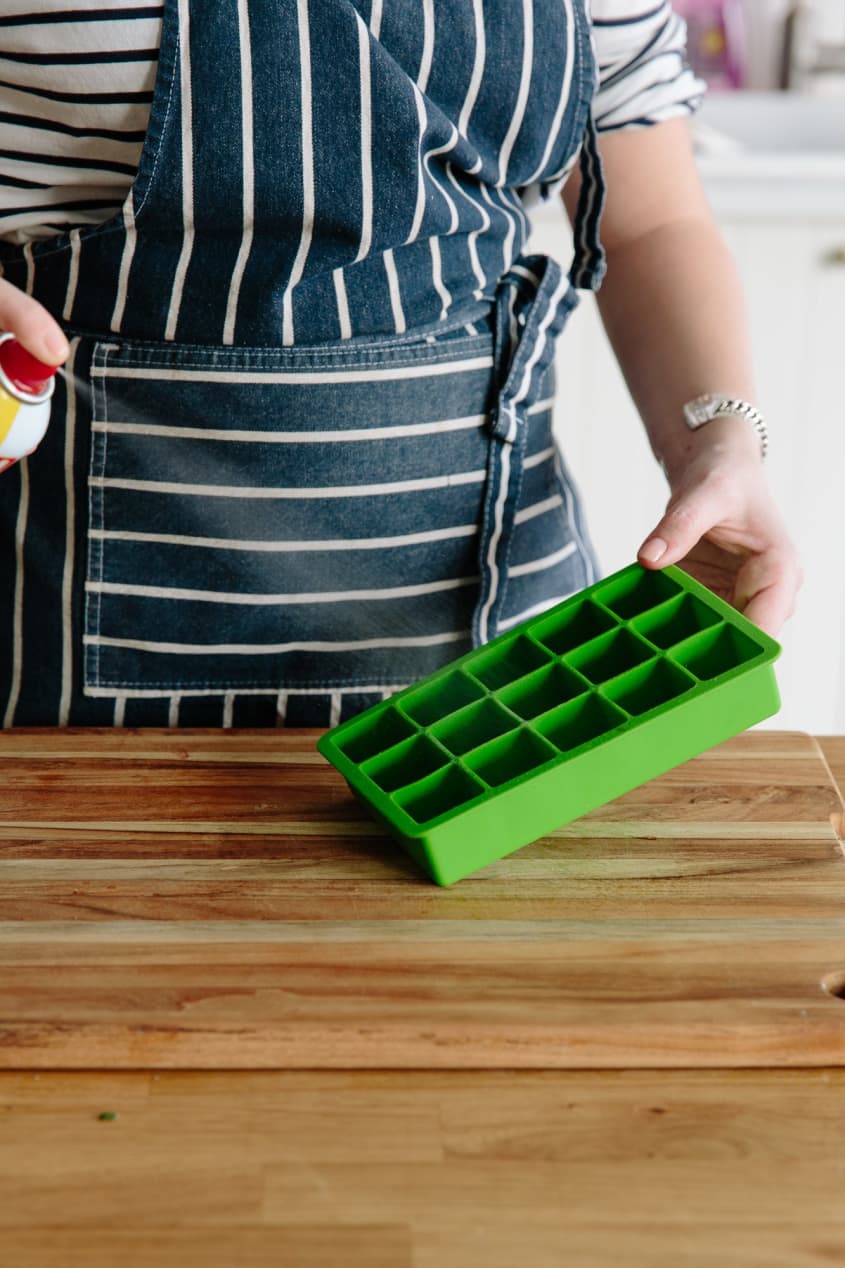
The ice cube tray has proven its worth as a multi-use kitchen tool again and again, and here’s one more: making chocolates. For this recipe, I prefer a silicon tray over a standard plastic tray because it makes it a little easier to get the chocolates out of the molds in one piece without breaking.
My Favorite Tray: Tovolo Perfect Cube Ice Trays from Amazon
You’ll need two trays for this recipe, and make sure they are both clean and completely dry before making your chocolates. Any flecks of water in the corners will make the chocolate set with a strange texture. Also, coat the trays with nonstick spray to make them easier to dislodge after they’ve set.
Treat Yourself to Good Chocolate
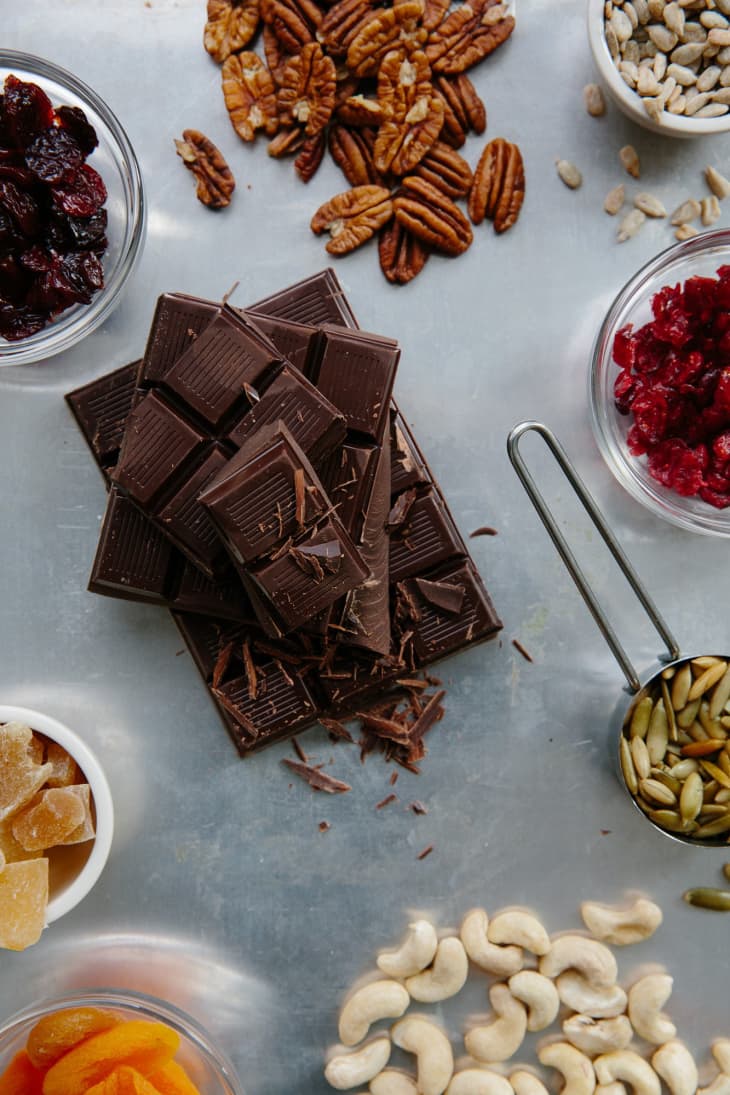
Go on, treat yourself to some good chocolate! Not only will your bites taste better, but good-quality chocolate usually melts and re-sets much better than chocolate chips or other lower-quality chocolate. This said, bites made with chocolate chips are better than no chocolate at all, so use what you have and enjoy eating! I use dark chocolate, but you could also make these bites with milk chocolate, white chocolate, or any percentage of dark chocolate that you like.
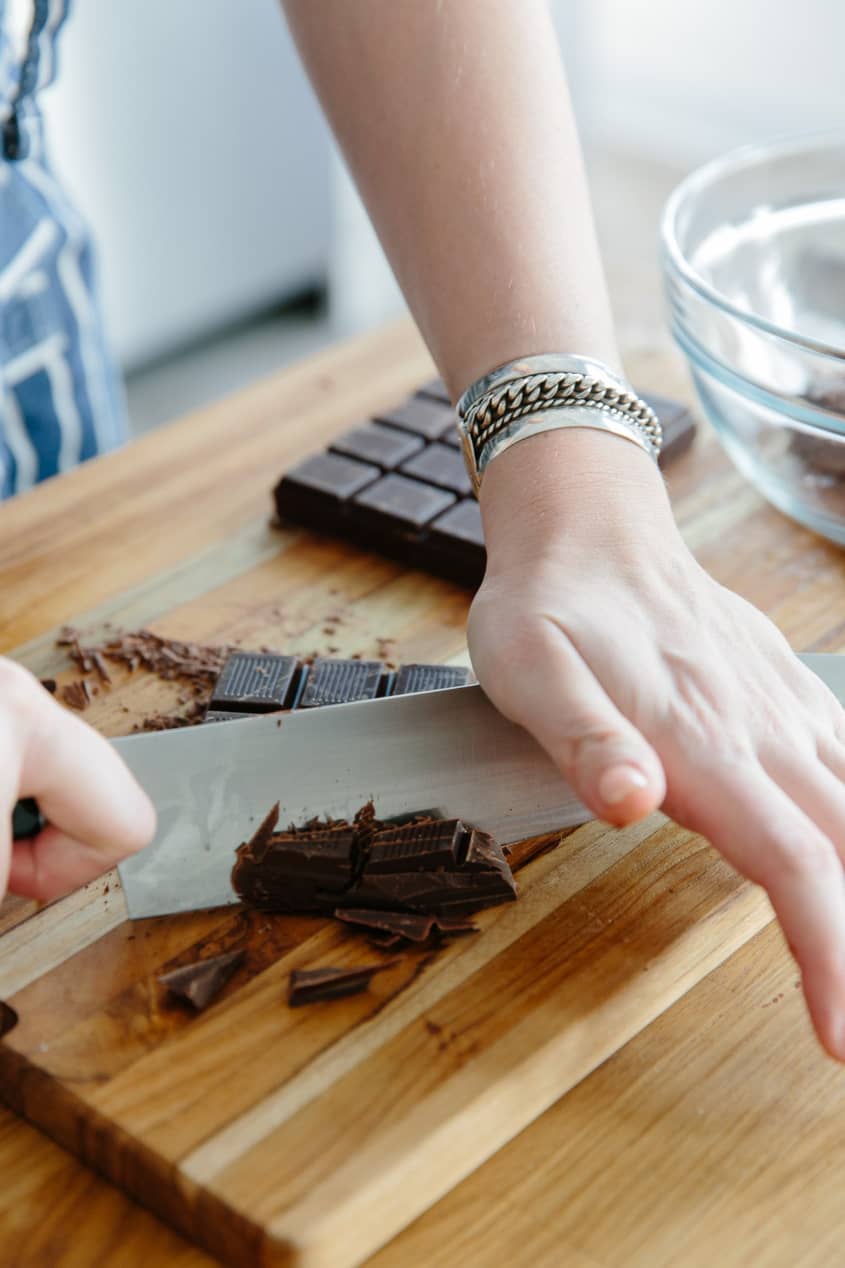
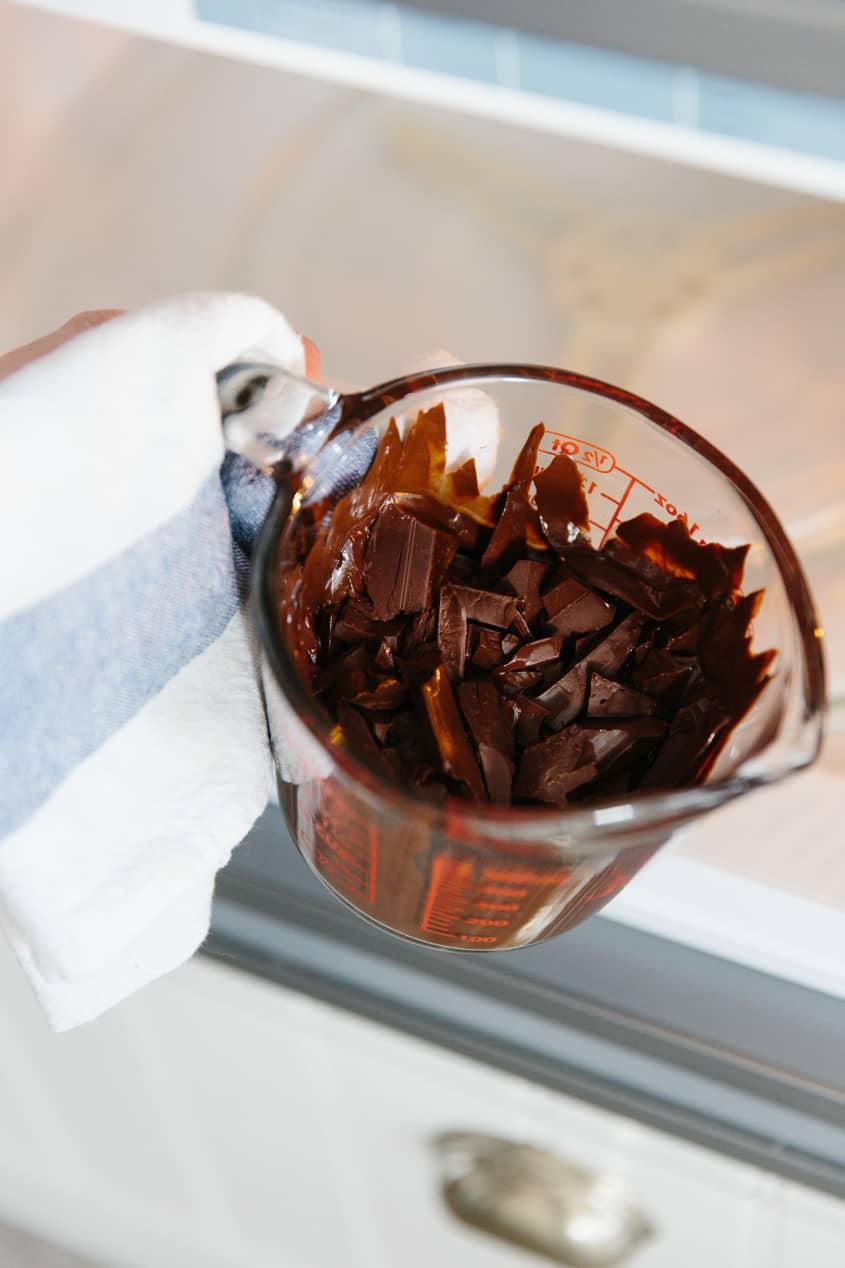
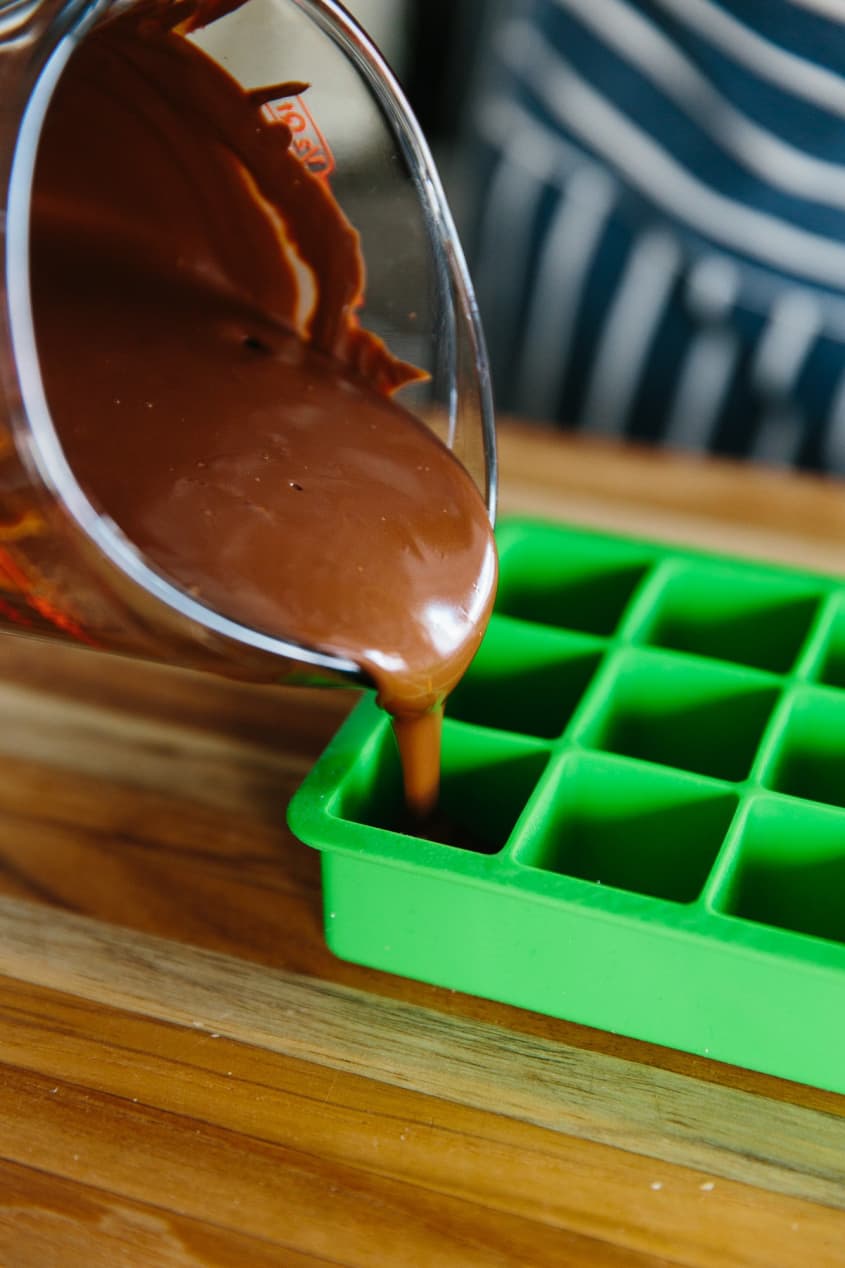
Chop up your chocolate fairly fine so it melts quickly and evenly (a serrated knife makes this job surprisingly easy). Since I’m not making these bites for anything except my own enjoyment, I just melt the chocolate in the microwave at half-power in 30-second bursts, and I melt it in a measuring cup so that the chocolate is easy to pour into the molds. If you’d prefer, you can also temper your chocolate to give the bites a glossier, more professional look.
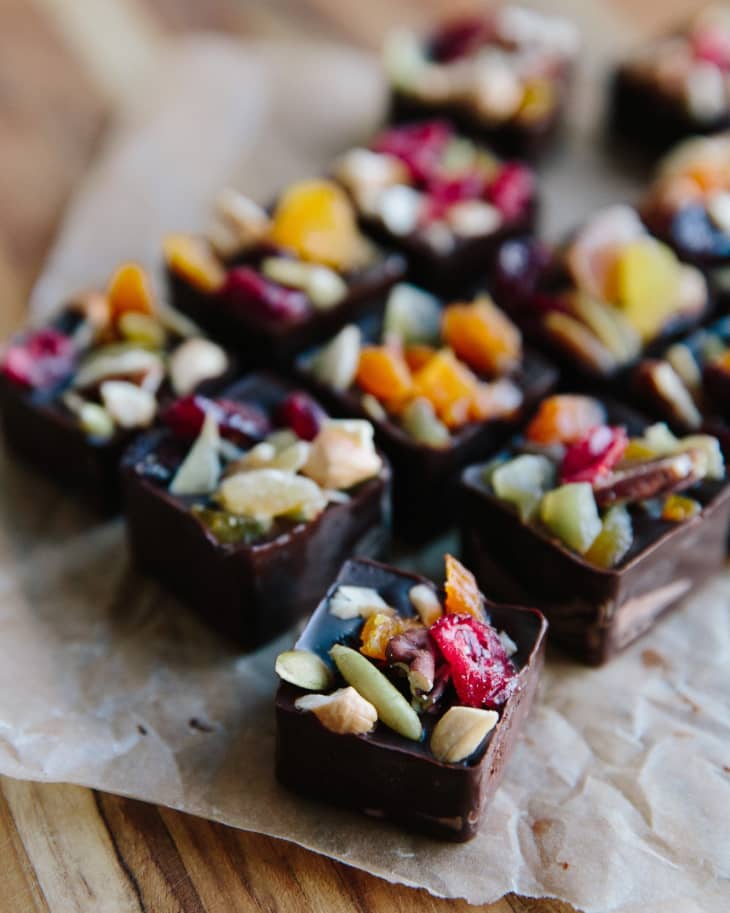
Topping Your Bites
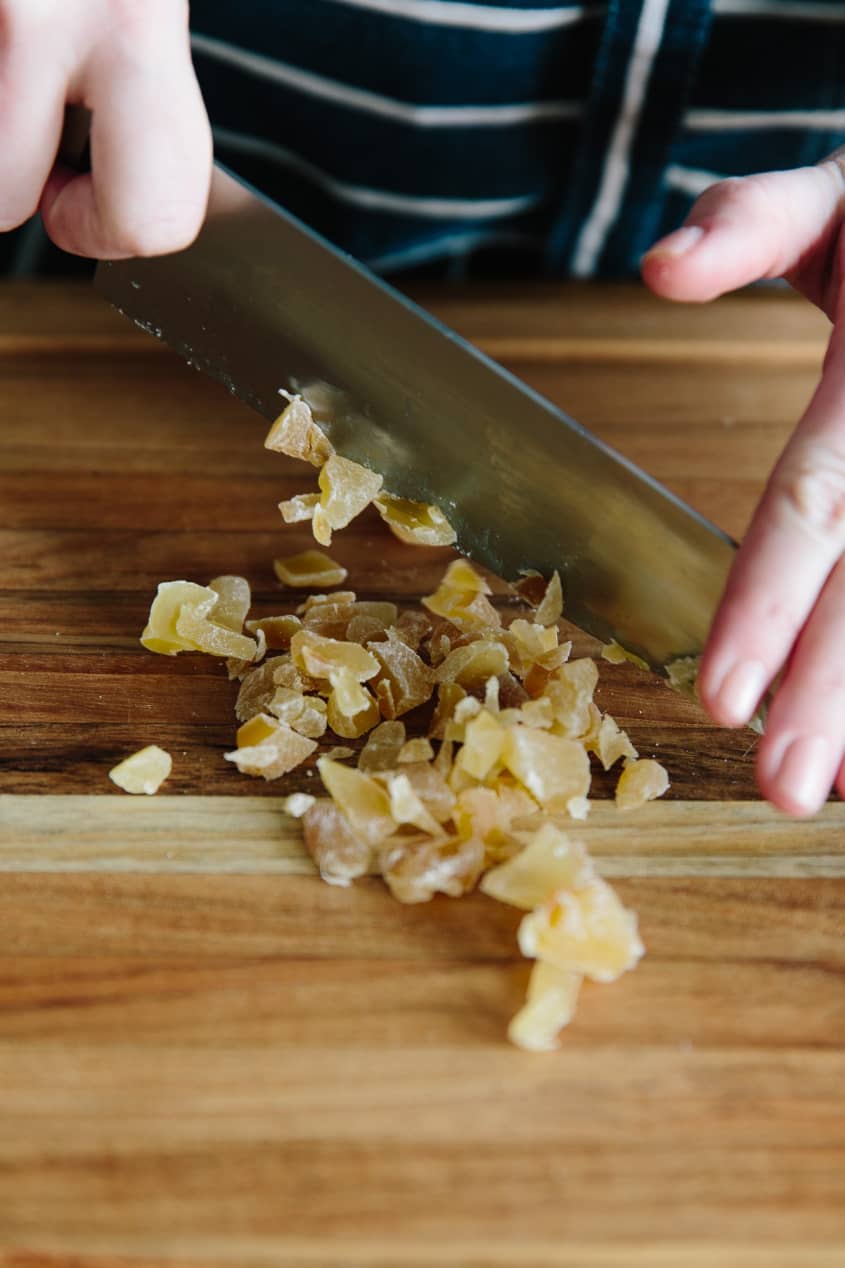
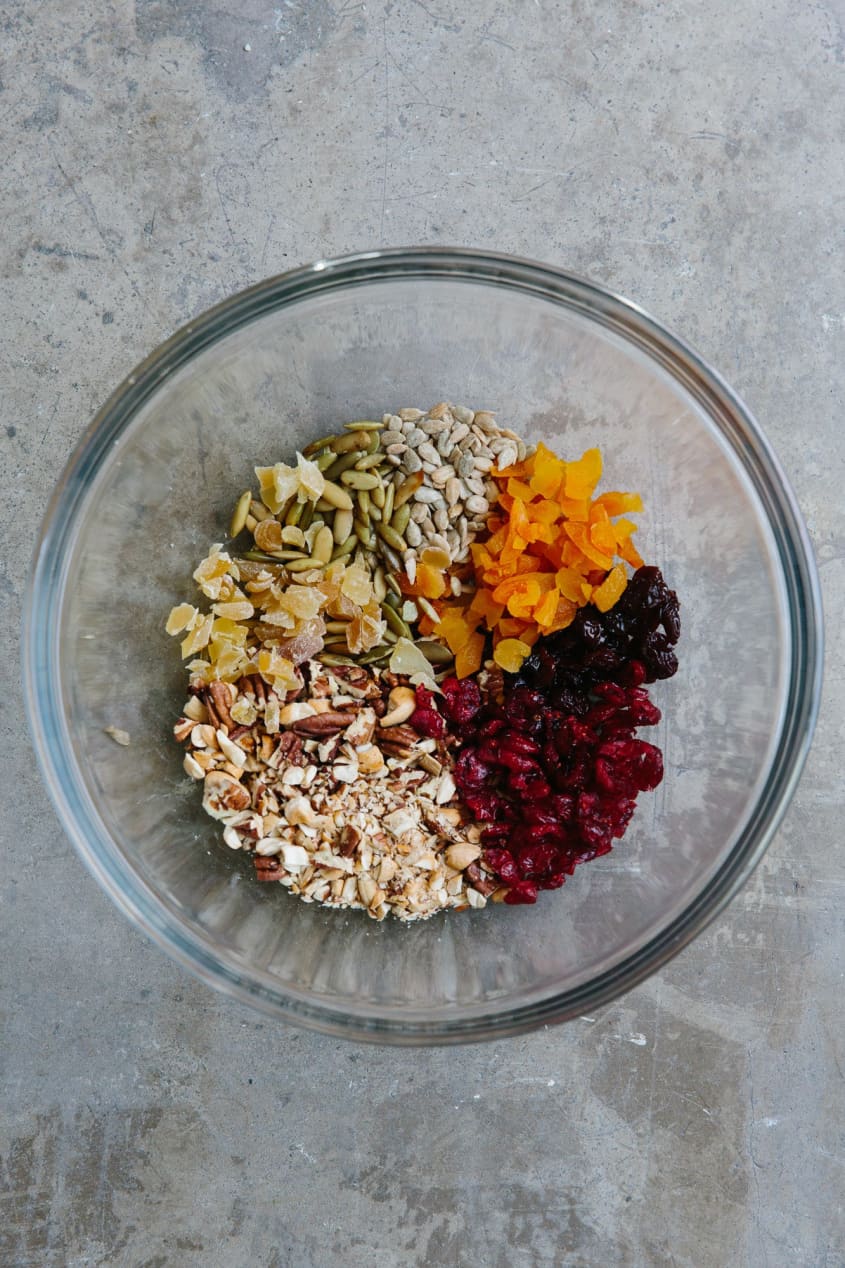
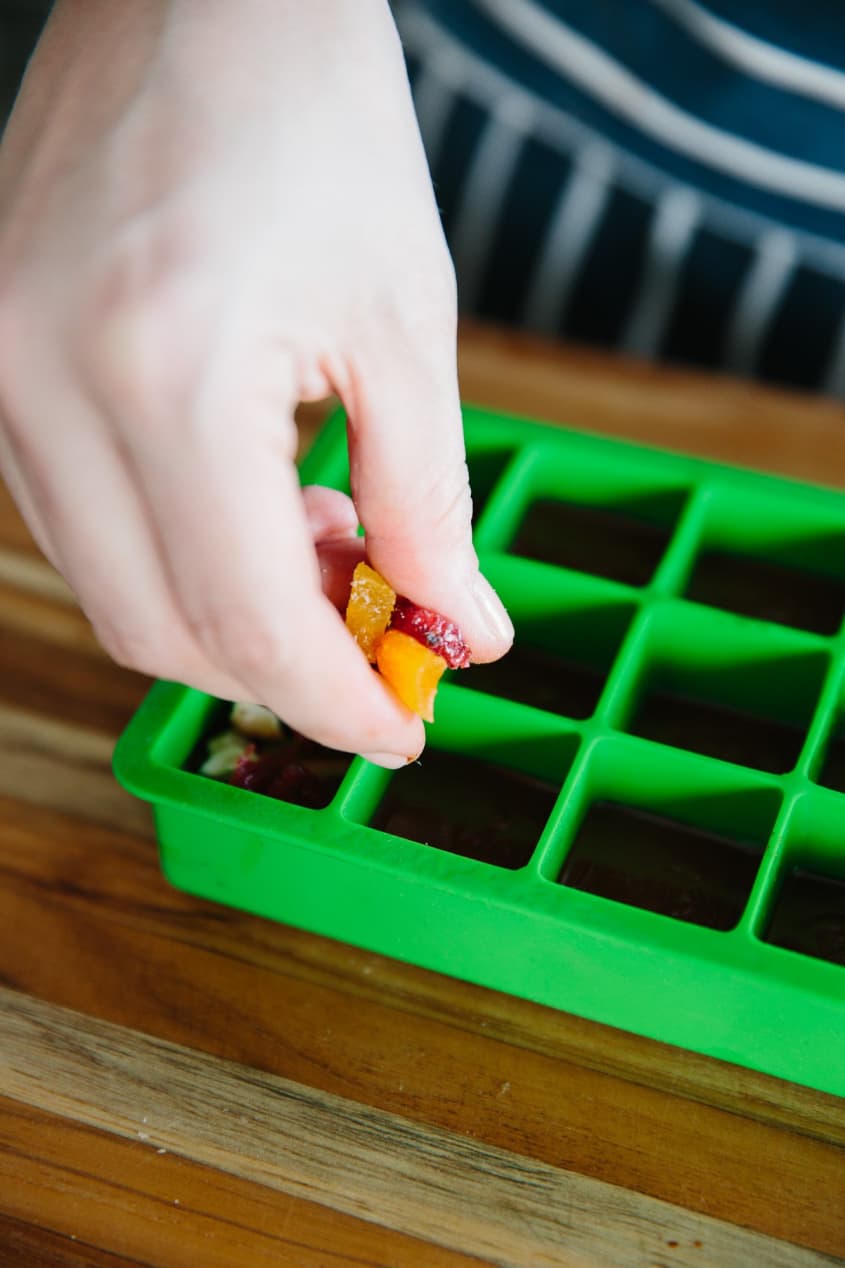
Here’s where you can really go wild. Top off these bites with chopped nuts, dried fruit, candied ginger, coconut flakes, or anything else that sounds appealing to you. Just avoid any fresh ingredients or ingredients that have a lot of moisture (like fresh berries or pomegranate seeds) since these will decrease the shelf-life of your chocolates and give the chocolate a grainy texture.
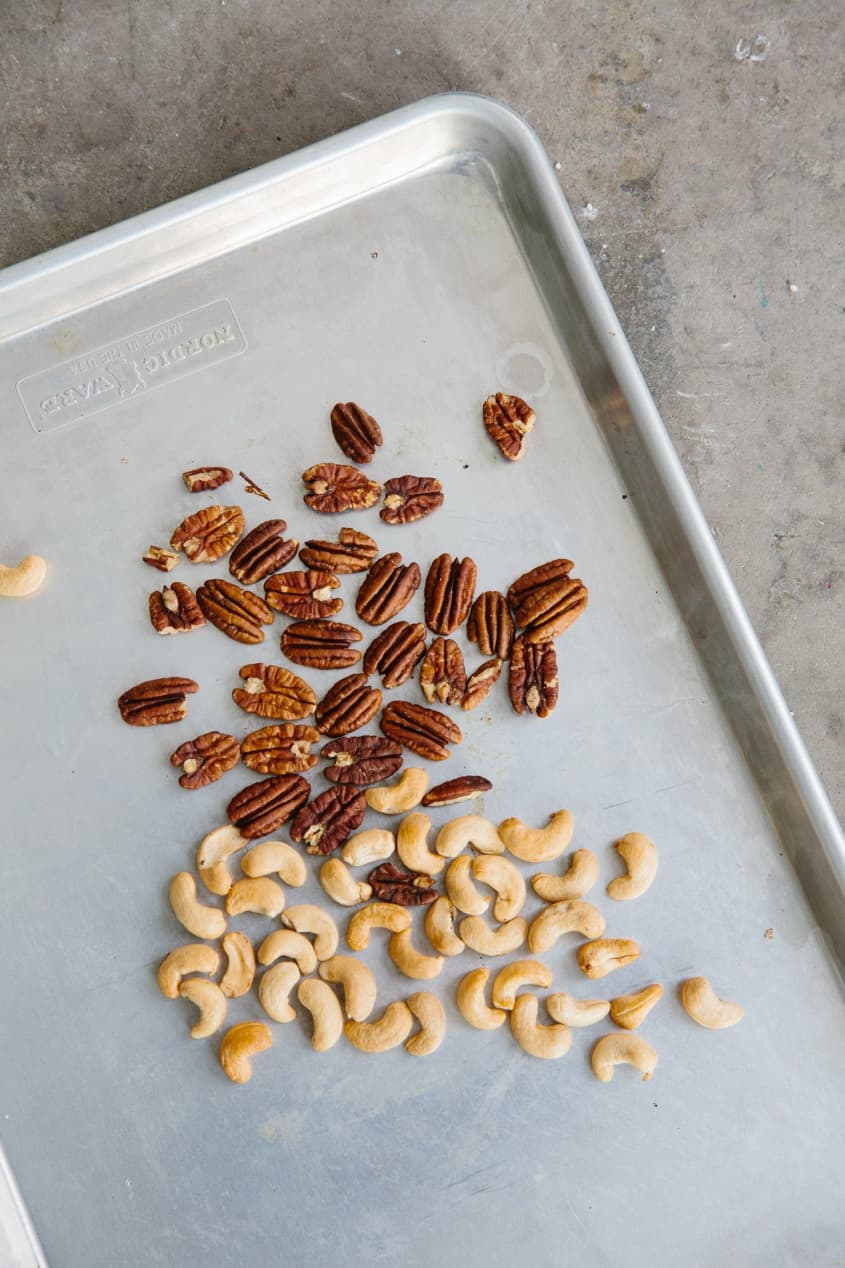
If you’re using nuts or seeds, I recommend toasting them beforehand. It’s not strictly necessary, but it gives them a deeper flavor and a nice crunch.
Finishing and Storing Your Bites
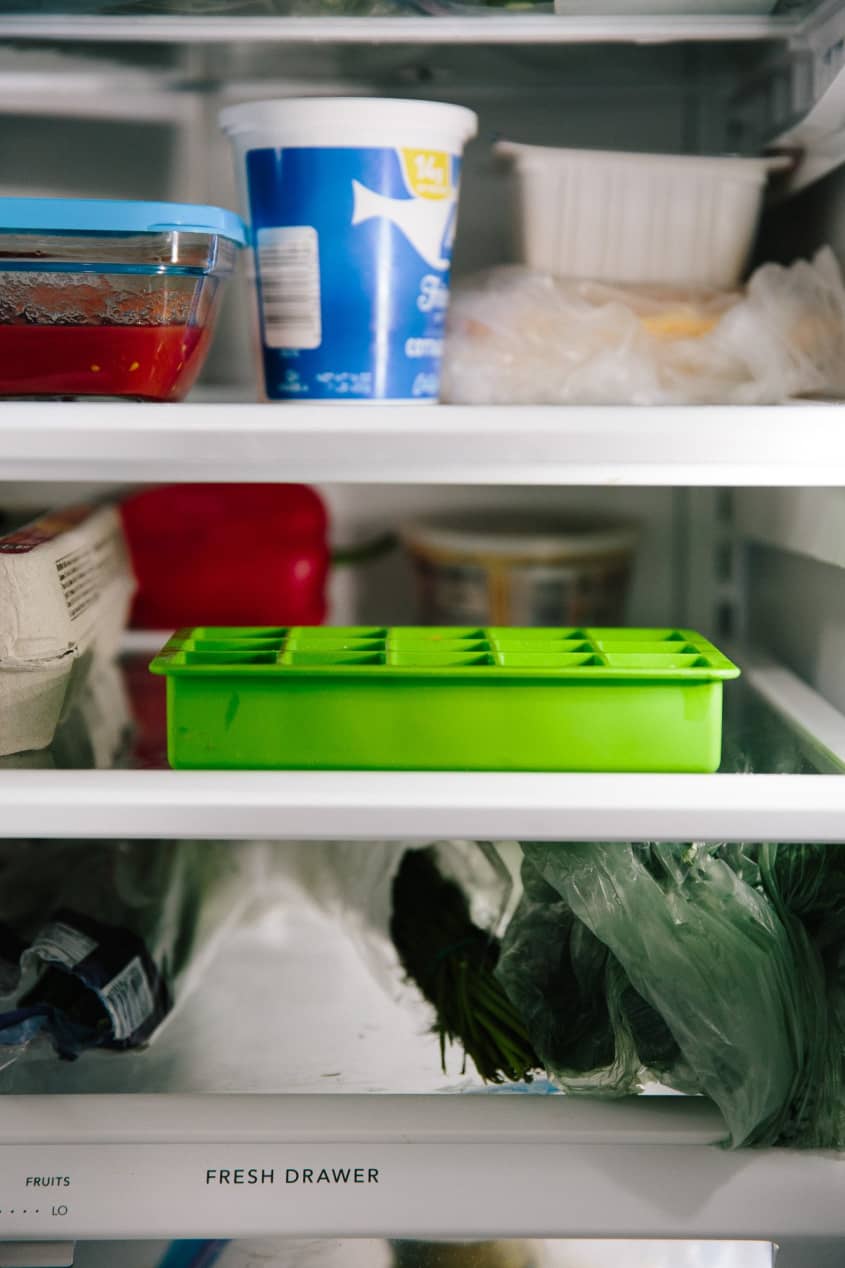
Let the chocolate set completely before you try to remove them from the trays. This can take a few hours at room temperature, or you can speed things up by putting the trays in the fridge.
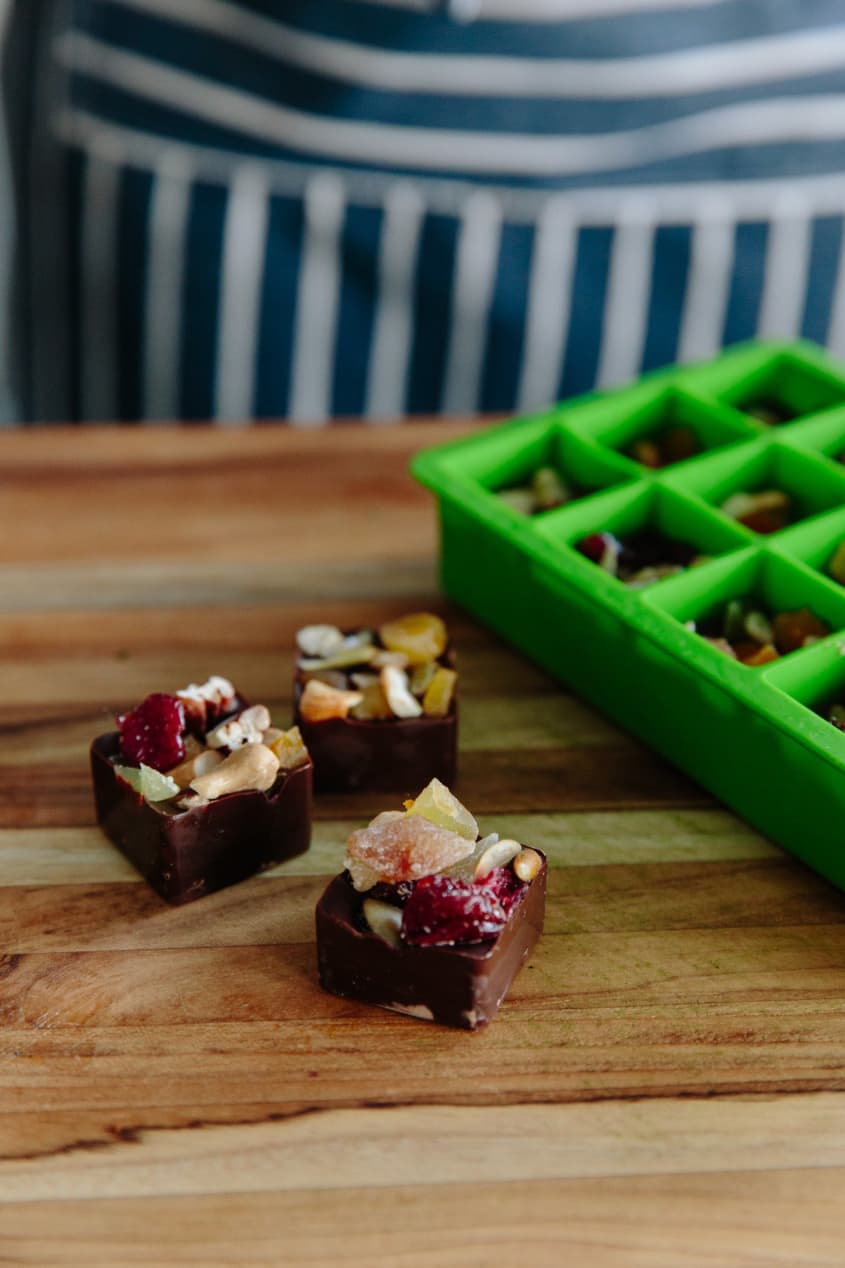
Be careful when removing the bites, especially if you’re using a plastic tray. Thinner bites will be a bit fragile and can break as you un-mold them.
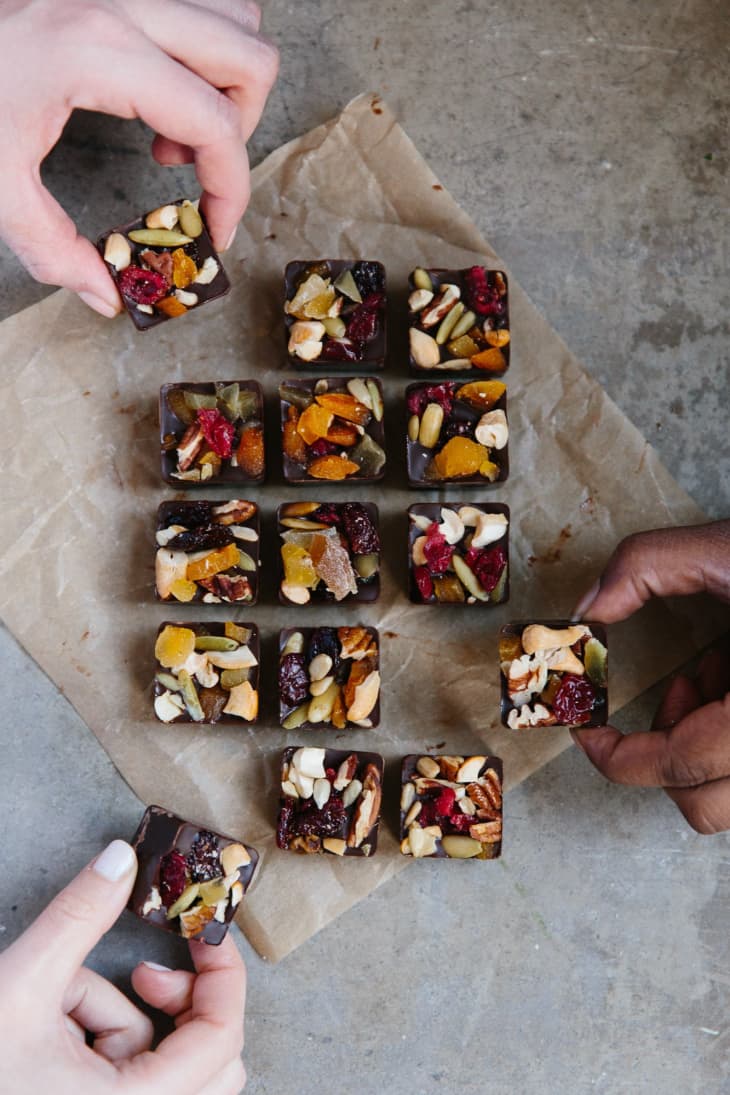
Store the bites in an airtight container at room temperature, or stash them in the fridge if your kitchen is warm and the chocolate is getting soft. They will last for weeks — I often keep a few in a small container in my backpack and carry them around until they’re gone. If your bites develop spots of white on the sides, this is just chocolate bloom, and they’re still fine to eat.

How To Make Dark Chocolate Snack Bites
Makes 30 pieces
Nutritional Info
Ingredients
- 10 to 12 ounces
good-quality dark chocolate
Choose a few of the following:
A few kinds of nuts, like almonds, peanuts, pistachios, or cashews
A few kinds of dried fruit, like cranberries, goji berries, cherries, blueberries, or apricots
Small seeds, like sunflower seeds, pumpkin seeds, or millet
Candied ginger, orange peel, or lemon peel
Coconut flakes
Equipment
- 2
silicone ice cube trays (each with 15 small cube-shaped wells)
Baking sheet, for toasting the nuts
Mixing bowl
Chef's knife or serrated knife, for chopping the chocolate
Microwave-safe measuring cup or a double-boiler
Rubber spatula
Spoon
Instructions
Prepare the ice cube trays: Make sure your ice cube tray is clean and completely dry. If you just washed it, let it air-dry for a few hours before making your chocolate bites until all moisture has evaporated. Coat each of the wells lightly with nonstick baking spray.
Toast the nuts: If you're using nuts, toast the nuts on a baking sheet for 5 to 10 minutes at 350°F, until slightly darkened and fragrant. Cool completely before using.
Chop large ingredients: Roughly chop larger ingredients like nuts, large dried fruits, and long strips of candied ginger until they're pea-sized or smaller.
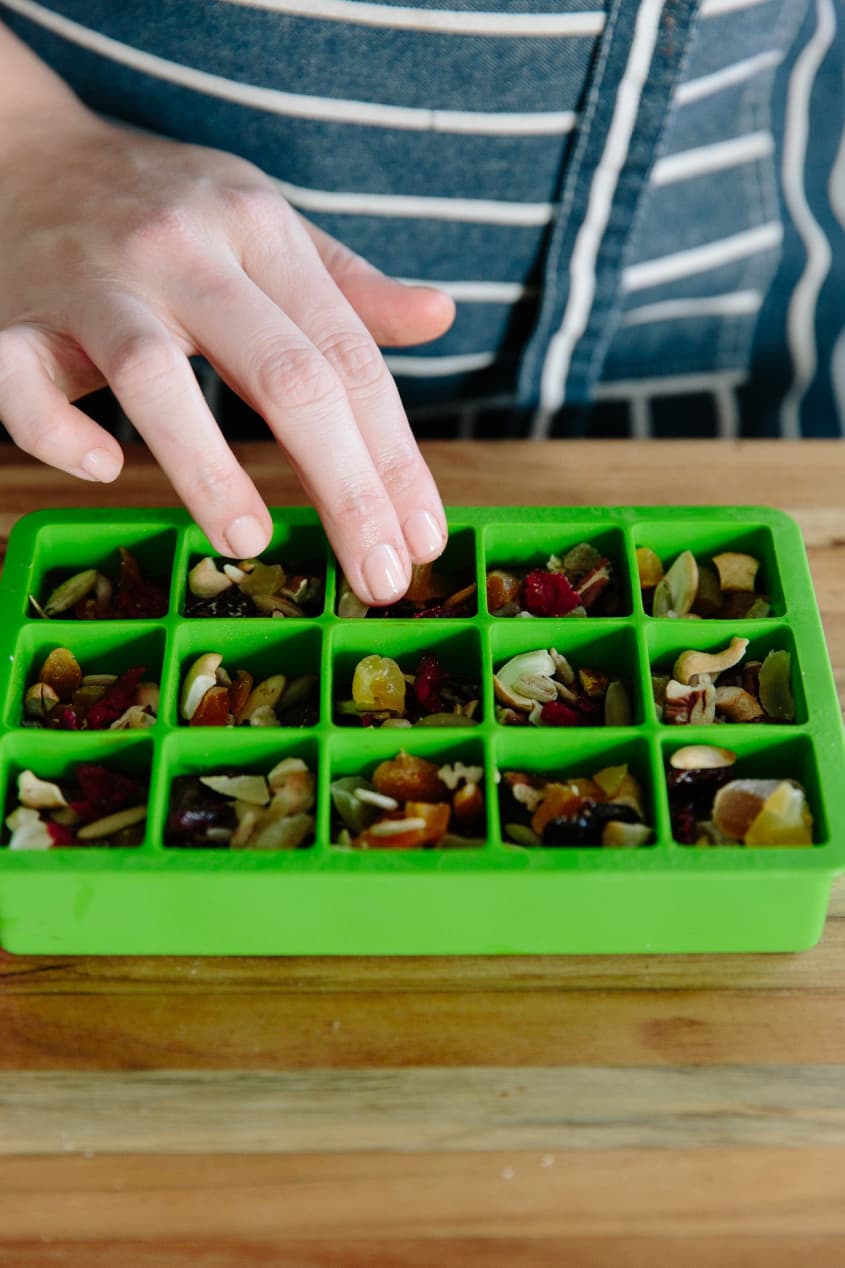
Place the ingredients in separate bowls: Place all the dried fruit in one bowl, the chopped nuts in another bowl, and so on. This makes them easier to sprinkle evenly over the chocolate squares.
Chop the chocolate: Chop the chocolate into small pieces no bigger than a chocolate chip. If you're using chocolate chips or discs, you don't need to chop the chocolate.
Melt the chocolate: Transfer the chocolate to a microwave-safe measuring cup. Microwave at half-power for 1 minute, then stir. Microwave another 20 seconds at half-power and stir. Continue microwaving at half-power and stirring every 20 seconds until only a few small lumps remain. Stir until the remaining lumps have melted. (Alternatively, melt the chocolate using the double-boiler method, or you can temper it.)
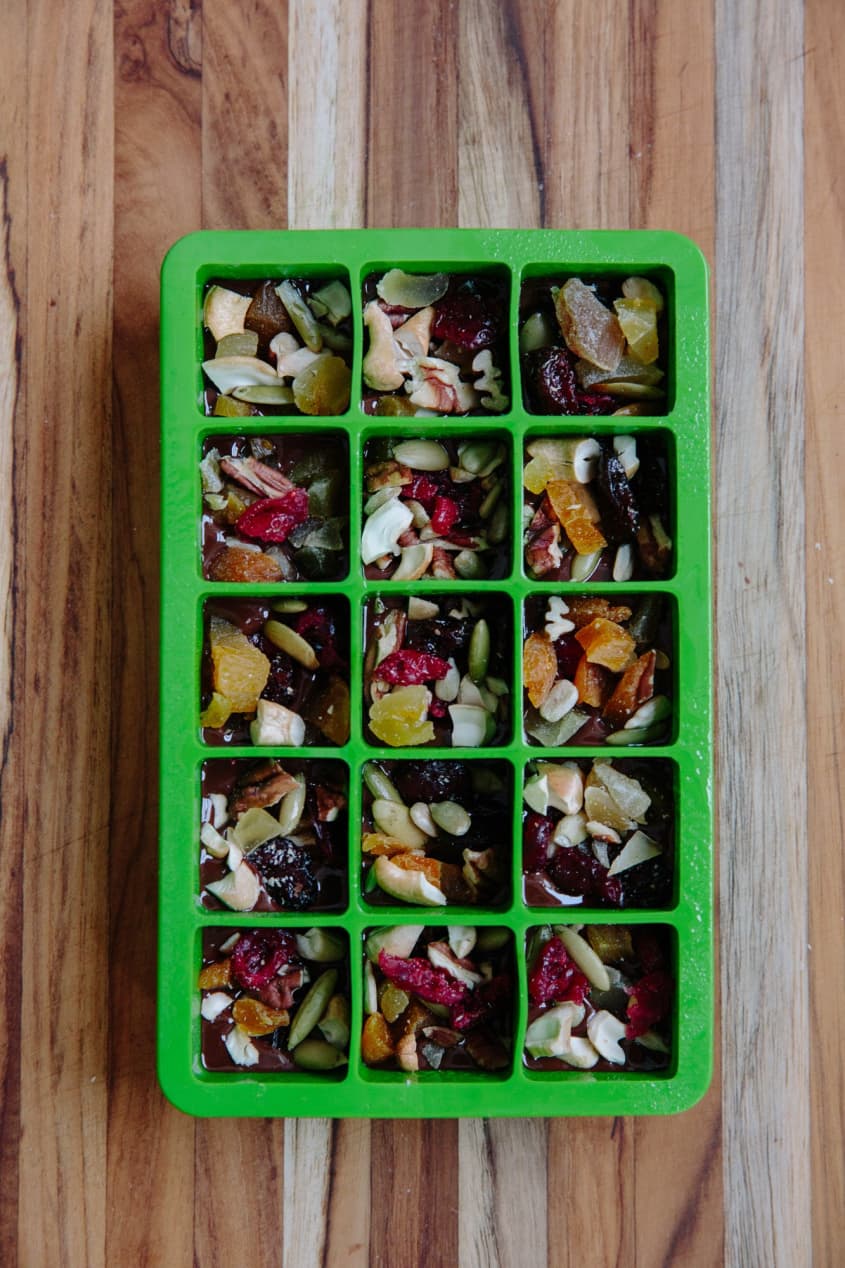
Divide the chocolate between all the wells of the ice cube tray: Fill the wells with just 1/4- to 1/2-inch of chocolate — the equivalent of a tablespoon or two.
Sprinkle the toppings over the chocolate: Sprinkle a little of each topping over the chocolate. When finished, use your fingers or the back of a spoon to very gently press the toppings into the chocolate to make sure they stick. If you have any leftover melted chocolate, you can drizzle it over the tops of the bites.
Let the chocolate set: The chocolates will set in a few hours at room temperature, or you can place the trays in the fridge to help the chocolate set more quickly.
Store the bites: Carefully pop the bites out of the ice cube tray (thinner bites might crack if pressed in the middle, so be gentle). Transfer the bites to an air-tight container. Store at room temperature for several weeks (or store in the fridge if your kitchen is very warm).