
I Tried 3 DIY Grout Cleaners — And One of Them Seriously Blew Me Away

The grout on my bathroom floor tile haunts me. It’s one of those projects I never really have the time or the initiative to tackle, but I hate how dirty it’s become. It’s beyond the maintenance stage and in need of a really good cleaning.
(Note: This post is technically about tiled bathroom floors but the methods would hold true for a tiled kitchen/dining room floor even a backsplash.)
Since I find myself at home now a lot more than before, I decided it was time to tackle some long-procrastinated cleaning projects. To start: weeding out my coat closet, getting myself to Laundry Hamper Zero, and cleaning the damn grout. Let’s call them my quaran-cleaning projects.
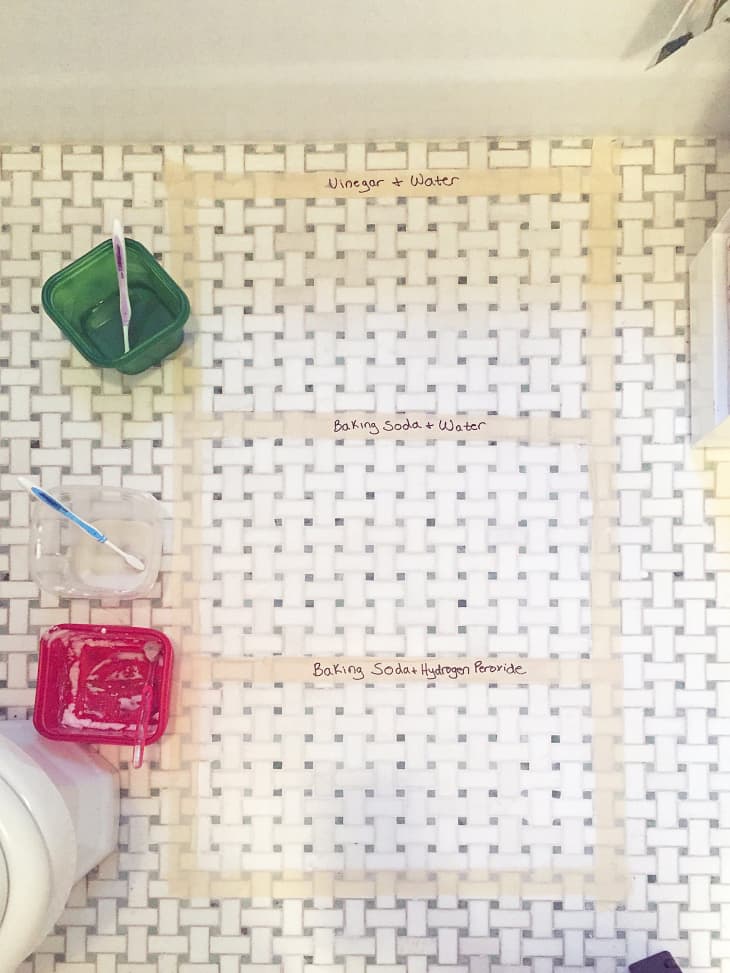
I asked Apartment Therapy’s Lifestyle Director and cleaning expert Taryn Williford for her best DIY grout cleaning suggestions. She suggested a combo of hydrogen peroxide and baking soda, water and baking soda, or warm water and vinegar. Since I had an abundance of time on my hands this weekend, I decided to approach it like a science experiment. I taped off three squares, and got to work. I can’t believe I’m displaying closeups of my grimy grout on the internet, but here we go.

I mixed everything up in a reusable container from the kitchen, and dug up three extra dentist office toothbrushes to do the dirty work.
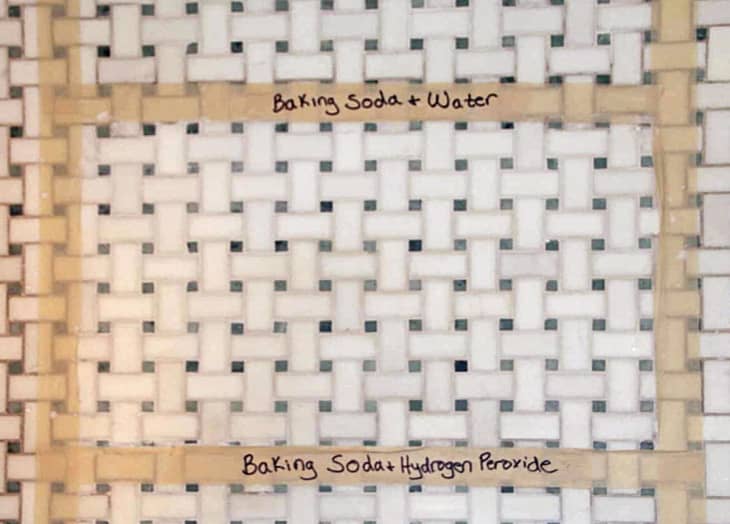
Method 1: Baking Soda and Water
I started with the middle square: baking soda and water. I mixed equal parts of both into a container to form a paste (it was a little thinner than I was expecting, so I added some extra baking soda). I was surprised how quickly this worked! I tried two techniques: the first was to let the paste sit for a bit and then scrub. The second was to just dip the brush in the paste and scrub directly on the grout. The second technique was actually more effective. Overall, the grout was noticeably cleaner, but still a bit discolored. At this point I started to wonder if a re-grouting project was in my DIY future.
Final grade: 7/10: This one gets points for simplicity (just one ingredient I almost always have stocked), as well as ease and effectiveness. However, the job isn’t 100% done and the grout is still pale gray.
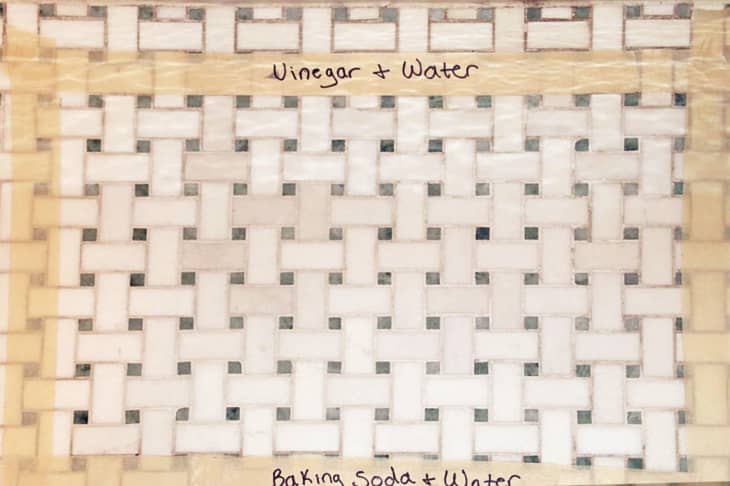
Method 2: Vinegar and Water
Vinegar can help clean so many things, so I had high hopes for this one. I mixed one part vinegar with one part warm water, and got to work. And then I worked. And worked. And nothing really happened. Again, I tried a mix of scrubbing and letting the mixture sit for a while, but it didn’t seam to make a difference. While the brush lifted visible/loose particles, making it marginally cleaner, it didn’t feel like a deep clean of the grout at all. Bummer.
Final grade: 3/10: I always have white vinegar on hand, so I’ll throw this one a few points. But it overall was disappointing (and a waste of an hour on the floor scrubbing which just made me … mad).
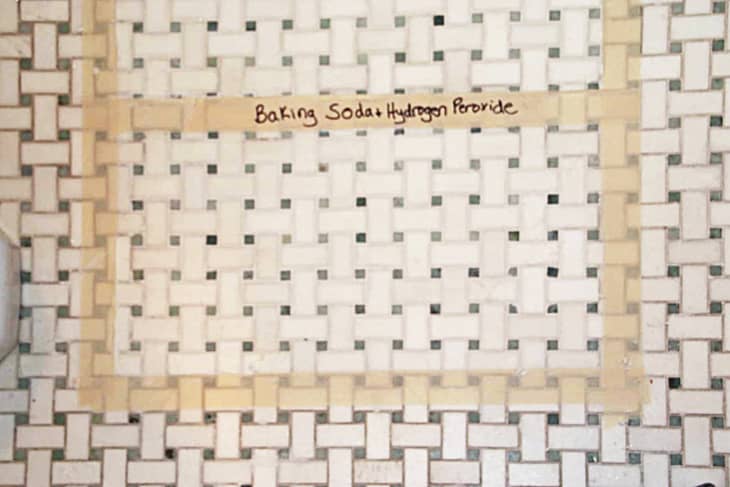
Method 3: Baking Soda and Hydrogen Peroxide
Hydrogen peroxide is one ingredient I don’t keep on hand, so I had to wait until my weekly run to the store to pick it up. Mixing this one up really felt like a middle school science throwback: the peroxide (one part) and the baking soda (two parts) made for a satisfying sizzle. And as I mixed it up, the paste turned foamy — like a watery shaving cream.
As I first started scrubbing, the results looked very similar to baking soda and water. But after a few minutes it started brightening — and brightening. This one required perhaps the most elbow grease (the watery and pasty solutions before were easier to spread out). But it was worth it. Over the hour I scrubbed, it kept looking better than I could have imagined.
Final grade: 9/10. This was by far my favorite — it’s been two days and I’m still delighted. Who knew grout could be so satisfying? I knocked off one point because I had to find hydrogen peroxide.
Grout Learnings
I think part of why I was putting off cleaning the grout was because I was worried I wouldn’t be able to clean it, and that my cleaning procrastination was going to end up costing me money and time in re-grouting all those little tiles. But finally facing the project head on was ultimately such a relief — I keep staring at that little square (I’ve since removed the tape) and feeling so relieved that I found a solution that works.
That said, once I finished, I did try to clean the whole bathroom with the winning solution. But after four hours of painstakingly scrubbing those three squares, I just didn’t have the arm stamina to keep going. So with that in mind, I really don’t think a toothbrush is the best option here. While it’s precise, it’s also incredibly slow and laborious. When things settle down, I’m going to find myself a proper scrub brush (OXO makes one for this very purpose), and take on the rest.
This post originally ran on Apartment Therapy. See it there: I Tried 3 DIY Grout Cleaners—And One of Them Blew Me Away