
We Tried 5 Methods for Cleaning Tarnished Silverware — And Found 2 Ridiculously Effective Winners
This year’s holiday season is shaping up to be even more meaningful than ever — especially after last year, when many of us had to forgo the usual Thanksgiving gathering and give thanks around a computer screen in a virtual meeting. If you have nice dishes and silverware tucked away for a special occasion, this is definitely the year to pull them out!
With prepping for this year’s festivities in mind, I started wondering about the most efficient way to remove tarnish from silver. Maybe you picked up a lovely set of silver-plated utensils at a thrift store or estate sale? Or perhaps you were given your Great Aunt’s set that has lingered in the back of a closet for far too long? No matter how you came about owning your silver, a tarnished fork is not exactly what your guests want to eat with come dinnertime. Annoyingly, removing the tarnish can be a tedious pain when you don’t have the right cleaning method.
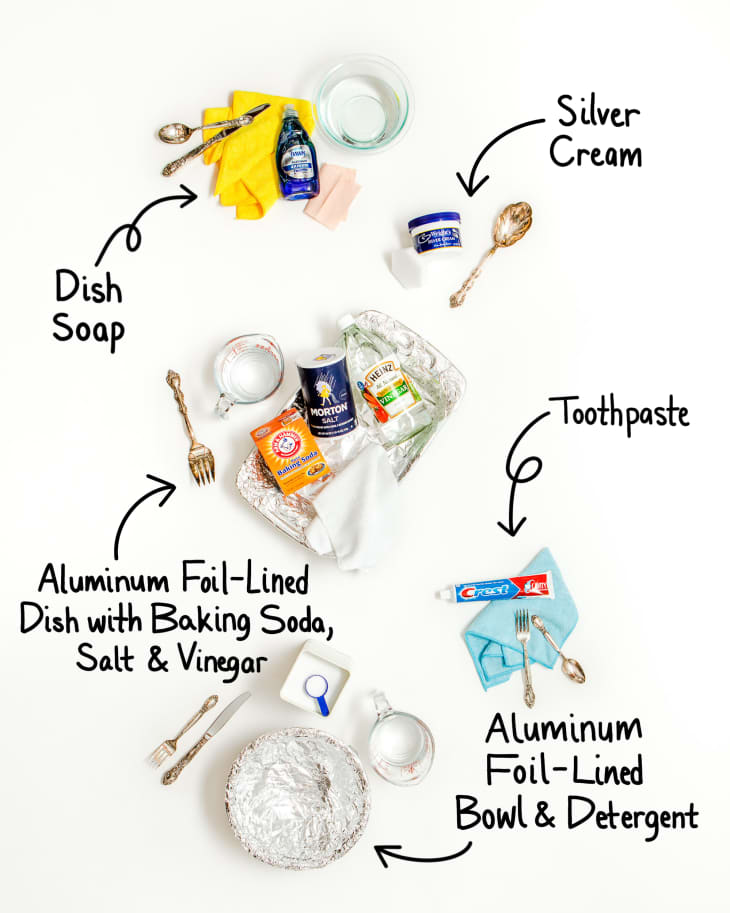
So, what to do? I began researching the most popular methods to clean tarnish from silverware, including a few ways that make use of common household items rather than special cleansers. I chose five methods to put to the test to see which ones make the job quick and effortlessly easy. Let’s take a look!
How I Tested the Methods for Cleaning Tarnished Silverware
Truth be told, I first had to tarnish my silver-plated eating utensils! See, they’re kept in a felt-lined chest, which does an absolutely amazing job of keeping the tarnish at bay. I took five spoons, five forks, and five knives and placed them in a large zip-top bag with 10 peeled and roughly chopped hard-boiled eggs. The sulfur from the eggs creates silver sulfide, which tarnishes the silver within minutes — especially when egg whites touch the silver. I zipped up the bag, and let it sit overnight. (If you ever need to tarnish silver for any reason at all, this is the way to go. My silverware was downright dark with tarnish the next day.)
After washing and rinsing the silverware, I let the pieces air dry while I prepared my testing ingredients. Each cleaning process was used on one fork, one spoon, and one knife, so that I could judge if the method was effective no matter the shape of the utensil.
The ratings: The goal wasn’t just to find a method that cleans away tarnish — it also had to be quick with minimal effort. After all, when you have a serving set for 12, you don’t want to have to spend a ton of time just to get one fork clean. I evaluated each method according to how quickly and evenly it removed the tarnish, and whether or not the method involved a lot of physical effort either in rubbing or prolonged preparation. The more efficient the method, the higher it ranked on a scale of one to five.
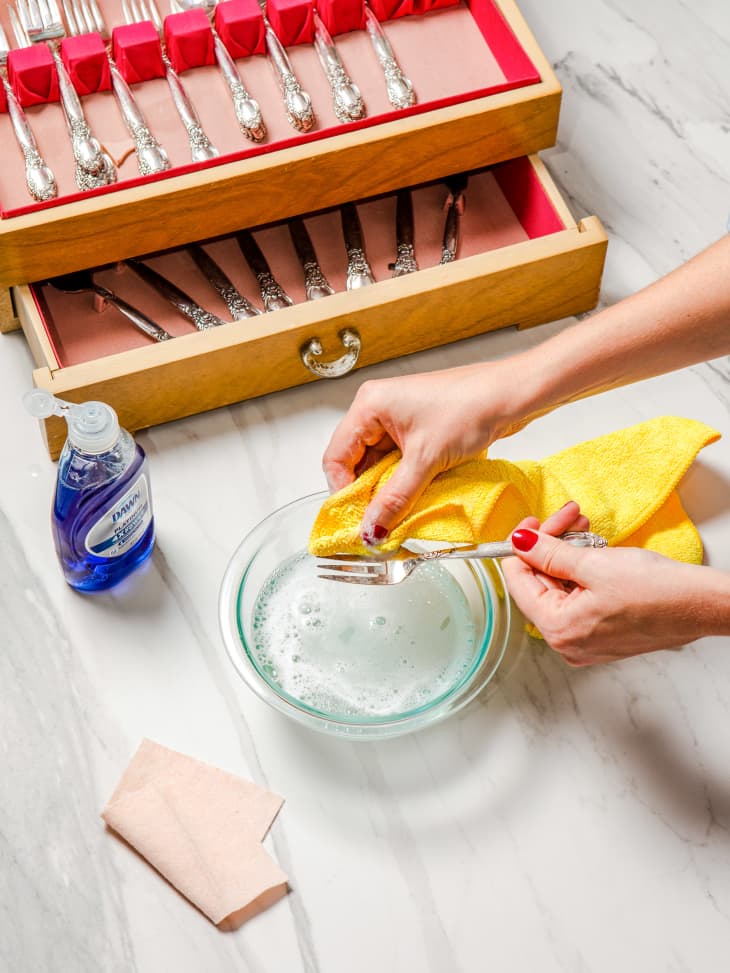
Tarnished Silver Cleaning Method: Dish Soap & Water
- Total time: 1 minute
- Rating: 1/5
The method: I rubbed Dawn dish soap on each utensil until fully coated, and wet a microfiber cloth with warm water. I rubbed each utensil with the wet cloth for one minute. I also pulled out a silver buffing cloth, too.
How it went: Although Dawn dish soap has come through for me as a powerful cleaner in a variety of applications, including nasty grill grates, greasy camping dishes, and dinner plates crusted with old food, it didn’t work as a tarnish remover. All of the utensils looked basically the same as they had before. A small amount of tarnish came away on the cloth, but not enough to be noticeable. (I didn’t even get enough results to warrant using the buffing cloth!)
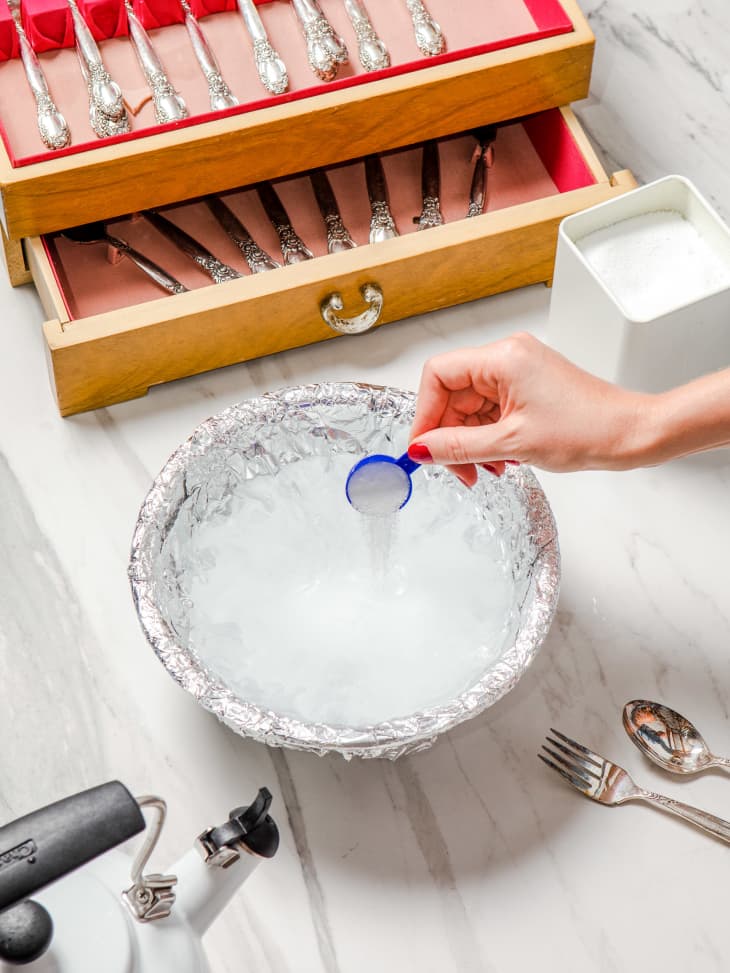
Tarnished Silver Cleaning Method: Aluminum Foil-Lined Bowl & Laundry Detergent
- Total time: 1 minute
- Rating: 2/5
The method: I lined a bowl with aluminum foil (shiny-side up) and poured in a little bit of detergent and boiling water. The idea is that the aluminum is a more active metal than silver, so it’s supposed to react with the tarnish to magically (read: chemically!) convert the tarnish back to silver! I added the utensils into the bowl and let the pieces sit for at least five minutes before buffing. I also tried a paste of OxiClean and warm water.
How it went: For the most part, the tarnish didn’t budge. As with the dish soap, a tiny bit of tarnish came off, but not enough to be of any use. Not only that, but the OxiClean also had my gloved hands feeling super slippery.
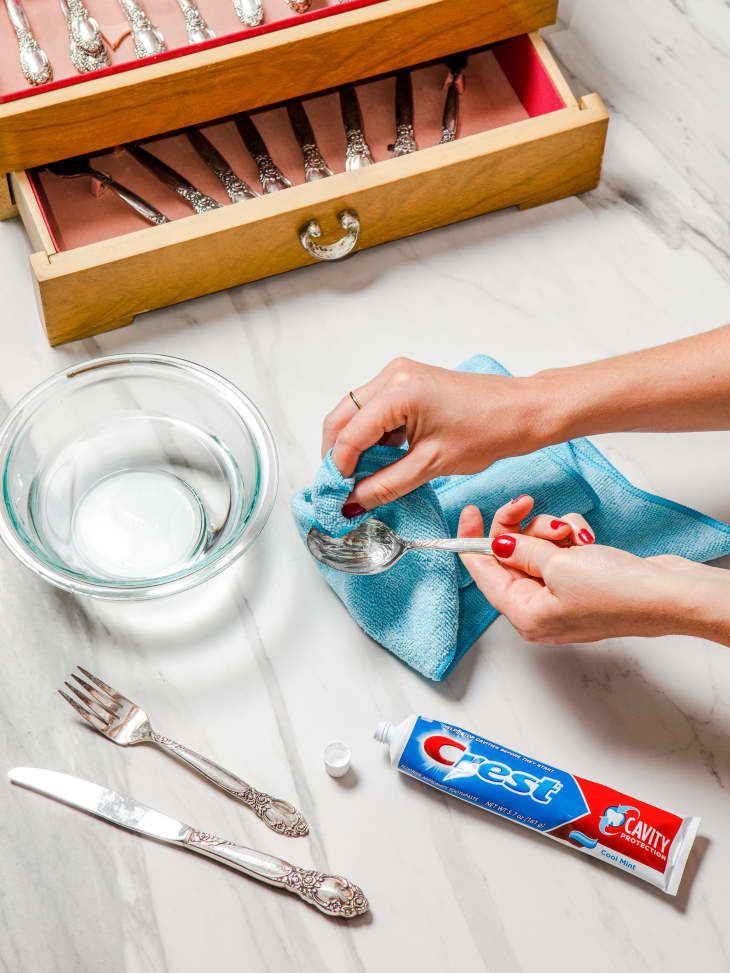
Tarnished Silver Cleaning Method: Toothpaste
- Total time: 1 minute
- Rating: 3.5/5
The method: I rubbed all the utensils in toothpaste (the all-white kind; no gel) until they were fully coated and then buffed the toothpaste off with a microfiber cloth.
How it went: I initially had low expectations for this method, because my attempts at using common household cleaners hadn’t gone too well thus far. But, boy, was I wrong! I was blown away by the toothpaste! It did a great job melting off the tarnish — and smelled great in the process. But it’s a little sticky to use and, because my utensils were heavily tarnished, it did take some serious elbow grease to buff it all off. Toothpaste might not be a miracle cure, but it definitely works nicely in a pinch!
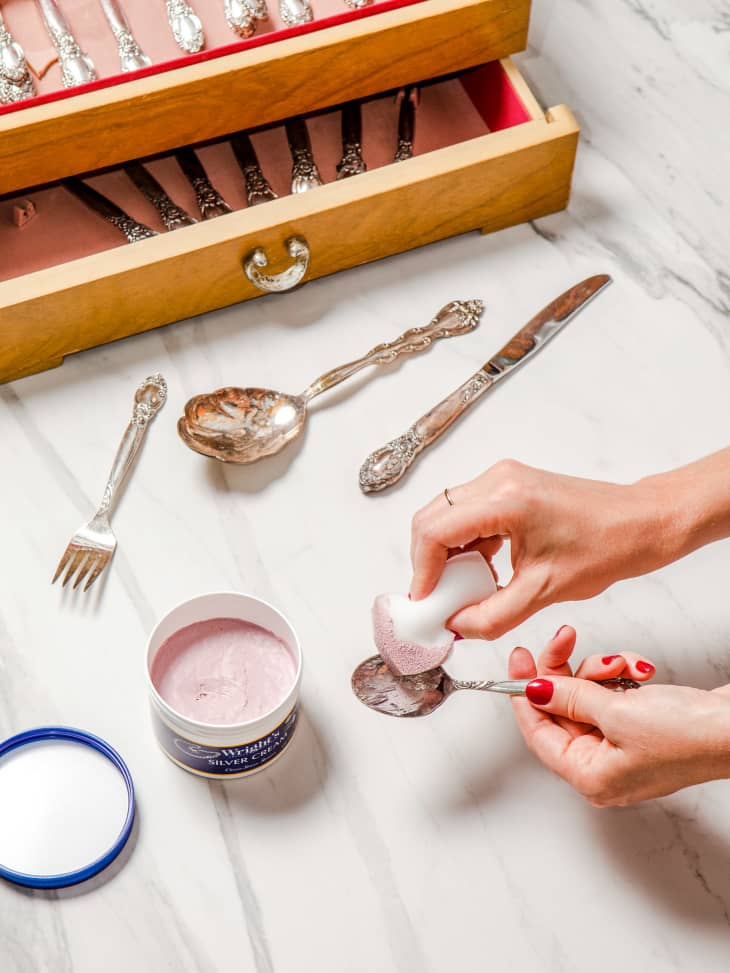
Tarnished Silver Cleaning Method: Silver Cream
- Total time: 1 minute
- Rating: 4.5/5
The method: I rubbed each utensil in Wright’s Silver Cream using the sponge that comes with the product. I coated the utensils in a thin layer of the cream. Then, I buffed it off with a microfiber cloth.
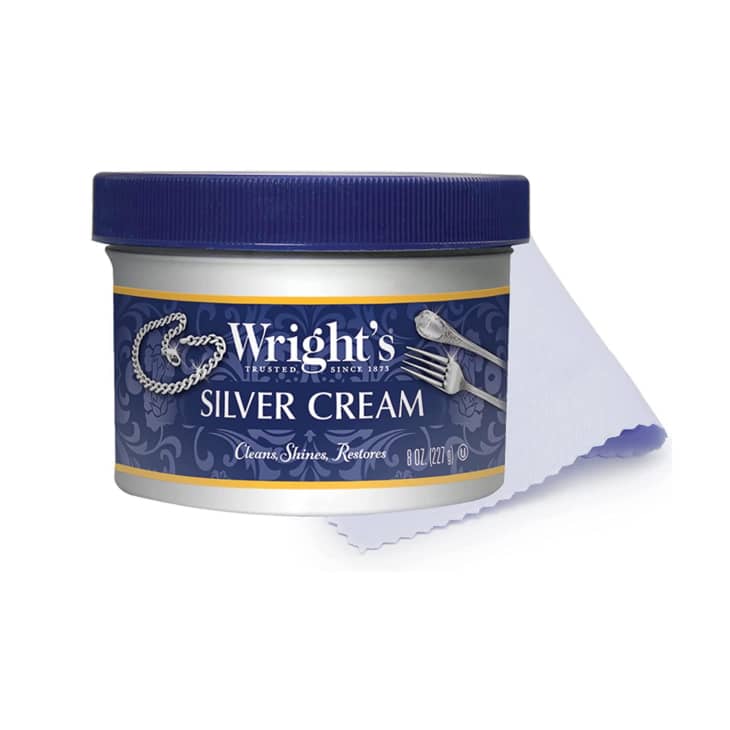
How it went: Turns out, cream made specifically for silver can’t be beat! Nothing melted the tarnish away faster than this popular paste. Even the darkest tarnish melted right off with very little effort, and the pieces were super shiny afterward, so there’s no need for an extra polishing step (you do have to wash and dry thoroughly, though). It’s cheap, too: Wright’s Silver Cream is less than $5 for one 8-ounce tub, and a little really goes a long way!
I really loved this method but it didn’t win the top spot for two reasons: It requires buying a special cleaner (and I really prefer methods that can be done using pantry ingredients), and it requires polishing each item separately.
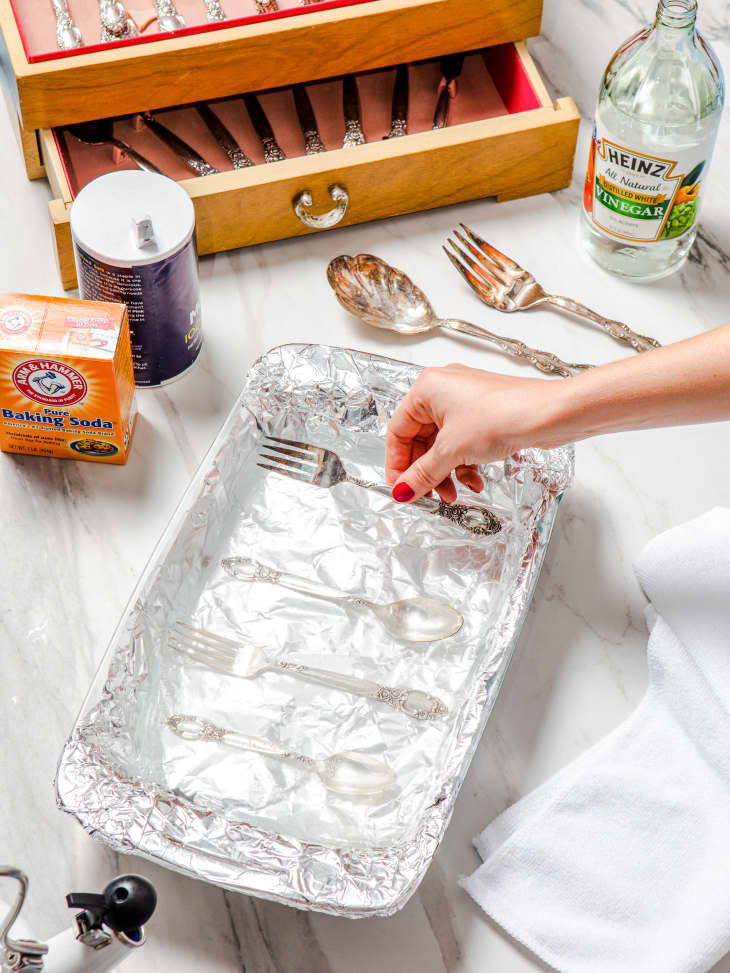
Tarnished Silver Cleaning Method: Aluminum Foil-Lined Dish with Baking Soda, Salt & Vinegar
- Total time: 10 minutes
- Rating: 4.8/5
The method: For this test, a favorite method at Kitchn, I lined a baking dish with foil and made a special bath for the utensils using 1 tablespoon baking soda, 1 tablespoon salt, 1/2 cup distilled white vinegar, and 1 cup boiling water. I placed the utensils in the bath, let them sit for five minutes, and buffed each with a microfiber cloth.
How it went: I prepped my baking dish with aluminum foil (again, shiny-side up) and made the bath. When I soaked the fork, spoon, and knife in the liquid (they should all be touching the foil), the kitchen filled with the scent of sulfur! Whoa! It must be doing something, right? I could see the tarnish fading away in most areas, but had to turn the pieces over to make sure all surfaces were fully submerged (add more hot water, if needed). My stuff was heavily tarnished, so I let it sit for five minutes.
Afterward, I rinsed the pieces and buffed with a microfiber cloth. Some areas that had been really blackened with tarnish still had faint traces of it. Also, the silver had a slightly dull finish, which I kind of liked because they looked more antique. (If you want shiny silverware, you’ll have to add a polishing step.) But what I really liked about this method is the fact that it removed tarnish from several pieces all at once and uses ingredients I always have on hand. It was wildly efficient, even though I still had to buff each one separately, which took about a minute each.
Read more: How To Clean and Polish Silver
How do you clean off tarnish on your silverware? Tell us in the comments below.