
How To Grill a Spatchcocked Turkey

I’m lucky enough that I live in temperate California with weather that’s suitable for grilling pretty much all year long, save for a few rainy days here and there. When we decided to grill the turkey for our Thanksgiving gathering this year, I was really excited about it — it’s the perfect excuse to be outdoors yet still be getting the centerpiece of Thanksgiving dinner cooked.
Even if you live in a colder climate, don’t let the weather stop you from trying grilled turkey; it’s both easy and delicious! Spatchcocking your turkey first before grilling allows you to cook faster than a whole one. Stuff cubes of butter under the turkey skin before grilling, and once the turkey skin turns brown, baste it with more butter. Here’s how to grill that spatchcocked turkey.
Tips For Grilling a Spatchcocked Turkey
- Dry-brine the turkey before grilling.
- Stuff cubes of butter under the turkey skin before grilling so it starts to baste the meat.
- Start cooking the turkey breast first, then add the legs.
- Separate the legs from the breast so you can take one part off the grill when it’s done.
- Baste the turkey skin with butter to keep it moist and tasty.
Why Grill Turkey?
You might think that grilling is only a nice-weather method of cooking, but it does have many more advantages besides letting you be outside:
- Grilling frees up oven space. There are enough side dishes requiring oven time already, so just move the whole turkey cooking operation outside instead.
- Grilling means less mess. While you might need to give your grill grates a scrub before throwing the turkey on (and after taking it off), you won’t have sputtering turkey grease all over your oven.
- Grilling is easy. The most important thing to remember is that grilling turkey is easy. We first spatchcock the turkey into two manageable pieces, and once the turkey is on the grill, you just have to baste it once in awhile. In fact, you can probably give the grill enthusiast in your family the basting brush, a timer and meat thermomter, and a glass of wine, and let them take care of it!
Spatchcock Your Turkey Before Grilling
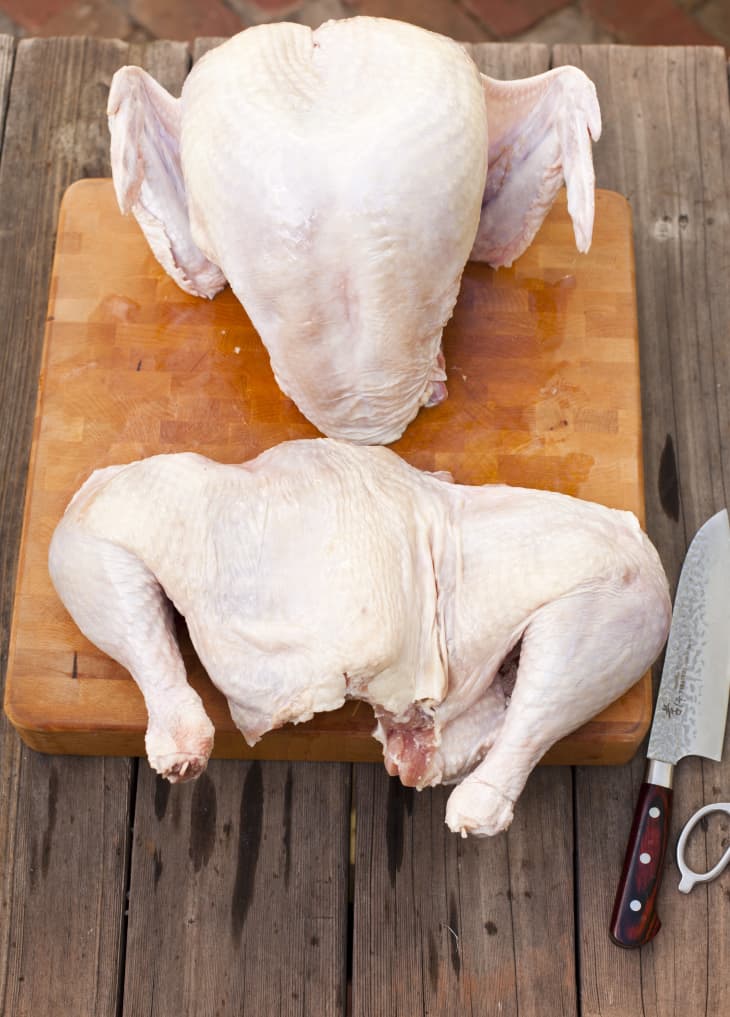
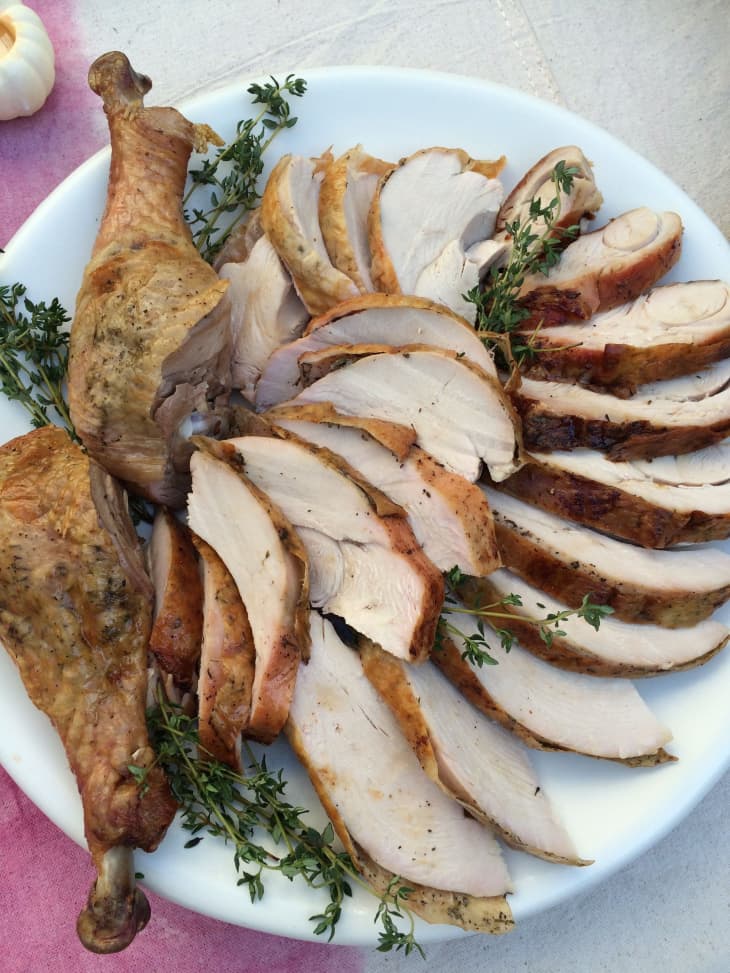
While you can certainly just throw a whole turkey onto the grill, we like to spatchcock, or butterfly, it first. Our more untraditional method of spatchcocking involves butterflying the bird so that the legs stay together and the breast is intact. Since a turkey is so large, we take it one step further and cut the two pieces apart.
Grilling two pieces of turkey instead of one whole turkey has a lot of advantages. It’s hard to wrestle a whole, slippery turkey on and off the grill, so two smaller, lighter pieces makes those tasks much easier.
Separating the legs from the breast also means that you’re left with white meat and dark meat, which can cook at separate rates. If one part is done before the other, simply take it off the grill so that it doesn’t overcook! A spatchcocked turkey also cooks much faster than a whole one: our 15-pound bird only took about 1 1/2 hours to grill.
→ Learn how to do it: How To Spatchcock a Turkey
Things to Remember When Grilling a Spatchcocked Turkey
- Seasoning is up to you. We love dry-brining, particularly with this method, but you can also do a wet brine or season the turkey with your favorite spice rub before grilling.
- Butter makes it better. Grilling involves dry heat, so we stuff little cubes of butter under the skin before grilling so that it starts to baste the meat. Once the skin on the outside is browned, we baste with even more butter to keep things moist and tasty.
- Keep an eye on grilling time. With our unusual method of spatchcocking, the thicker turkey breast actually takes longer to cook than the legs. To account for this, we start cooking the turkey breast first, then add the legs later. Since grill temperatures can fluctuate, especially in cold weather, check the temperature of both pieces once in awhile so you can gauge how quickly the cooking is going.
How to Grill a Spatchcocked Turkey
Serves 10 to 12
Nutritional Info
Ingredients
- 1
(14-to-16 pound) thawed turkey
- 8 tablespoons
unsalted butter
Equipment
A gas or charcoal grill
Meat thermometer
Basting brush
- 2
pairs of tongs or 1 pair of tongs and a flat spatula
Foil
Instructions
Spatchcock the turkey: Follow our instructions for How To Spatchcock a Turkey. Then wet brine, dry-brine, or season the spatchcocked turkey. (If wet- or dry-brining, you can do this up to 3 days ahead of cooking.)
Let the turkey warm to room temperature: Let the spatchcocked turkey sit at room temperature on the counter while you prepare the grill to take the chill off from refrigerating.
Prepare the grill: If you have 3 burners on your gas grill, light the side burners to medium and keep the middle burner off. (If your grill only has two burners, light them both to medium low.) For a charcoal grill, divide the lit coals in half and place a pile on each side of the grill, leaving the middle empty. Preheat to between 300°F and 325°F degrees, and maintain this temperature throughout cooking.
Place butter under the skin of the turkey: Cut 4 tablespoons of the butter into small cubes and tuck the butter pieces under the skin of the turkey over the breast and legs.
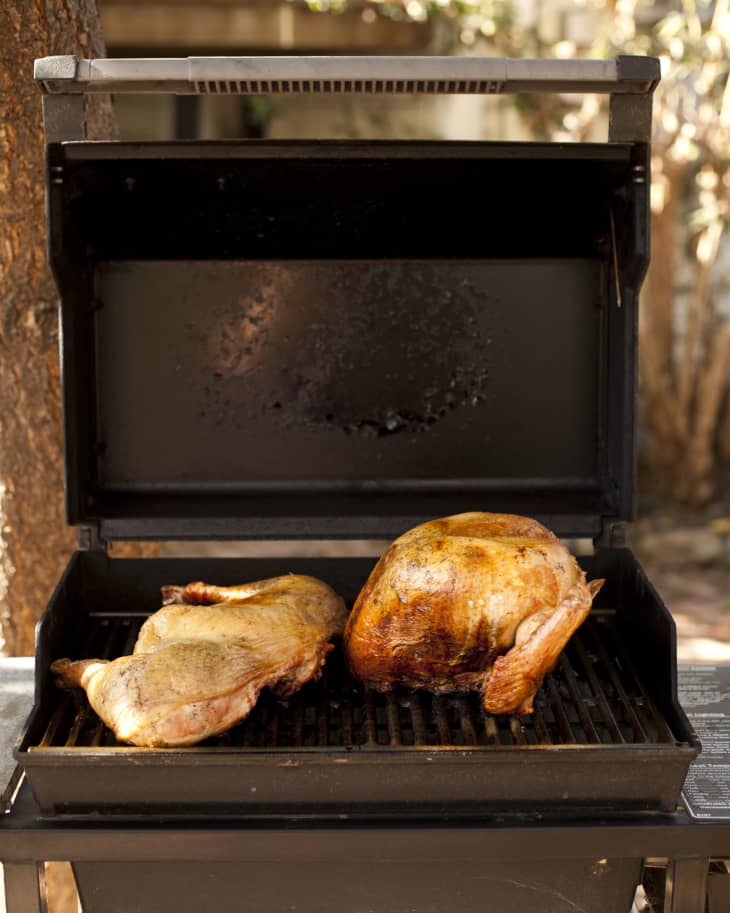
Grill the turkey breast first: When the grill has preheated, place the breast skin-side up over the back half of the unlit burner on the gas grill. (If your grill only has two burners, just place the breast on one half of the grill.) For a charcoal grill, place the breast over the middle of the grill where there are no coals, making sure to leave enough space in the middle for the legs. Cover the grill and cook for 20 minutes.
After 20 minutes, begin grilling the turkey legs: After the breast has been cooking for 20 minutes, place the legs in front of the breast over the unlit burner on the gas grill. (If your grill only has two burners, place the legs on the other half of the grill.) For a charcoal grill, place the legs in the middle of the grill where there are no coals. Cover the grill and continue cooking.
Baste the skin as the turkey cooks: After about 40 minutes of total grilling time, the skin should be starting to turn brown. Melt the remaining 4 tablespoons of unsalted butter and brush the skin with it. Continue to grill, covered, basting every 20 minutes.
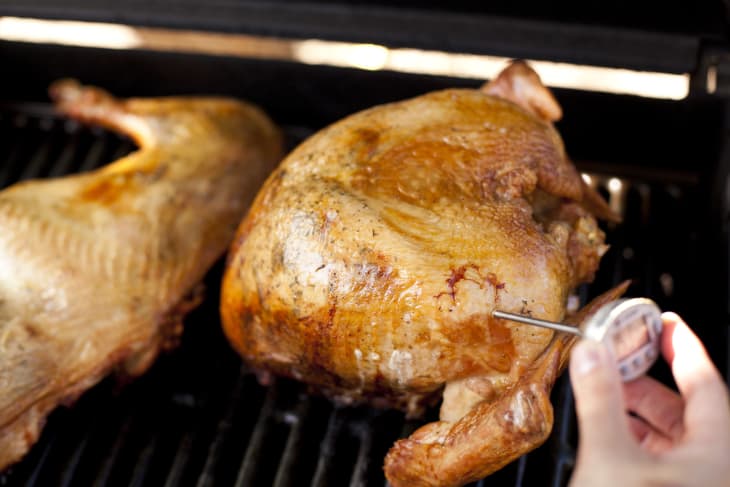
Check the temperature: Check the temperature of both the breast and the legs occasionally throughout cooking to gauge how quickly the turkey is cooking. After 1 hour and 20 minutes of total cooking time from when the breast was placed on the grill, the turkey should be close to finishing. It is done when it registers 165°F in the thickest part of the leg (not touching bone) and in the thickest part of the breast (not touching bone). Continue grilling and basting as needed.
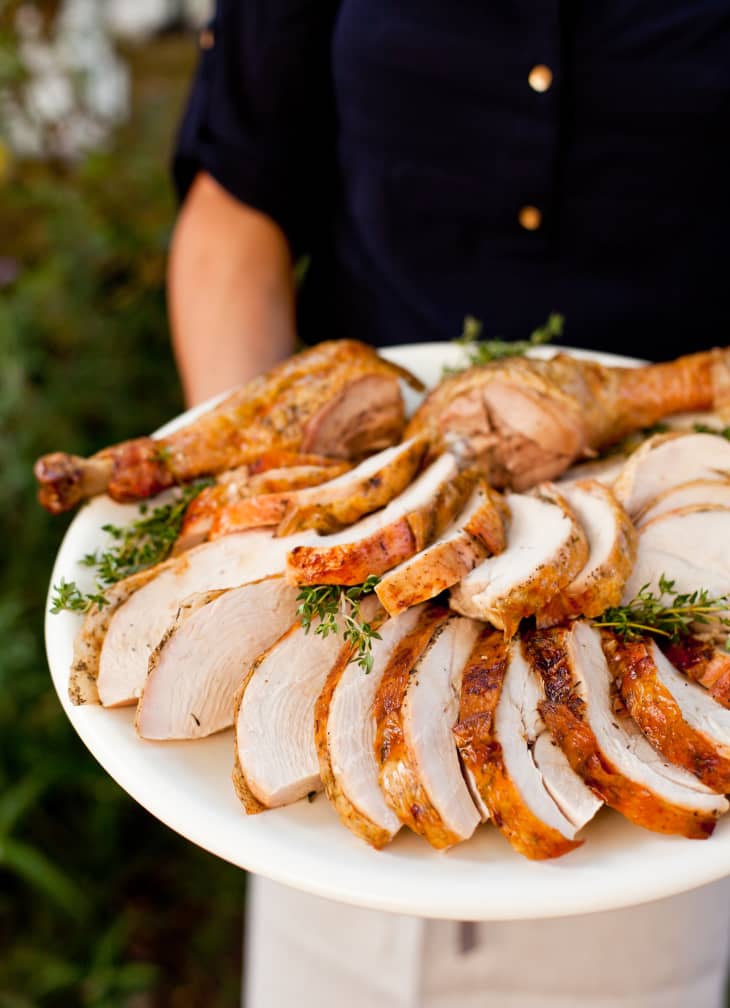
Remove from the grill: As each piece is ready, use 2 pairs of tongs (or 1 pair tongs and a flat spatula) to transfer it to a clean serving platter, roasting pan, or rimmed baking sheet. Cover loosely with a piece of foil.
Rest the turkey: Let the turkey rest in a warm place for at least 30 minutes before carving and serving.
Recipe Notes
Remember to start with a clean grill — after preheating the grill, scrub the hot grill grates with a grill brush or wadded piece of aluminum foil.
As tempting it is to keep peeking at the turkey while it's cooking, it's best to keep the lid on as much as possible so the heat stays steady. You don't want any heat escaping or risk extending the cooking time and running out of fuel before the turkey is cooked.
Since grilled turkey isn't cooked in a roasting pan, you won't have any turkey drippings, so we recommend making gravy separately. Try our delicious Make-Ahead Gravy recipe.
Want more smart tutorials for getting things done around the home?
See more How To posts
We’re looking for great examples of your own household intelligence too!
Submit your own tutorials or ideas here!