
Small Batch Recipe: Garlic Dill Refrigerator Pickles

I believe in the power of a good pickle. Toss baby greens with a bit of crumbled cheese and a slices of pickled beet and call it dinner. Drizzle olive oil over pickled cauliflower and it becomes a quick appetizer for guests. Nuzzle a couple of dilly beans alongside your hot dog instead of relish for a crunchy pucker. Truly, there isn’t much that a pickle can’t do to jazz up or round out a meal.
Here in the US, pickles are inextricably linked to cucumbers. However, there’s no rule that cucumbers are the only vegetable that can be pickled. This basic technique can be applied to green beans, okra, garlic scapes, beets*, hot peppers, asparagus*, cauliflower, carrots* and all manner of summer squash.
* If you plan to make a refrigerator pickle out of these vegetables, they will need a quick bath in some boiling water before they’re able to be pickled. Spend the time and dirty the pot in order to blanch them for 30 to 60 seconds. The extra step pays off in flavor absorption.
Refrigerator Pickles vs. Processed Pickles
From a canning perspective, there are two categories of pickle. There are refrigerator pickles and processed pickles.
When you make refrigerator (they’re also known as quick pickles), you pack your vegetables into a jar (or other container) with spices and aromatics and pour over hot pickling liquid. These pickles are allowed to cool on the counter and are stored in the fridge once they’ve returned to room temperature. This is a great method if you have a small amount of produce to preserve or if you’re working with fragile vegetables that don’t do well when exposed to the heat of the canning pot.
Preserved pickles begin their life in much the same way that a refrigerator pickle does. Vegetables and spices are packed into clean mason jars and are then filled with a vinegar-based pickling liquid (made with 5% acidity vinegar). The jars are carefully tapped to ensure that all the trapped air bubbles get released. Lids and rings are attached and then the jars are processed in a boiling water bath canner for the amount of time that the recipe prescribes. Once processed, these pickles are shelf stable for up to a year.
For pickle-loving households, it’s a particular boon to be able to make enough pickles during the summer months to satisfy a year’s worth of eaters. However, processed pickles do require a bit more work and attention than a quick jar of refrigerator pickles do. I find that I use both methods, but for different vegetables. I like to stick to refrigerator pickles when working with cucumbers, because they begin to lose their texture as soon as you apply any heat to them. For vegetables that can stand the heat like green beans, okra, asparagus and beets, running them through a boiling water bath canner is a good way to free up fridge space and ensure you have delicious pickles come February.
The question then becomes, how do you pick a pickling method? Evaluate how much produce needs to be preserved. Take into account how quickly you think you’ll eat up the pickles and how much fridge space would be needed to stash them away. Is your produce sturdy or will it lose texture in the canning pot? Once you have your answer, go forth and pickle!
Garlic Dill Refrigerator Pickles
Prep time 20 minutes
Cook time 5 minutes
Makes 3 pints
Nutritional Info
Ingredients
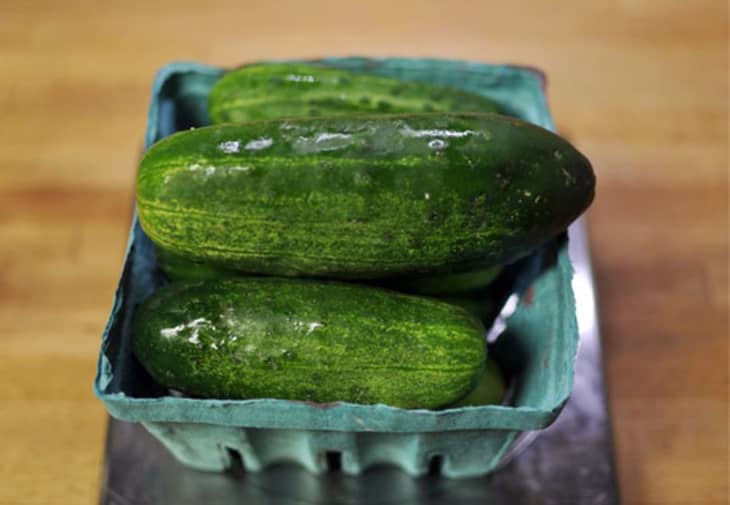
- 2 pounds
Kirby cucumbers
- 1 1/2 cups
apple cider vinegar
- 1 1/2 cups
water
- 2 tablespoons
pickling salt
- 2 cloves
garlic per jar, peeled (6 total)
- 1/4 teaspoon
red pepper flakes per jar (3/4 teaspoons total)
- 1 teaspoon
dill seeds per jar (3 teaspoons total)
- 1/2 teaspoon
black peppercorns per jar (1 1/2 teaspoons total)
Instructions
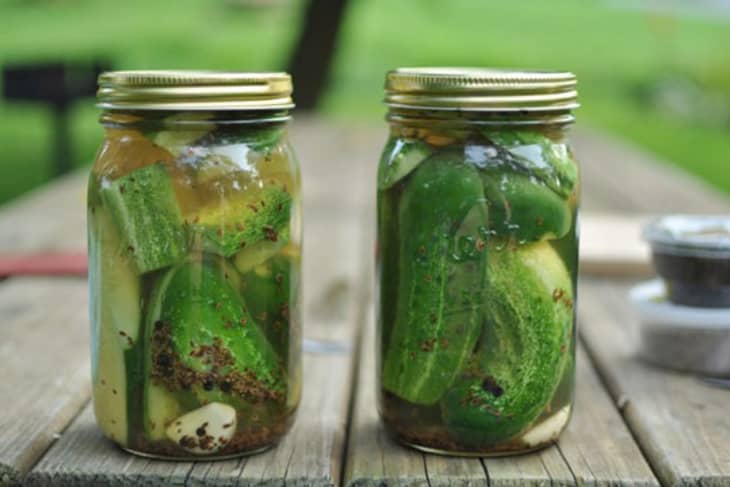
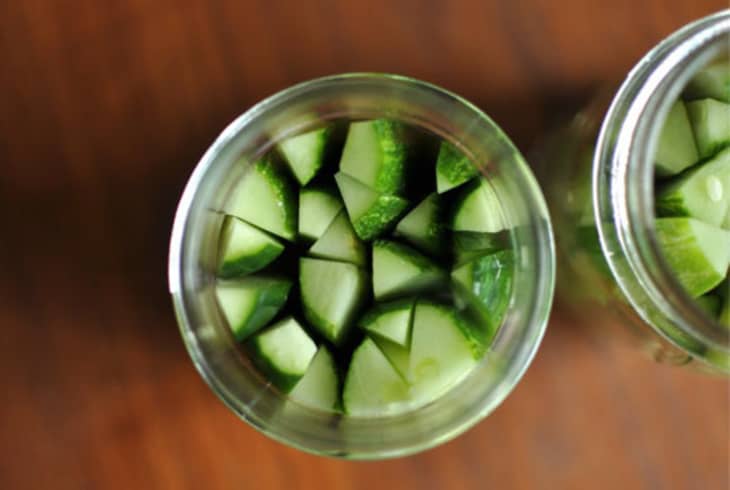
Wash and trim the cucumbers of the stem ends. Cut the cucumbers into rounds, sticks, or chunks.
Bring the vinegar, water and salt to a simmer in a small saucepan over medium heat to make a brine. Meanwhile, divide the garlic, red pepper flakes, dill seeds, and peppercorns between 3 pint jars. Pack the cucumber slices firmly into the jars. You don't want to damage the cukes, but you do want them packed tight.
Pour the brine into the jars, leaving approximately 1/2-inch headspace. Tap the jars gently on countertop to dislodge any trapped air bubbles.
Seal the jars and let cool to room temperature. Refrigerate for at least 48 hours before eating.
Previously in Urban Preserving
• Why Small Batch Canning Is Awesome: And What You Need To Get Started
• Strawberry Thyme Jam
• An Adaptable Chutney
Marisa McClellan is our guest feature writer for June. She is a food writer, canning teacher, and dedicated farmers’ market shopper who lives in Center City Philadelphia with her husband Scott McNulty. She’s the author of the blog Food in Jars and spends most of her days cooking up jams, fruit butters and pickles in her 80 square foot kitchen. Food in Jars: Preserving in Small Batches All Year Long is her very first cookbook.
More Food In Jars
• Visit Food in Jars, Marisa’s blog
• Find Food in Jars: Preserving in Small Batches Year-Round, Marisa’s new book, at your local library, independent bookstore, or on Amazon.com
(Images: Marisa McClellan)