
How To Paint Plastic Laminate Kitchen Cabinets Kathleen’s February Jumpstart Project 2009

Project: How to Paint Plastic Laminate Kitchen Cabinets for Under $100
Name: Kathleen
Time: 4 days- two nights after work and an entire weekend
Cost: $89.33
Kathleen is another renter stuck with a great apartment but so-so kitchen. She took a tiny budget and her restrictions in stride, however, and she painted her old laminate cabinets to give them a fresher look. For her very detailed how-to, read on!
TOOLS:
Painter’s Tape
Spackle & Putty Knife
Hammer, Nails, Drill, Screwdriver Sponge, Dishsoap Super Glue
120 Sandpaper, 1 sheet
Sherwin Williams PrepRite Bonding Primer
Sherwin Williams ProClassic Acrylic Latex Paint, Semigloss, Color 7006 Extra White
Glidden Evermore Semigloss Paint, Color Niagara Mist
Synthetic Bristle Paint Brushes (2 new, 2 owned)
Ceramic Tile Samples
Metal Tackboards
Magnets
Mirrored Glass Sample = newly purchased
STEPS:
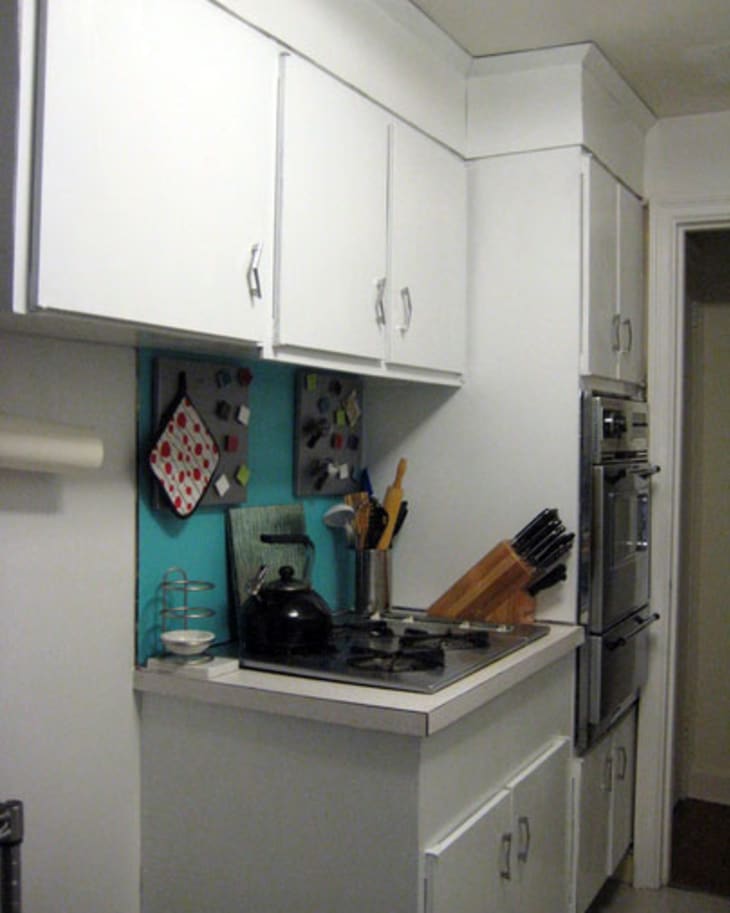
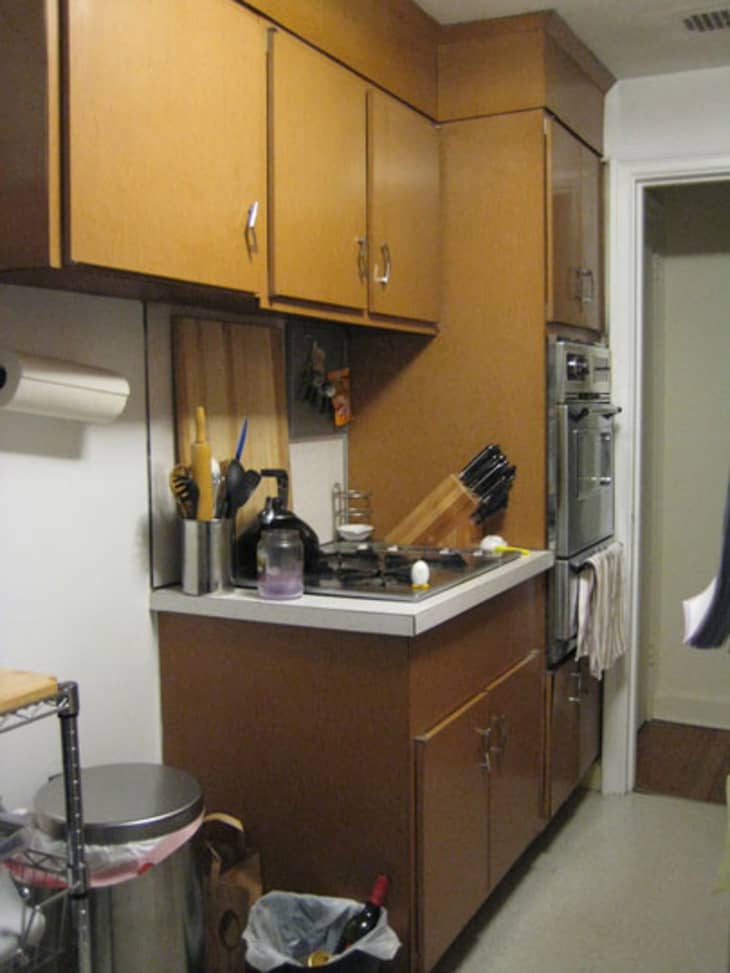
It took about 9 months of being on a waiting list to finally get an apartment in this building, and though I fell in love with my studio apartment right away, the 1970s fake wood grain laminate cabinets were pretty rough, except for the amazing boomerang-shaped hardware. To make matters worse, the cabinets were delaminating in some spots. The cabinets should’ve been replaced long ago, but I know the building isn’t willing to do that at this point. I tried to fix up the room with a turquoise accent wall, red drapes, and black and white damask carpet tiles from Interface, but it wasn’t enough. The brown, fake wood mess had to stop.
The first step in my project was to research what type of primer and paint to use on laminate. I read online about a few products, but ended up contacting a sales rep at Sherwin Williams for his recommendation. He told me to use SW PrepRite Bonding Primer Adhesion Promoting Primer for the 1st coat, and SW ProClassic Waterborne Acrylic B31 Series for the 2nd and 3rd coats.
I also had a very small budget – less than $100 – so I looked at what I already owned and thought about ways to still get the updated look I wanted without overspending.
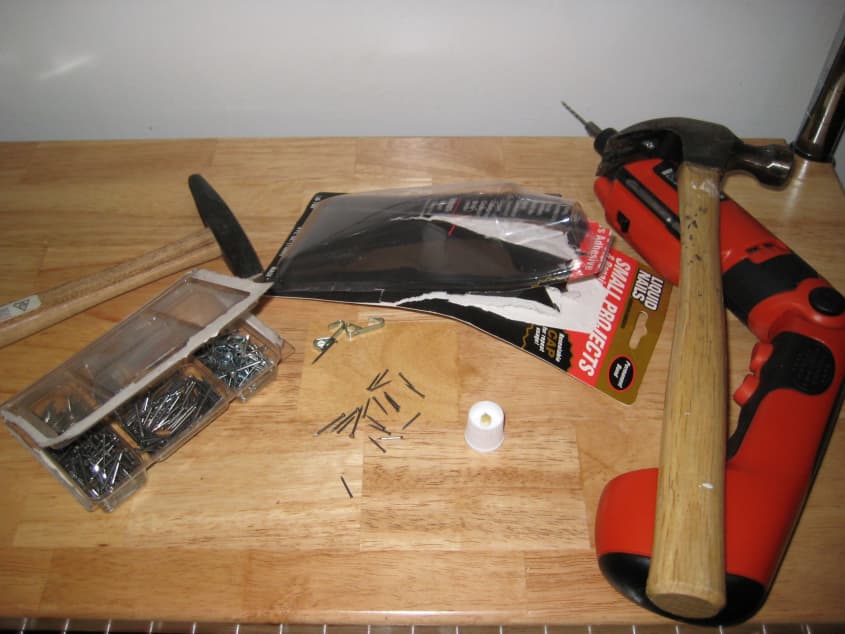
Actual work on the cabinets began with removing the hardware, then nailing the laminate back to the substrate in areas where the two were separating. I found it was easier to drill small holes into the laminate and then hammer in nails rather than trying to nail through the laminate ( I bent a few nails before figuring that one out). I also spackled cracks.
Next, I scrubbed the surfaces, then sanded them with 120 grade sand paper, and wiped them clean again after sanding. I didn’t take the doors off the cabinet bases because the cabinets don’t have typical hinges, so I was able to paint over them, and I also don’t have any other space to use for painting due to other projects in flux.
Sanding indoors wasn’t as bad as I thought it was going to be, I didn’t need a mask or eye protection but recommend them.
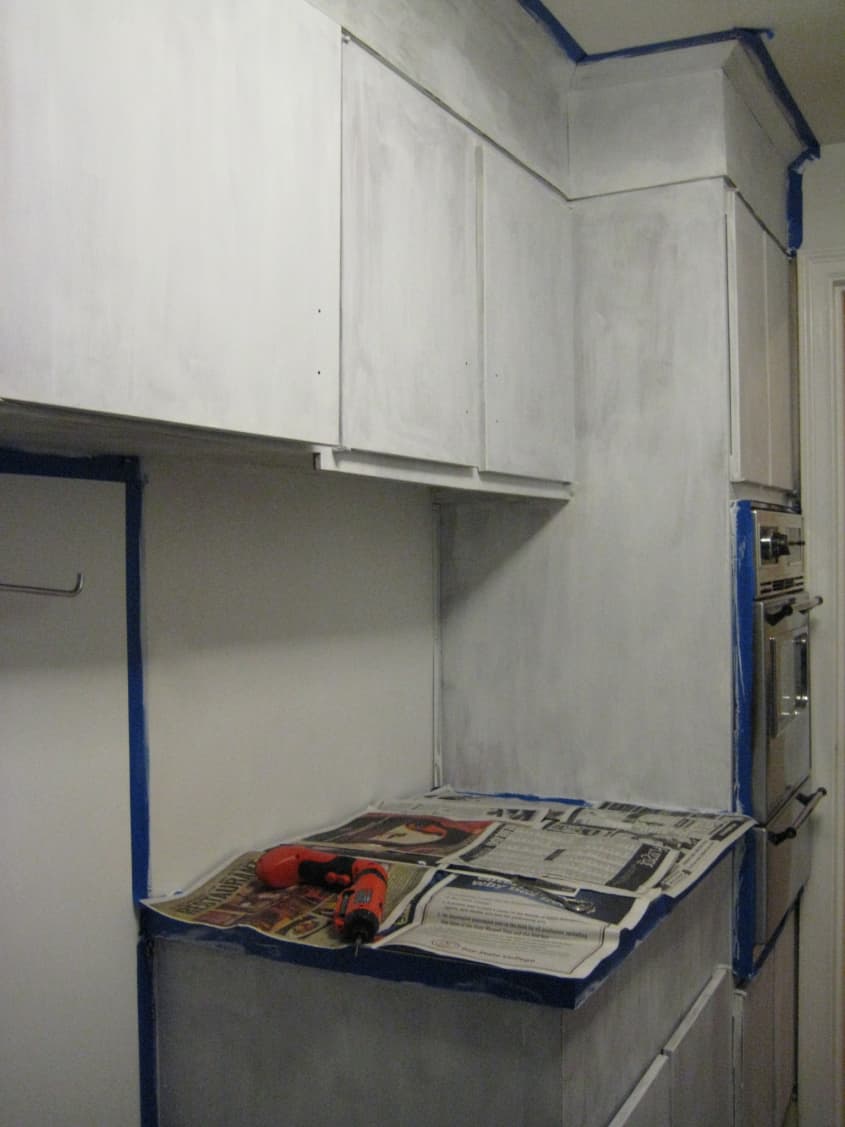
After taping, I began priming the cabinets and vinyl base using a brush. The primer and paint can both be applied with a synthetic roller, which in retrospect I would’ve done, but I was trying to cut back on purchases and the brushes were less expensive and reuseable. I let the primer dry overnight to make sure there wouldn’t be any issue with the next coat. Over the course of the next day I applied two coats of the paint, and touch ups the day after.
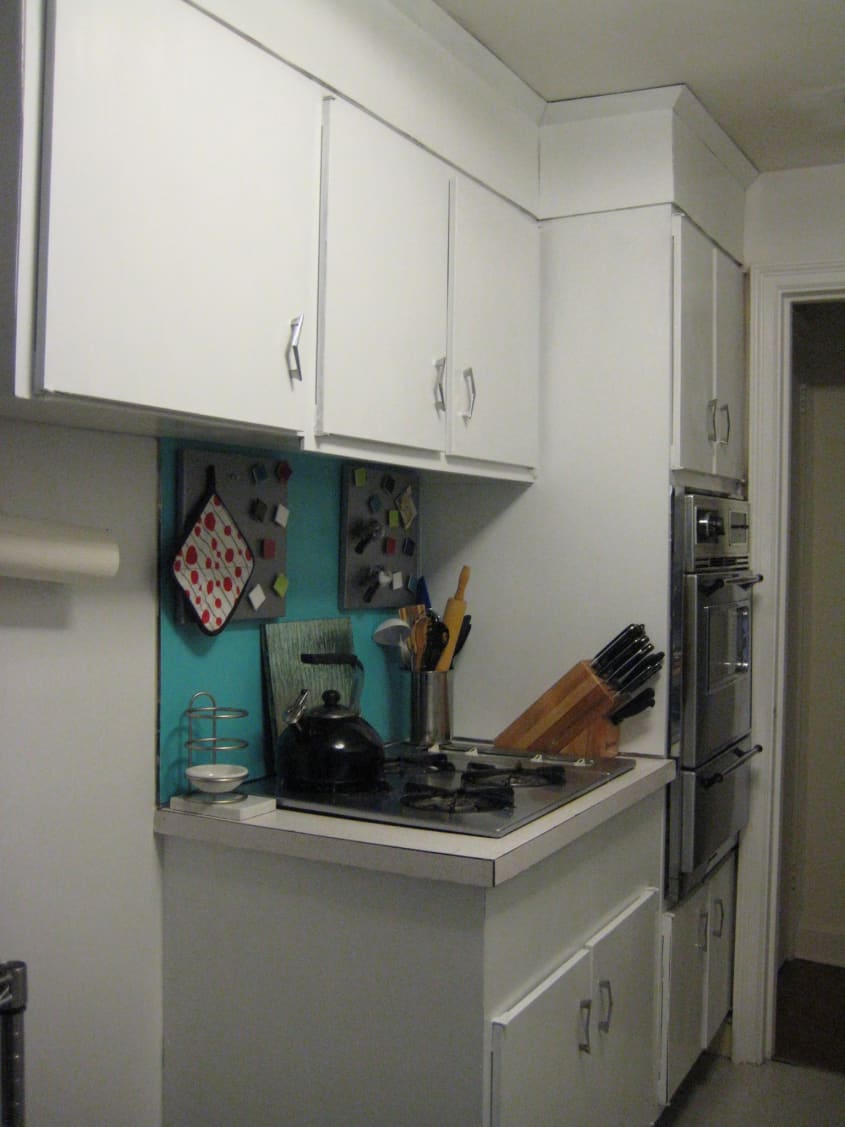
For the backsplash I at first wanted to use magnetic primer with chalkboard paint over it, but “value engineered” that idea down to using the leftover turquoise paint from the kitchen accent wall, and metal tackboards that I purchased a few years ago and am not currently using. The backsplashes are also laminate, so I used the same primer and then applied the turquoise semi-gloss. (If I had decided to go with the magnetic or chalkboard paint, I still would’ve had to use the SW primer, the Rustoleum paints can’t be applied to laminate. I called Rustoleum to verify that while I was still deciding whether to use it.)
I hung two of the tackboards over the stovetop and used some leftover tile samples (1×1 ceramic tiles in white, black, red, lime green, and aqua) to make magnets- the tackboards came with plain magnets, which I glued to the back of the tiles. The backsplashes were finished with linens and a serving tray from Anthropologie and a leftover mirrored glass sample, all of which I already owned.
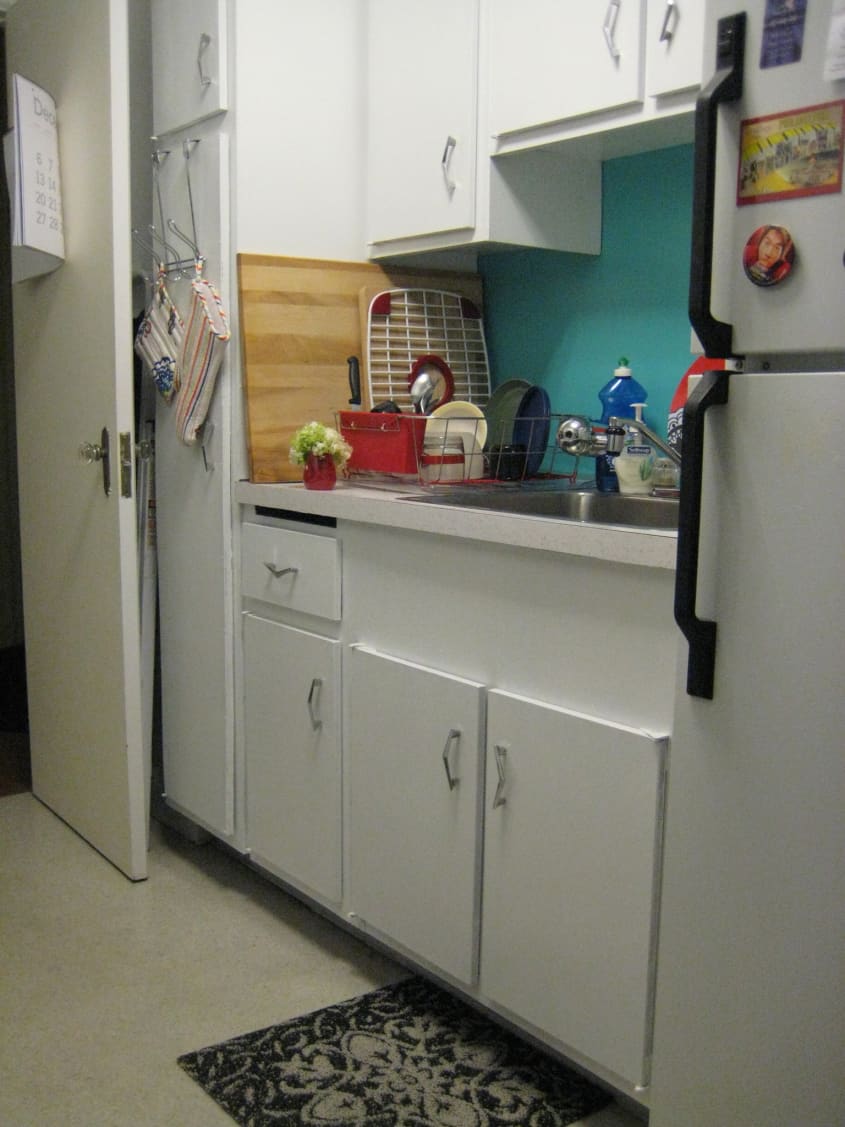
Putting the hardware back on the cabinets was the finishing touch – I absolutely love the new look!
There are definitely ways to upgrade this type of project for people who don’t have such a restrictive budget (rollers and nicer brushes, orbital sander, better tape), and I want to emphasize that if this was an apartment that I owned versus a rental I would’ve replaced the cabinets altogether since they are literally falling apart, but for someone else in my situation – a tight budget and a space that needs improvement without investment – this is a good example of the difference paint makes.
If the room had more light I might’ve gone with a gray or black for the cabinets, but with a single overhead light and some indirect sunlight from the window, it would’ve looked like a cave. It will also be easy for the building to repaint when I move out since the white semigloss is the same shade as the paint they use for the kitchen walls.
RESOURCES:
As a LEED AP, I was happy to see that the SW ProClassic Paint is LEED compliant. This was also my first time actually visiting a Sherwin Williams retail location, and the store was much nicer than I expected. It was really well lit and inviting, and the employees were great.