
How To Make Easter Egg Cakes

Makes3 individual cakes
When we were growing up, my sister and I always got Easter egg cakes on Easter. They came from a bakery and had our names across the tops in delicate icing script. I insisted on chocolate frosting, which meant mine was always a very un-Easter-like dark brown, while hers was pink or yellow. But that egg cake was The Thing in our house.
Now, I see them at New York City bakeries for an unforgivable amount of money. I could bake my own with a special egg-shaped pan, but I don’t have room in my cupboards for a pan I might use once or twice a year. So I set out to make egg cakes with nothing more than a loaf pan and a sharp knife.
I’m not saying these egg cakes are as perfectly shaped as those that come out of the special pans. Yours may look better, they may look worse. What I can tell you is that an egg is really not the hardest of shapes; we’re not talking pirate ships or castles, or even an anatomically correct Lego here.

I also practiced, trying pound cake and regular birthday-style cake, to figure out which works best. A pound cake is your best bet, in my opinion, for a few reasons. For one, it’s baked in a loaf pan, which lends itself well to making three individual eggs. Also, you don’t have to guess how much batter to put in (as you would with a recipe that’s not meant to be baked in a loaf pan). Finally, pound cake is firm, which means it’s easier to carve.
As you cut the pound cake into eggs you’ll notice that it generates a lot of cake scraps – save every last piece! These little pieces of cake are the perfect foundation for strawberry trifle. And even if you’re not ready for another dessert right away, that’s ok. You can store the cake scraps in the freezer for later.
Turn cake scraps into another dessert → Quick Strawberry Trifle
Tester’s Notes:
When I see cute, festive cakes like these eggs, I’m more than happy to eat them, but when it comes to actually making them, I stick with admiring from afar. It comes down to this — I’m not crafty. There is not one crafty bone in my body. I’ve tried to learn how to be crafty, to no avail. So, when I set out to make these Easter egg cakes, I was nervous. Like, sweaty palms nervous.
But then it was just happening. My knife was making slices, and a rectangular block of pound cake was turning into an Easter egg. It was surprisingly easy!
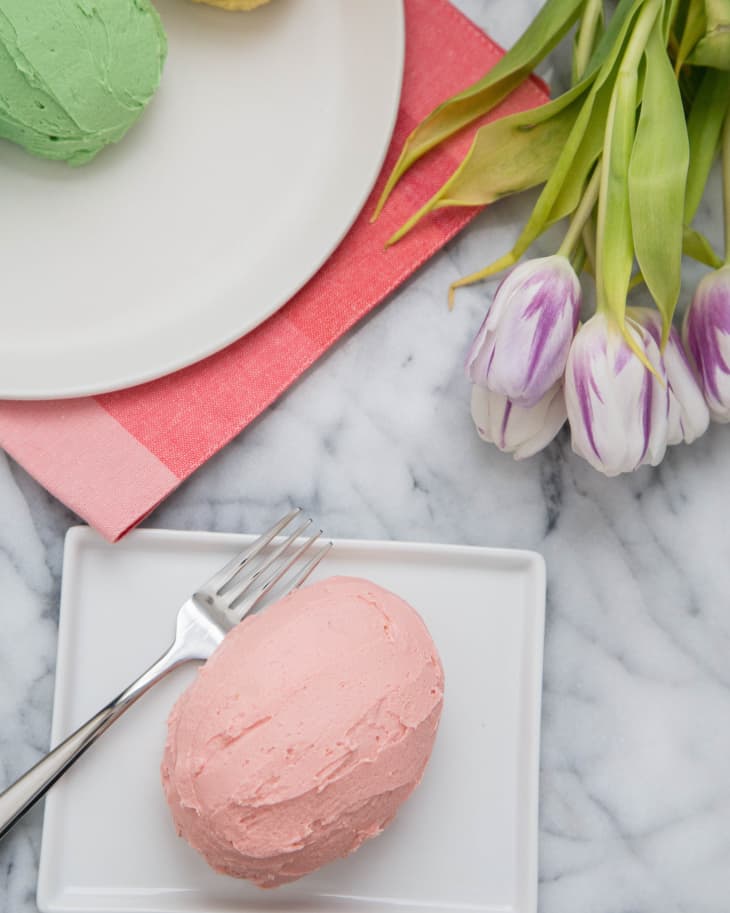
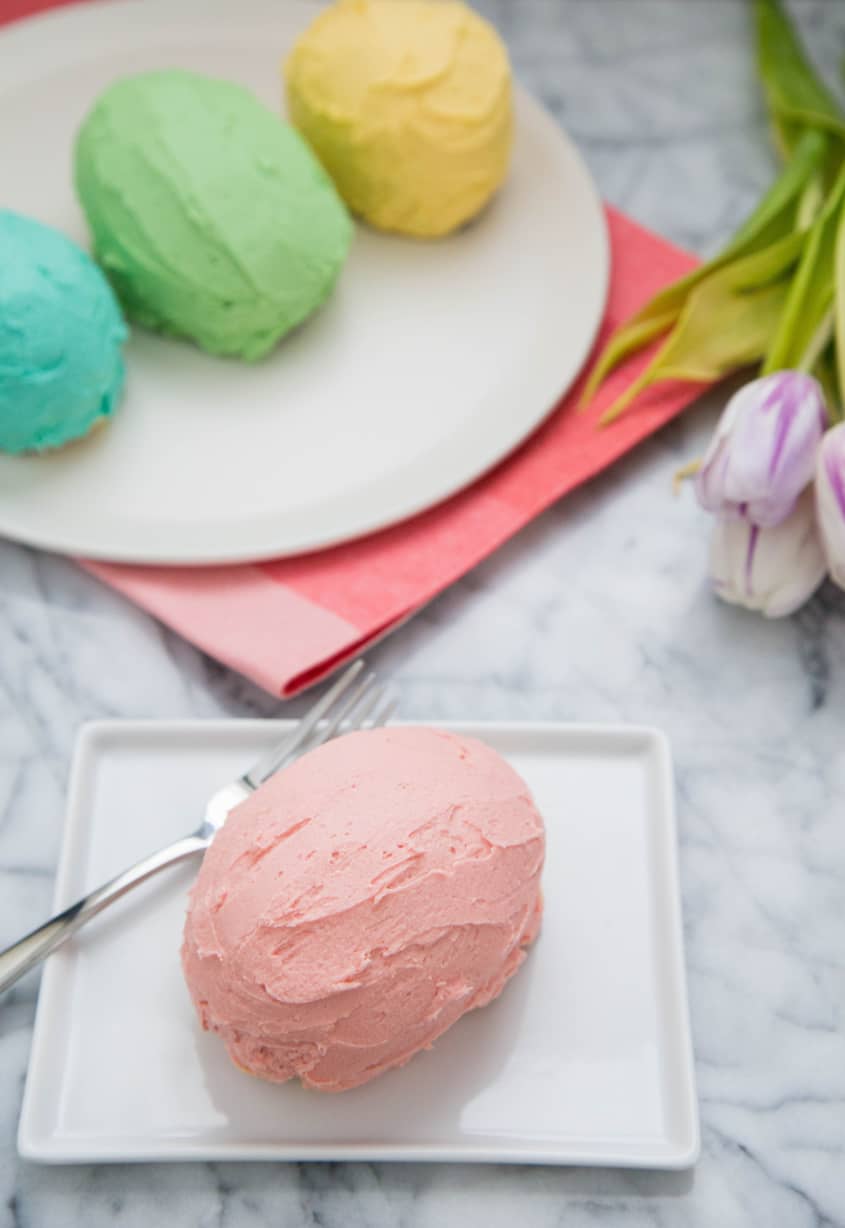
When decorating the cakes, be sure to use a thick buttercream that stays together well and isn’t runny.
– Kelli, March 2015

How To Make Individual Easter Egg Cakes
Makes 3 individual cakes
Nutritional Info
Ingredients
- 1 loaf
pound cake, like Lemon Pound Cake or sour cream pound cake
- 2 cups
buttercream, like Classic Buttercream, French Buttercream, Basic Lemon Buttercream
Equipment
- Sharp knife
- Cutting boards
- Food coloring (optional)
- Spatula
Instructions
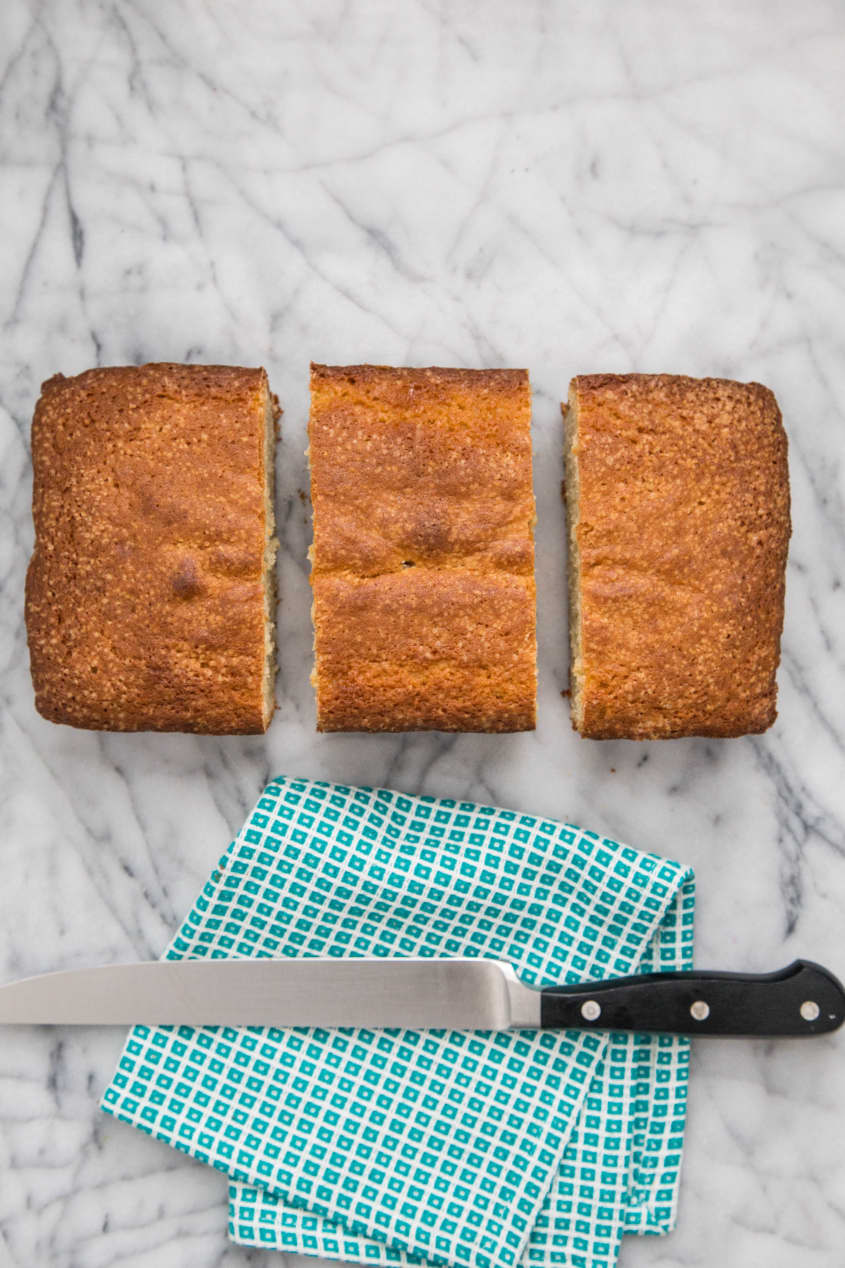
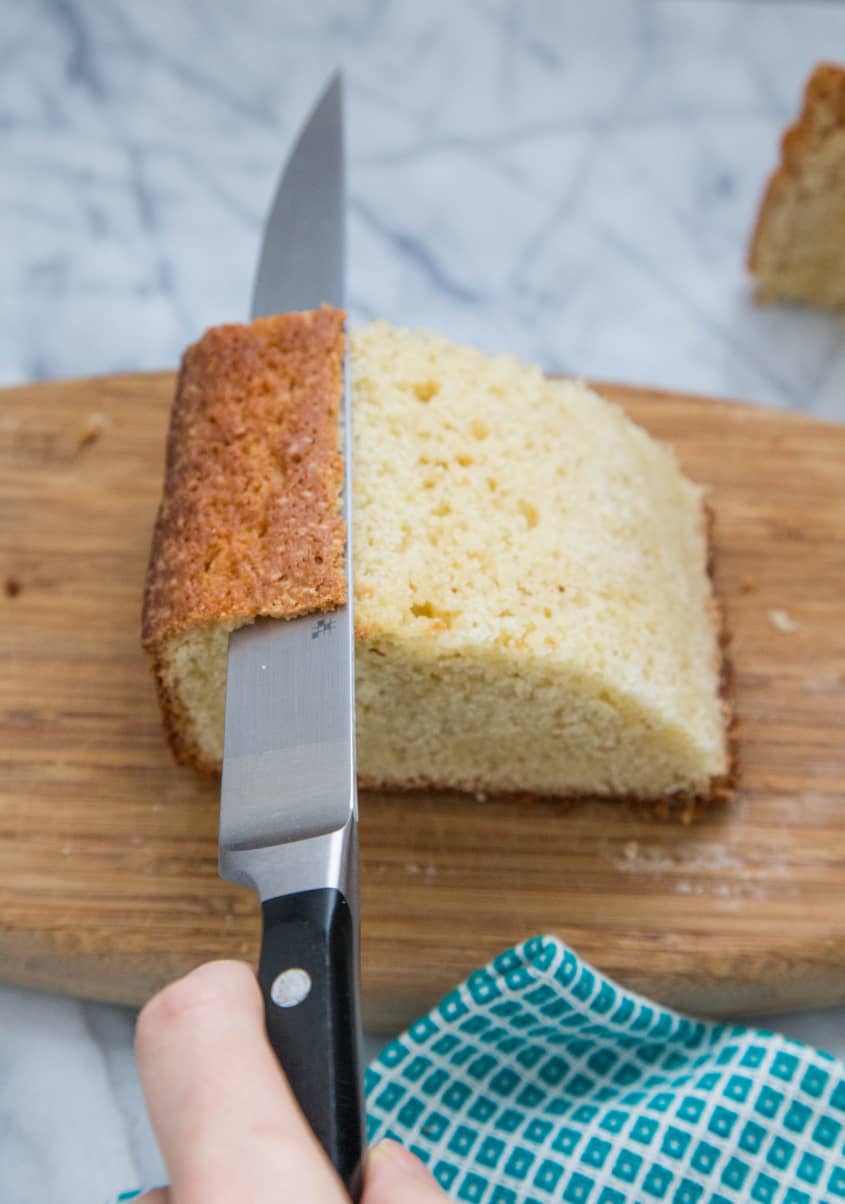
Cut the pound cake into thirds: Once the poundcake has completely cooled, use a sharp knife to cut it into thirds. To make it easier to slice, you can place the cake in the freezer for 15 to 20 minutes.
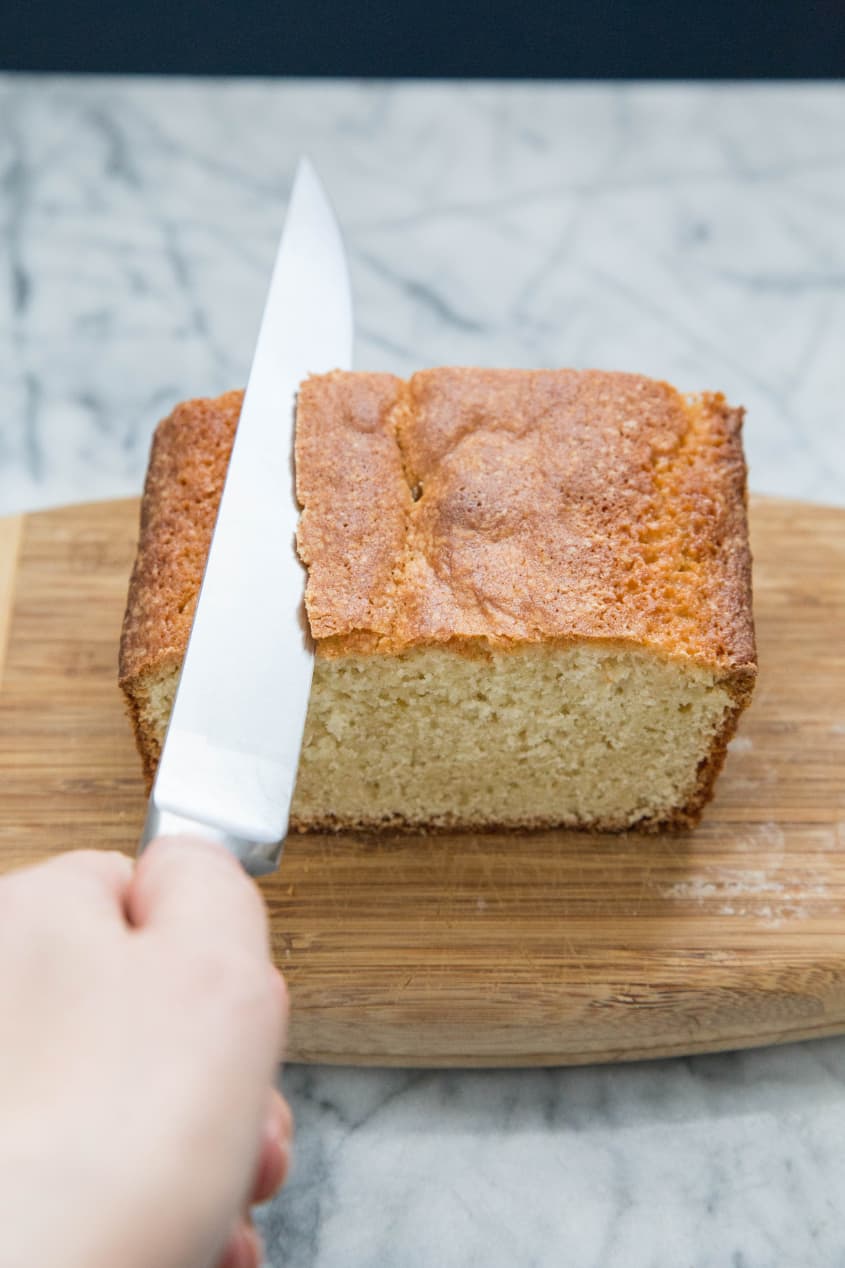
Slice the top off the cake: Working with one portion of cake at a time, place your knife almost parallel to the top of the cake, though slightly angled, about a third of the way from one end. Slice forward at a slight angle, slicing off two-thirds (the majority) of the top. Press your other hand lightly on top of the cake to give some pressure and help guide the knife. You want to create a shape like the hood of a car. This will back end of your "egg."
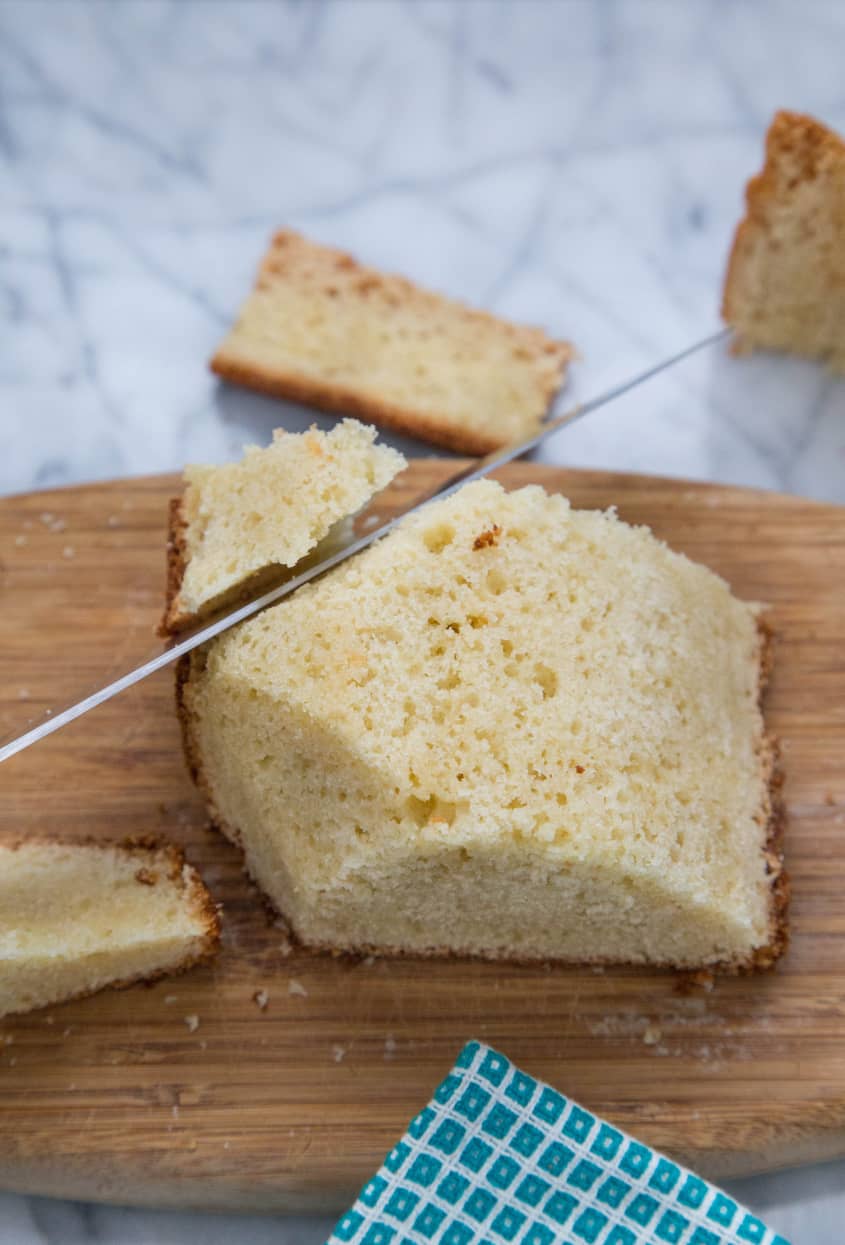
Cut the other end of the cake, also at an angle. This will be the "front" end of your cake.
Remove the corners: On the front end, slice away the corners on either side of the slope, creating a slightly rounded front.
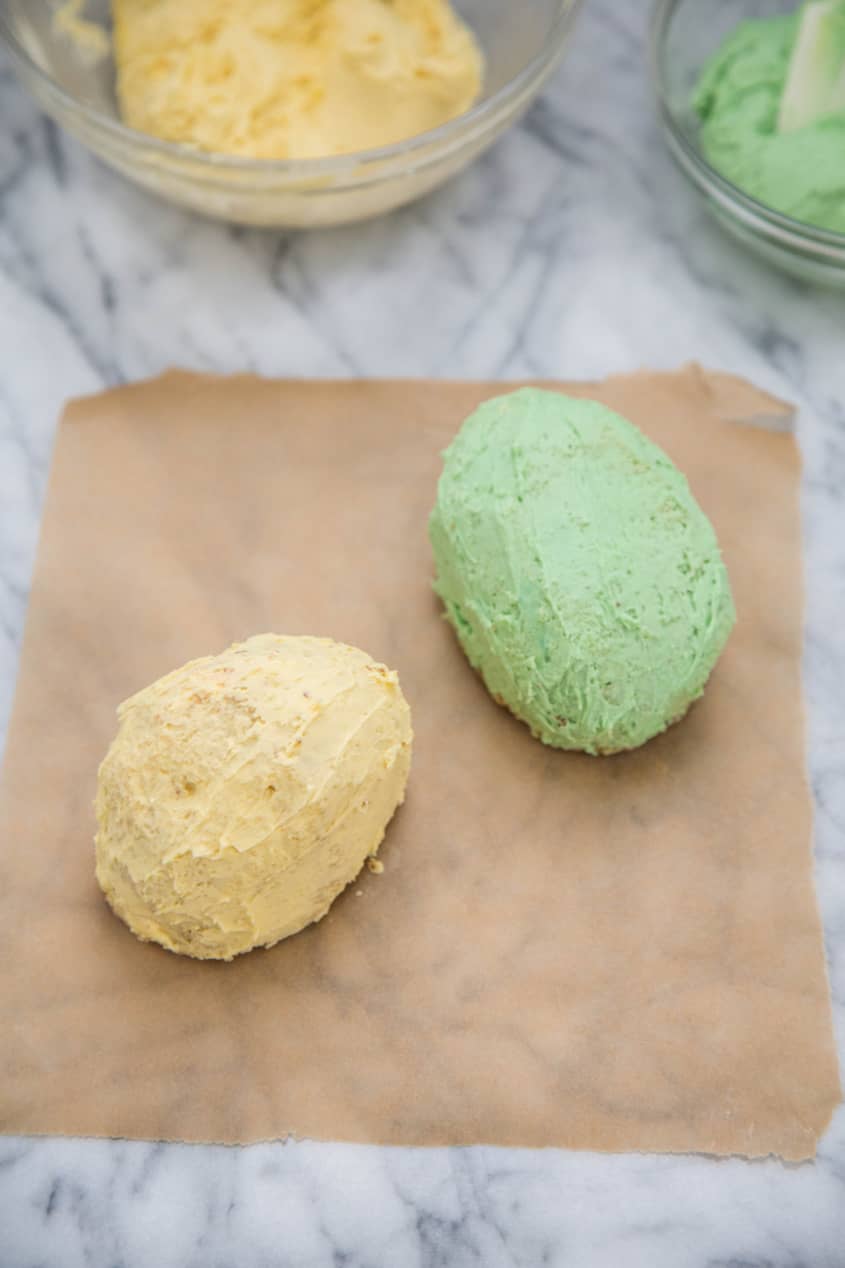
Smooth out the edges and pointy parts: Go slow. Press the top of the bits you're shaving off with your free hand to help guide the knife and avoid slicing off too much. Delicately shave off the pointy edges of the front and trim the points on the back so the whole cake is rounded. You may want to take more slivers off of the top to get a more pronounced curve. As you trim, pat down loose crumbs and use your hands to (lightly!) press and mold the egg.
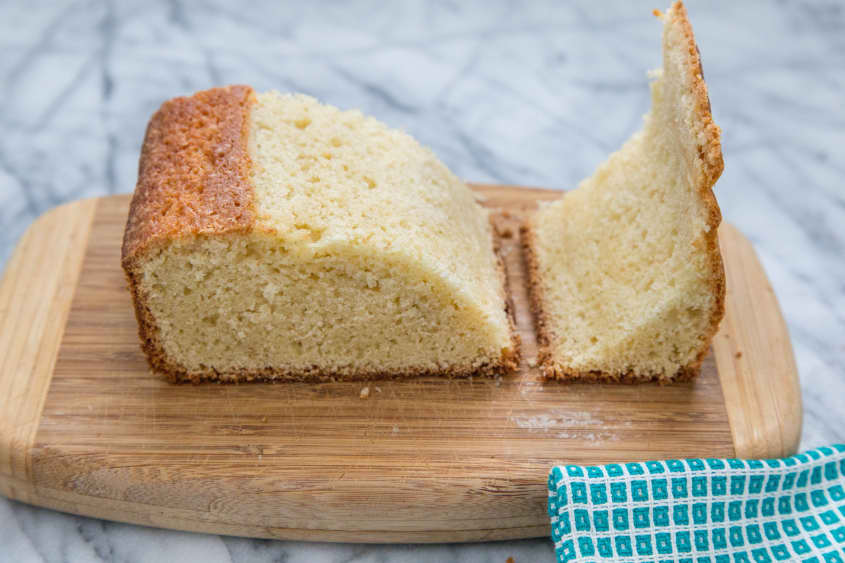
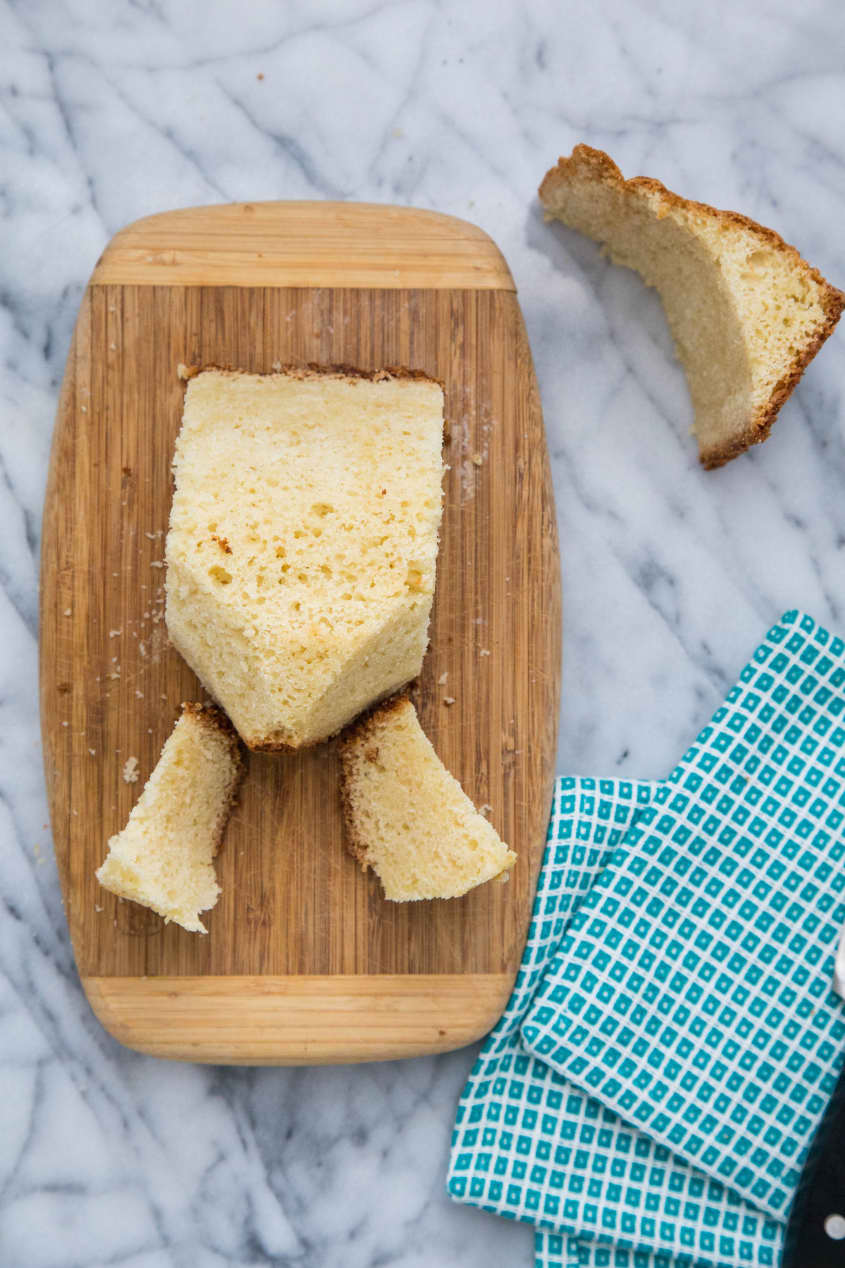
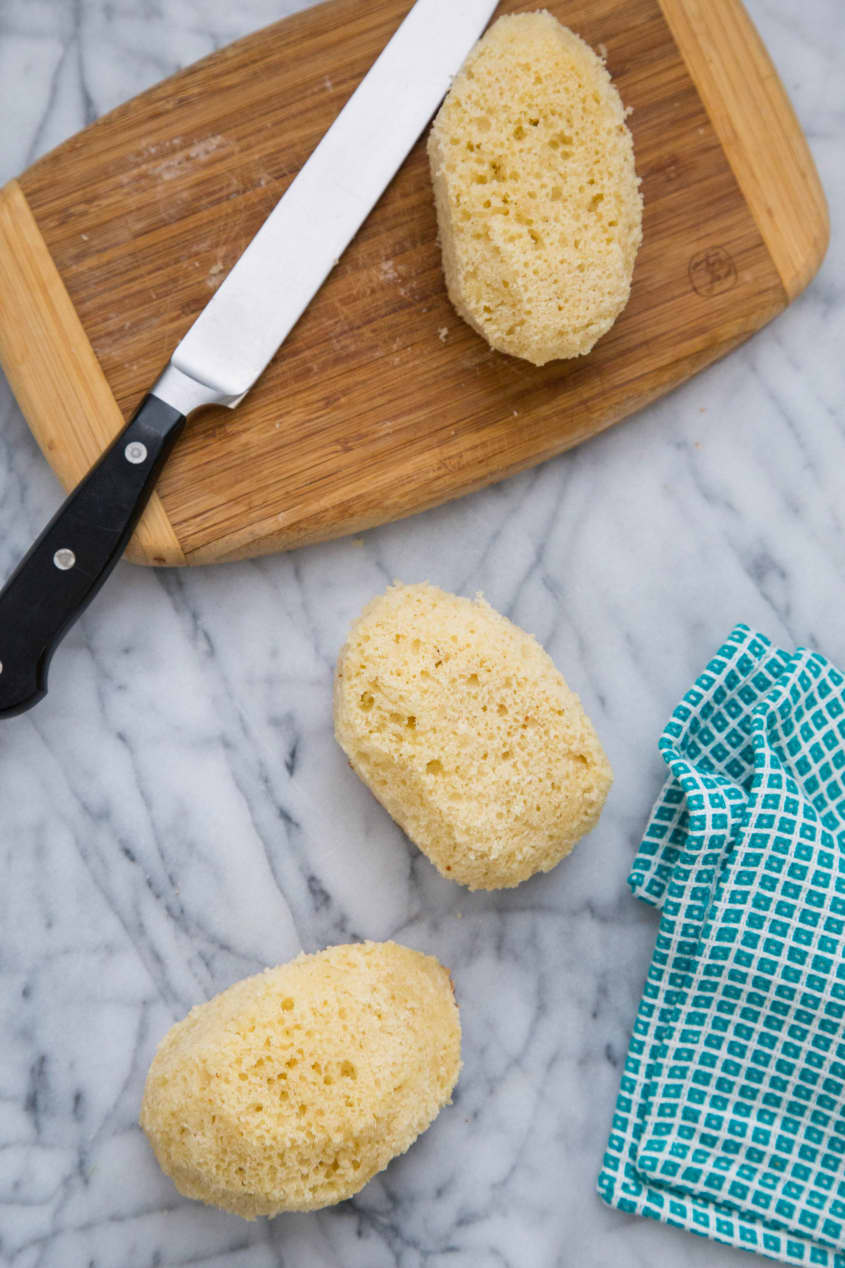
Repeat with the other portions of cake. Use the same process to cut and shape the other two-thirds of the pound cake into eggs. It's helpful to slice off the crusted ends before shaping.
Spread a thin "crumb coat" of buttercream over the cakes: Spread a very thin layer of frosting over the eggs to smooth over the crumbs and hold them in place. Place the cakes in the refrigerator to set for about 10 minutes.
Frost the cakes with a thick layer of buttercream: Divide the remaining frosting over the cakes and frost generously.
Recipe Notes
Storing the cakes: If not serving within a few hours, cover the cakes with a cake dome or over-turned bowl and keep at room temperature for 1 to 3 days.
Save the cake scraps! They freeze really well. Store in a freezer bag, and take them out as needed. They're great for trifle and parfaits, and served over ice cream.