
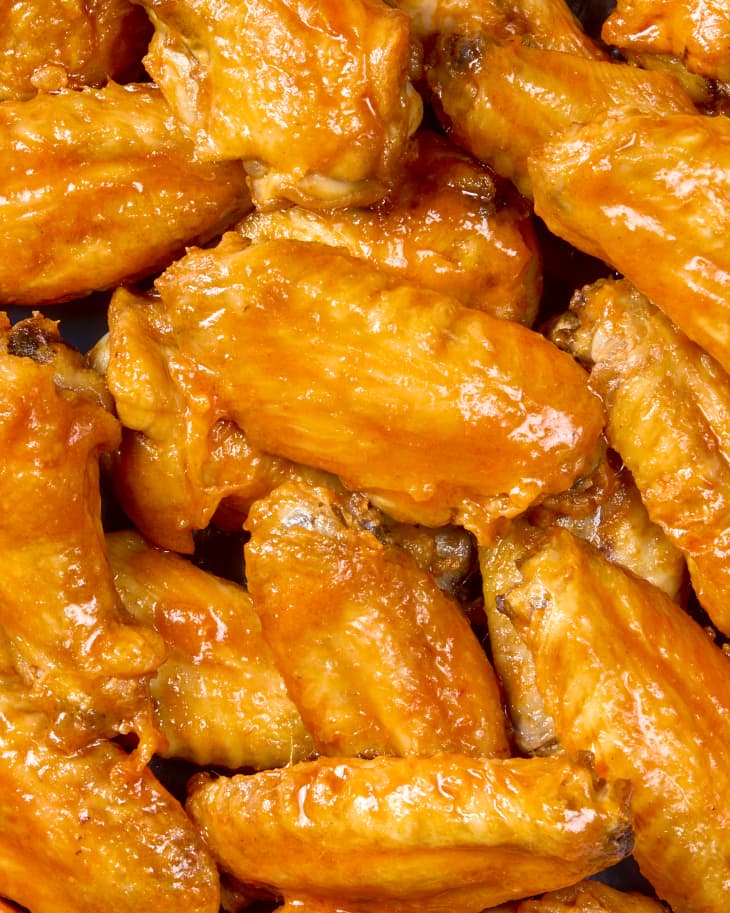
Crispy Buffalo Chicken Wings

The best-kept secret for super-crispy Buffalo wings? Baking powder.
Serves6 to 8
Prep15 minutes to 20 minutes
Cook40 minutes to 50 minutes

No Super Bowl party spread is complete without a platter of Buffalo wings. But there’s no need to order pick-up from your favorite bar or battle with a deep fryer while everyone else watches the game. Why? Because I’ve discovered the secret to the very best spicy, crispy, and saucy Buffalo wings. They’ll make you wish the Super Bowl happened more than just once a year.
These wings are best when you prep them in advance — even the day before. Once the pregame coverage starts, slide them in the oven so they’re hot and crispy by kick-off. Here’s how to make the very best restaurant-style Buffalo chicken wings at home.
Ingredients for Buffalo Wings
- Chicken wings: Separate the chicken wings into drumettes and flats, and freeze the wing tips for stock.
- Kosher salt: For seasoning the wings.
- Aluminum-free baking powder: This is the secret to crispy wings. Make sure your baking powder is aluminum-free and that you don’t grab the box of baking soda by mistake.
- Frank’s Original RedHot Sauce: For that classic Buffalo wing flavor, there’s no substitute for Frank’s Original RedHot Sauce. Make sure you pick up the original, not the bottle of wing sauce.
- Garlic powder: Dissolves more easily into the sauce than fresh garlic.
The Secrets to Extra-Crispy Buffalo Wings
The Buffalo wings you order at your favorite restaurant are deep-fried in oil. (If that’s the route you want to go, we’ve got you covered. Here’s a recipe for extra-crispy fried chicken wings.)
At home, I’m more likely to use the oven when making Buffalo wings. Luckily I’ve got a secret or two for making spicy, saucy wings with an audibly crackly crunch.
- Aluminum-free baking powder: Encourages browning and absorbs some of the moisture on the wings’ surface. When that moisture evaporates in the oven, a textured surface remains, giving us the crispy crunch we’re aiming for. Just remember baking powder and baking soda are not the same thing, and using baking soda in this recipe will give your Buffalo wings a metallic aftertaste (as can using baking powder that is not aluminum-free). Check — and double check — the label before you begin.
- Refrigerate overnight to dry wings: Refrigerating the wings uncovered dries out the skin way more than any amount of paper toweling ever could. Eight hours or up to one day will give you the crackly skin you’re looking for, but even a four-hour drying time is better than nothing.
The Anatomy of a Chicken Wing
There are three parts of a chicken wing: the drumette, the flat (or wingette), and the tip.
- Drumette: One end of the chicken wing looks like a miniature drumstick, hence its name.
- Flat: This middle portion of the chicken wing is sometimes referred to as the wingette. The flat has two bones with tender, dark meat between them.
- Tip: This is the thin, bony tip of the chicken wing (sometimes called the flapper). There isn’t much meat on this part of the wing, so remove it at the joint and save for homemade chicken stock or discard.
How to Separate a Chicken Wing
Some grocery stores sell chicken wings already separated into flats and drumettes (they may be labeled as party wings). Other times you may find whole chicken wings with the drumette, flat, and tip all connected. You can ask the meat counter employees to separate the wings for you, but it’s simple to learn how to cut whole chicken wings yourself at home.
Here are the basic steps.
- Place one whole chicken wing skin-side down. This lets you see the joints more easily.
- Cut between the drumette and flat. Place the middle or heel of your chef’s knife at the joint where the bones meet. Sometimes you can feel a space where the two wing portions meet. Press down firmly with the knife, cutting all the way through the joint to the cutting board.
- Separate the flat and the tip. Repeat the process, cutting through the joint that connects the flat and the tip.
How to Store and Reheat Buffalo Wings
Refrigerate leftover Buffalo chicken wings for up to four days. Reheat leftovers in the upper third of a 400°F oven until heated through and the skin is crisp, about 10 minutes. Toss with more Buffalo sauce before serving.
What to Serve with Buffalo Wings
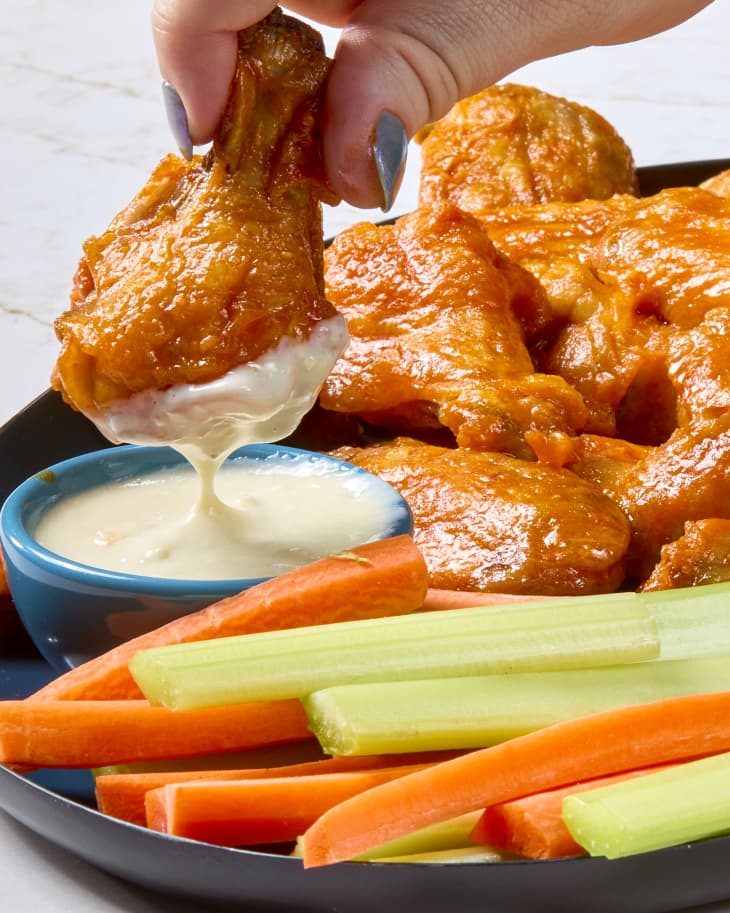
A platter of Buffalo wings isn’t complete without a dish of blue cheese dressing or ranch dressing and some celery and carrot sticks. Here are some more ideas for your game-day spread.
Buffalo Wings Recipe
The best-kept secret for super-crispy Buffalo wings? Baking powder.
Prep time 15 minutes to 20 minutes
Cook time 40 minutes to 50 minutes
Serves 6 to 8
Nutritional Info
Ingredients
For the chicken:
Cooking spray
- 3 pounds
chicken wings, preferably party wings
- 1 3/4 teaspoons
kosher salt
- 1 1/2 teaspoons
aluminum-free baking powder (not baking soda)
For the Buffalo sauce and serving:
- 4 tablespoons
(1/2 stick) unsalted butter
- 1/3 cup
Frank’s Original RedHot Sauce (not wing sauce)
- 1/4 teaspoon
garlic powder
For serving: blue cheese dressing, ranch dressing, carrot sticks, and celery sticks
Instructions
Line a rimmed baking sheet with aluminum foil, then fit with a wire rack. Coat the rack with cooking spray.
Prepare 3 pounds chicken wings if the wings are whole and not yet separated: Use a chef’s knife or kitchen shears to cut through the first joint of the wing and remove the wing tip. Discard or freeze the wing tips for stock. Cut through the second joint to separate the wing into forearm (flat) and upper arm (drumette) portions.
Pat the wings dry with paper towels and place in a large bowl. Sprinkle with 1 3/4 teaspoons kosher salt and 1 1/2 teaspoons baking powder. Toss with your hands to evenly coat the wings.
Transfer the wings skin-side to the rack, arranging them in a single layer. The wings may touch slightly but should not overlap. Refrigerate uncovered for at least 8 hours or up to 1 day.
Arrange a rack in the middle of the oven and heat the oven to 425°F. Let the wings sit at room temperature while the oven heats.
Bake until the top of the wings are golden-brown and crisp, 25 to 30 minutes. Flip the wings. Bake until the second side is golden-brown and crisp, 15 to 20 minutes more. Meanwhile, melt 4 tablespoons unsalted butter in a small saucepan over medium-low heat. (Alternatively, place in a microwave-safe bowl and microwave until melted.) Turn off the heat, add 1/3 cup Frank’s Original RedHot Sauce and 1/4 teaspoon garlic powder, and whisk until combined.
When the wings are ready, transfer to a large bowl. Drizzle with the sauce and toss evenly to coat. Serve with blue cheese or ranch dressing for dipping and carrot and celery sticks, if desired.
Recipe Notes
Make ahead: The chicken wings can be tossed with kosher salt and baking powder, arranged on a wire rack, and refrigerated up to 1 day in advance before baking.
Storage: Leftovers can be refrigerated in an airtight container for up to 4 days. Reheat leftovers in the upper third of a 400°F oven until heated through and the skin is crisp, about 10 minutes.
Recipe variation: The wings can be baked immediately after seasoning, or after 4 hours uncovered in the refrigerator, but the skin will not be as crispy.