
Pan co’Santi: Walnut Bread from Jim Lahey Cookbook Recipe

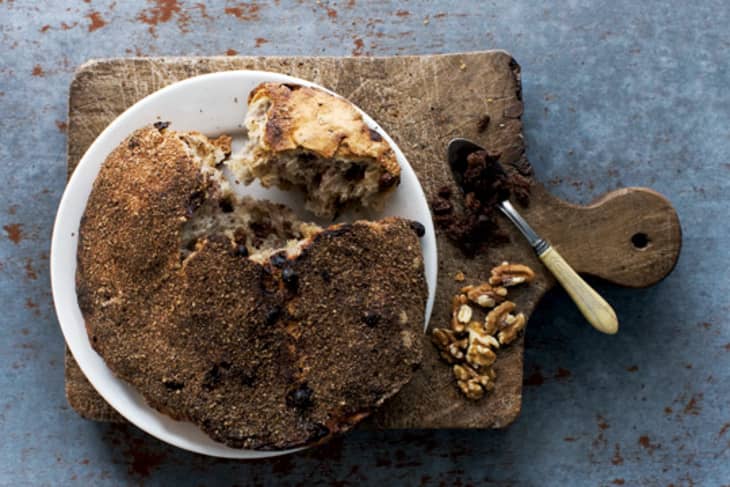
This simple no-knead bread is studded with walnuts and raisins, and has just a hint of cinnamon. We could have this for breakfast or we could just as easily serve it alongside a hearty meal. It’s also a perfect example of the kind of simple, elegant recipes we found in Jim Lahey’s new book,
My Bread
When I was in Tuscany and my love affair with baking was growing, one of the most enjoyable yet simplest brads I learned about was a version of this raisin walnut bread. It’s a classic, festive bread for the holidays, which I ate first on All Saints’ Day (Tutti Santi Giorni). – Jim Lahey
Pan co'Santi - Walnut Bread
Makes 1 (10-inch) loaf
Nutritional Info
Ingredients
- 3 cups
bread flour (400 grams)
- 1/2 cup
raisins (85 grams)
- 1/2 cup
chopped walnuts (50 grams)
- 1 1/4 teaspoons
table salt (8 grams)
- 3/4 teaspoon
ground cinnamon (2 grams)
- 1/2 teaspoon
instant or other active dry yeast (2 grams)
- Pinch
freshly ground black pepper
- 1 1/2 cups
cool (55 to 65 degrees F) water (350 grams)
Wheat bran, cornmeal, or additional flour for dusting
Equipment
4 1/2- to 5 1/2-quart heavy pot
Instructions
In a medium bowl, stir together the flour, raisins, walnuts, salt, cinnamon, yeast, and pepper, mixing thoroughly. Add the water and, using a wooden spoon or your hand, mix until you have a wet, sticky dough, about 30 seconds. If it's not really sticky to the touch, mix in another tablespoon or two of water. Cover the bowl and let sit at room temperature until the surface is dotted with bubbles and the dough is more than doubled in size, 12 to 18 hours.
When the first rise is complete, generously dust a work surface with flour. Use a bowl scraper or rubber spatula to scrape the dough out of the bowl in one piece. Using lightly floured hands or a bowl scraper or spatula, lift the edges of the dough in toward the center. Nudge and tuck in the edges of the dough to make it round.
Place a tea towel on your work surface and generously dust it with wheat bran, cornmeal, or flour. Gently place the dough on the towel, seam side down. If the dough is tacky, dust the top lightly with wheat bran, cornmeal, or flour. Fold the ends of the tea towel loosely over the dough to cover it and place it in a warm, draft-free spot to rise for 1 to 2 hours. The dough is ready when it is almost doubled. If you gently poke it with your finger, it should hold the impression. If it springs back, let it rise for another 15 minutes.
Half an hour before the end of the second rise, preheat the oven to 475 degrees F, with a rack in the lower third, and place the covered 4 1/2 - to 5 1/2 -quart heavy pot in the center of the rack.
Using pot holders, carefully remove the preheated pot from the oven and uncover it. Unfold the tea towel and quickly but gently invert the dough into the pot, seam side up. (Use caution--the pot will be very hot; see photos, page 55.) Cover the pot and bake for 30 minutes.
Remove the lid and continue baking until bread is a deep chestnut color but not burnt, 15 to 30 minutes more. Use a heatproof spatula or pot holders to gently lift the bread out of the pot and place it on a rack to cool thoroughly.
Recipe Notes
Reprinted with permission from My Bread by Jim Lahey, copyright (c)2009, W.W. Norton & Company.
• Read our review:
My Bread by Jim Lahey
• Buy the book: My Bread: The Revolutionary No-Work, No-Knead Method .
(Image: Squire Fox. Image and recipe reprinted with permission from W.W. Norton & Company.)