
How To Make Ice Cream Cones

Is there anything better than the smell of a fresh ice cream cone? I always thought you needed a fancy press and shaping tools. Turns out all you need is a baking sheet and a $3 prop from the crafts store!


Tuiles are crispy lightweight cookies that can be molded into shapes while hot out of the oven. This version, adapted from Epicurious, uses ground almonds for a delicate, almond-scented cone. Once you get the hang of shaping the cone (without burning your fingers), these are surprisingly easy to make and totally delicious.
What You Need
Ingredients
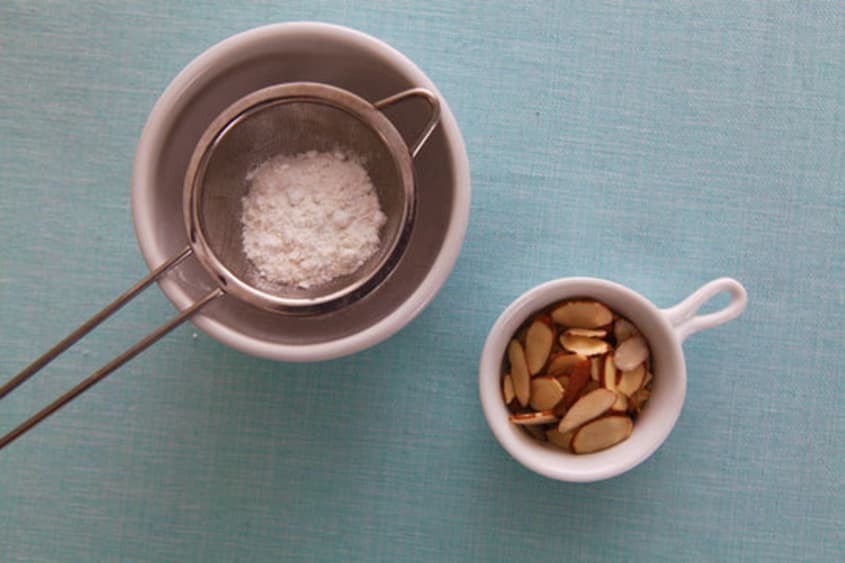
1/2 cup almonds, ground fine
1/4 cup all-purpose flour
1/2 cup confectioner’s sugar
1/4 teaspoon salt
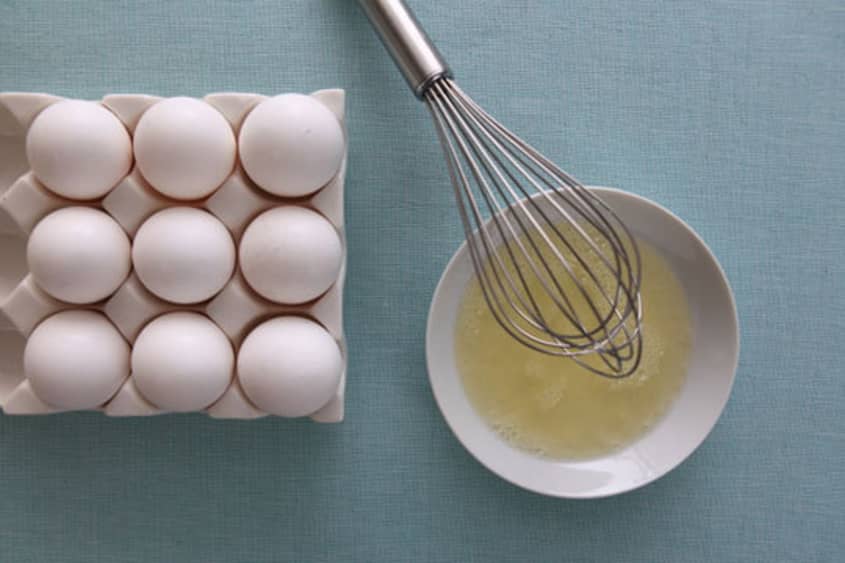
2 large egg whites
1/4 teaspoon almond extract
1/2 teaspoon water
5 tablespoons unsalted butter, melted
Equipment
baking sheet
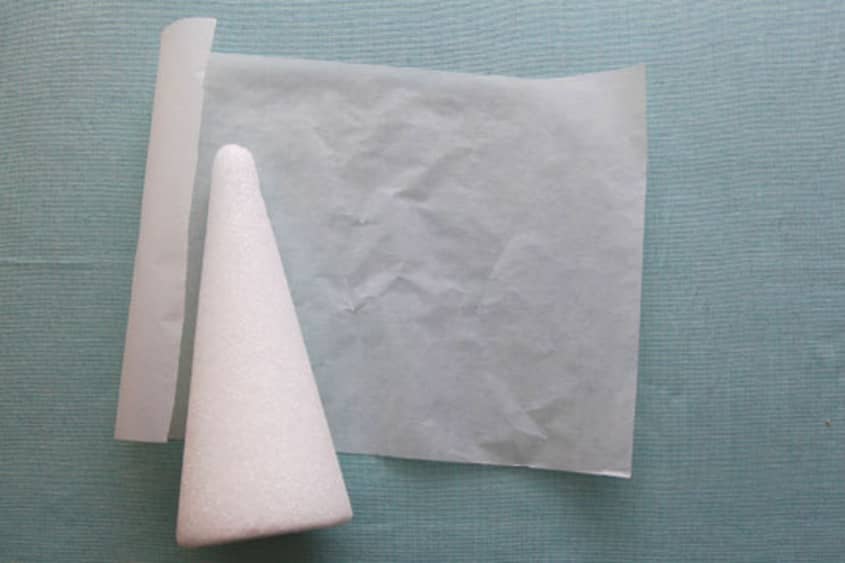
1 foam cone from crafts store
parchment paper
Instructions
1. Cut a strip of parchment paper the same height as the foam cone. Wrap around the cone until completely covered in parchment; tape securely.
2. Preheat oven to 300°F. Coat a heavy baking sheet well with cooking spray or line with parchment paper. (Cut four pieces of parchment to fit the baking sheet; you’ll make four batches of cones).
3. Grind almonds in a food processor until they’re as fine as possible. Place ground almonds in a bowl, and sift in flour, sugar, and salt.
4. In a separate bowl, lightly whisk whites with water and almond extract, and add to flour mixture with butter. Mix until combined well. Mixture should drip slowly off the end of a whisk, and hold its shape for a heaping tablespoon. If it’s runny, put in the refrigerator for 5 minutes.
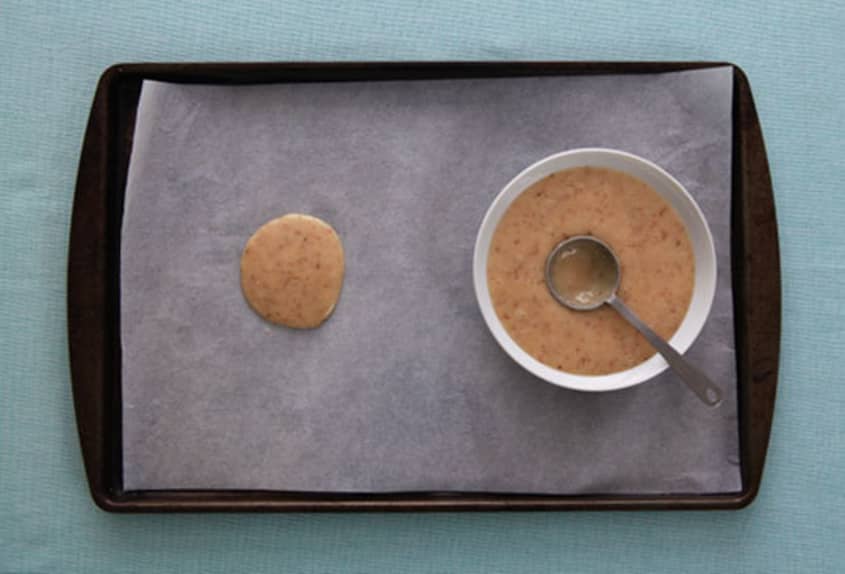
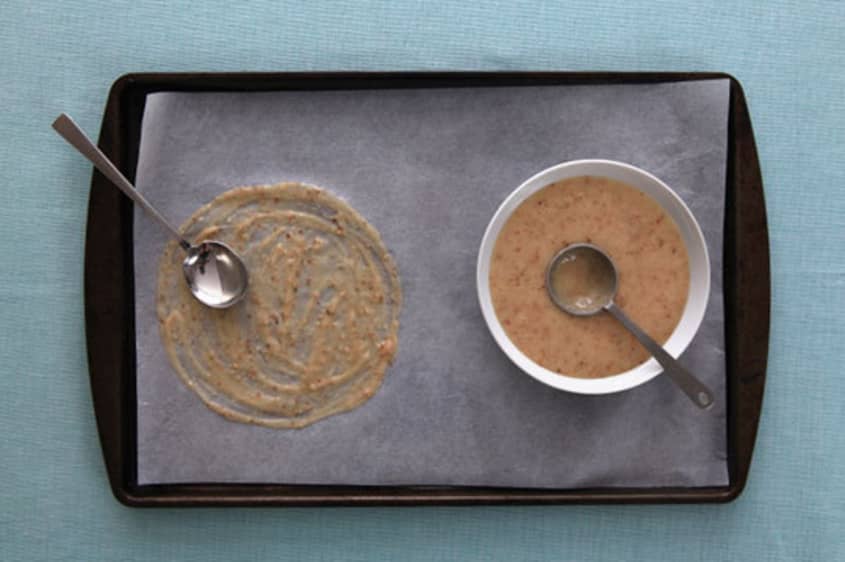
5. Drop two heaping tablespoons of batter on opposite sides of baking sheet and, with back of a spoon, spread evenly into 6-inch rounds. Use the back of the spoon to push the batter outwards in a ring until nearly translucent; there should be no pools of batter, or wrinkles in the parchment paper.
6. Bake in middle of oven, turning halfway through, until golden brown throughout. If using a thin baking tray, this will take 8-10 minutes. If using a lined pyrex pan or heavy roasting dish, the cookie will brown more slowly and evenly, 18-20 minutes.
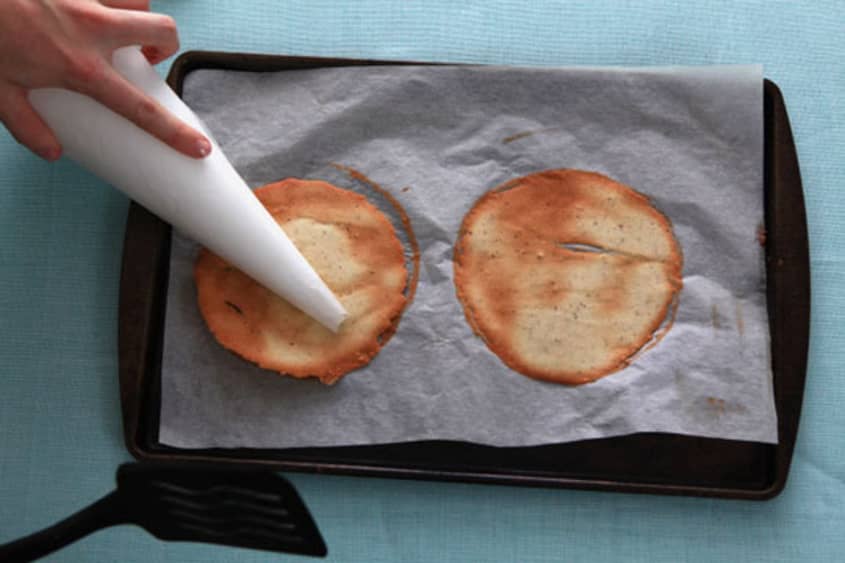
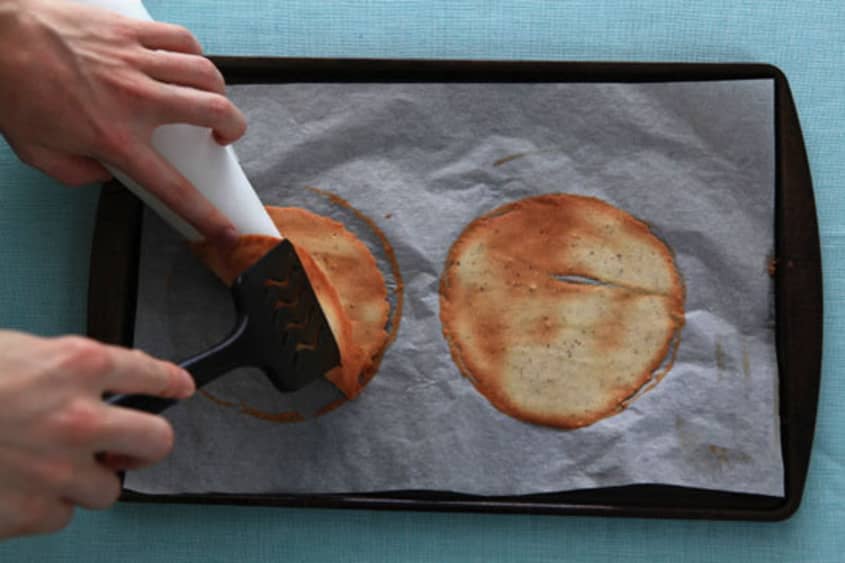
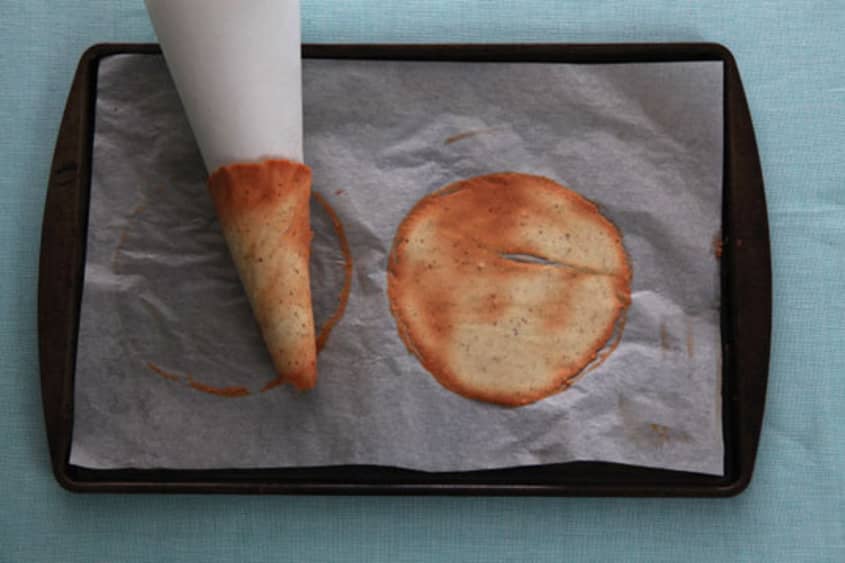
7. Remove tray from oven. Gently slide your spatula under the first cookie, and loosen from sheet, using a sideways back and forth motion.
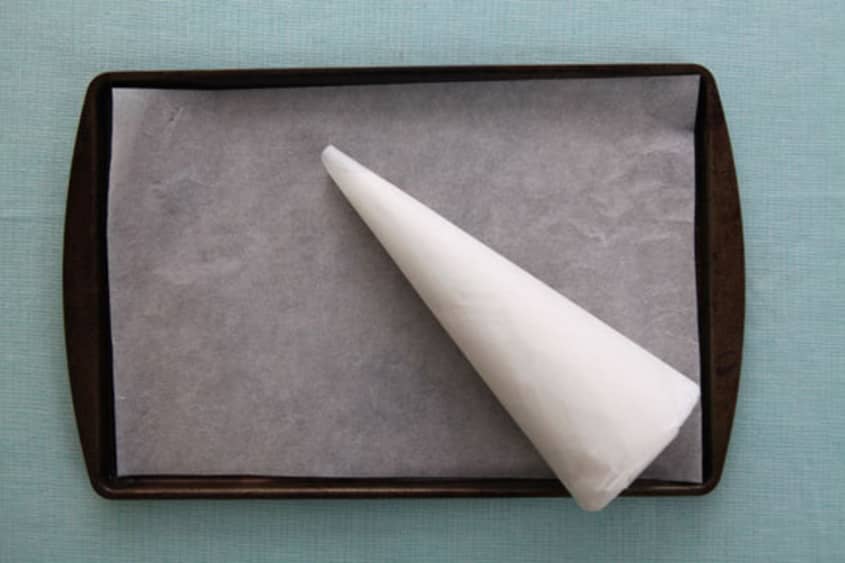
8. Place your cone in the middle of one of the cookies. Use your spatula to lift one edge of the cookie, and fold over the cone.
9. Using the spatula or your fingers (careful, it will be hot), roll the cone until the seam is face down. Hold, seam side down, at least 10 seconds, until hardened. Return the second cookie to the oven for 15-30 seconds to soften, and repeat.
10. Place formed cones upright in a small glass to cool completely. Make more cookies with remaining batter in same manner, spraying or lining baking sheet for each batch.
11.To serve, place a mini marshmallow in the bottom of the cone to prevent drips. Top with ice cream, and enjoy.
Additional Notes:
• Cones may be made 2 days ahead and kept in an airtight container at room temperature (but are best eaten immediately). For more homemade cone ideas, check out Crunchy Carriers: Making Ice Cream Cones at Home.

Want more smart tutorials for getting things done around the home?
We’re looking for great examples of your own household intelligence too!
(Originally published August 12, 2010)
(Images: Liz Vidyarthi)