

We Tried 7 Methods for Making Ice Cream Without a Machine and Found 2 Favorites
Consider us your ice cream-at-home evangelist: Our personal mission is to get as many people churning out homemade ice cream as possible this summer. Since ice cream ingredients are kitchen staples (milk, cream, eggs, and sugar make up ice cream’s base), equipment is the last hurdle to making ice cream.
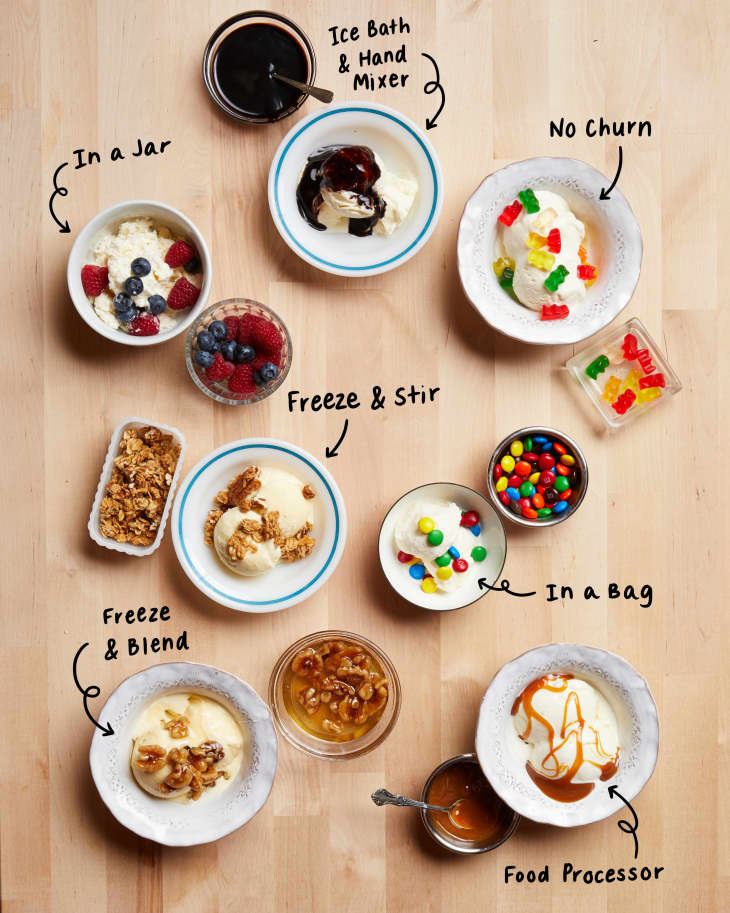
That’s why we put seven popular methods for making ice cream without a machine to the test. We wanted to find a process that would work in almost any kitchen — well-equipped or not — so that anyone who is up for the task can make their own ice cream. Two top contenders work well for any home cook, with one smart method leading the pack as our favorite. Here’s what we found.
How We Tested the Ice Cream Methods
After exploring the internet, popular ice cream books, and Kitchn archives, we landed on seven methods for making ice cream without a machine. Each used a basic ice cream recipe and common kitchen equipment, like a blender or hand-mixer. We kept things simple by only making vanilla ice cream; vanilla lets the particularities of each recipe really shine when they’re side by side. Our main goal was to find a method that could be made with any ice cream base using minimal kitchen equipment.
A few of the ice cream bases require chilling before freezing, overnight freezing, or overnight hardening (this is freezing after churning or mixing to let the ice cream firm up). We staggered making bases with churning and refreezing over the course of two days so that all of the ice creams would be churned, frozen, and tasted on the same day. We also stuck to the same milk, eggs, cream, and vanilla for each recipe to keep testing as equal as possible.
Method: Ice Cream in a Bag
- Total time: 40 minutes
- Rating: 2/10
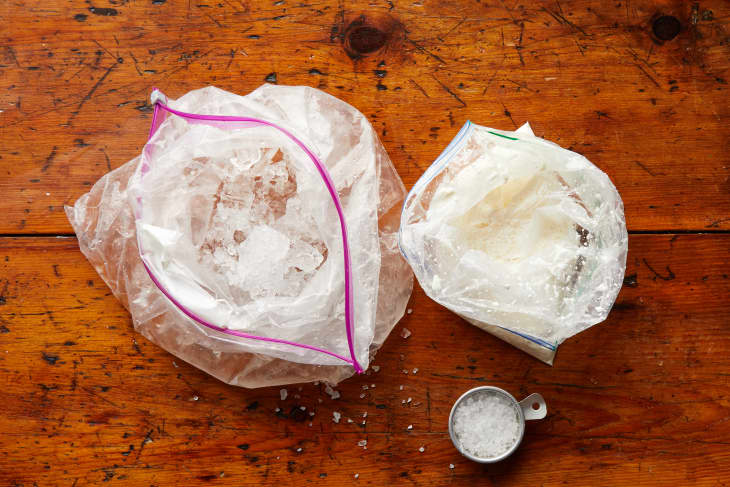
About this method: Ice Cream in a Bag has been around since we were kids, and it is something many Kitchn staffers look forward to making with our own kids each summer. You make a mixture of half-and-half, sugar, and vanilla inside a quart-sized zip-top bag, then you fill a large zip-top bag with ice and salt and seal the smaller dairy-filled bag inside the ice. For 30 minutes, you toss, massage, and otherwise “churn” the smaller bag within the ice-filled bag until the dairy mixture has the consistency of soft-serve ice cream.
Results: This is a super-fun activity for kids, but isn’t quite as fun if you’re a solo adult mixing this up by yourself. The bag gets super cold, can leak, and also sweats a bit, making a mess inside your kitchen. The resulting ice cream doesn’t have the flavor or texture of churned ice cream.
The takeaway: Skip this method if you’re goal is super creamy, dreamy ice cream, and a yield of more than a couple scoops. This method’s ice cream is best eaten right after mixing and doesn’t keep well in the freezer.
Method: Ice Cream in a Jar
- Total time: 3 hours
- Rating: 3/10
About this method: This method popped up most recently in the New York Times Food section, but has been around for a while. Heavy cream is sweetened and flavored with vanilla, then added to a jar and shaken until the cream thickens. Freeze the cream for about 3 hours and you’ve got something like ice cream.
Results: For those of us whole ate a lot of semi-frozen Cool Whip as kids, this frozen treat is great, but it isn’t really ice cream-like in texture or flavor. The cream makes for a dense frozen treat that leaves a fatty film as part of its aftertaste.
The takeaway: This is another method that can be fun for kids, as part of a creative classroom experiment or for a party (even a socially distanced one), but it doesn’t yield anything close to traditional ice cream.

Method: No-Churn, 2-Ingredient Ice Cream
- Total time: 4 hours or overnight
- Rating: 3/10
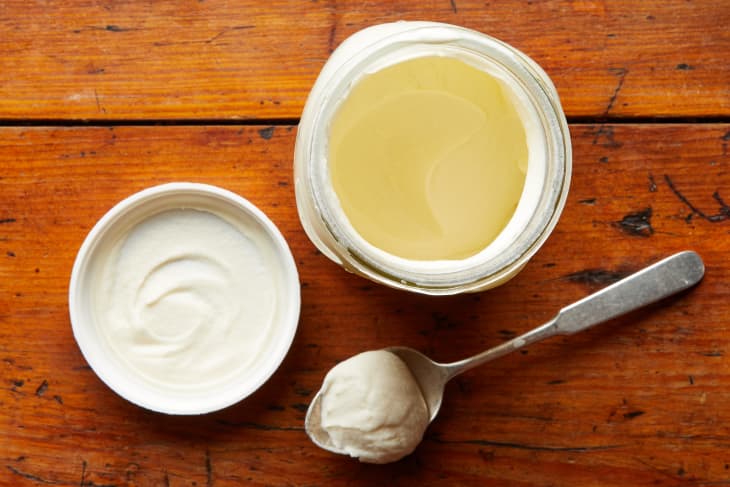
About this method: No-churn ice cream is wildly popular, and for good reason — it’s super easy to make. Essentially you whip heavy cream until fluffy stiff peaks form, then fold it into sweetened condensed milk (with some vanilla extract). You freeze the mixture in a loaf pan and have nearly instant ice cream!
Results: This method results in an ice cream-like treat that isn’t quite the custard-y ice cream you expect. The ratio of heavy cream to sweetened condensed milk leaves a lingering film of fat in your mouth.
The takeaway: You do need a hand or stand mixer to whip the cream — this is paramount to the ice cream-like texture of this ice cream hack. It is hard to call the resulting treat ice cream when it tastes more like frozen whipped topping than the real deal.
Method: Freeze and Blend
- Total time: 8 hours, including two freezing sessions
- Rating: 7/10
About this method: This method is equal parts ingenious and maddening. You make a very rich custard ice cream base, fold in some whipped cream to the base, but also reserve some of the cream for later. Then freeze the base, ideally in ice cube trays. Once frozen, you’ll blend the ice cream cubes with the remaining dairy in the blender until they reach a soft-serve consistency. Then freeze the whole batch again before eating.
Results: The ice cream flavor and texture of this method is pretty incredible; the frozen custard is rich. Blending makes for an ultra-smooth ice cream with tiny ice crystals that help this ice cream melt slowly on the spoon.
The takeaway: While we really loved the resulting ice cream from this method, it does require a little math for you to use your favorite ice cream recipe as the base. You have to leave some of the dairy out for blending. Plus you’ll probably need about 4 empty ice cube trays for freezing what is more than a quart of custard base. Our ice trays were full of ice, so we used a muffin pan with great success, but that also means you have to have enough freezer space for a muffin pan instead.
Method: Freeze and Stir
- Total time: 4 hours plus overnight freezing
- Rating: 8/10
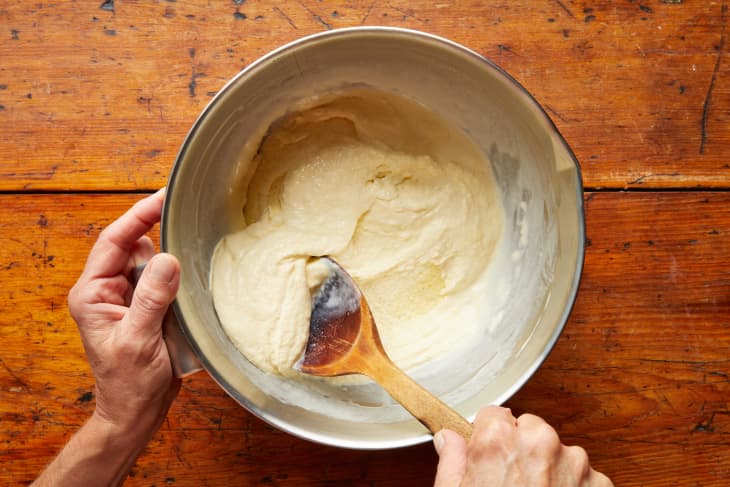
About this method: This method is exactly as it sounds: You make an ice cream base, pour it into a shallow pan or bowl, and stir it every 30 to 45 minutes as it freezes over 4 hours. We used this vanilla ice cream base, but you could use any ice cream recipe you love for this method.
Results: The finished ice cream was a little icy, which means that we should have stirred more frequently to get smaller, finer ice crystals. We loved that this method required very little in the way of equipment (just a cake pan for freezing that fit handily in my freezer), but it’s worth noting that you are tied to the kitchen all afternoon.
The takeaway: Again, we loved that no special equipment was required and you could use any ice cream base with this method. But the resulting ice cream had a less-than-ideal texture and kept me running back and forth to the freezer all afternoon.
Method: Ice Bath and Hand Mixer
- Total time: 3 hours, plus overnight freezing
- Rating: 8/10
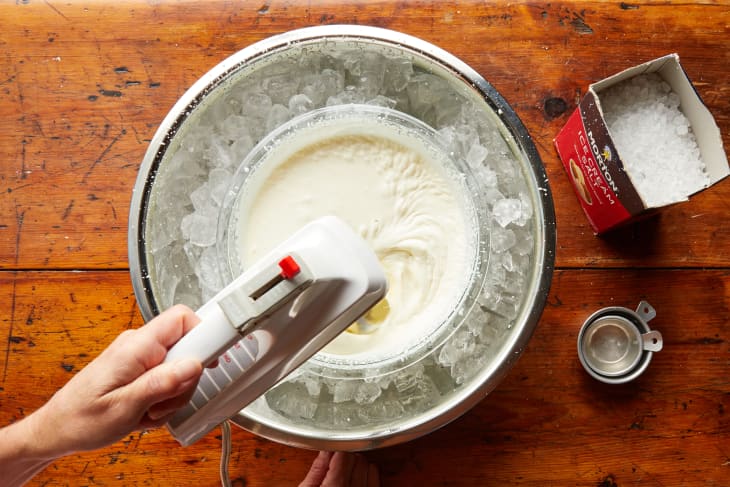
About this method: With this method, you’re basically building a temporary ice cream machine. Ice and salt go into your biggest bowl, while an ice cream base goes into another bowl. You set the ice cream bowl into the ice and mix it with a hand mixer as it freezes. You do have to tuck the whole crazy contraption in the freezer for 45 minutes to seed the mixture with ice crystals, but this doesn’t require hours of stirring like the freeze-and-stir method does.
Results: There are quite a few equipment considerations here. Do you have room for an ice bath in your freezer? You also need a hand mixer, and lots of ice. You’ll be limited in yield by how large your two largest bowls are. But this most closely mimics an ice cream maker. This made some of the very best ice cream, texture-wise; the crystals were small and made for a very smooth, slow-melting ice cream.
The takeaway: This is a really great method if you’ve got the time and space to manage building a bowl-in-bowl method that fits in your freezer. The original recipe suggests making half a batch of ice cream at a time with this method. You can use this method for any ice cream recipe you like.
Method: Food Processor
- Total time: 2 hours plus overnight freezing time
- Rating: 10/10
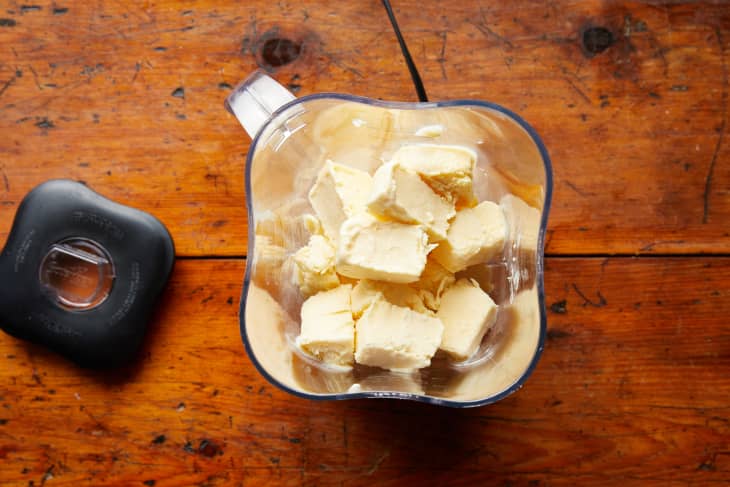
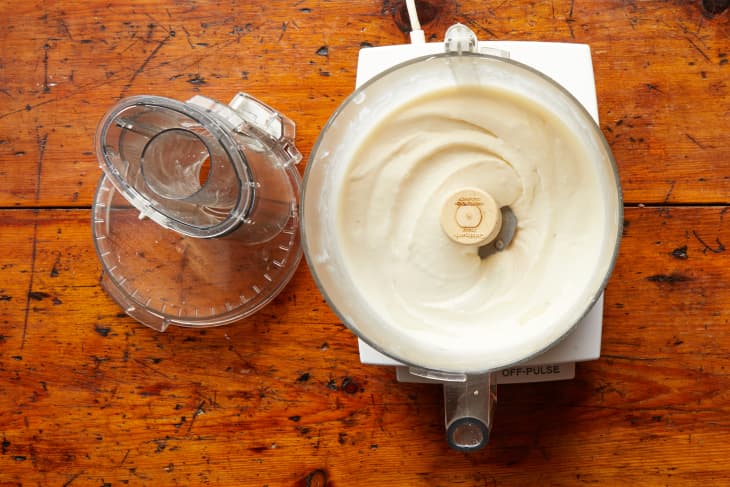
About this method: Mix up your favorite ice cream base (we used this recipe), then freeze it flat in a large zip-top bag. After freezing, you’ll have a sheet of frozen ice cream base that you can break or cut into chunks to fit inside your food processor. Then you pulse the frozen base in a food processor before freezing again.
Results: Ice cream made with this method was a dream; the texture was light and easy to scoop with a very creamy frozen texture. It was also very easy to mix up the base, freeze it, and then “churn” it in the food processor.
The takeaway: This method won for ease, speed, and resulting texture. Because the ice cream is frozen in a single bag, it doesn’t take up a ton of freezer space, and popping the frozen base into the food processor to blend is fast and takes less than 10 minutes to “churn” (even a home ice cream machine can’t claim that!). The only downside? You need a food processor to pull it off.
The Biggest Takeaways
If you’ve already got a food processor, the food processor method is the closest to an ice cream machine you can get. You can use any ice cream recipe you’ve been eyeing and have hand-churned ice cream in a single day, even with freezing time. No food processor, but plenty of freezer space? Try the ice bath-and-hand mixer method. This method will take a little more time, but will give you scoop shop-quality ice cream at home. Finally, the freeze-and-stir method can work for any home cook with minimal equipment, even if it keeps you tied to the kitchen most of the day. There is literally no excuse for not making ice cream at home this summer; there’s a machine-free method for every kind of kitchen and home cook.
Do you have a favorite method for making ice cream without an ice cream maker? Let us know in the comments!