
How To Make Homemade Chicken Stock

The easiest way to make a classic, flavorful chicken stock.
Makesabout 8 cups
Prep15 minutes
Cook2 hours 30 minutes
Homemade chicken stock is a kitchen project we firmly believe everyone should try at least once. Made from what are essentially cooking scraps, it’s a magical ingredient that serves as the unassuming backbone of dishes like soups, risottos, gravies, and sauces. It’s not ingredient-heavy, but instead relies on time to extract all the flavor out of the chicken to get a golden-hued, rich-tasting liquid.
All you need are chicken parts and some basic vegetables. The end result is invariably delicious and nourishing. Soup made with homemade chicken stock is always just a little extra special! Here’s how to do it.
Chicken Stock Versus Chicken Broth
You might have noticed that some recipes call for chicken broth, while others call for chicken stock. Grocery store shelves most often have broth, but sometimes there’s stock mingled in there. So what’s the difference? The process for both is the same: simmering chicken with aromatics. Stock, however, is usually made primarily from bones that sometimes are roasted first, simmered for a long time, and kept unsalted so that it can be used as an ingredient in other recipes. Chicken broth is made mainly from meat, simmered for a shorter period of time, and can be seasoned and sipped as is.
While that’s the traditional definition, lines have been very blurred over the years, and they’re used interchangeably for the home cook. Here at Kitchn, we primarily call for chicken broth since that’s what’s easiest to find at grocery stores, but you can always substitute chicken stock into a recipe instead.
The Best Type of Chicken for Homemade Chicken Stock
Chicken stock is a super-flexible recipe, and it can be made with any cut of chicken. Save scraps from breaking down a whole chicken, freeze a rotisserie chicken carcass — all of it will work. The key is knowing how various cuts affect the final flavor and body of the finished chicken stock.
Different parts of the chicken offer different things to stock. Meat adds the rich chicken-y flavor we all know and love, but a stock made with all meat can be thin and watery. Chicken bones have lots of collagen, so a stock made with all bones has more body but may lack flavor.
The best chicken stock has a blend of both. If you were to pick only one cut of chicken for your stock, go with chicken wings, which have lots of skin and meat for flavor but also thin bones that help to add body. But that doesn’t mean your chicken scraps aren’t valuable: Any stock, no matter what it’s made of, is still going to contribute a lot more flavor to a recipe than water alone. And to get the deepest flavor, you can roast the chicken bones or the raw chicken first.

Adding Aromatics and Herbs to Your Stock
You can absolutely make chicken stock with just chicken and water, which will give you a pure stock with chicken-forward flavor. But aromatics and herbs are an easy way to add a bit more nuance.
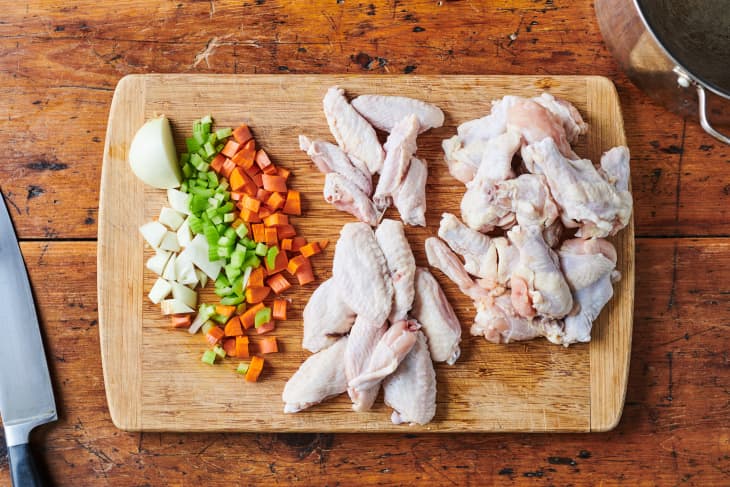
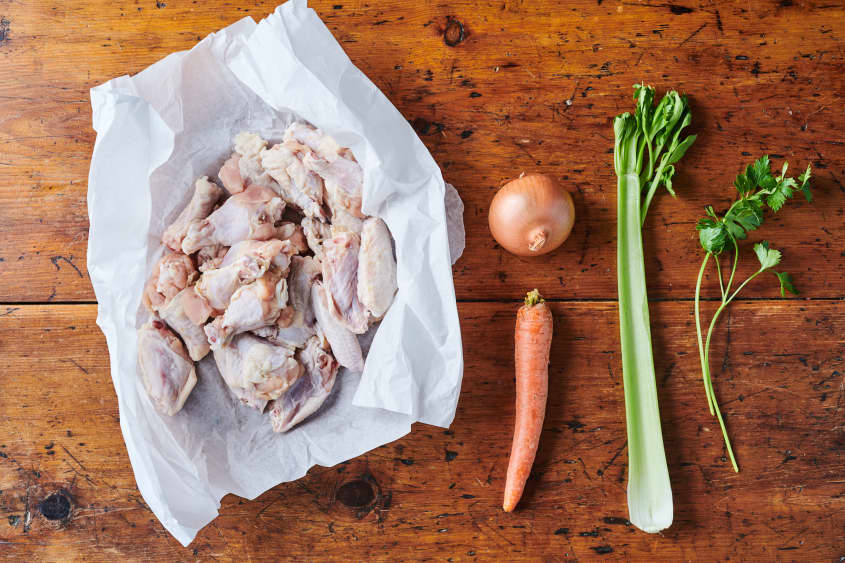
It’s best to start by considering how you’re going to use the stock. For instance, if you use stock in a lot of Asian recipes, skip the celery and sub in ginger so that the finished stock complements the other ingredients in a recipe. This recipe has easy-to-find carrots, celery, onion, and parsley. You don’t need a lot of each; you want to taste chicken, not vegetables. For two to three pounds of chicken, you only need one carrot and celery stalk, half an onion, and two sprigs of parsley. These will add a nice background flavor but let the chicken shine through.
The last ingredient is water. A good rule of thumb is that for each pound to pound-and-a-half of chicken, you’ll need one quart of water, or enough to just barely cover everything. Any more than that and you’ll have a watery chicken stock or need to simmer it for much longer to get it flavorful enough.
The one ingredient you shouldn’t add to chicken stock is salt. Because stock is used as an ingredient, a salty one might add too much salt to the recipe it’s used in. Plus, once you add salt in, you can’t take it out, so it’s safer to just skip the salt altogether.

How to Make Chicken Stock
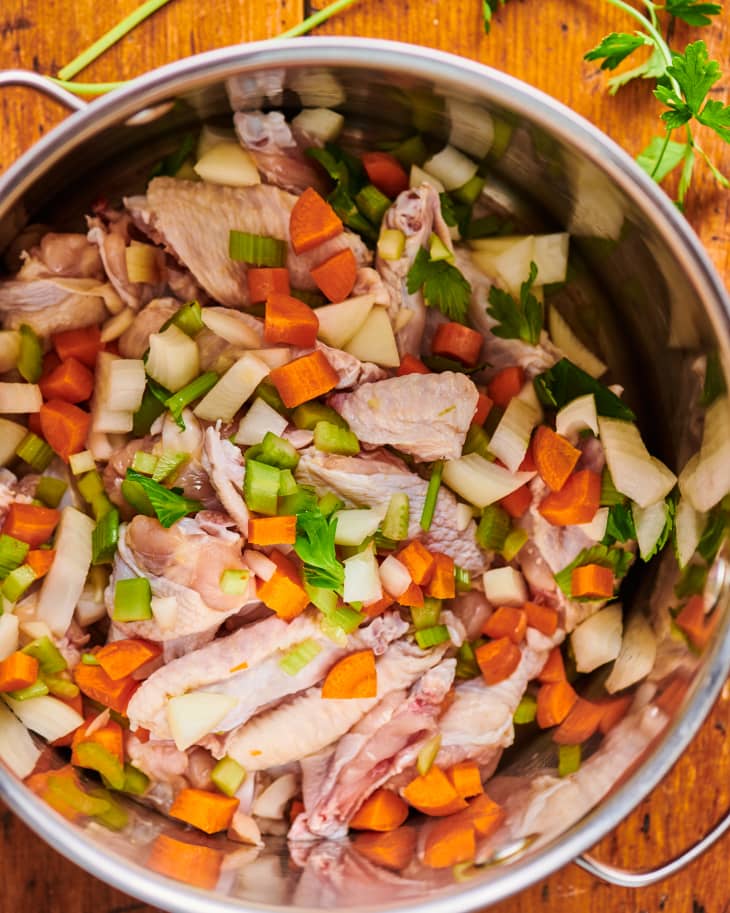
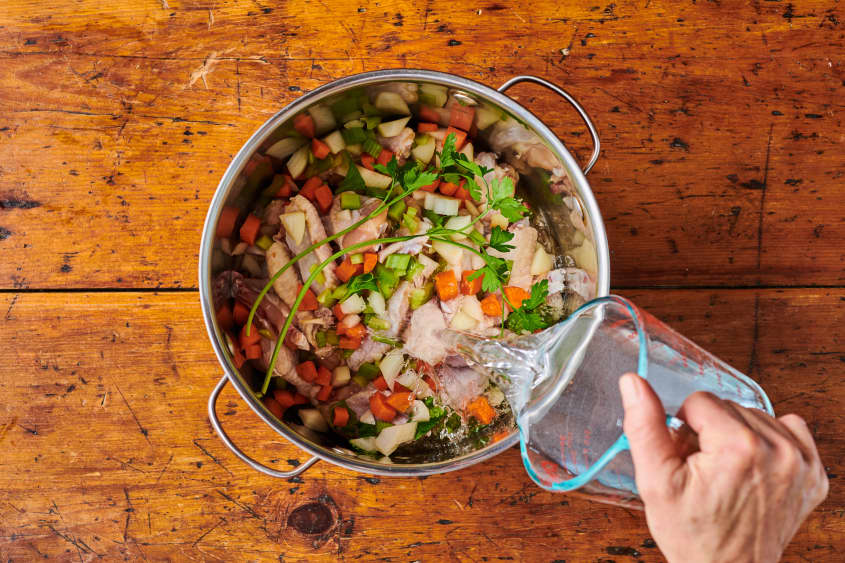
While you can certainly toss the chicken, aromatics, and water straight into the pot and get straight to simmering, it’s worth taking a few minutes to chop up the chicken and vegetables first. Chopping the chicken, especially if there are bones, means that more flavor and collagen can be extracted in a shorter amount of time. You can also use your hands to break down a chicken carcass into smaller pieces. Dicing the vegetables is also beneficial — when cut smaller, the flavor comes out more easily and the resulting stock is more balanced.
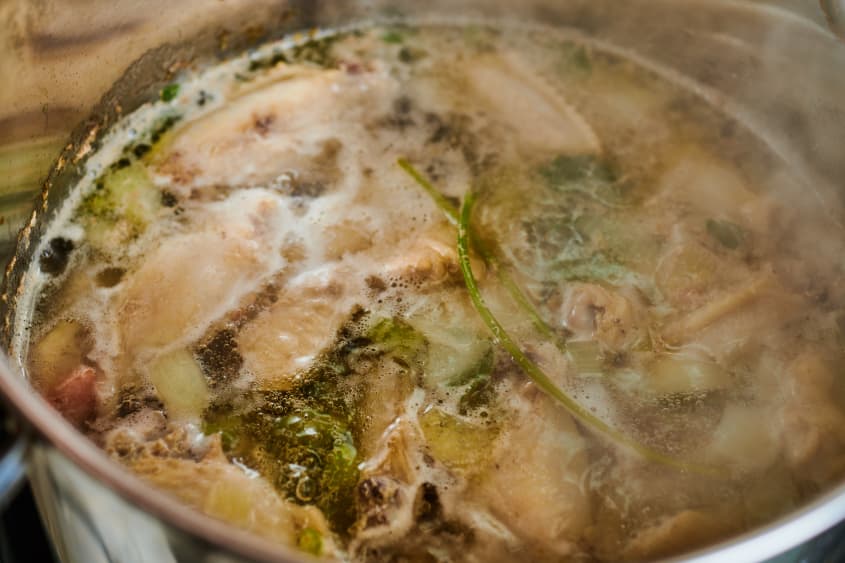
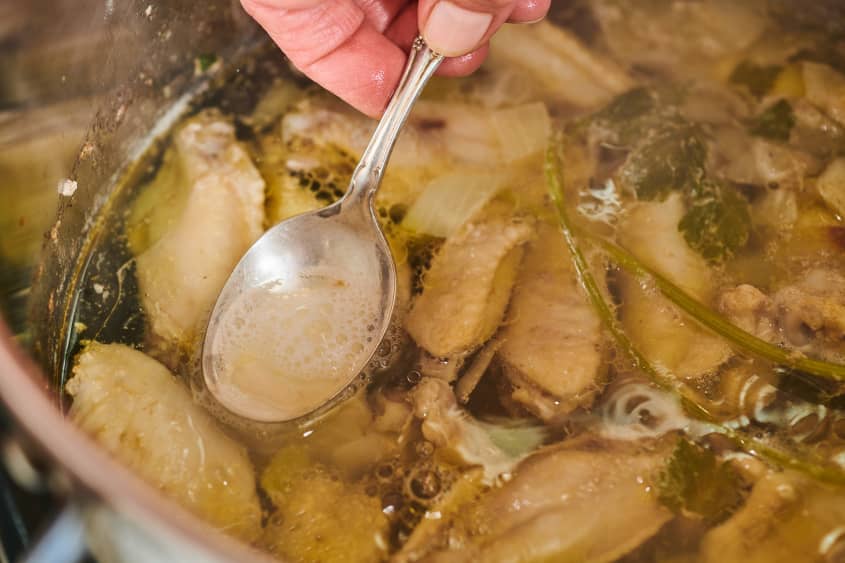
If you want a clear chicken stock, the key is to never let it come to a boil. Bring it up to a gentle simmer, which means little bubbles on the surface here and there, and keep it there. If you’d like, you can occasionally skim the scum that floats to the top, but it’s also fine to skip the skimming.
I’ve found that two hours is a good amount of time for simmering chicken stock. A good amount of flavor is extracted from the chicken, but it’s not an all-day affair. Just make sure you taste the stock, as it may need a little more time to get it to where you want it. Do remember that since there’s no salt, it might seem a bit bland, so focus on how intense the chicken flavor is instead.
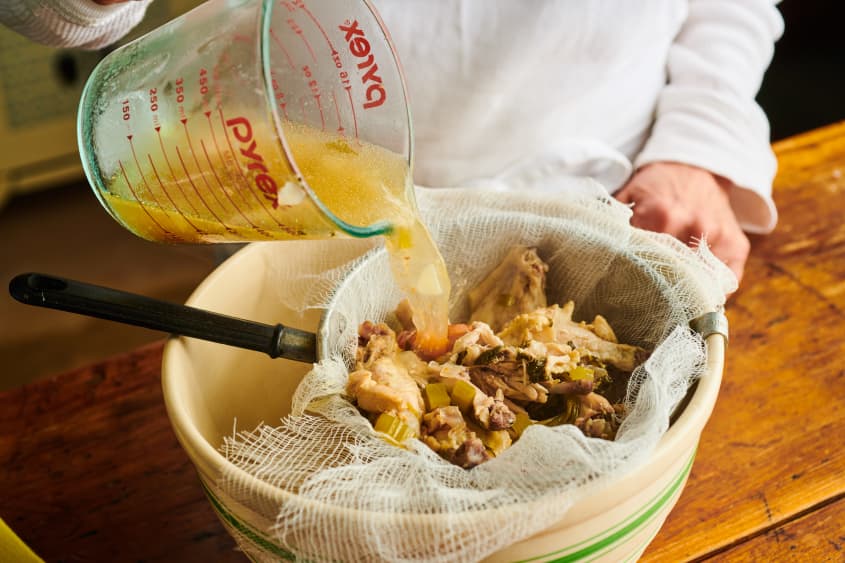
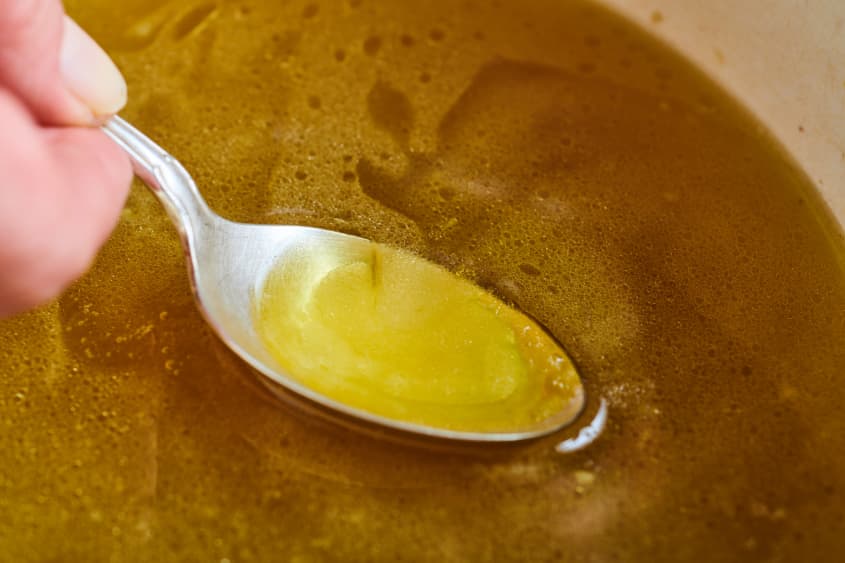
When the stock is ready, strain it through a fine-mesh strainer, or line a colander with cheesecloth, coffee filter, or even a lint-free kitchen towel. If you want to skim the fat off, give it a few minutes for the fat to rise to the top, then spoon off. Another way is to refrigerate the stock and let the fat congeal first, making it even easier to scrape off.
This stovetop method is the classic one for making chicken stock, but you can also use other appliances instead.
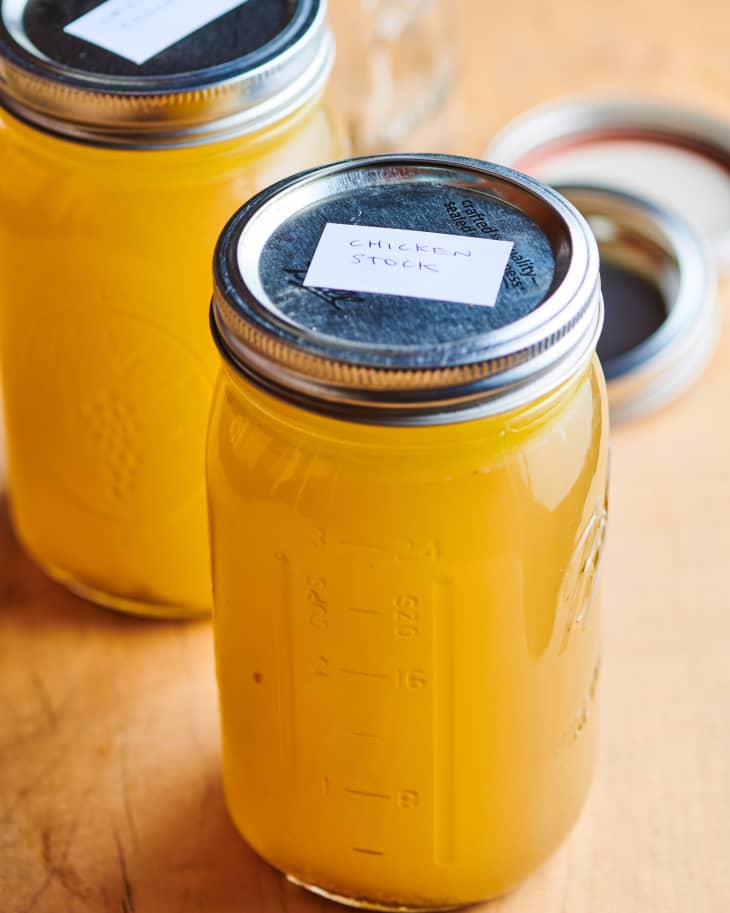
Storing Chicken Stock
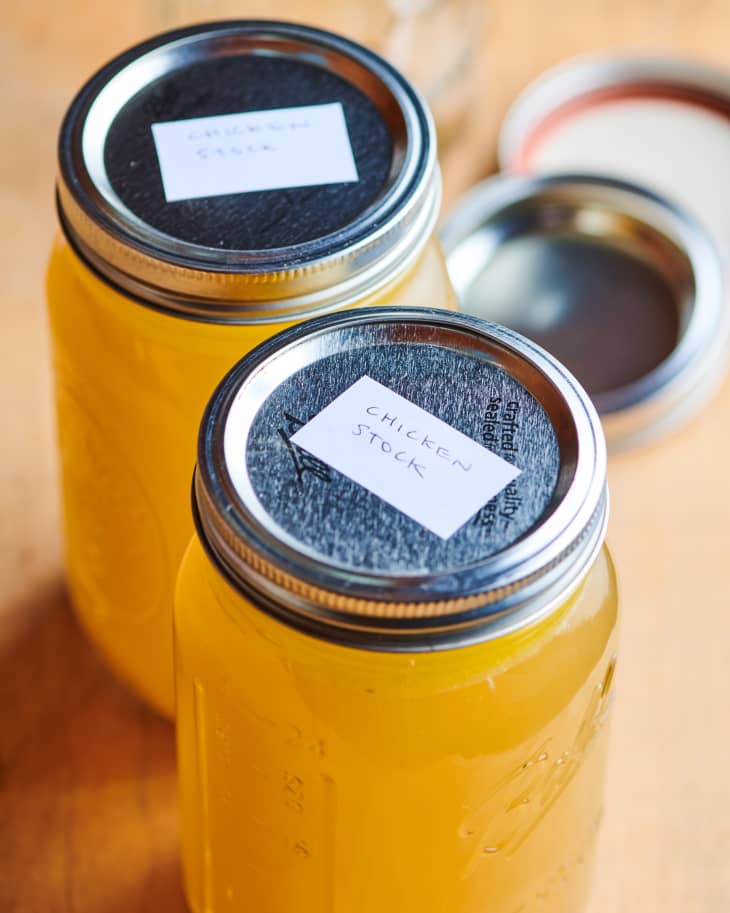
If you’re not using the stock right away, pour it into storage containers so it can cool a little faster. Quart containers are great if you’re using the chicken stock for soups, but if you use small amounts for other recipes, transfer it to smaller jars instead. Let it cool for an hour and then refrigerate or freeze.
For those who have precious little freezer space to spare, a neat trick is to concentrate the chicken stock so that it takes up less space. Strain the stock, then boil it until it’s reduced by half. Cool, then pour into ice cube trays and freeze. Pop the cubes into a zip-top bag for longer-term storage. To reconstitute the stock, just add an equal amount of water to the chicken stock cubes. Easy homemade chicken flavor is now at your fingertips.


How to Make Chicken Stock
The easiest way to make a classic, flavorful chicken stock.
Prep time 15 minutes
Cook time 2 hours 30 minutes
Makes about 8 cups
Nutritional Info
Ingredients
- 2 to 3 pounds
chicken parts or bones, or a mixture
- 1
medium carrot
- 1
medium celery stalk
- 1/2
medium yellow onion
- 2
fresh parsley sprigs
- 2 quarts
(8 cups) water
Equipment
Measuring cups
Fine-mesh strainer or colander and cheesecloth
Chef’s knife
Cutting board
Large heatproof bowl
Large pot
Instructions
Chop the chicken and vegetables. Chop 2 to 3 pounds chicken parts into 2 to 3-inch pieces and place in a large pot. Dice 1 medium carrot, 1 medium celery stalk, and 1/2 medium yellow onion, and add to the pot.
Add the parsley and water. Add 2 fresh parsley sprigs to the pot, then pour in 2 quarts water.
Bring to a simmer. Bring to a simmer over medium-high heat, making sure it does not come to a boil. You want a gentle, constant bubbling, mostly around the edges.
Simmer for 2 hours. Keep at a gentle simmer, reducing the heat if needed, and cook for 2 hours. You can skim off the scum that floats to the surface occasionally if you’d like, but it isn’t absolutely necessary. Check by tasting after 2 hours — if the stock isn’t as flavorful as you’d like, keep simmering and taste again every 15 minutes.
Strain the stock. When the stock is ready, fit a fine-mesh strainer (or colander lined with a coffee filter or double layer of cheesecloth) over a large heatproof bowl. Pour the stock through the strainer, then discard the contents of the strainer.
Skim the fat from the stock if desired. If you’d like to remove the fat from the stock, let it cool until the fat settles at the top, then skim it off with a spoon. You can also more easily remove the fat by chilling the stock and spooning the congealed fat from the surface later.
Use or store the stock. The stock is now ready to be used. To store, pour into storage containers (it’ll cool faster that way), and let cool uncovered at room temperature 1 hour. Cover and refrigerate up to 5 days or freeze up to 3 months.
Recipe Notes
Storage: Cooled stock can be refrigerated up to 5 days or frozen up to 3 months. Make sure you leave 1/2-inch of space at the top of the container if freezing, as liquid expands when frozen.
Concentrating stock: You can also concentrate the stock by boiling the finished stock down and reducing by half. Cool, pour into ice cube trays or small containers, and freeze. To reconstitute the stock, add an equal amount of water back to the concentrated stock.