
Recipe: Whole Wheat Sandwich Loaf with Oats and Pecans
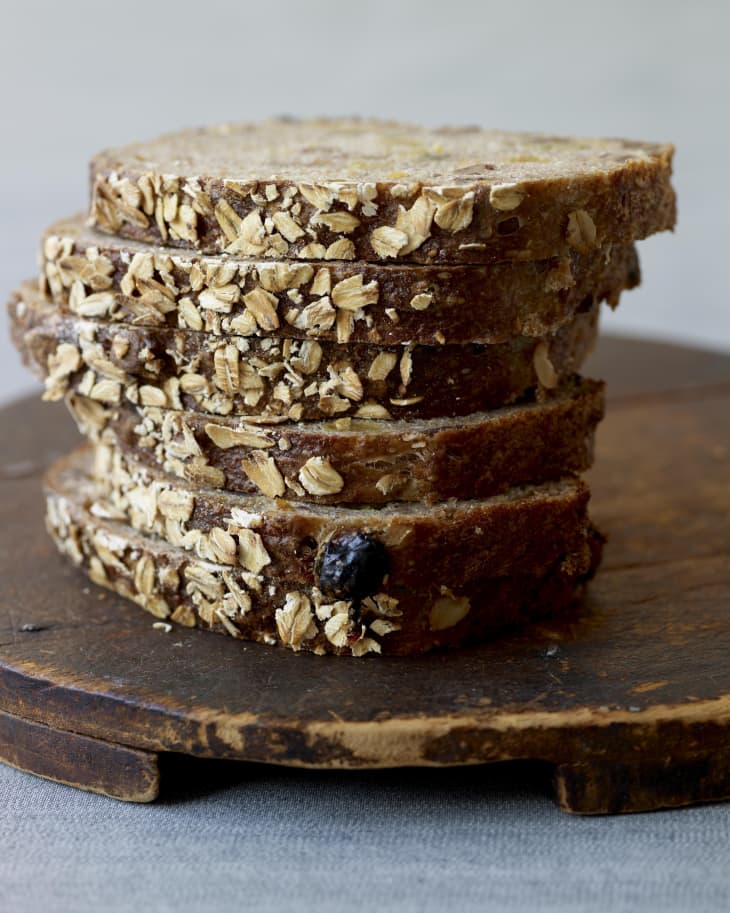
Whole Wheat Sandwich Bread with Oats and Pecans
Made with Biga Starter
Makes two 9 x 5-inch loaves
Equipment: two 9 x 5-inch loaf pans, oiled
Mildly sweet and slightly crunchy, our version of whole wheat–oatmeal bread is great for tuna sandwiches. Cut in thick slices, it’s perfect for French toast. Shape it into rolls for a dinner party or a family picnic. For variety, add two cups (ten ounces) of golden raisins to the dough and shape half of it into twists; crusty and delicious, they’re good for breakfast-on-the- go and afternoon snacks. This versatile bread is sure to become one of your favorites.
Very warm water (105º to 115ºF) – 57 g / 2.00 oz / 1/4 cup
Active dry yeast – 1 teaspoon / 1 teaspoon / 1 teaspoon
Whole wheat flour – 524 g / 18.48 oz / 3 1/2 cups
Unbleached bread flour – 354 g / 12.50 oz / 2 1/3 cups
Old-fashioned rolled oats – 170 g / 6.00 oz / 2 cups
Kosher salt – 20 g / 0.70 oz / 2 tablespoons
Cool water (75º to 78ºF) – 622 g / 22.00 oz / 2 3/4 cups
Biga Starter (see recipe below) – 340 g / 12.00 oz / 1 1/2 cups
Honey – 42 g / 1.50 oz / 2 tablespoons plus 2 teaspoons
Molasses – 35 g / 1.23 oz / 2 tablespoons
Canola or vegetable oil – 20 g / 0.70 oz / 2 tablespoons
Pecan pieces, toasted – 227 g / 8.00 oz / 2 cups
Extra oats, for topping the shaped loaves
1. Combine the very warm water and yeast in a large bowl and stir with a fork to dissolve the yeast. Let stand for 3 minutes.
2. Whisk the whole wheat flour, bread flour, oats, and salt together in a medium bowl. Set aside.
3. Add the cool water, biga, honey, molasses, and oil to the yeast mixture and mix with your fingers for 2 minutes, breaking up the biga. The mixture should look milky and slightly foamy. Add the flour mixture and stir with your fingers to incorporate the flour, scraping the sides of the bowl and folding the dough over itself until it gathers into a shaggy mass.
4. Move the dough to a very lightly floured surface and knead for 7 to 8 minutes, until it becomes supple and elastic, using as little additional flour as possible. This dough should be very soft and moist but not mushy. If it feels too wet, add another tablespoon or so of bread flour as you knead. If it feels too stiff, add cool water 1 tablespoon at a time until you have a pliable dough. It will feel sticky in the beginning but become compact and elastic as you knead it. Put the dough back into the mixing bowl, cover with oiled plastic, and let rest for 20 minutes to relax and develop elasticity. You should be able to stretch it easily but you won’t get a transparent sheet with this dough, because of the chunky oatmeal.
5. Spread out the dough in the mixing bowl and evenly sprinkle on the pecans. Press them into the dough, then pull the dough from the edges of the bowl and fold it in toward the middle. Knead the dough in the bowl until the nuts are evenly incorporated, 3 to 4 minutes.
6. Gather the dough into a loose ball, lift it up and oil the bowl, then place it back in the bowl, along with any loose nuts. Turn the dough to coat with oil, cover the bowl with oiled plastic wrap, and let it rise at room temperature (75º to 77ºF) for about 2 to 2½ hours, until it doubles in volume. When the dough is fully risen, an indentation made by poking your lightly floured finger deep into the dough should not spring back.
7. Gently remove the dough from the bowl and place it on a lightly floured work surface, pressing in any loose nuts. Divide it into two equal pieces and shape each piece into a log.
8. Spread a thin layer of the extra oats for topping on a flat plate or baking sheet. Use a pastry brush or plastic spray bottle to lightly moisten the top of each log with water, then roll the tops of the loaves in the oats. Place each loaf seam side down in one of the oiled 9 x 5-inch loaf pans. Cover with oiled plastic wrap and allow to proof for about 2 hours or until they have doubled in size (a finger pressed lightly into the dough will leave an indentation).
9. Thirty minutes before baking, preheat the oven to 450ºF. Prepare the oven by placing a cast-iron skillet and a smaller pan (a mini loaf pan) on the floor of the oven or on the lowest possible rack in an electric oven. Place an oven rack two rungs above the cast-iron pan, and if you have one, put a baking stone on the rack. Fill a plastic spray bottle with water. Fill a teakettle with water to be boiled later, and have a metal 1-cup measure with a straight handle available near the kettle.
10. Five to 10 minutes before the loaves are ready to bake, turn the water on to boil, and carefully place two ice cubes in the small loaf pan in the bottom of the oven. This helps to create moisture in the oven prior to baking.
11. When the loaves are ready, place the pans on the baking stone. (If you’re baking without a stone simply slide the bread pans onto the empty oven rack.) Pour 1 cup of boiling water into the skillet and immediately shut the oven door. After about 1 minute, quickly spray the loaves with water, then shut the oven door.
12. After 20 minutes, reduce the oven temperature to 400ºF and rotate the loaves if necessary to ensure even browning. Bake them for another 25 to 30 minutes, until the loaves sound slightly hollow when tipped out of the pan and tapped on the bottom (an instant-read digital thermometer should register around 210ºF). The sides and bottom of the loaves should feel firm and slightly crusty. If the tops are browned but the sides are still somewhat soft, place the loaves directly on the stone or the oven rack to bake for 5 to 10 more minutes.
13. Cool the loaves completely on a wire rack before slicing. This bread freezes well, wrapped tightly in aluminum foil and a heavy-duty plastic freezer bag.
Tips and Techniques
We used unbleached bread flour with a protein content of 12.7% and regular whole wheat flour with a protein content of 14.5% for this dough. The biga was made with all-purpose unbleached flour with a protein content of 11.7%.
Use the same container for weighing/measuring the honey and molasses and the oil. Pour the oil into the container first, then pour the specified amounts of honey and molasses on top of the oil. When you add them to the ingredients in your mixing bowl, the sticky sweeteners will be released easily from the cup without sticking, giving a more accurate measure and an easier clean-up. (When using volume, measure the oil first, then use the same tablespoon to measure the honey and the molasses.)
If you want to duplicate the Whole Wheat Oat Pecan bread we sell in the bakery, add 290 grams/10.25 ounces/2 cups of golden raisins to the dough when you add the pecans; divide the dough into four equal pieces and shape them into bâtards before proofing and baking. You may have to bake two of the loaves on a sheet pan if they won’t all fit on your baking stone.
You can also refrigerate this dough overnight and shape and bake it the next day. After mixing, let it rise for 1 hour at room temperature or until it looks slightly puffy but has not doubled, before refrigerating. The next day, let it rise for 2 hours at room temperature to warm and soften before shaping it.
Biga Starter
Many of our recipes use a biga starter made from flour, water, and a small amount of yeast. Biga, which is the Italian word for starter, was called Sponge Starter in the first version of Amy’s Bread, but today the word biga is well known by bread bakers so we decided to use it here as well. Biga usually refers to a starter made with yeast, not sourdough, although sourdough biga (biga naturale) can be found in some Italian recipes. This starter, which is thicker than poolish, is allowed to ferment for at least 8 hours. It can then be used immediately or stored in the refrigerator, covered with plastic wrap, for up to 24 hours. We like breads made with biga because they have a moist, chewy texture with more flavor, a nicer crust, and a longer shelf life than straight yeasted breads. These are many of the same qualities that make sourdough breads so appealing, but you can achieve them without the extended process of making a sourdough starter.
Small Batch
Makes 400 grams / 14 ounces / 1 3/4 cups
Very warm water (105º to 115ºF) – 200 g / 7.00 oz / 3/4 cup plus 2 tablespoons
Active dry yeast – 1/8 teaspoon / 1/8 teaspoon / 1/8 teaspoon
Unbleached all-purpose flour – 227 g / 8.00 oz / 1 1/2 cups plus 2 tablespoons
Large Batch
Makes 800 grams / 28 ounces / 3 1/2 cups
Equipment: one 2-quart clear plastic or glass container with high sides
Very warm water (105º to 115ºF) – 397 g / 14.00 oz / 1 3/4 cups
Active dry yeast – 1/4 teaspoon / 1/4 teaspoon / 1/4 teaspoon
Unbleached all-purpose flour – 454 g / 16.00 oz / 3 1/4 cups
1. In a medium bowl, mix the warm water and yeast together and stir to dissolve the yeast. Add the flour and stir vigorously with a wooden spoon for 1 to 2 minutes, until a smooth, somewhat elastic batter has formed. The batter will be fairly thick and stretchy; it gets softer and more elastic after it has risen. Scrape the biga into the container, mark the height of the starter and the time on a piece of tape on the side of the container so you can see how much it rises, and cover the container with plastic wrap.
2. Let it rise at room temperature (75º to 78ºF) for 6 to 8 hours. Or let it rise for 1 hour at room temperature, then chill it in the refrigerator for 8 hours or overnight. Remove it from the refrigerator and let it sit at room temperature for 3 to 4 hours to warm up and become active before use. Biga should more than double in volume. If you use the starter while it’s still cold from the refrigerator, be sure to compensate for the cold temperature by using warm water (85ºF to 90ºF) in your dough, instead of the cool water specified in the recipe. Use the starter while it is still bubbling up, but before it starts to deflate.
Buy the Book: Amy’s Bread: Revised and Updated by Amy Scherber and Toy Kim Dupree, $24 on Amazon.com