
How to Can Shelf-Stable Produce (for People Terrified of Canning)
As anyone who’s had too many vegetables in their fridge knows, the best way to preserve a garden or farmers market haul is by canning, or preserving the food in glass jars. And as anyone who has even casually Googled “preserving vegetables” knows, the real way to can food is in a hot water bath, so it stays shelf-stable (and can go in your pantry, actually freeing up room in that overstuffed fridge. But canning is scary, right? If you do it wrong, you can end up with food covered in dangerous bacteria, right?
No.
First off, let go of anything you’ve heard about canning being scary or dangerous. If you can boil water for pasta, you have the capacity to do a boiling water-bath process. Today, we’re only going to be talking about home canning high-acid foods like jams, pickles, tomatoes, and fruit in syrup. Botulism, that fearsome bacterium, cannot grow in high-acid environments. This means that it will not develop in your carefully canned strawberry jam. You can safely share it with friends, content in the knowledge that it will cause them absolutely no harm. Feel better? Good!
To get started canning, take stock of your current kitchen supplies. A canning pot is essentially a stockpot with a rack placed in the bottom. I am partial to a 12-quart stockpot fitted with a round cake cooling rack. If you have something similar, you’re halfway there.
In addition to your pot and rack, you’ll want a wide-mouth funnel, a variety of measuring cups and, a jar lifter. Buying an inexpensive canning kit is an easy way to get these tools in a single move. Beyond that, a generous stack of kitchen towels is always incredibly helpful.
Now, here’s what to do.
First, pick out a recipe from a reliable source. Grab the stockpot you’ve decided to use as your canner and fit it with a rack. Arrange the empty jars in the pot and fill it with enough water to cover the jars. Place a lid on the pot and bring it to a boil.
Set the rings aside and wash the lids in warm, soapy water. Set both aside.
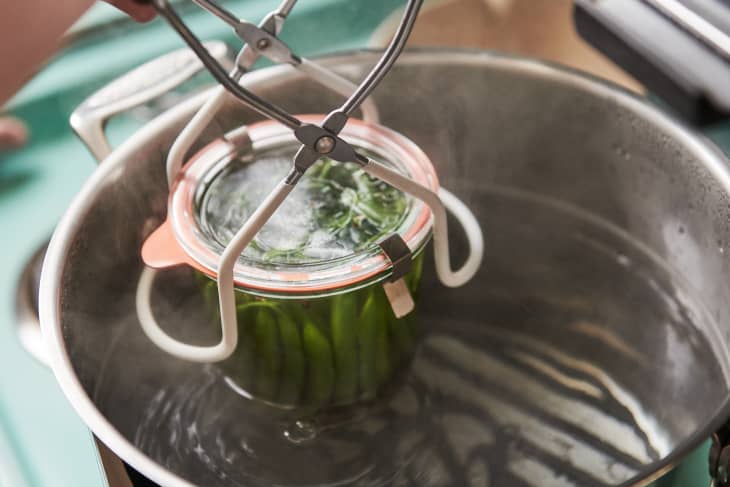
While the canning pot heats, prepare your food according to the recipe. When it is ready to be canned, remove the jars from the pot (pouring the water back into the pot as you remove the jars) and set them out on a clean towel on your counter.
Fill your jars. Depending on the recipe, you’ll need to leave between 1/4 and 1/2 an inch of headspace (the recipe should tell you). Wipe the rims of the jar with a clean, damp paper towel or the edge of a kitchen towel. Apply lids and rings, taking care not to tighten the rings too tightly.
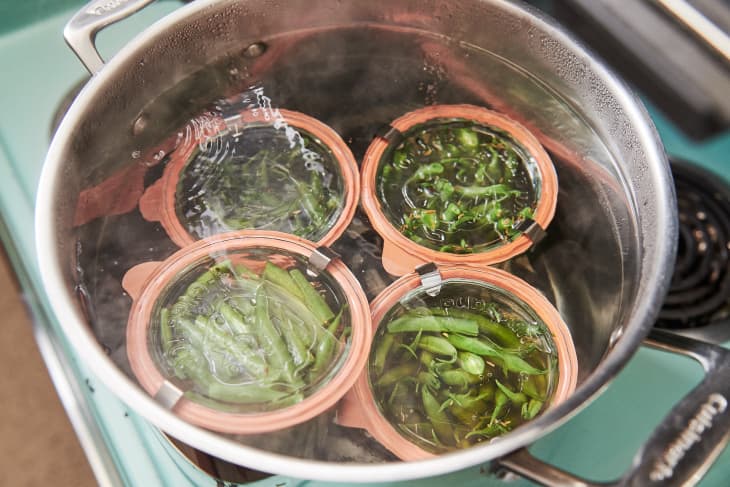
Lower the filled jars into the canning pot and make sure that they are covered with only about an inch of water. If you need to remove some water from the pot, use a heatproof measuring cup. Once the pot has returned to a rolling boil (you want robust action here, not just a few pokey bubbles), start your timer. The length of the processing time will vary from recipe to recipe. The boiling water-bath process both sterilizes the jars and contents, and it forces the air out of the jars, creating a situation in which the jars will form a vacuum seal once out of the water.
When your timer goes off, pull the pot off the heat and remove the lid. Let the jars cool slowly in the pot for five to 10 minutes. Remove the jars from the water bath. Place them back on the towel-lined countertop and let them cool. The lids should begin to seal soon after they’ve been removed from the pot. If the lids are metal, you may hear a pinging or popping sound as they seal or go concave.
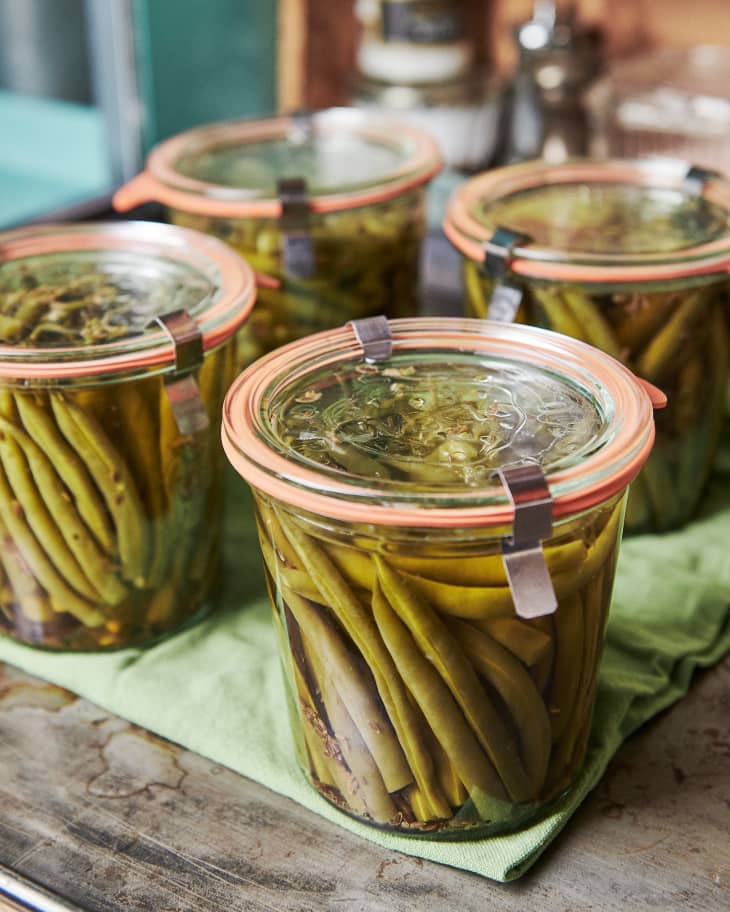
Once the jars have cooled to room temperature, check the seals by removing the rings, grasping the jar by the edge of the lid, and gently lifting it an inch or two off the countertop. If the lid holds fast, the seal is good.
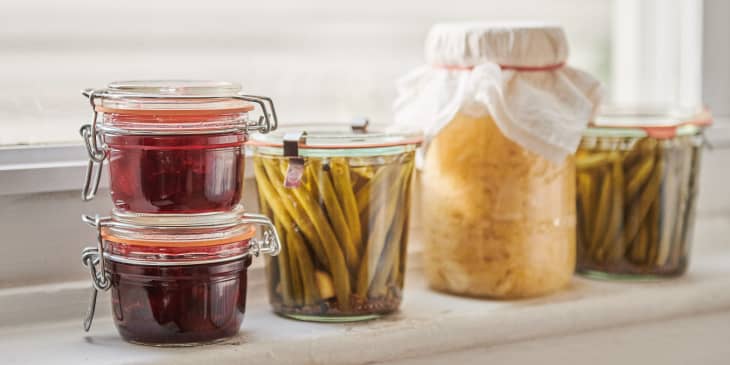
If your seals are good, you can store your jars in a cool, dark place (with rings off, please) for up to a year. Did a jar not seal? No problem: It can be refrigerated and used within a few weeks.
Now that you have your tools in place, and know how to do the boiling water bath process, here are some tips to set you off on the right path.
- Work with the freshest produce around. Take care not to purchase more than you can process in a 48-hour period.
- Always can what’s in season. In my area, that means you make your pickled asparagus in May, strawberry jam in June, and put up as many tomatoes as you can manage during August and September.
- It can be a challenge to keep pickles crisp. Cut off the blossom end of cucumbers and slip a grape or cherry leaf into each jar for optimum crunch.
- When making any sweet preserve with bits of fruit or peel in it, stir it off the heat for at least a minute when the cooking time is up. This helps evenly distribute those bits throughout.
- If your recipe calls for a processing time of 10 minutes or longer, you do not have to use sterilized jars, just clean ones. If the processing is less than that, sterilize the jars by boiling them for at least 10 minutes.
- Never pour hot preserves into cold jars. The heat shock can cause the jars to break.
- Always store jars in a cool, dark place without the bands. This allows you to more easily see any bad seals or bulging lids.
Ready to can? Here’s why you should start with dilly beans!
(Image Credit: Peter Colin Murray/Kitchn)
Weeknight Preserving is your beginner’s guide to preserving the best of the season even if you have a small kitchen or a couple hours on a weeknight. We asked Marisa McClellan of Food in Jars for a true beginner’s guide to preserving, from pickles to jams to freezing to fermenting. You (yes you!) can make a pickle or a jam to be proud of this summer. Share your preserving triumphs with us by tagging #thekitchn on Instagram.
Wondering what to do with the pickles you’ve made? Check out Marisa’s latest book, The Food in Jars Kitchen. It contains over 100 recipes to help you cook, bake, transform, and share your homemade preserves!
Follow Marisa on Facebook, Instagram, and by visiting her website Food in Jars.