
How To Make Croissants


It’s probably a good thing that croissants are so fussy to make or I’d be eating them every day. As it is, the whole process of making the croissant dough, layering it with butter (and then more butter), shaping the rolls, and baking them to crispy perfection is at least a two-day affair.
But friends, I have to tell you — it is so very worth it. You will never have better croissants than the ones you make yourself and eat fresh from the oven while standing over the kitchen counter. And here’s how to do it.

Why Croissants Are So Glorious
Croissants are the love child between puff pastry and yeast bread. Let’s just let that sink in for a minute. Buttery, flaky, cloud-like puff pastry, and fresh, yeasty, chewy bread. The best of both baked goods, all rolled up in one perfect little breakfast bite.
The basic idea is to make a regular yeasted dough, something not too different than sandwich bread, and then fold it around a block of butter to make a neat package. Croissant dough then gets “turned” just the same as for puff pastry — the package is rolled out, folded up like a letter, and rolled out again. This happens a total of six times before the dough is finally cut into individual croissants and baked.
As a result of all that rolling and folding, we get hundreds of layers of butter separated by hundreds of layers of dough. In the heat of the oven, the combined forces of the yeast and the evaporating liquids in the dough cause the croissants to spring up into lofty, folded, golden-brown layers. That sounds pretty glorious to me.

Better Croissants with a Poolish
A poolish is like a mini-dough that you make the night before making the final dough. It’s pronounced “pooh-leash” (yes, it’s fine to laugh), and it gives the croissants a deeper, more complex yeasty flavor, along with better texture in the finished pastry. You can skip it if you’re pressed for time or you forget — just add the ingredients that would have gone into the poolish along with the rest of the dough — but it’s worth the extra step if you can swing it.
Also, if you have a sourdough starter going, try replacing the commercial yeast in the poolish with a tablespoon of your active starter. So good!
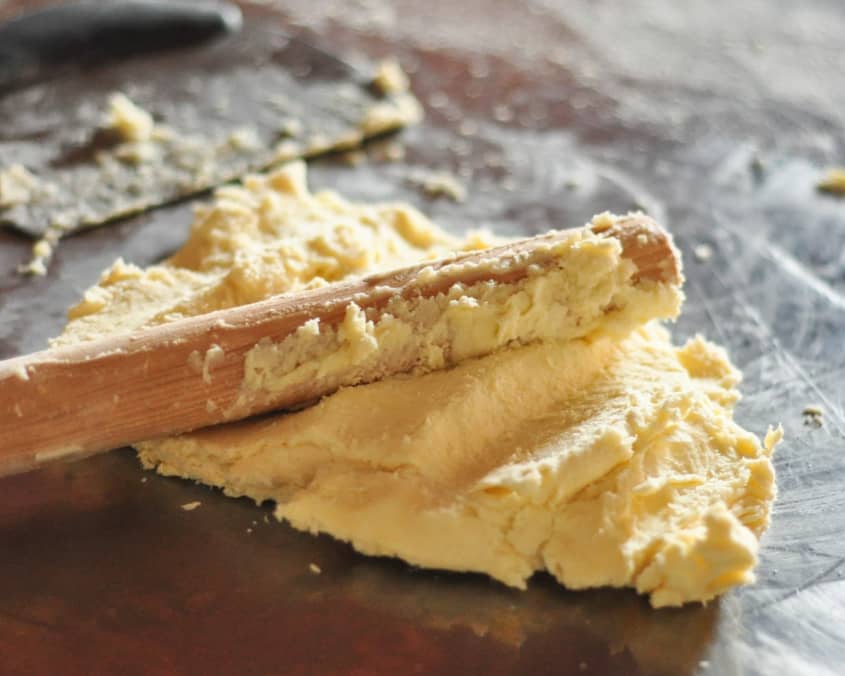
The Butter Needs Some TLC
The butter in this recipe deserves a little extra explanation. It gets folded into the dough through the “turns” we talked about before, and this means that it needs to be both pliable enough to fold without cracking, but not so warm that it melts into the dough.
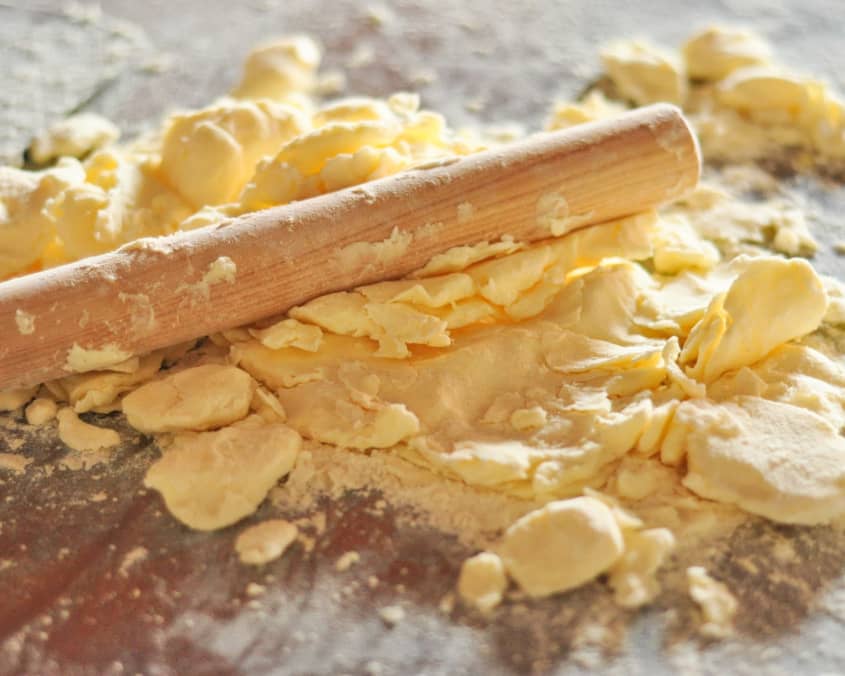
Those two characteristics are obviously at odds with each other, but we can reconcile them by pounding the butter with the business end of a rolling pin. Use a French rolling pin or a tapered rolling pin for this; the ones with handles and a free-spinning roller won’t work. Pound the butter flat, then scrape it up with a pastry scraper. Pound it flat again and repeat until the butter still feels cold to the touch, but you can fold it in half without it breaking. This will happen, I promise.


How To Make Croissants
Makes 14 to 16 croissants
Nutritional Info
Ingredients
For the poolish starter:
- 1 cup
(4 1/2 ounces) all-purpose flour
- 1/2 cup
(4 ounces) water
- 1/2 teaspoon
active dry or instant yeast (or 1 tablespoon active sourdough starter)
For the croissant dough:
- 1/3 cup
(3 ounces) water
- 2 teaspoons
active dry or instant yeast
- 1/2 cup
(4 ounces) whole milk
- 1/4 cup
(1 3/4 ounces) sugar
- 3 cups
(13 1/2 ounces) all-purpose flour
- 1 1/2 teaspoons
kosher salt
For the butter block:
- 1 1/4 cups
(10 ounces) cold unsalted butter
- 1 tablespoon
all-purpose flour
For croissant assembly:
- 2
large egg yolks
- 1 tablespoon
whole milk
Equipment
Stand mixer, or mixing bowl
Rolling pin, preferably a french-style rolling pin without handles
Bench scraper
Pizza cutter or a sharp knife
Baking sheet
Silpat or parchment
Pastry brush
Instructions
Prepare the poolish: Stir together the flour, water, and yeast to form a thick batter-like dough. Cover and let stand for 3 to 4 hours, until you see lots of bubbles on the surface, or place in the fridge overnight.
Make the dough: Combine the prepared poolish with the remaining water and yeast in the bowl of a stand mixer or mixing bowl. Stir with a spatula to break up the poolish and dissolve the yeast; it's OK if the poolish remains in blobs. Stir in the milk and sugar, then add the flour and salt. Stir to form a shaggy dough, then knead with a dough hook at low speed or against the counter until the dough comes together in a smooth, slightly tacky ball, roughly 5 minutes in the mixer or 10 minutes by hand. Add extra flour as needed if the dough is bubble-gum sticky, but avoid this if possible.
Cover and let the dough rise at room temperature for 1 hour: The dough should roughly double in bulk.
Chill the dough overnight: Transfer the dough to your counter and press it into a thick disk. Transfer it to a large plastic bag or a large, square container with a lid. Refrigerate overnight; the dough will rise a little more in the fridge.
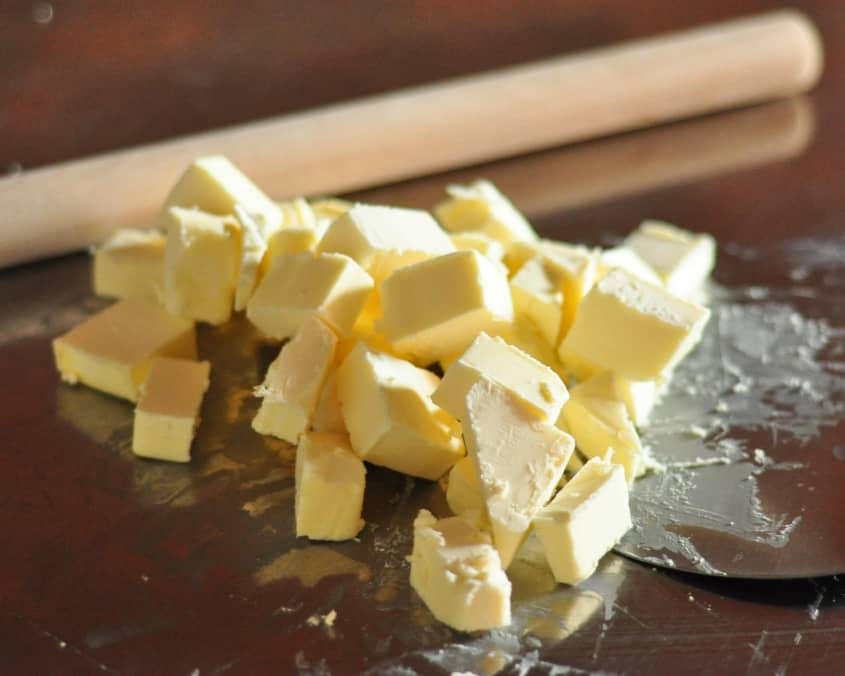
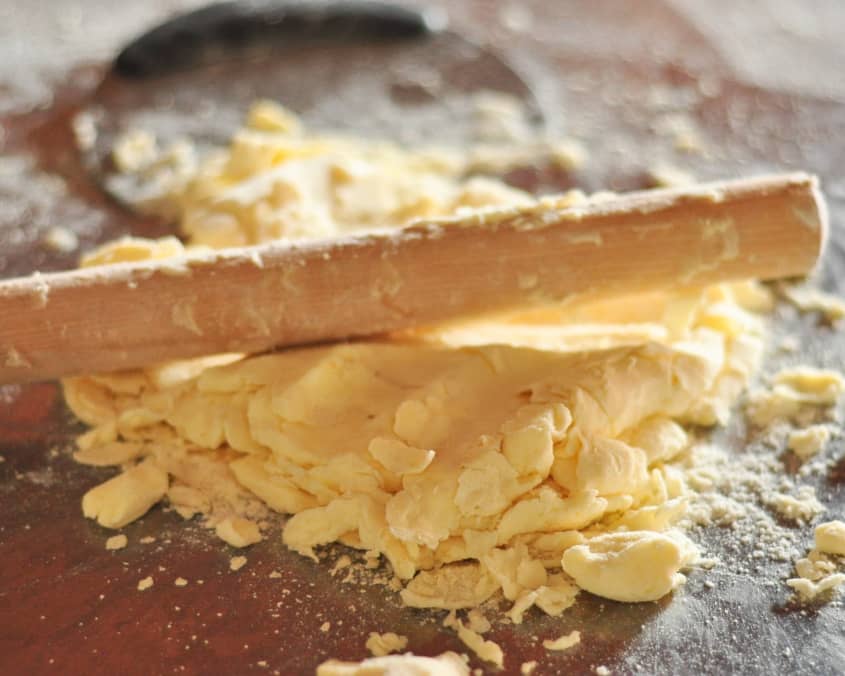
Make the butter block: Cut the butter into a few large pieces and sprinkle with a teaspoon of flour. Begin pounding the butter with a French rolling pin to soften it, sprinkling flour on your rolling pin as needed. Pound the butter flat, then use a pastry scraper to gather it up again. Sprinkle with another teaspoon of flour, pound flat, and repeat. Add one more teaspoon of flour, then continue pounding and gathering, pounding and gathering, until the butter is very pliable and does not break when you fold it over on itself.
Chill the butter block: Once the butter is pliable, shape it into a 4x4-inch square, wrap in plastic, and chill 10 minutes (no longer).
Roll out the dough: Remove the dough from the fridge and roll out to a roughly 7-inch square.
Wrap the butter in the dough: Place the square of butter on top of the dough at a 90-degree angle to the dough. Fold the corners of the dough over the butter so they meet in the middle. Pinch to seal.
First turn: Flour the work surface lightly and flip the butter package over so the seams are down. Roll it out to a rectangle roughly 12 inches long by 6 inches wide. Fold the top third over the bottom third, and the bottom over the top third, like a letter.
Second turn: Rotate the folded dough so it looks like a book about to be opened. Roll it out again into a rectangle 12 inches by 6 inches. Fold it again.
Chill for 30 minutes: Mark 2 divots in the edge of the dough to remind yourself that you've done two turns. Wrap the dough in plastic and chill for 30 minutes.
Do two more turns: Repeat rolling out and folding the dough two more times. The dough should feel much more smooth and pliable at this point. If you notice any butter popping up through the dough, pat it with a little flour.
Chill for 30 minutes: Mark 4 divots in the edge of the dough to remind yourself that you've done 4 turns. Wrap in plastic and chill for 30 minutes.
Perform two final turns: Repeat rolling and folding the dough two more times for a total of six turns. By this point, the dough should feel completely smooth and be easy to roll out.
Chill for 1 hour or overnight: Wrap in plastic and chill for at least 1 hour, or overnight.
Roll out the dough: Roll the chilled dough out to a rectangle roughly 1/2-inch thick.
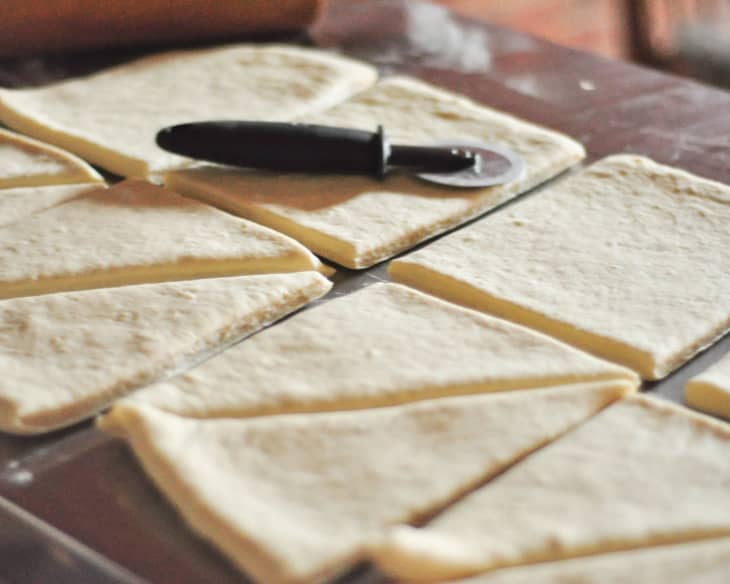
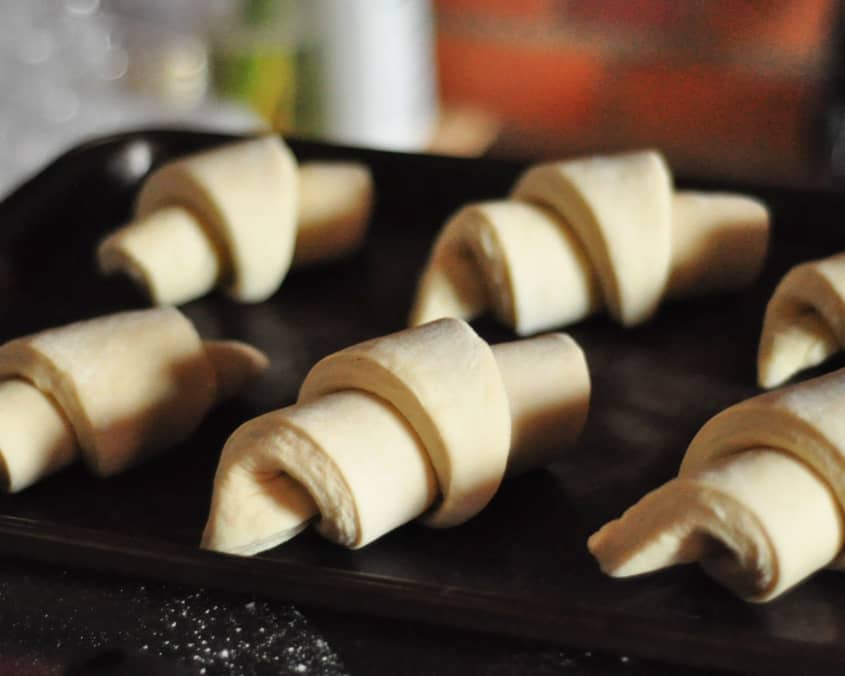
Shape the croissants: Using a bench scraper, pizza cutter, or sharp knife, slice it lengthwise (the long way) down the middle. Cut each half into 6 to 8 equal-sized triangles. Roll up each triangle, starting at the wide end. Transfer the rolls to parchment-lined baking sheets and space them about 2 inches apart.
Let the croissants rise: Let the croissants rise until they are about 50% larger in size. They should look puffy and you'll be able to see the layers in the cut edges. Alternatively, you can refrigerate the croissants overnight to develop their flavor and let them rise in the morning. (And to save yourself a lot of labor in the wee hours if you're planning on serving these for breakfast!)
Bake the croissants: Heat the oven to 425°F while the croissants are rising. When ready to bake, whisk together the egg and milk in a bowl, and brush each of the croissants with a thin layer. Transfer the croissants to the oven and bake until the croissants are deep golden-brown, very crisp, and feel light when you pick one up, 20 to 30 minutes. Rotate the trays halfway through baking.
Cool and eat! Let the croissants cool for a few minutes and then eat right away. They are at their very best straight out of the oven. Leftovers can be re-crisped in a toaster oven or for a few minutes in a warm oven.
Recipe Notes
Filling your croissants: You can add fillings just before rolling the croissants (chocolate! Fruit preserves! Ham and cheese!). Place a small amount of the filling on the widest part of the croissant and roll it up into the dough.