

We Tested 8 Methods for Searing Meat — And the Winner Was a Shocker
You know what makes meat taste good? A deep, dark sear. What is searing? It’s browning meat until a burnished crust forms. That browned crust is packed with flavor and makes meat taste meatier and more delicious. A good sear is the key to a great steak, a beefier beef stew, and an awesome braise.
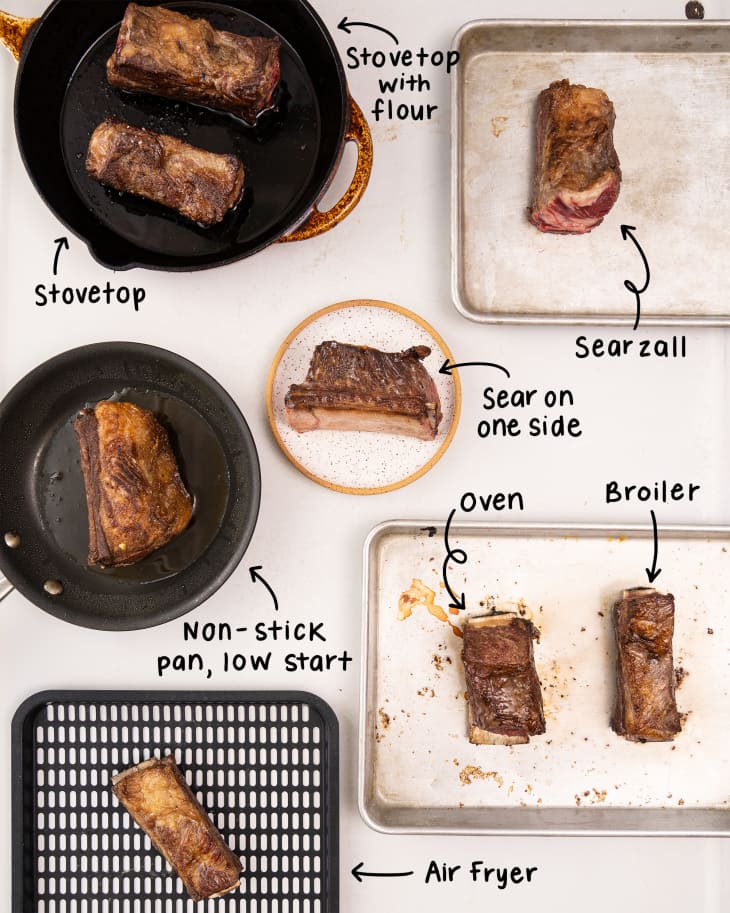
To find the best way to sear, we put eight methods to the test. Some are classic techniques we’ve know for years, and others involve special equipment, but we were completely surprised by the new method that came out on top. Here’s what we learned about how to get a superior sear with less mess.
How We Tested These Searing Methods
We polled the Kitchn team of food editors to find out their favorite searing methods, as well as any tips they’d heard of or read about over the years. There were a surprising number of variations on simple, stovetop searing that were deemed worthy of testing. We also discussed the grill as a searing tool, but ultimately decided to stick with methods that didn’t require leaving the house.
To test the techniques, we chose our recipe for braised short ribs. Short ribs have enough surface area to really see how each method fared without leaving us to eat pot roast until the end of the year. The short ribs were all purchased on the same day and had relatively the same weight and size. We tested all of the methods side by side to see which was fastest and gave the most consistent browning — and our favorite technique actually made cleanup easy, too.
Searing Method: Searing on the Stovetop with Flour
- Timing: 10 minutes
- Rating: 3/10
The idea behind coating meat with a sprinkling of flour before browning in a hot pan is pretty simple: Flour is full of starch that will caramelize quickly and give a deeper color and flavor. You most often see this technique called for in stews, where flour is used to thicken the cooking liquid. All you need for this technique is a hot pan, a little oil, and some flour. Sprinkle the meat with flour before adding it to the pan and then turning it until it’s brown on all sides.
This method seems like it should be a home run, but the process of coating the short ribs with flour was messy and uneven, leaving pockets of flour that didn’t actually brown and left a thick sludge in the bottom of the pan. Use this method for stews, where the meat is cut into bite-sized pieces and the flour can help thicken the sauce.
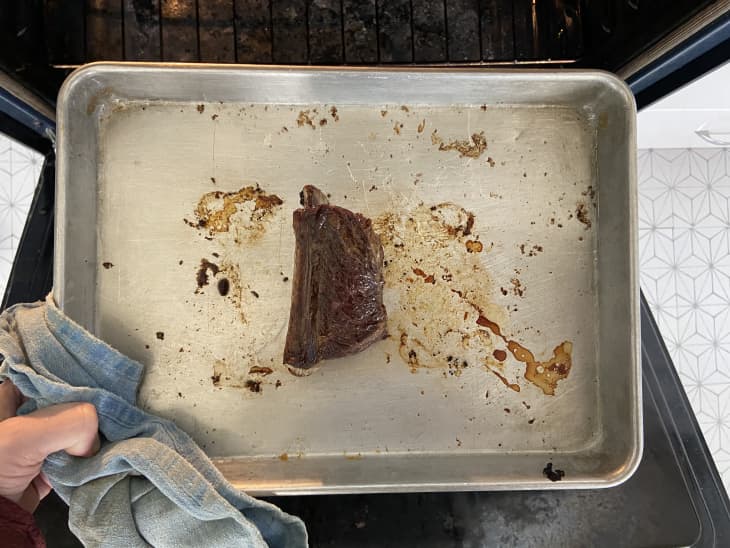
Searing Method: Browning in a Hot Oven
- Timing: 40 minutes, including preheating the oven
- Rating: 4/10
We were first introduced to this idea by a Kitchn contributor who used the method for browning a pork shoulder before putting it into a slow cooker. Cranking the oven to 500 degrees and then “searing” the meat with the hot dry heat of the oven is supposed to be quick and efficient for large pieces of meat.
Ironically, this method took the longest of all 8 we tried. It takes a while for most ovens to preheat to 500 degrees, and even a relatively small short rib took more than 12 minutes to brown. The browning was uneven, too. The meat was browned on top, but less so on the sides and bottom, even though the meat was flipped halfway through cooking. Reserve this technique for big hunks of meat that are hard to wrangle on the stovetop, like rib roasts or pork shoulders.
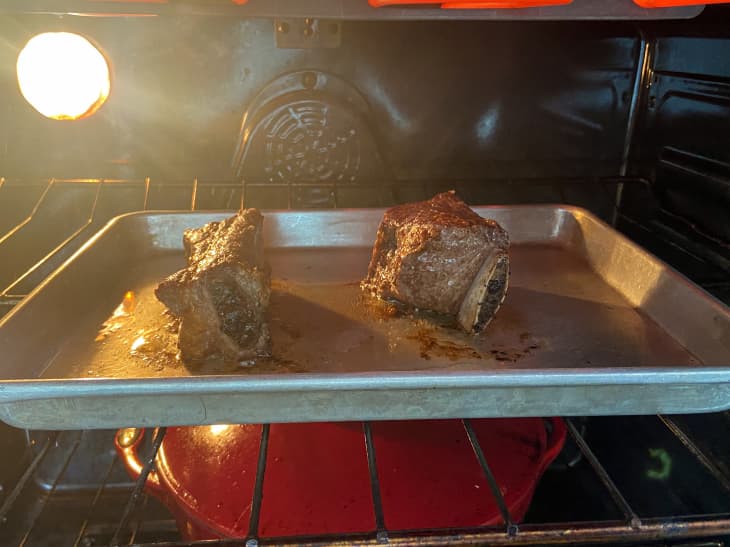
Searing Method: Browning Under the Broiler
- Timing: 12 minutes
- Rating: 5/10
The broiler is a powerful kitchen tool that is often underutilized. It heats up quickly and burns super hot, making it a compelling candidate for searing.
To test this method, we put the meat on a baking sheet about 6 inches away from the broiler. The ribs browned pretty quickly, but there were significant downsides. While we love the broiler for browning cheese and caramelizing ribs, it is hard to get a hard, even “sear” on meat with it. The browning was also inconsistent, and broiling required as much hands-on cooking as other stovetop methods. Broiling is still our go-to for cooking quick-cooking cuts of meat or fish, but skip it for searing.
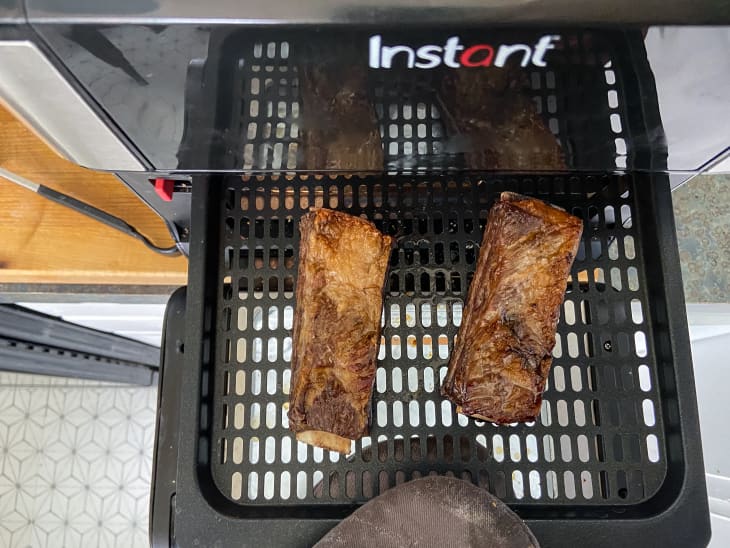
Searing Method: Searing in the Air Fryer
- Timing: 8 minutes
- Rating: 6/10
When Studio Food Editor Jesse Szewczyk suggested the air fryer as a searing shortcut, we couldn’t believe we hadn’t thought of it sooner. The idea of tossing the short ribs with just a tiny bit of oil and then air frying them at 400 degrees — which would blast them with hot, dry heat — seemed like it could be a game-changer.
But here’s the thing about air frying a bunch of short ribs: All the luscious fat ends up in the bottom of the machine. Sure, you get beautiful browning, but without that fat you may also end up with tough meat. If you want to try this method, make sure your air fryer is squeaky clean, so you can pour off, and use, the rendered fat instead of spending your time straining out old french fries and panko bread crumbs that were hidden in the bottom of the air fryer basket.
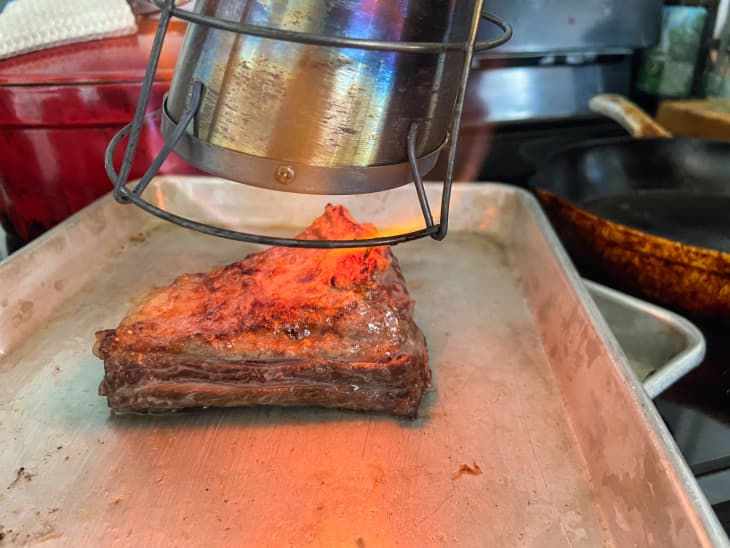
Searing Method: Using a Searzall
- Timing: 10 minutes
- Rating: 6/10
Have you ever heard of a Searzall? This fancy chef’s torch is designed purely, as the name implies, for searing meat. It is most often used in restaurants, where chefs use sous vide cooking to get steaks to a perfect internal temperature, then fire up the Searzall to create that beautiful browned crust. To use the Searzall, just place the meat on a baking sheet or a cooling rack and then blast it on all sides. The special torch attachment, which has a dial to help you adjust the heat, browns the meat quickly and perfectly.
We really wanted to declare the Searzall the winner, but we ultimately couldn’t give the crown to such a specific, expensive, and hard-to-find tool. That said, if you happen to have a Searzall (or can borrow one from a neighbor or befriend a chef) you should certainly use it!
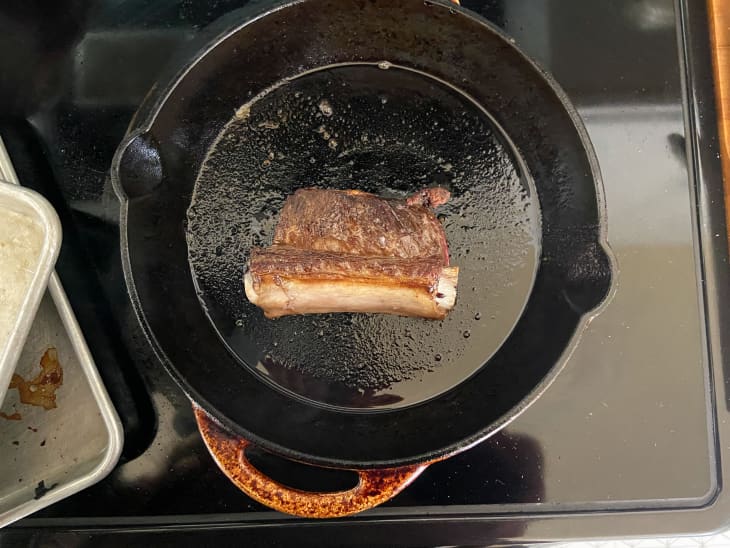
Searing Method: Searing in a Cast Iron Skillet (Only on One Side)
- Timing: 4 minutes
- Rating: 8/10
When we used this method for our Instant Pot beef stew recipe, Food Editor-at-Large, Christine Gallary, wrote, “Searing just one side saves you time, so be patient with the process, sear in two batches, and let one side of the beef get nice and dark.” We used the same principles from our guide to properly searing meat, but only applied it to one side of the short ribs.
This method creates a nice, deeply browned crust that really stands up. While some of the other methods were nearly indistinguishable from each other after braising, these short ribs kept their deeply bronzed color. Ultimately, we didn’t choose this as the winning method because it didn’t save much on cleanup time. We’d opt for this method if we were in a hurry, but prefer another method when browning is key.
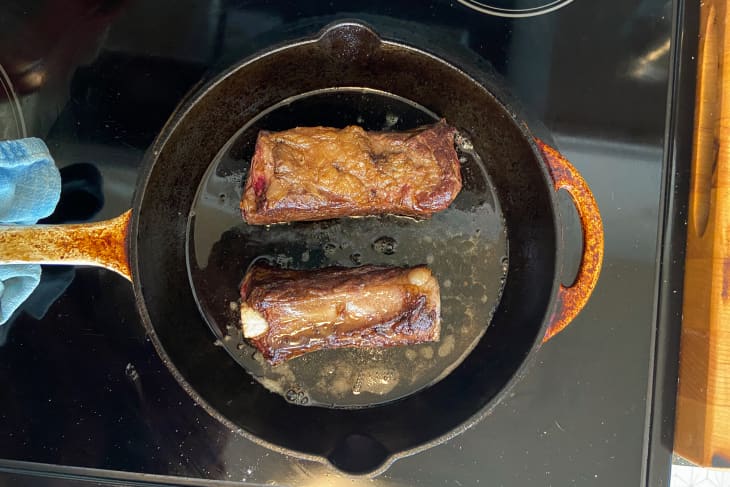
Searing Method: Searing on Stovetop in a Cast Iron or Stainless Steel Pan
- Timing: 15 minutes
- Rating: 9/10
Properly searing meat is a technique we’ve covered several times on Kitchn, both in recipes and in our Cooking School. It’s a universal method that can be used on steaks, stew meat, or short ribs. Thinly coat your meat with neutral oil, get a pan good and hot over medium-high heat, and cook the meat without moving it until deeply browned. Repeat the process on all sides of the meat. You can do this in a cast iron skillet or a sturdy stainless steel pan.
This method gets lots of points for reliability. Sure, it might make a mess on your cooktop, but your patience will be rewarded with perfectly browned meat no matter the shape or cut.
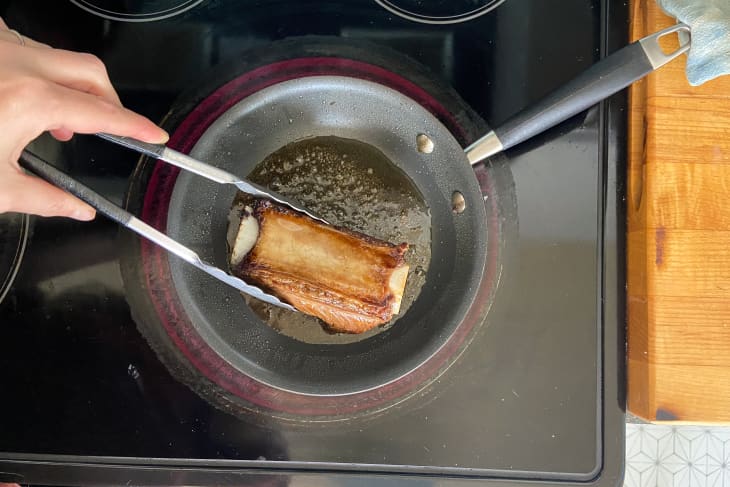
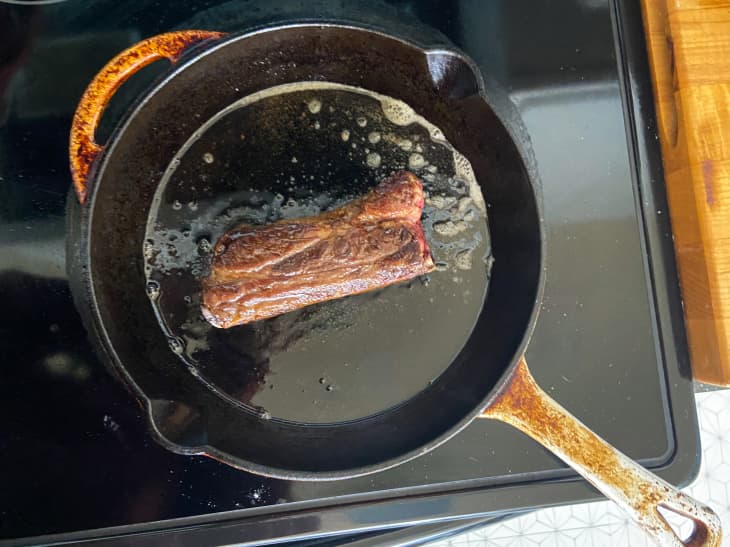
Searing Method: Starting in a Cold, Nonstick Pan
- Timing: 15 minutes
- Rating: 10/10
Cook’s Illustrated dubs this the cleanest, easiest way to sear meat: Instead of adding your meat to a ripping hot pan, you start the meat in a cold pan and then turn on the heat. The gradual heat approach slowly browns the meat while releasing its fat, then uses that fat to brown the meat further. The method works best in a lightweight nonstick or carbon steel skillet. Because you aren’t starting the pan over high heat, you can safely use a nonstick skillet to achieve a golden-brown crust.
This technique works shockingly well. Looking at the rib above, you’d think a ton of fat was used, but no oil was added to the pan. It all came from the meat itself! All of that fat made for an incredible crust on the short rib and was easy to pour right into the braising pot, thanks to the nonstick pan. This winning method was fast, created a super-even sear, and cleanup was breeze.
Our Key Takeaways
It is rare that a new technique comes along that actually improves our home cooking as much as this Cook’s Illustrated method does. The same principles that helped us brown short ribs to perfection could easily be applied to stew meat, steaks, and even vegetables, whether they are destined for braising or not. Still, if you find yourself without a reliable nonstick pan, our testing also proved that some tried-and-true techniques, like classic pan searing, are worth mastering.