
How To Make Easy Sesame Chicken That’s Fresher and Faster than Takeout

An easier, lighter version of the sweet and savory takeout favorite.
Serves4 to 6
Prep10 minutes
Cook25 minutes
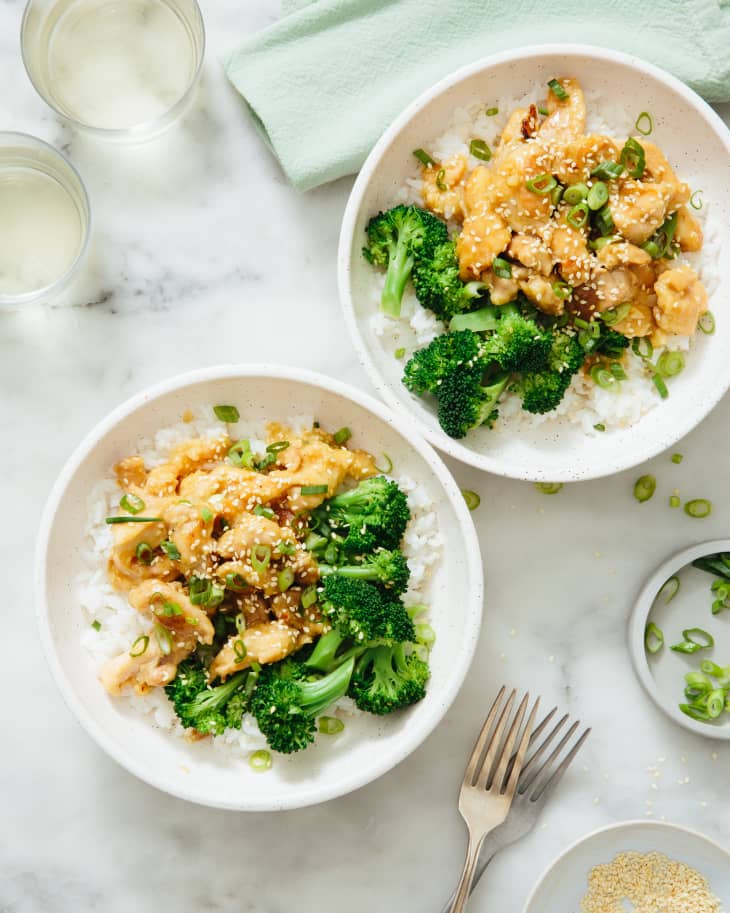
When picking up steam table or Chinese takeout, I always find myself drawn to sesame chicken. The savory-sweet brown sauce coating crispy sesame-flecked chunks of chicken gets me every time, and is a little less cloying than its orange or lemon counterparts. All I need is a heaping bowl of fluffy white rice and some vegetables to make it a satisfying dinner.
Making sesame chicken at home is not as hard as you think. Knowing a few key techniques will yield delicious sesame chicken that’s crisp without any deep-frying, making it a weeknight-friendly option and one that’s a bit lighter than what normally comes out of a takeout box.
Homemade Sesame Chicken Sauce Is a Simple Mix of Pantry Staples
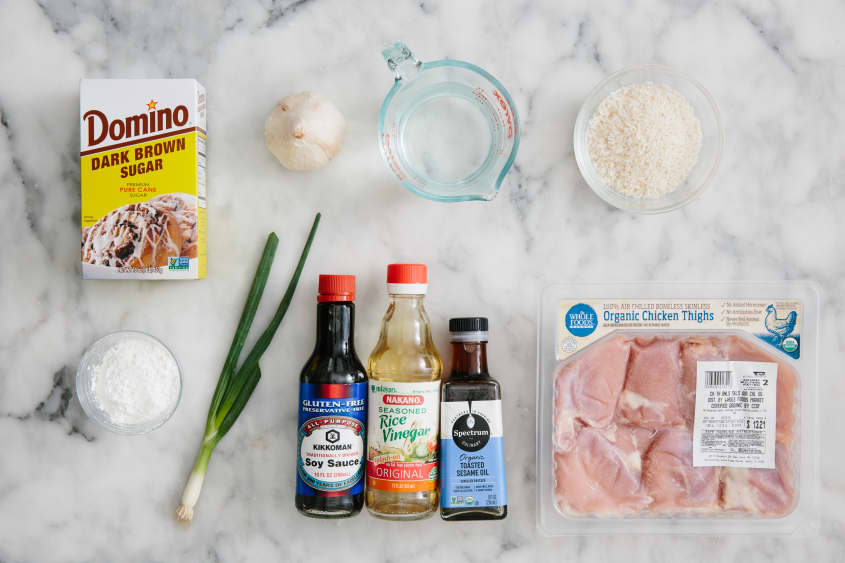
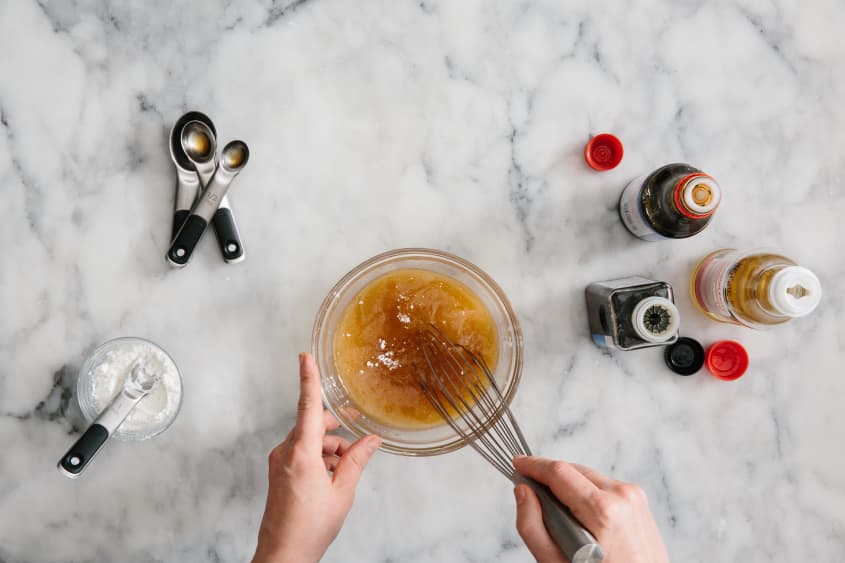
So what’s exactly in that irresistible sauce that coats sesame chicken? Just a mixture of pantry items that you already probably have: soy sauce or tamari for savory and salty flavors, dark brown sugar for some sweetness, rice vinegar to balance things out, and, of course, a good spoonful of toasty sesame seed oil. When whisked together with a little bit of cornstarch for thickening, this sauce coats all the crunchy nuggets of chicken with a perfect glaze.
3 Key Tips for Crispy Chicken Without the Fuss
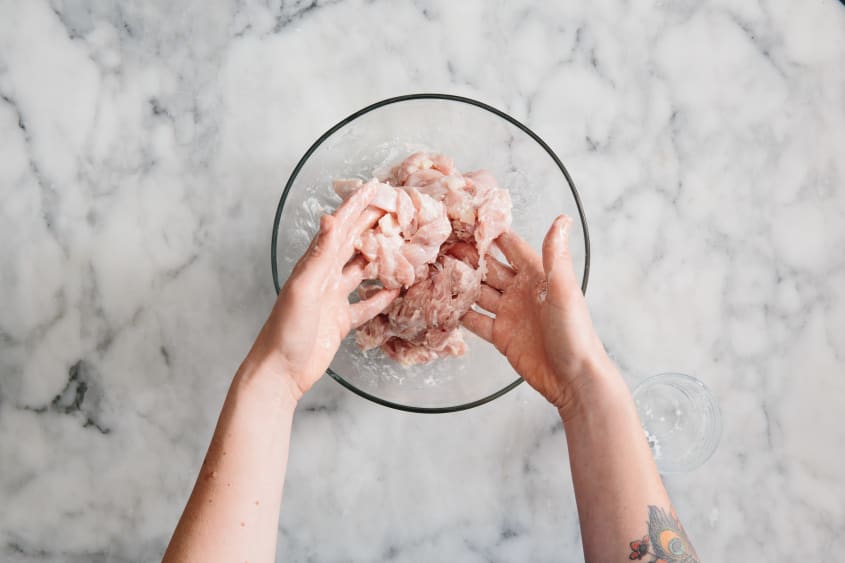
Sesame chicken starts with boneless chicken — you can use chicken breast or thighs. I prefer thighs since they stay nice and juicy. Next, you’ll coat the chicken with a generous dusting of cornstarch. This gluten-free coating both browns and crisps up the chicken, as long as you are mindful of a few things I learned from making our sweet and sour chicken recipe.
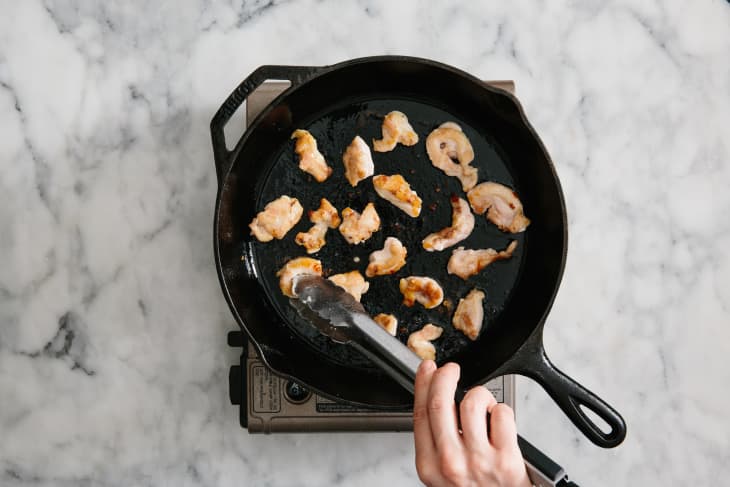
- Use a nonstick pan. If you use a nonstick pan, you won’t run into any frustrating sticking issues and you won’t need too much oil — especially when compared to deep-frying.
- Brown in two batches. When pan-frying 1 1/2 pounds of chicken, do it in two rounds so that the chicken pieces have plenty of space around them to brown instead of steam.
- Be patient for the best browning. The final thing is the most important: Be patient with the pan-frying. The cornstarch coating needs time to brown, so even though the chicken might look cooked, let it continue cooking until golden-brown before flipping it and proceeding with the recipe. You’ll be rewarded with crunchy chicken that holds up in the sauce.
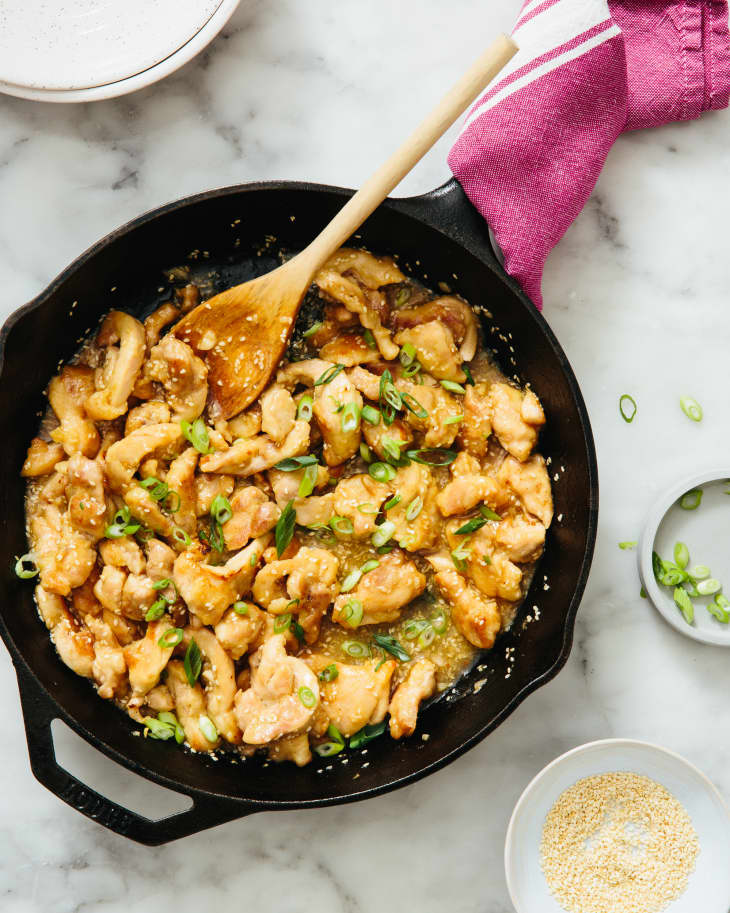
For that extra dose of sesame flavor and of course to make it look gorgeous, the saucy chicken is sprinkled with sesame seeds right at the end. If you can find already toasted sesame seeds, nab them, but you can always toast them yourself in the pan (without any oil) over medium heat for a few minutes before you cook the chicken. Black sesame seeds will also work, or go yin and yang with a blend of white and black.
This sesame chicken, served with a side of steamed broccoli, is now on regular rotation in my house because my 6-year-old daughter loves it. Hopefully it’ll find a place in yours, too.


Sesame Chicken
An easier, lighter version of the sweet and savory takeout favorite.
Prep time 10 minutes
Cook time 25 minutes
Serves 4 to 6
Nutritional Info
Ingredients
- 1/4 cup
water
- 2 tablespoons
packed dark brown sugar
- 4 teaspoons
soy sauce or tamari
- 1 tablespoon
rice vinegar
- 1 1/2 teaspoons
toasted sesame oil
- 1/4 cup
plus 1 teaspoon cornstarch, divided
- 1 1/2 pounds
boneless, skinless chicken thighs or breasts, cut into 1-inch pieces
- 1 1/2 teaspoons
kosher salt
- 3 tablespoons
vegetable oil
- 2 cloves
garlic, minced
- 2 tablespoons
toasted white sesame seeds
- 1
medium scallion, thinly sliced
Cooked rice, for serving (optional)
Equipment
Whisk
Chef's knife
Cutting board
Measuring spoons
Mixing bowls
Large nonstick or cast iron frying pan
Instructions
Make the sauce. Whisk the water, soy sauce, brown sugar, vinegar, sesame oil, and 1 teaspoon of the cornstarch together in a small bowl; set aside.
Season and coat the chicken in cornstarch. Place the chicken in a medium bowl and season with the salt. Sprinkle the remaining 1/4 cup cornstarch over the chicken and toss with your hands until evenly coated, separating any pieces that are stuck together.
Sear the chicken in 2 batches. Heat 2 tablespoons of the oil in a large nonstick or cast iron frying pan over medium-high heat until shimmering. Add half the chicken and spread into an even layer. Cook undisturbed until golden brown on the bottom, 5 to 6 minutes. Flip and cook undisturbed until the chicken is browned on the second side and cooked through, about 4 minutes more. Transfer to a plate. Add the remaining 1 tablespoon oil to the pan and repeat cooking the remaining chicken.
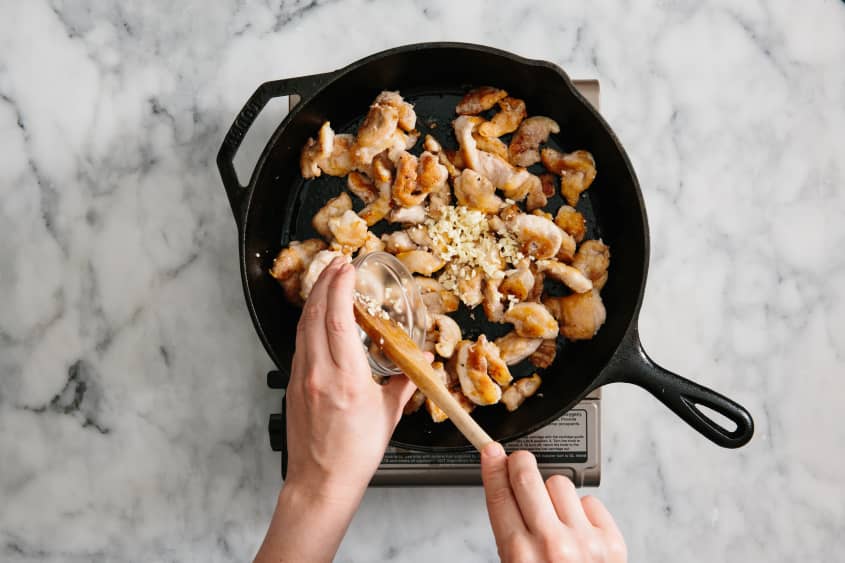
Cook the garlic. Return the chicken to the pan, add the garlic, and cook until fragrant, about 30 seconds.
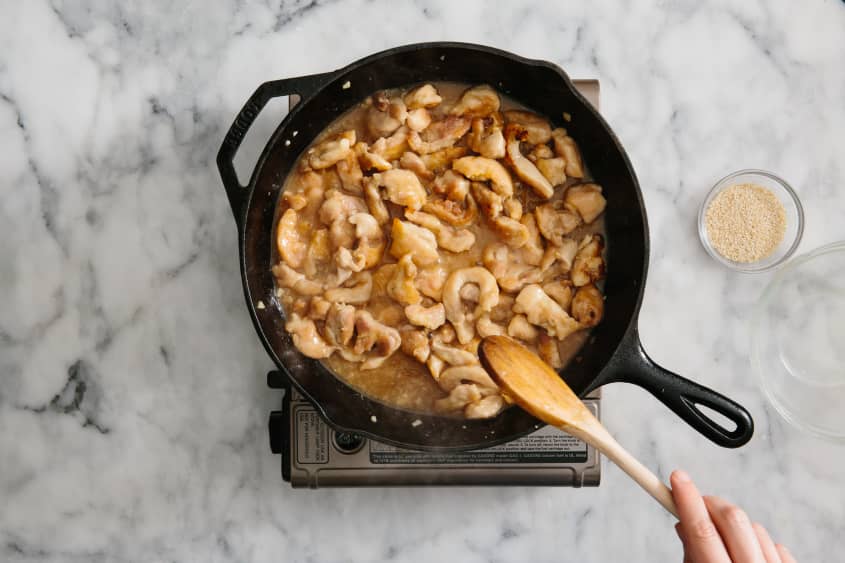
Add the sauce. Rewhisk, then pour the sauce into the pan. Cook, tossing constantly, until the sauce thickens, is glossy, and coats the chicken, about 30 seconds.
Toss with sesame seeds. Sprinkle with the sesame seeds and toss to coat. Garnish with the scallions and serve over rice if desired.
Recipe Notes
Storage: Leftovers can be refrigerated in an airtight container for up to 4 days.
At Kitchn, we know how important it is to find recipes that are worth your time. That’s why every tutorial — like this one — features recipes that have been tried and tested by our team of developers and at-home cooks from across the country. Questions or feedback for us? Say hello: recipes@thekitchn.com.