
Pineapple Buns

These classic Chinese buns don't actually have pineapple, but make up for it with a crispy sweet topping.
Makes12 (about 4-inch) buns
Prep40 minutes to 45 minutes
Cook20 minutes
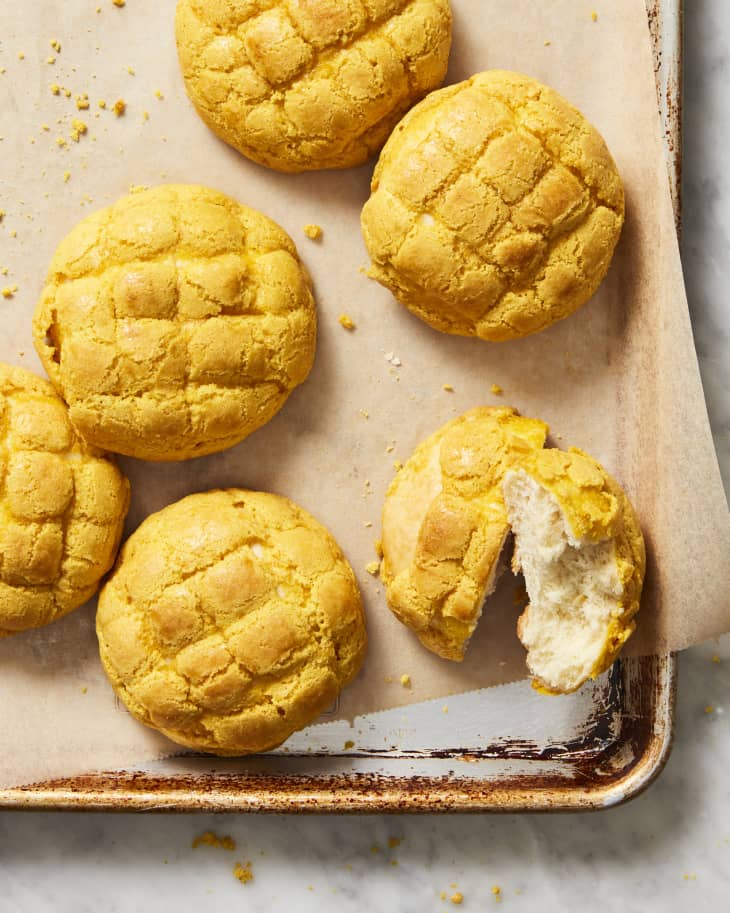
All the Chinese bakeries near me when I was growing up used pink boxes to package their pillowy goodies, and the sight of that box always brings a feeling of nostalgia. Our usual order was a combination of cocktail buns, pork buns, egg tarts, and of course pineapple buns. The crosshatch-patterned pineapple buns had a bright yellow hue and were the messiest to eat, leaving a trail of crisp crumbs as the sweet topping inevitably fell apart as you bit into the plain soft bun. I knew of no one who actually made any of these buns and pastries at home, as they were cheap and easy to just purchase, but I’m glad to see that home bakers are now trying to replicate them. This pineapple bun recipe was developed based on tips and recipes I found from other Chinese women I admire and respect, and I’m so thankful for their collective wisdom.
Why Are Pineapple Buns Called Pineapple Buns?
The name is a bit misleading for those not familiar with pineapple buns. There’s no pineapple juice or fruit in the bun; rather, the pineapple references both the yellow hue and the crosshatch pattern of the topping. Many bakeries nowadays skip the crosshatch pattern, so the buns just have a crackly top.
Who Invented the Pineapple Bun?
The pineapple bun was invented in the 1940s in Hong Kong. The original pineapple bun contains no filling, but modern versions can be filled with a cold pat of salted butter, char siu pork, custard, or even red bean paste.
How to Make Pineapple Buns
These buns are a project for sure, taking 3 1/2 to 4 1/2 hours from start to finish, but here are a few tips I’ve gleaned along the way to make the process as foolproof as possible.
- Make a tangzhong: Tangzhong is a technique where some of the flour and liquid is cooked together until thick and gel-like. It makes doughs softer and fluffier, and keeps them from drying out as quickly. I borrowed a trick from my mom’s pineapple bun recipe to make a larger tangzhong here.
- Make the dough: Make a standard milk bread dough with the tangzhong and bread flour and set it aside to rise while you make the topping.
- Make the topping: The topping is the crowning glory of a pineapple bun, and I learned from Kristina Cho’s lovely Mooncakes and Milk Bread cookbook to use baking soda to help it crackle, and to add some food coloring if you want that signature yellow hue.
- Form the rolls: Once the dough is risen, shape into individual buns like you would dinner rolls.
- Roll out and chill the topping: While the rolls do their second rise, roll out the topping into individual rounds between a cut-up plastic sandwich bag (a fabulous tip from Lisa Lin), which is thicker than plastic wrap. Cut out the crosshatch pattern (which you can skip if you want) and chill until ready to use.
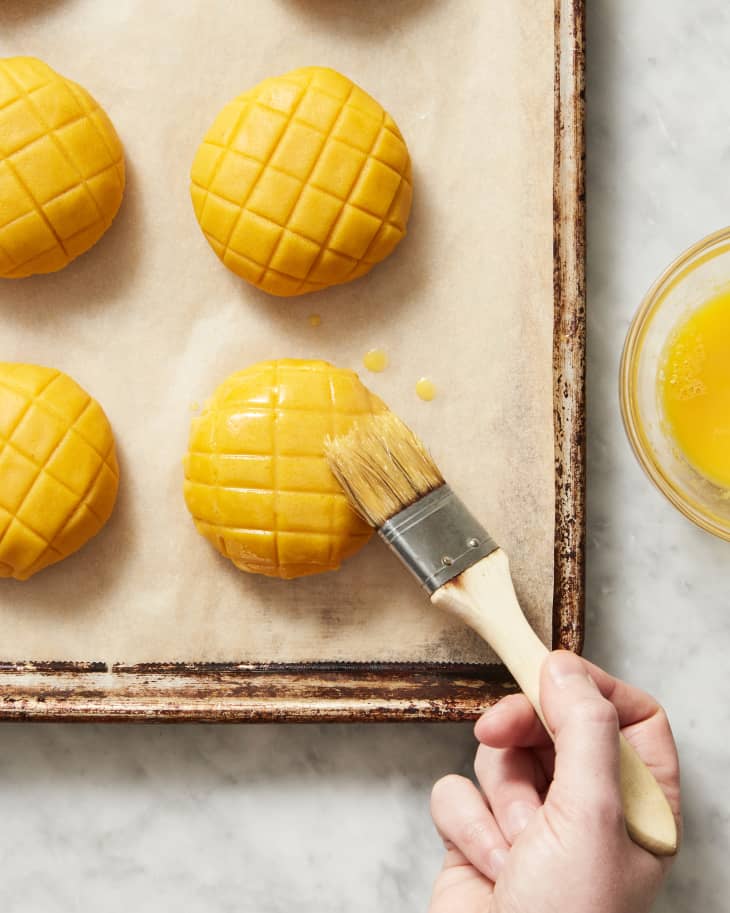
- Top and bake: When the rolls are puffy and soft, lay the topping on top, brush with egg wash to make the buns are shiny and to add a touch more color, and bake.
Topping Options
Most pineapple bun recipes just use all-purpose or bread flour to make the topping, but I learned from pastry chef Melissa Chou that adding some rice flour, which she does in her Dutch crunch pork buns in Mister Jiu’s cookbook, makes the topping lighter and crisper. This also makes the topping a bit more delicate to work with, so make sure to chill it to firm up once rolled out. I’ve given the option of using a blend of all-purpose and rice flour or just using all AP if you don’t want to buy the extra ingredient.
How Do You Eat a Pineapple Bun?
I love eating pineapple buns warm from the oven with a mug of strong tea or Hong Kong milk tea if I’m going for a Hong Kong café vibe. They last for a few days when stored at room temperature and only need a few minutes in an oven to refresh. Whenever you eat them, though, make sure you have a plate handy to catch all the crumbs so you can eat every last bite!
Pineapple Buns Recipe
These classic Chinese buns don't actually have pineapple, but make up for it with a crispy sweet topping.
Prep time 40 minutes to 45 minutes
Cook time 20 minutes
Makes 12 (about 4-inch) buns
Nutritional Info
Ingredients
For the tangzhong:
- 1/2 cup
whole or 2% milk
- 1/4 cup
bread flour
For the dough:
- 4 tablespoons
(1/2 stick) unsalted butter
- 2/3 cup
whole or 2% milk
- 1 (1/4-ounce) packet
active dry yeast (2 1/4 teaspoons)
- 2 2/3 cups
bread flour
- 1/4 cup
granulated sugar
- 3/4 teaspoon
kosher salt
- 1
large egg
Cooking spray
For the topping and egg wash:
- 4 tablespoons
(1/2 stick) unsalted butter
- 1 cup
all-purpose flour, or 1/2 cup all-purpose flour plus 1/2 cup rice flour
- 1/4 teaspoon
baking soda
- 1/4 teaspoon
kosher salt
- 2/3 cup
granulated sugar
- 1 tablespoon
whole or 2% milk
- 2
large egg yolks, divided
- 1 teaspoon
vanilla extract
- 1/4 teaspoon
yellow liquid food coloring, or 2 drops yellow gel food coloring (optional)
Instructions
Cut the 4 tablespoons unsalted butter for the dough into 4 pieces. Place another 4 tablespoons unsalted butter (for the topping) and 1 large egg on the counter. Let the butter and egg sit at room temperature until the butter is softened. Meanwhile, make the tangzhong.
Make the tangzhong:
Place 1/2 cup whole or 2% milk and 1/4 cup bread flour in a small saucepan. Cook over medium heat, whisking constantly, until the mixture thickens to the consistency of mashed potatoes and is steaming, 2 to 3 minutes. Scrape the mixture into a small heatproof bowl and let cool until lukewarm, about 10 minutes. Meanwhile, proof the yeast for the dough and measure out the dry ingredients.
Make the dough:
Place 2/3 cup whole or 2% milk in a small microwave-safe bowl or measuring cup. Microwave until warm to the touch (105ºF to 110ºF), 30 to 40 seconds. (Alternatively, warm on the stovetop and pour into a small bowl.) Sprinkle with 1 (1/4-ounce) packet active dry yeast, stir to combine, and let sit until foamy, 5 to 10 minutes. Place 2 2/3 cups bread flour, 1/4 cup granulated sugar, and 3/4 teaspoon kosher salt in the bowl of a stand mixer and whisk to combine.
Add the tangzhong, yeast mixture, and 1 large egg to the flour mixture. Mix with the dough hook on the lowest speed until a shaggy dough forms, about 1 1/2 minutes. Increase the speed to medium and add the butter 1 piece at a time, waiting until each piece is completely incorporated before adding the next, about 5 minutes total.
Increase the speed to medium-high and mix for 5 minutes more. At this point, the dough should clear the sides of the bowl but stick a little to the bottom; the dough will be smooth, tacky, and shiny.
Lightly coat a large bowl with cooking spray. Transfer the dough into the bowl and flip to coat. Cover with plastic wrap or a kitchen towel. Let rise in a warm place until about doubled in bulk, about 1 1/2 hours, or refrigerate for at least 8 or up to 24 hours. Meanwhile, make the topping.
Make the topping:
Place 1 cup all-purpose flour (or 1/2 cup all-purpose flour plus 1/2 cup rice flour), 1/4 teaspoon baking soda, and 1/4 teaspoon kosher salt in a small bowl and whisk to combine.
Wash and dry the stand mixer bowl. Add the remaining 4 tablespoons unsalted butter and 2/3 cup granulated sugar to the bowl and beat with the paddle attachment on the lowest speed until combined, about 1 minute.
Add 1 of the large egg yolks, 1 tablespoon whole or 2% milk, 1 teaspoon vanilla extract, and 1/4 teaspoon yellow food coloring or 2 drops yellow food gel if desired. Beat on the lowest speed until combined, about 30 seconds. Stop the mixer and scrape down the sides of the bowl. Add the flour mixture and beat on the lowest speed until just combined, about 1 minute.
Scrape the topping onto a sheet of plastic wrap and use the plastic wrap to form it into a thick disk. Wrap the disk tightly in plastic wrap and refrigerate until ready to assemble the buns.
Assemble and bake:
When the dough is ready, line 2 baking sheets with parchment paper. Gently punch the dough down and transfer to a work surface. Divide the dough into 12 pieces (about 2.4 ounces or 68 grams each). Form each piece into a round ball by pushing down with the heel of your hand (lightly flour your hand but not the work surface if the dough is sticky) while moving your hand in a circular motion, then cupping the ball toward the end (here are step-by-step photos). Place 6 on each baking sheet, spacing them at least 3 inches apart.
Lightly cover each baking sheet with plastic wrap and let rise in a warm place until puffed and about 3-inches wide, 1 to 1 1/4 hours. Meanwhile, roll out the topping.
Cut a sandwich-sized plastic zip top bag into two sheets by cutting along the 3 seams. Have 2 silicone baking mats or 2 sheets of parchment or wax paper the length of a baking sheet ready. Divide the topping into 12 pieces (about 1 ounce or 29 grams each) and roll each piece into a smooth ball.
Place 1 ball between the 2 plastic sheets and press into a disk. Roll out with a rolling pin or dumpling dowel into a 3 1/2-round that’s slightly thicker than 1/8-inch (it’s okay if it has ragged edges). Uncover and flip the round out onto one corner of the mat or paper. Use the back of a chef’s knife or a ruler to score a crosshatch pattern onto the round (space the lines about 3/4-inch apart), being careful not to cut all the way through. Repeat rolling out the remaining balls, 6 per mat or sheet. If the dough is too soft to work with at any point, refrigerate until firmer before continuing.
Slide the sheets of topping onto a third baking sheet, stacking them (if you don’t have a third baking sheet, slide one sheet of buns onto a work surface and use that baking sheet). Refrigerate until ready to use.
About 30 minutes before the buns are ready, arrange 2 racks to divide the oven into thirds and heat the oven to 375ºF.
Remove the topping from the refrigerator (slide the sheets of topping off the baking sheet and transfer the sheet of buns back on it if needed). Uncover the buns. Slide a bench scraper or thin, flat spatula under a topping round to lift it up, then drape the round onto a bun (it will not completely cover the bun). Repeat topping the remaining buns. Gently press the topping so it conforms to the shape of the bun.
Beat the remaining 1 large egg yolk in a small bowl with a fork until broken up. Lightly brush a thin layer of egg onto the topping.
Bake for 10 minutes. Rotate the baking sheets between racks and from front to back. Bake until the topping is a shade darker and golden brown in spots, about 8 minutes more. Let cool for 5 minutes on the baking sheets, then transfer to a wire rack to cool. Serve warm or at room temperature. The buns will be crispest on the first day.
Recipe Notes
Storage: Leftovers can be stored in an airtight container at room temperature for up to 4 days or frozen for up to 2 months. Reheat in a 325ºF oven for 5 minutes or microwave for 15 seconds. If frozen, reheat in a 325ºF oven until warmed through, about 15 minutes.