
8 Smart Tips for Assembling and Freezing Sandwiches in Advance

In the land of make-ahead lunches, sandwiches reign supreme. You can build them in the morning, wrap ’em up, then toss them in the fridge or take them on the go. When lunchtime rolls around, there’s no heating, assembling, or freshening up required — just unwrap and dig in.
But there’s an art to making a sandwich that holds up well. Without a bit of planning, you run the risk of the bread getting soggy, the lettuce wilting, and the whole thing tasting stale. From using condiments to “seal in” freshness to simply picking out the right sandwiches to make, here are eight tips that will make sure you never eat a soggy sandwich again.

1. Pick ingredients that will stay fresh for several days.
Some ingredients, like fresh mozzarella and other soft cheeses, start to go bad quickly, and some breads go stale within hours of being exposed to air. Before you start assembling your sandwich, think about what components will last the longest.
Try this: Provolone, Swiss, and cheddar are great examples of sturdy cheeses that won’t get soggy. Avoid fresh mozzarella, goat cheese, and other soft varieties. For meats, any deli-style meat will work well. Stick to crusty bread and rolls and stay away from soft, Pullman-style loaves, which tend to go soggy quickly.

2. “Seal in” the freshness of the bread with condiments or butter.
You might think that smearing your bread with condiments days in advance will make it go soggy, but that’s not always the case. Some spreads (such as butter) actually “seal in” the freshness and make the bread taste fresher for longer.
Try this: Fatty condiments (such as butter, aioli, or mayonnaise) can be spread on both the top and bottom pieces of bread on the interior side of the sandwich. This creates a barrier between the filling and the bread, preventing the bread from absorbing as much moisture.
Read more: 7 Creamy Spreads for a Breakfast Sandwich

3. And toast it for added insurance that it won’t get soggy.
The toasted bread won’t remain crispy by the time you eat the sandwich, but it will prevent it from getting soggy. By removing the excess moisture from the bread you’re providing extra insurance that it won’t get soggy.
Try this: Throw your bread into the toaster for just a few seconds before assembling the sandwich. It should feel crisp to the touch. Just make sure to let the bread cool off for a few minutes before assembling.
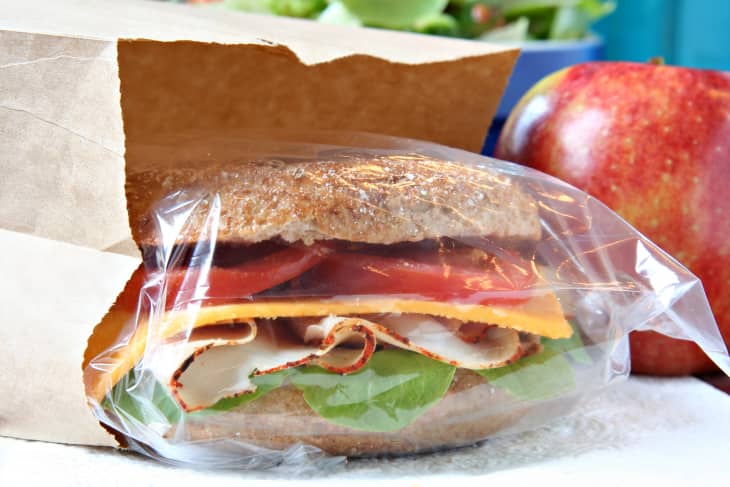
4. Store your sandwich in either plastic wrap or parchment paper.
When it comes to storage, zip-top baggies and parchment paper are both great options — but it depends on what type of sandwich you’re making.
Try this: Sandwiches stored in zip-top baggies tend to get soggy faster, while sandwiches that are tightly wrapped in parchment paper (deli-style) risk drying out. If your sandwich is already wet (it’s made with ingredients like tomatoes, pickles, and saucy condiments) parchment paper might be your best bet, but for drier sandwiches, a zip-top baggie will work just fine.
Read more: The 5-Step Guide to Wrapping Your Breakfast Sandwich Like a Pro
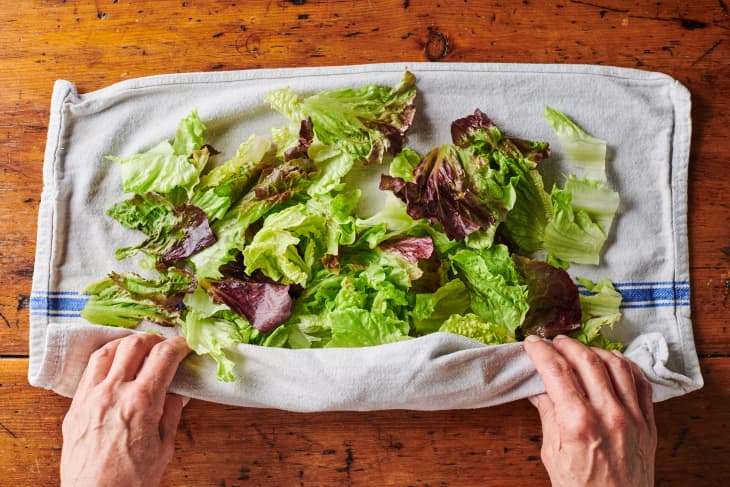
5. Make sure your ingredients are as dry as possible.
When it comes to assembling sandwiches in advance, moisture is your enemy. Make sure all of your ingredients are as dry as possible, including your lettuce.
Try this: Dry your greens in a salad spinner before adding them to your sandwich, and pat any other wet ingredients (like pickles or sliced tomatoes) off with a paper towel.
Read more: We Tested 7 Methods for Washing and Drying Salad Greens and Found a Clear Winner

6. Pack chicken salad, tuna salad, and any other creamy filling separately.
If you’re planning on prepping sandwiches with a creamy filling in advance (such as tuna salad, chicken salad, or smashed chickpeas), pack them separately.
Try this: Pack your finished creamy salad in an air-tight container stashed in the fridge and assemble your sandwich with everything except the filling separately.
Read more: We Tested 4 Famous Chicken Salad Recipes and Did Not Expect These Results

7. If you plan to store them for more than three days, freeze them.
Sandwiches made with hearty ingredients like hard cheeses and deli meats are perfect candidates for freezing, but ones made with more delicate ingredients (such as soft cheeses) are not the best bet.
Try this: Wrap your sandwiches in foil to keep them together, then transfer to a large zip-top baggie. (You can store multiple sandwiches in one bag.) Sandwiches can be stored in the freezer for about a month.
Read more: How To Make Freezer-Friendly Breakfast Sandwiches

8. Wait to add fresh veggies to freezer sandwiches until you’re ready to eat.
Wait to add fresh vegetables (such as lettuce or tomato) to any sandwiches you store in the freezer until you’re ready to eat them.
Try this: The day before you want to eat them, take the frozen sandwich out of the freezer and let it defrost in the fridge. Right before eating, just add your finishing touches. Lettuce, tomatoes, and any other fresh produce should be added at the last minute.
Ready to put these tips to use? Here are some of our favorite sandwich recipes.
What are your best tips for making sandwiches ahead of time? Let us known in the comments!