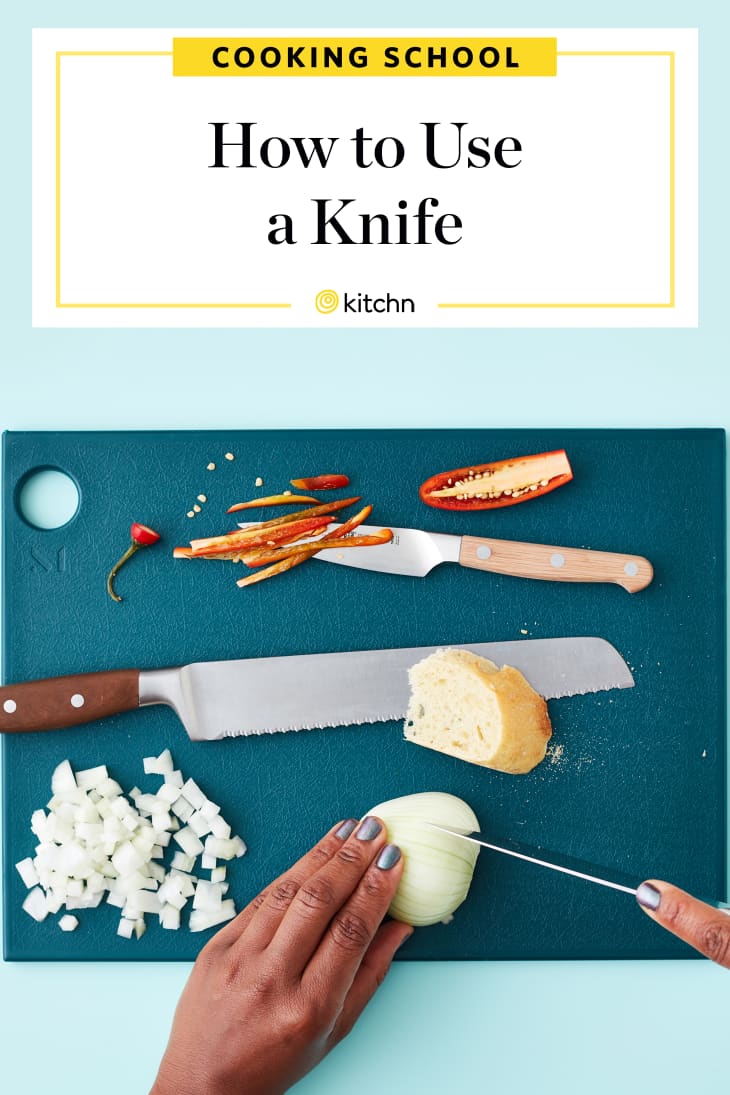
How to Become a Cook Who Wields a Knife with Confidence

- Today’s Lesson: Knife Skills
- Enroll & See All Lessons So Far
Today we’re talking about knife skills. There is nothing as important to a cook as knowing how to slice, dice, and chop. Today’s lesson will start with the (perhaps surprising!) basics that you need before you ever pick up a knife, and give you the secrets to getting faster, better, and more confident with a sharp blade. Ready? Let’s go!
Why Knife Skills?
The very first thing you do when you begin cooking almost any recipe is to start cutting things. So it’s something you do a lot in the kitchen. It’s often one of the skills that cooks feel slows them down and keeps 30-minute dishes from actually being 30-minute dishes. So even if you’ve chopped a lot: Are you as efficient as you could be?
Also, are the things you cut uniform in size and shape? The difference between an okay dish and a very good dish often hinges on whether it’s cooked evenly, which means your ingredients should be evenly, uniformly cut. Can you cut things evenly and uniformly, at speed? That’s what today will help you learn and practice.
Start Here: Knife Basics
What Knives Do I Need?
The main knife you need for cooking in the kitchen is a standard chef’s knife. This is the large knife pictured above. The blade is usually six to 10 inches long (eight inches is standard). There is no one right chef’s knife for everyone; you should have something that is sharp and feels good in your hand. (Here are a few that we have tried and like!)
A chef’s knife will do the bulk of your cutting, and you don’t need much more. But there are two others that are pretty essential.
- Paring knife. This is extremely useful for doing close-up work like cutting eyes out of potatoes, peeling vegetables, segmenting citrus fruit, or deveining shrimp, among other things.
- Serrated knife. This is useful not only for cutting bread, but is also often better than a chef’s knife on delicate vegetable skin, like tomatoes.
Neither the paring knife nor the serrated knife need to be particularly expensive. We’ll have recommendations below, in our gear list.
Great Knife Skills Start Before You Cut Anything!
Before we get to fancy flashy knife skills, there is one extremely important thing you need to learn in order to cut with confidence.
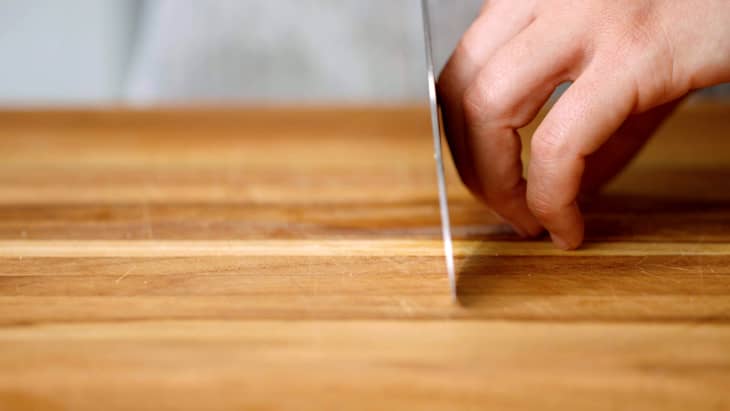
Stabilize your cutting board! Your cutting board should be on the countertop, at a comfortable height, and it should be stable. This means that if you place your hand on the board you shouldn’t be able to slide it around. If your cutting board doesn’t already have non-slip feet or a rubberized bottom, there are several easy ways to do this. The easiest little trick is to place a damp cloth or paper towel under your board, to keep it from sliding around. For a reusable option, you can also get a roll of non-slip shelf liner and cut it to fit your board. Never start cutting something without making sure your board won’t move around under your knife.
Use a sharp knife: Once you have a stable working surface, you need to make sure your knife is sharp. If you’ve recently bought your knife, it’s probably sharp enough. If, like most people, you’ve owned it for years, and it’s never been sharpened, it’s time to change that. A dull knife is a dangerous knife. Dull knives require more force to cut through food, and are more likely to slip, meaning that you’re more likely to cut yourself. And on top of that, they’re just not going to do as good of a job.
Think of knife sharpening like teeth cleaning: Take your knives to a professional once or twice a year to get them sharpened, and then get a honing steel and hone it once a day before you start to cook. The honing steel doesn’t sharpen the blade, but it does straighten the edge, so it’ll feel sharper when you use it. Serious Eats has a good guide on honing a blade if you’re unsure how to do it, but it’s not difficult, and it’s hard to do too wrong.
If you don’t have a good local knife sharpener, you can send knives out to a service like Knife Aid or the Seattle Knife Sharpening company.

How to Grip a Knife Like a Pro
Congratulations! You have a sharp knife and a stable cutting surface! Now you finally get to pick up your knife! When it comes to fast, accurate, safe knife use, your grip is everything. You want the knife to feel completely in your control while cutting. You don’t want it to slip around (especially if your hands are greasy) and you don’t want your fingers to get anywhere in the way. So let’s look at some holding styles.
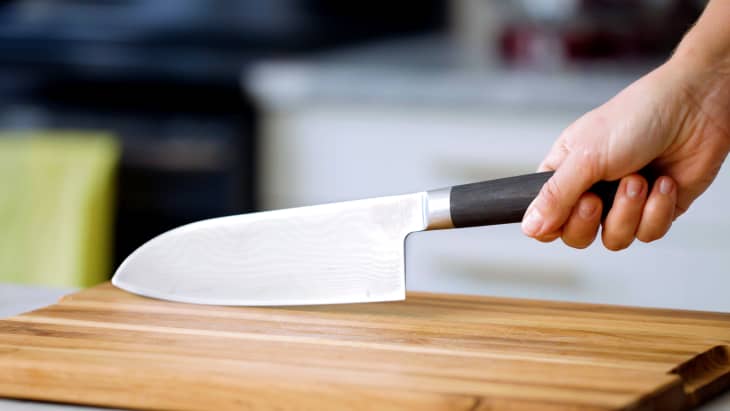
WRONG! This is NOT a good way to hold a knife! When the blade is so far from the hand, it’s hard to have any control over where it’s cutting.
WRONG! This is also not a good way to hold a knife. With a finger on the spine, it could too easily slip and get in the way — or under the blade. And again, you have less precision over where the knife is going.
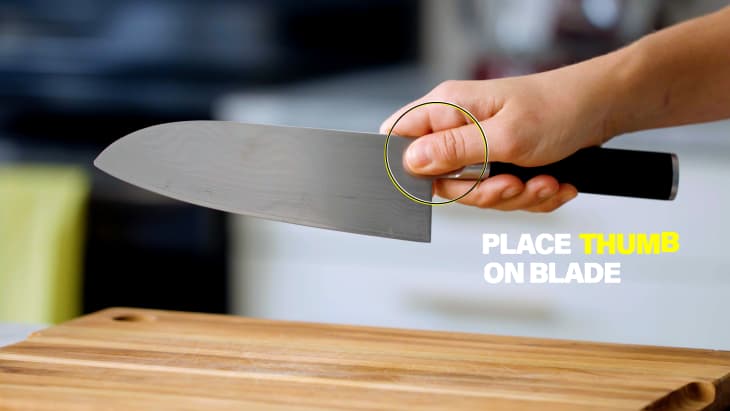
RIGHT! Pinch the blade with the thumb and forefinger, wrap your hands around the bolster and curl other fingers around the handle. Pick up your knife and hold it like this. Feel how easy it is to decide exactly where to set the blade down on an ingredient. This will give you the most power and control. Holding your knife right and pinching the blade like this can be absolutely revolutionary to your speed and confidence in chopping quickly!
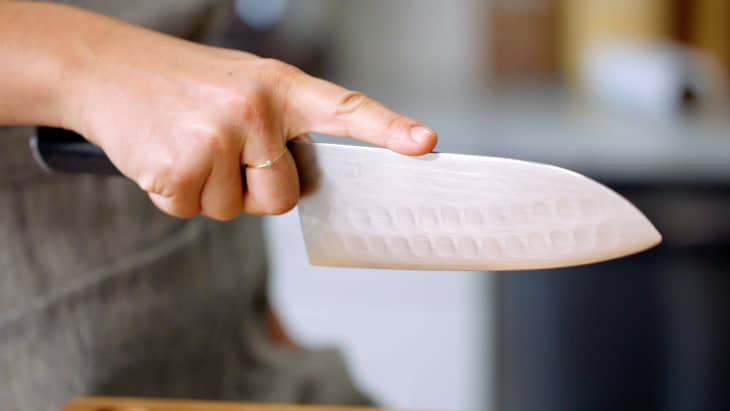
How to Hold the Food You’re Cutting
To cut food, the important thing is to make sure that your fingers are out of the way, and that the blade is moving evenly through the food. The best way to do this is by holding food with what’s called the “claw grip,” keeping the middle of the blade close to your knuckles as a guide, and rocking the blade over the food. This gives you the most precision and control. Here’s what it looks like (without food).
Notice that the fingers are curled in, just slightly. This way, the knuckles can act as a guide to the knife blade, and you can safely slice food without worrying about cutting your fingers. (Definitely watch Grace demo this in the video above!)
If you don’t typically use this method, it may feel uncomfortable at first, but it’s far safer, and worth practicing. Especially as you get better (and faster) at cutting, it will be useful to know that your fingers are out of the way of the blade without having to think about it.
If You Learn Just One Thing Today …
The goal when cutting ingredients is first and foremost to achieve an even size. This will make sure that everything cooks evenly and is done at the same time, and will help avoid having undercooked or overcooked elements of a dish. When practicing cutting, start slow and focus on this. Speed will come with time and practice, but if you can achieve uniform slices (or cubes, or sticks) you’re already ahead of the game.
Cutting with a knife shouldn’t feel like cutting with an axe. You aren’t trying to force the blade down into food, as much as you are drawing the knife across the food, and letting the sharp blade slice.
What You Don’t Need to Learn
Unless you are planning to do a lot of professional-level cooking, it’s not as important to be able to perfectly execute the variety of knife cuts, like brunoise, batonnet, etc. Nor should you feel like you need to do every bit of cutting with a knife. While impressive-looking, fancy cuts don’t make food tastier, and there are plenty of things you can do with a food processor or mandoline — like getting thin slices for a scalloped potato dish, for instance — that are, frankly, far easier. There are some basic cutting terms that it’s helpful to know, however.
Level Up! Knife Skill Pro Tips
Let’s talk about some basic cuts! For most root vegetables like potatoes and carrots, a recipe will generally ask you to slice, chop, dice, or mince your vegetables.
- Slices are straightforward: Whether it’s a carrot, potato, or celery, or another veggie, you simply make even-width slices. A mandoline or food processor often works fine for this, especially if you are cooking for a lot of people and need a large amount.
- Chopped: When instructions call for chopped ingredients, that indicates the pieces do not need to be terribly precise. The goal is to get evenly sized, but not perfectly uniform, cuts.
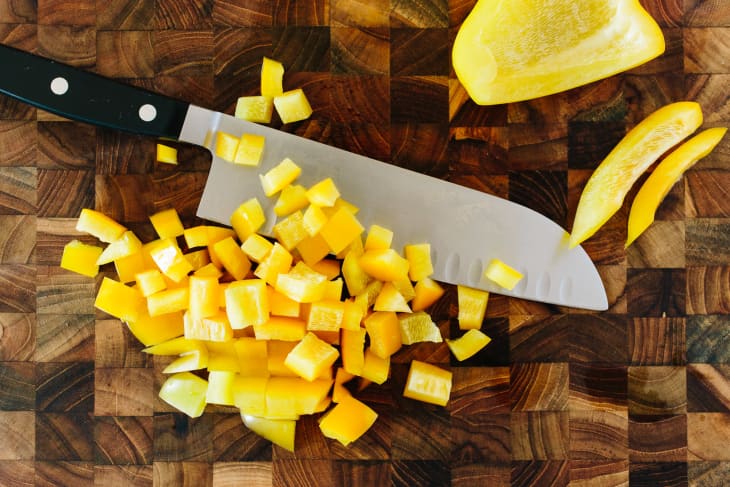
- Diced ingredients are different. When a recipe asks you to dice potatoes for, say, home fries, the goal is to get them into evenly sized cubes. About 1/2 inch is typical for a medium dice. A large dice is closer to 3/4 inch, and a small dice is closer to 1/4 inch. But again, the most important part is that the food is roughly the same size. Read more: Learn Just What a Dice Looks Like
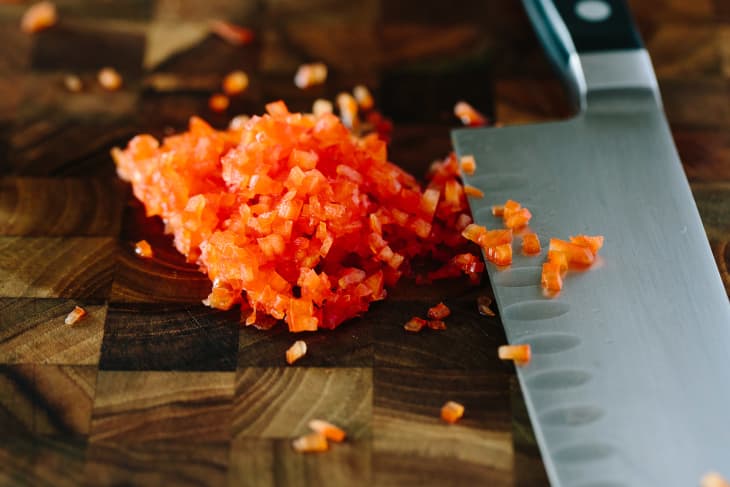
- Minced: Finally, there’s minced. This is something recipes often ask you to do with herbs, garlic, or other flavorful aromatics that should be spread through a dish. Mincing is a very fun way to cut, because it’s hard to do wrong: You simply chop everything up in a big pile, and then keep chopping until it becomes as small as possible. A knife works just great for this, but you can achieve a similar effect with a grater, Microplane, or even a blender. Again, make sure to watch Grace demo this in the video above.
Our Favorite Knife Gear
If you need recommendations on basic chef’s knives or cutting boards, check our Cooking School Equipment List. It has recommendations for all the tools necessary to complete your cooking school assignments. But here are a few extra tools that can save time, and frustration. We’ve linked to products that we specifically recommend.
If you’re ready to invest in a slightly nicer chef’s knife, or are unhappy with the one you have, learn all about how to buy a chef’s knife, and see our top five recommendations, here.
5 Recipes to Use Your Knife Skills

All of our assignments have three options, depending on how much time you have today. Do what you can; come back for more later!
15-Minute Assignment: Watch & Read
If you haven’t yet, watch the crash course video above. After that, read these basic primers. If you could pick just one thing from all this information, what would you like to try first?
30-Minute Assignment: Practice!
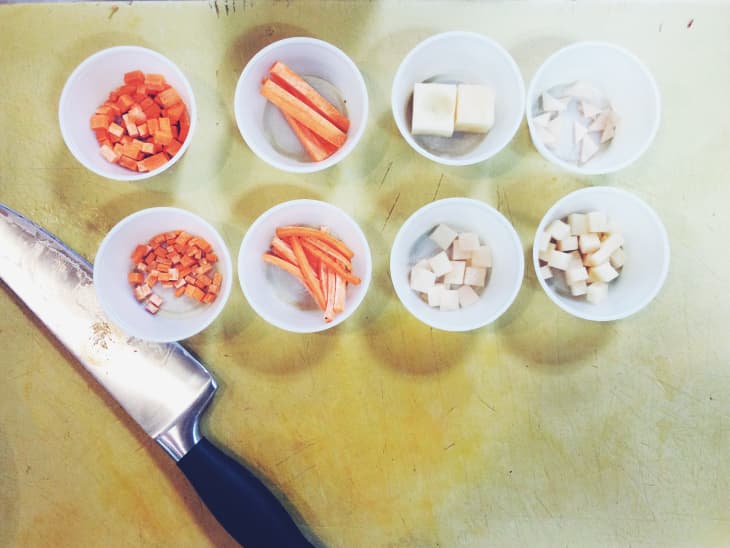
If you haven’t, watch the crash course video above. After that, get a bag of onions, set up your work station, hone your knife, and practice dicing onions. (You can set aside some for tomorrow’s lesson, and store the rest in the fridge or freezer for later recipes). Tips: Go slow. Be sure to follow the horizontal and vertical slices as demonstrated in the video. Aim to create three sizes: a large dice (about 3/4 inch) a medium dice (about 1/2 inch), and a small dice (about 1/4 inch).
Check your work: Compare the pieces in one size dice to each other. How much variation is there? How uniform are they? Now compare the pieces in the onion you began with to the pieces in the onion you finished with. Did your cuts gets more even as you practiced?
60-Minute Assignment: Stretch Yourself
Make a big batch of multi-vegetable soup. Include potato or sweet potato, zucchini, celery, onions, garlic, carrots, and any other vegetable you’d like to practice on. Experiment with a variety of cuts — mince the garlic, slice the onions, then dice the potatoes, zucchini, etc. See if you can get uniform-sized pieces across several vegetables.
Check your work: As with the 30-minute assignment, check your pieces and compare for consistency and size. How well did you do?
What It Takes to Be an Expert
It takes a long time to really master any cooking skill, but knife skills are particularly a matter of muscle memory. Even professional chefs who have been working for years can benefit from practice. Although it’s not practical to do this every night, try to take occasional moments to slow down, focus on the technique, and attempt to get the most even and uniform cuts possible.
Meet Your Classmates
You can also join your Kitchn Cooking School cohort in our Kitchn Facebook group, which is devoted to all things Cooking School this month.