
How To Grill Perfect Steak

A step-by-step method for perfect steak on the grill, including how to achieve maximum flavor, a gorgeous crust, and an evenly cooked interior every time.
Serves1 to 2
Makes1 steak
Prep5 minutes
Cook8 minutes
Browned and lightly charred on the outside, juicy and tender inside, a perfectly grilled steak has the power to make grown men cry. But you know what makes everyone cry? A dry, overcooked steak. Or a gray, tentatively-grilled steak with no crusty edges. With so many ways to get it wrong, it’s no wonder grilling steak can be intimidating.
To get it right once and for all, we turned to chef and grilling expert Adam Perry Lang, who shared his step-by-step method for perfect steak on the grill. His process is straightforward, but also includes a few tricks that ensure maximum flavor, a gorgeous crust and an evenly cooked interior every time.

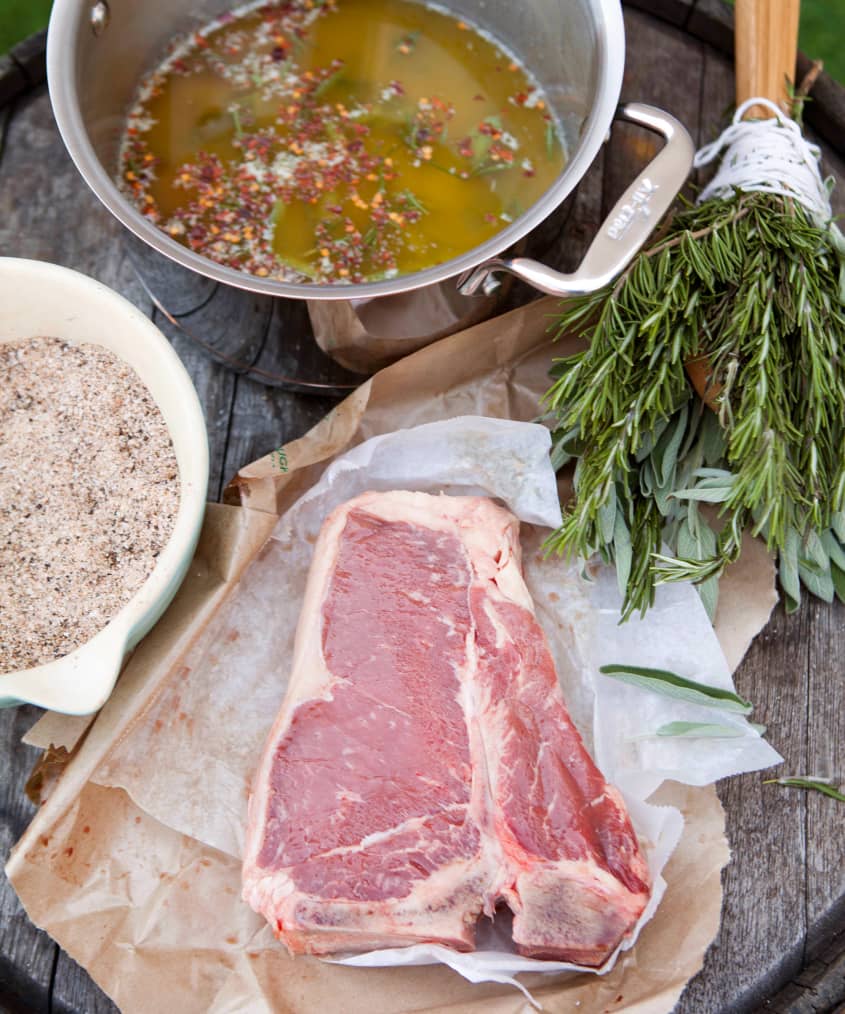
Adam’s technique involves building flavor at every step. He seasons steak with a dry blend of garlic salt, black pepper and cayenne pepper before putting it on the grill, and then he bastes it frequently with butter while it cooks, which always produces a steak that is, in his words, “GB and D”: golden-brown and delicious.
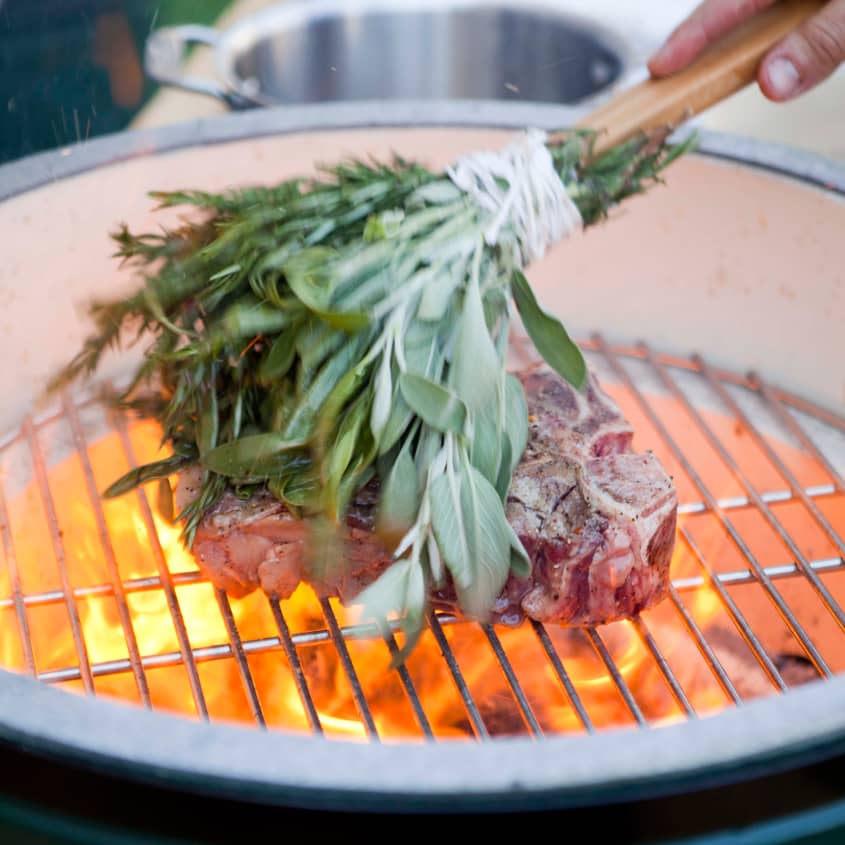
Baste with Herbs
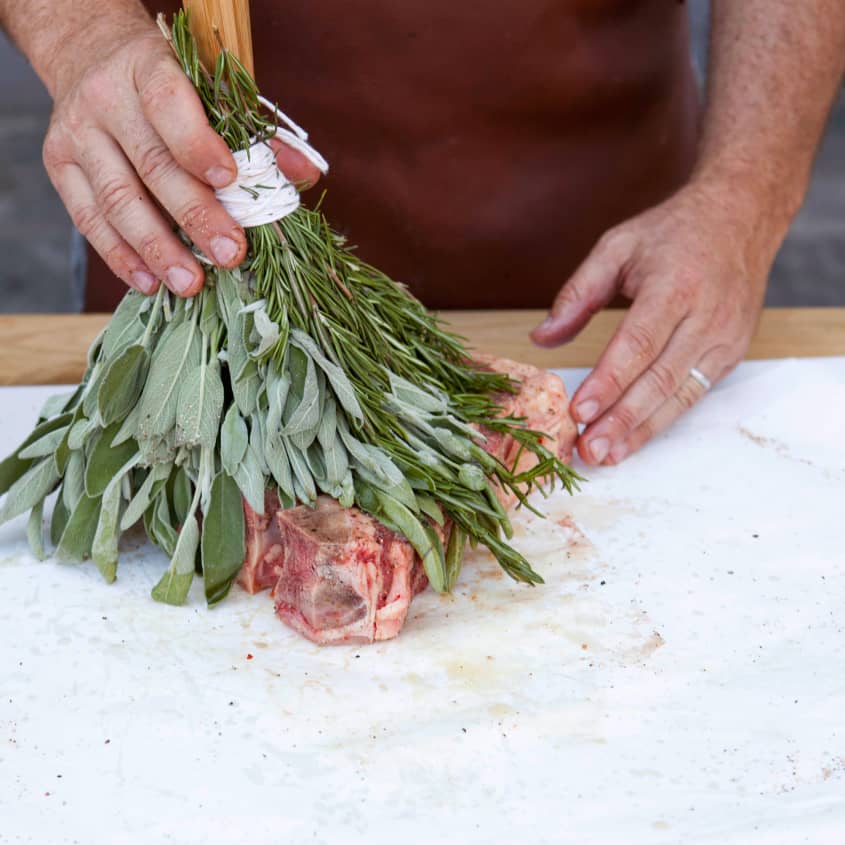
To make things even more delicious, the basting is done not with the usual barbecue brush, but with a bundle of woody herbs like rosemary, sage or thyme. When they touch the sizzling steak, the oils from the herbs are released, adding even more flavor to the meat. You can make the brush a little fancier and easier to use by tying the herbs to the end of a wooden spoon or dowel, or simply use a piece of kitchen twine to tie them into an easy-to-grip bunch.

Flip Frequently
You may have heard that meat shouldn’t be messed with once it’s on the grill. Adam recommends the opposite; you want some browning when each side of the steak initially hits the grill, but after that you should flip your steak frequently in order to ensure even cooking. Forming that wonderful crust on the steak will happen naturally by the end, especially if you are basting with butter.
If you are skeptical, as many of readers were when we previously mentioned this technique, all I can say is try it! I’ve been using this method since learning it from Adam and have been turning out perfectly cooked steaks every single time.
Finish with a Dressing
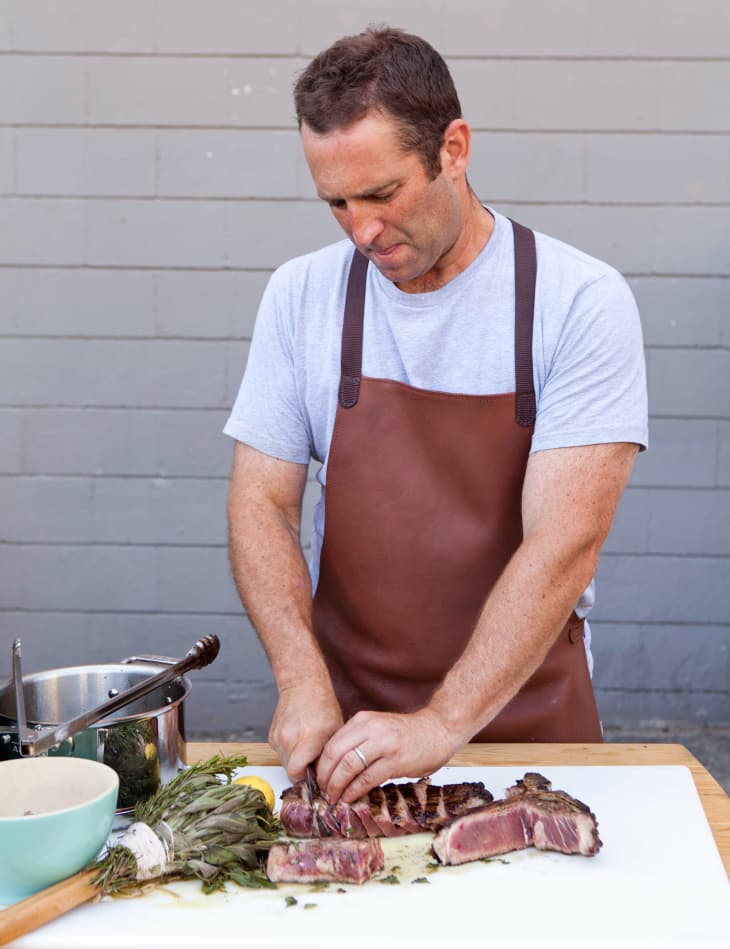
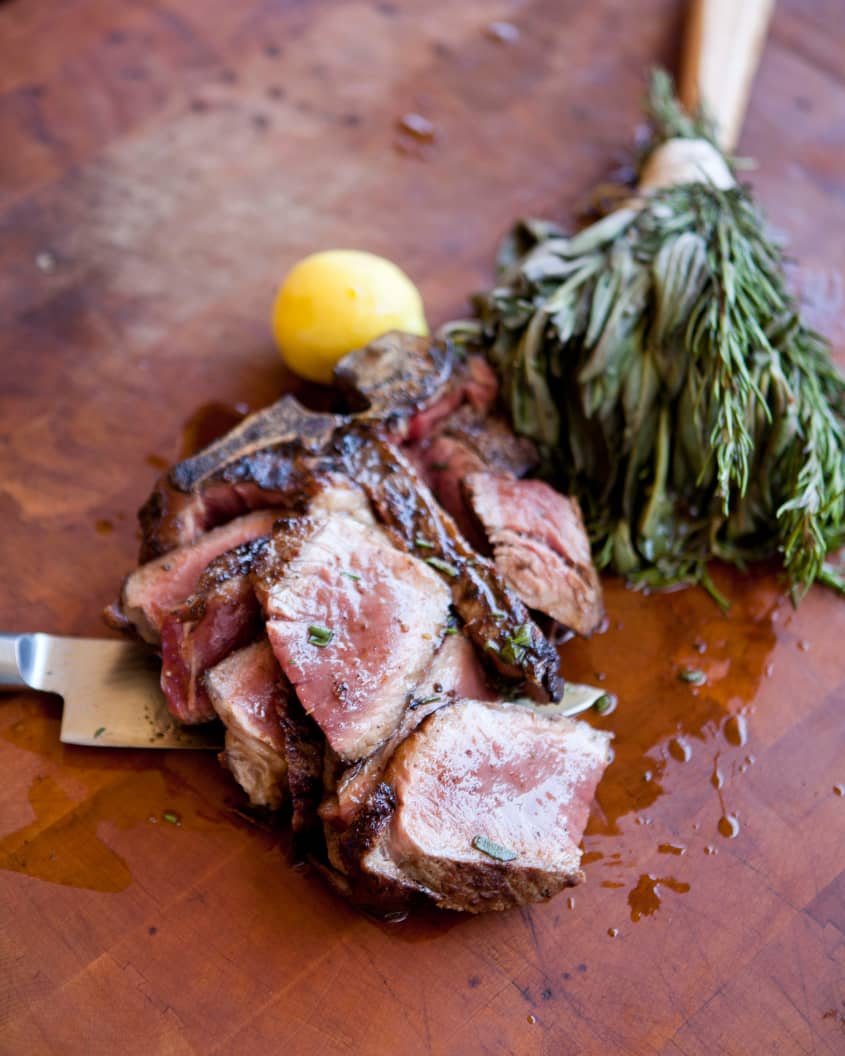
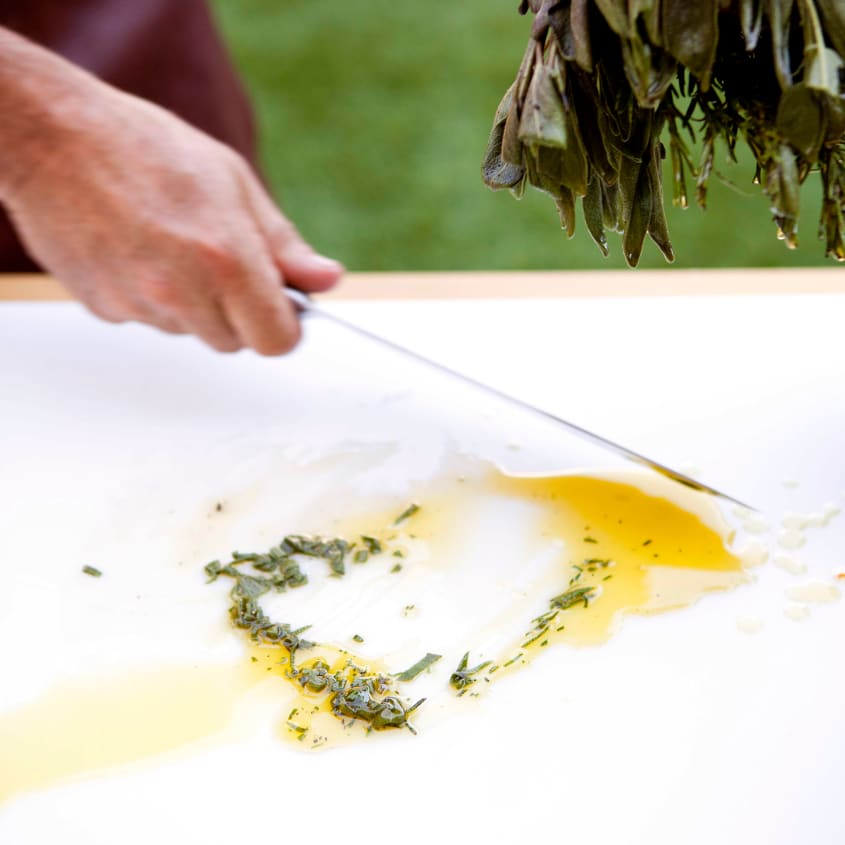
Once the meat is grilled, you can add one final layer of flavor by making a quick dressing with the meat juices, minced herbs from the herb brush, lemon zest and extra virgin olive oil. Tossing the slices of meat in the dressing means every bite is juicy and perfectly seasoned.
After Adam took me through the steps of his steak-grilling process, I was so inspired, I organized a backyard steak barbecue a few nights later. Normally cooking steak for 15 people would be a little intimidating or at least something of a chore, but this time it was truly fun. Everyone was intrigued by the melted butter and the herb brush, and I definitely heard some skeptical remarks as I explained, “No, I’m flipping them a lot on purpose.” But when I was done and the platter was piled high with slices of crusty-edged, rosy-pink steak, the guests’ mouths were too stuffed to say anything but “Perfect steak!” before they headed back for seconds.

How To Grill Perfect Steak
A step-by-step method for perfect steak on the grill, including how to achieve maximum flavor, a gorgeous crust, and an evenly cooked interior every time.
Prep time 5 minutes
Cook time 8 minutes
Makes 1 steak
Serves 1 to 2
Nutritional Info
Ingredients
- 1 teaspoon
garlic salt
- 1 teaspoon
ground black pepper
- 1/4 teaspoon
cayenne pepper
- 1 bunch
fresh thyme, sage, rosemary or a combination
- 4 tablespoons
(1/2 stick) unsalted butter
- 1 teaspoon
red pepper flakes (optional)
- 1
(1 1/2- to 1 3/4-inch-thick) ribeye, T-bone, or Porterhouse steak
Finishing dressing:
- 1 tablespoon
extra-virgin olive oil
- 1/2 teaspoon
finely grated lemon zest
Salt
Freshly ground black pepper
Equipment
Kitchen twine
Wooden spoon or dowel (optional)
Gas or charcoal grill
Tongs
Cutting board
Instructions
Remove the steak from the fridge 1 hour before cooking. Set the steak on a plate and let it sit at room temperature for about an hour before grilling. This helps it cook more evenly.
Prepare the dry seasoning blend, herb brush, and melted butter. Mix the salt, black pepper, and cayenne pepper together in a small bowl. Use a piece of kitchen twine to tie the herbs together in a tight bundle. (For a longer brush, tie the herbs onto the end of a wooden spoon or dowel.) Melt the butter in a small saucepan and add the red pepper flakes if desired and a few herbs snapped off from the herb brush.
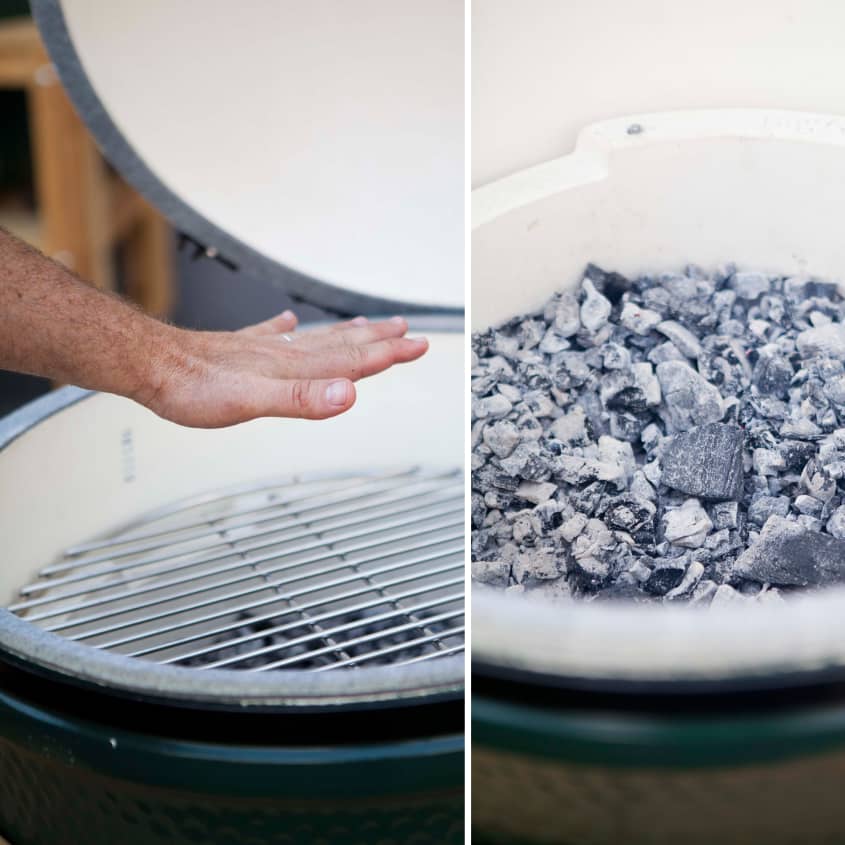
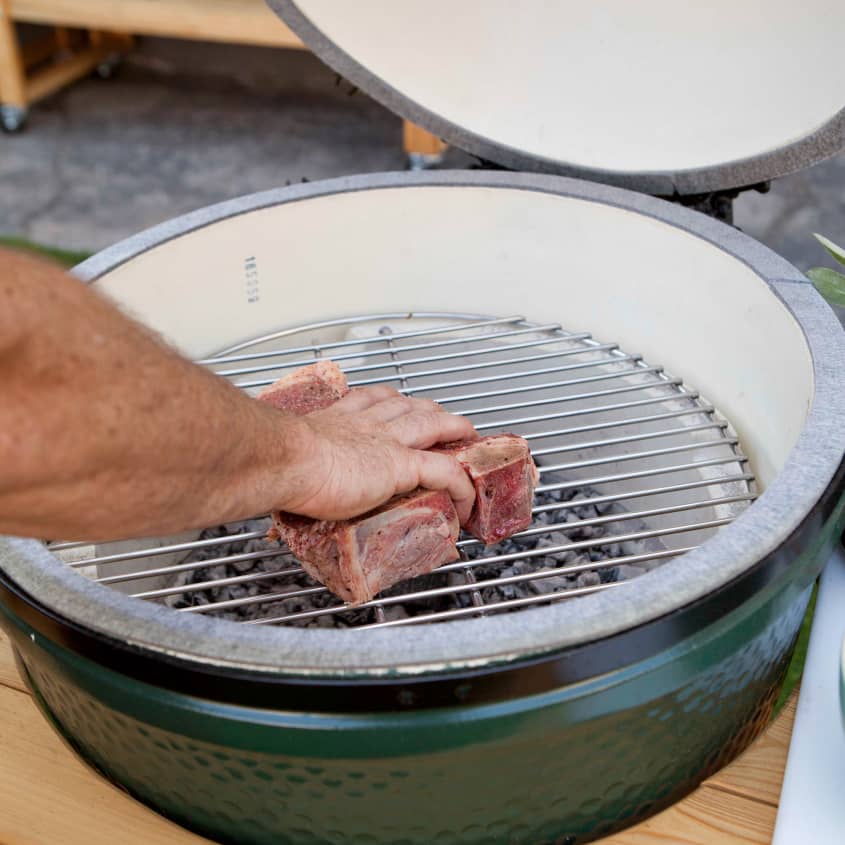
Heat the grill to high. Heat a charcoal or gas grill to high. You'll know the temperature is right when the coals are ashed over (if using a charcoal grill) and you can only hold your hand over the grill for 4 to 6 seconds before it feels too hot.
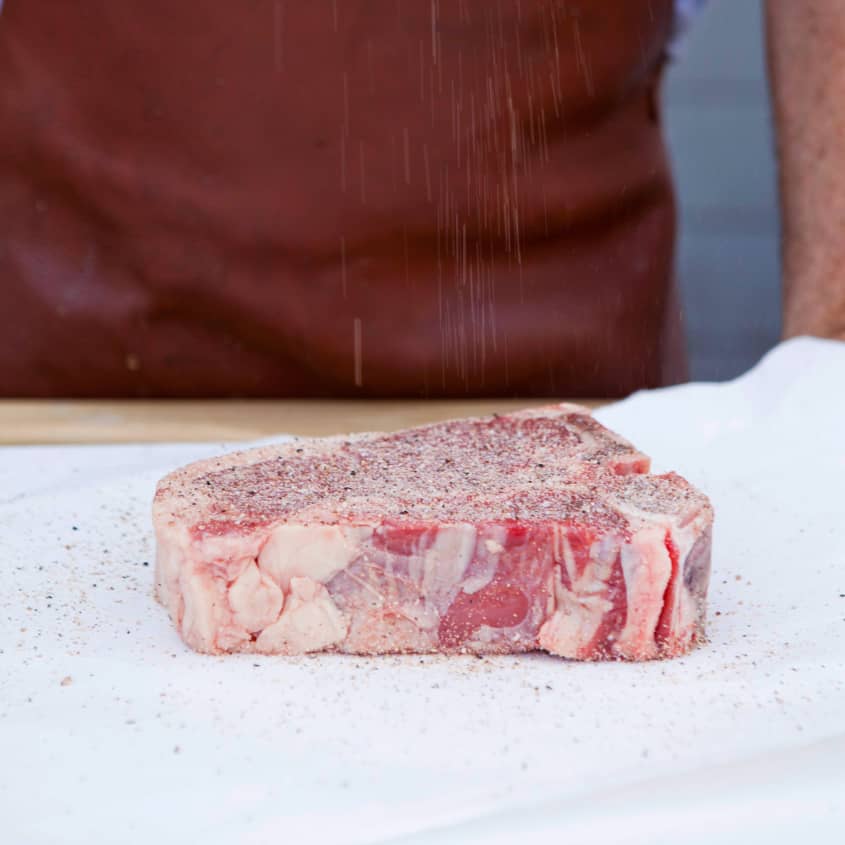
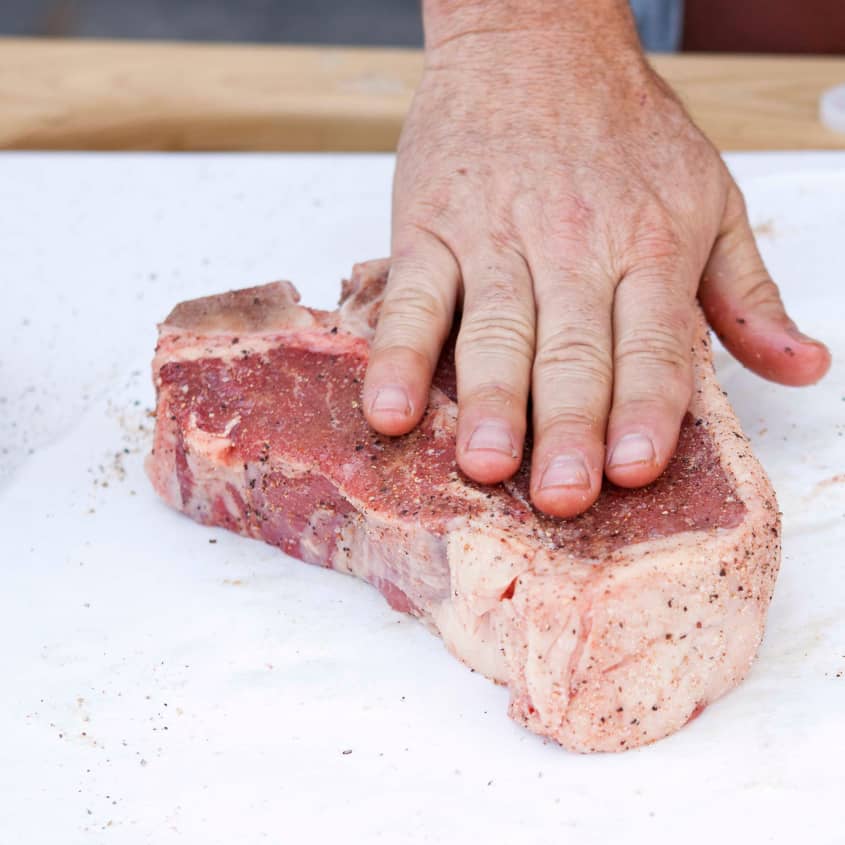
Season the steak. Sprinkle the pepper mixture generously over both sides of the steak, letting plenty of the seasoning fall on the surrounding cutting board or butcher paper.
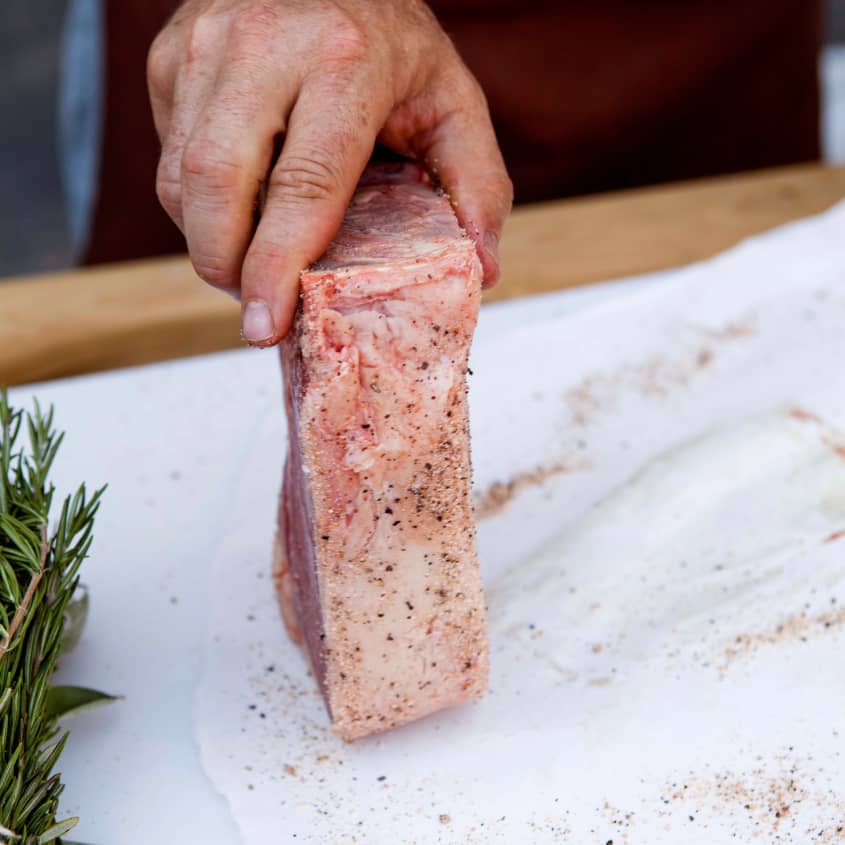
Season the edges of the steak. Dip the sides of the steak into the excess seasoning.
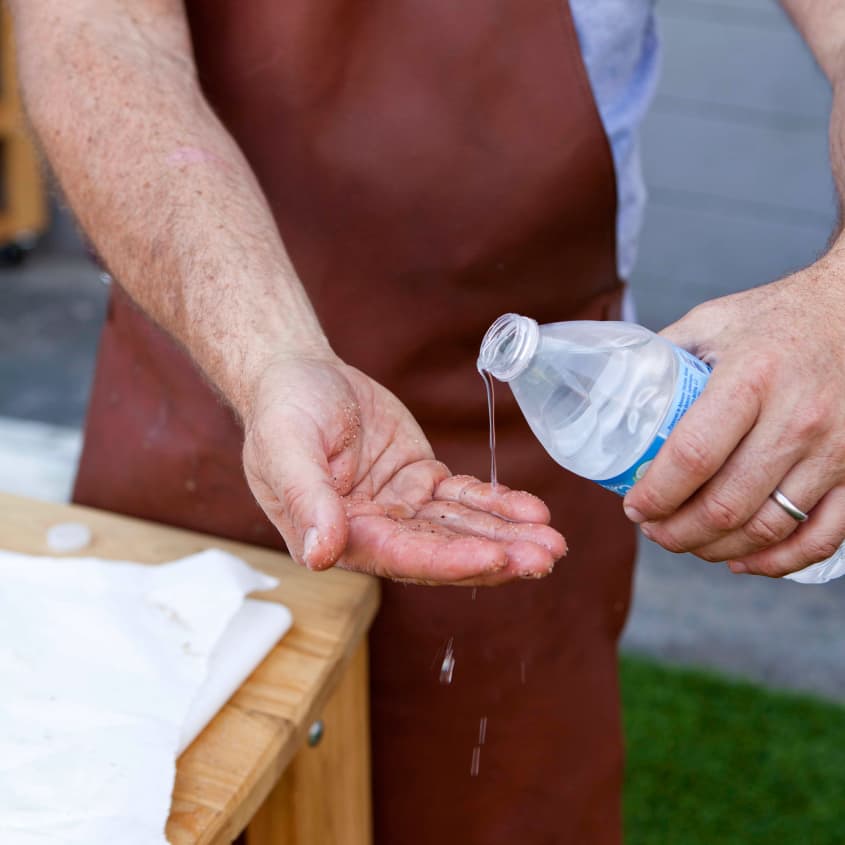
Dampen your hand. Wet your hand with a little water.
Create a seasoning "paste". Pat your dampened hand over both sides of the steak. This turns the dry seasonings into more of a paste that sticks to the meat.
Butter the steak with the herb brush. Dip the herb brush into the butter and lightly brush both sides of the steak.
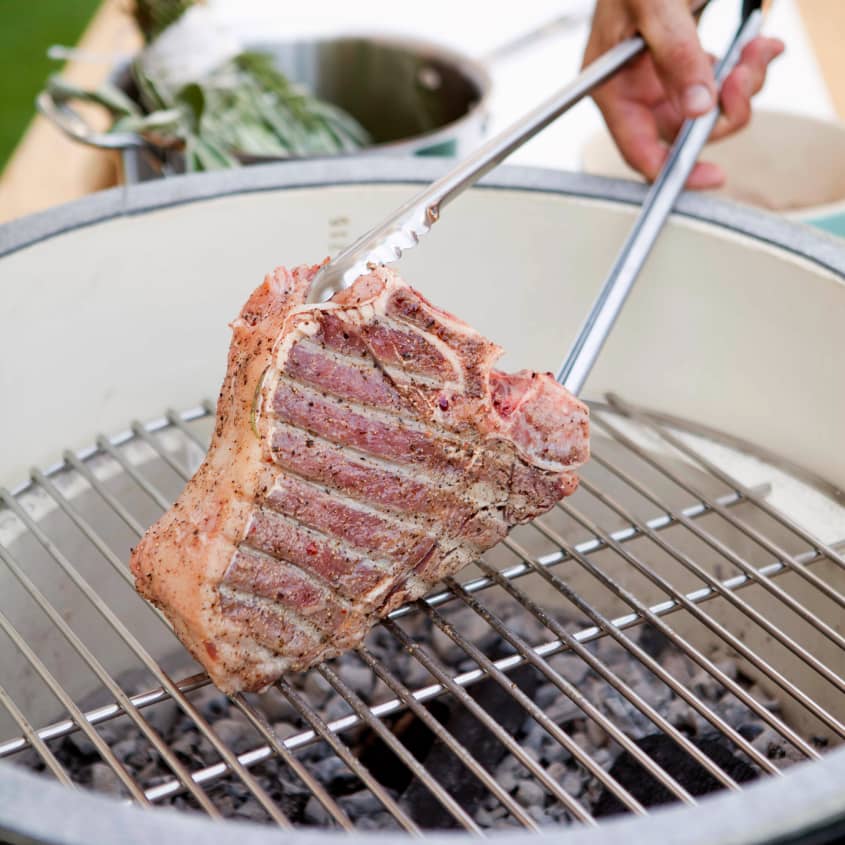
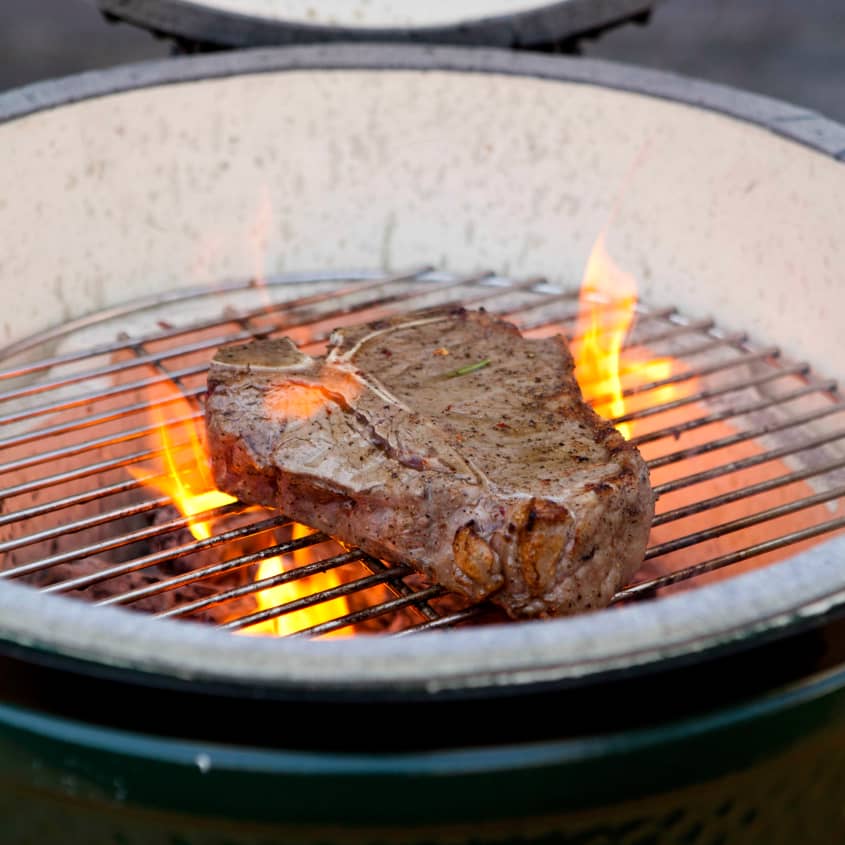
Sear the first side of the steak. Place the steak on the grill. Cover and do not move the steak until grill marks appear, about 3 minutes.
Flip the steak. Use the tongs to flip the steak.
Baste with butter. Dip the herb brush in the butter and brush on the steak.
Sear the other side of the steak. Cover and do not move the steak until grill marks appear on the second side. Flip and baste the second side with butter.
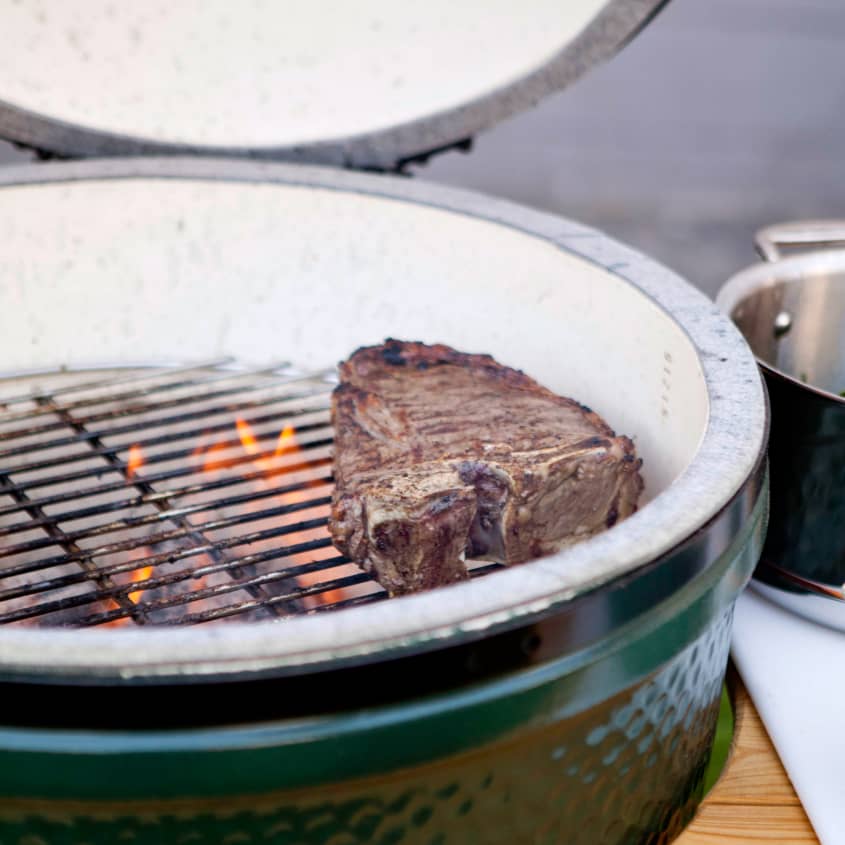
Continue grilling, flipping and basting with butter. Continue to cook covered. Flip frequently, basting the steak with butter every time you flip. If you have a flare-up, move the steak to a cooler part of the grill or to the edge of the grill where it is cooler.
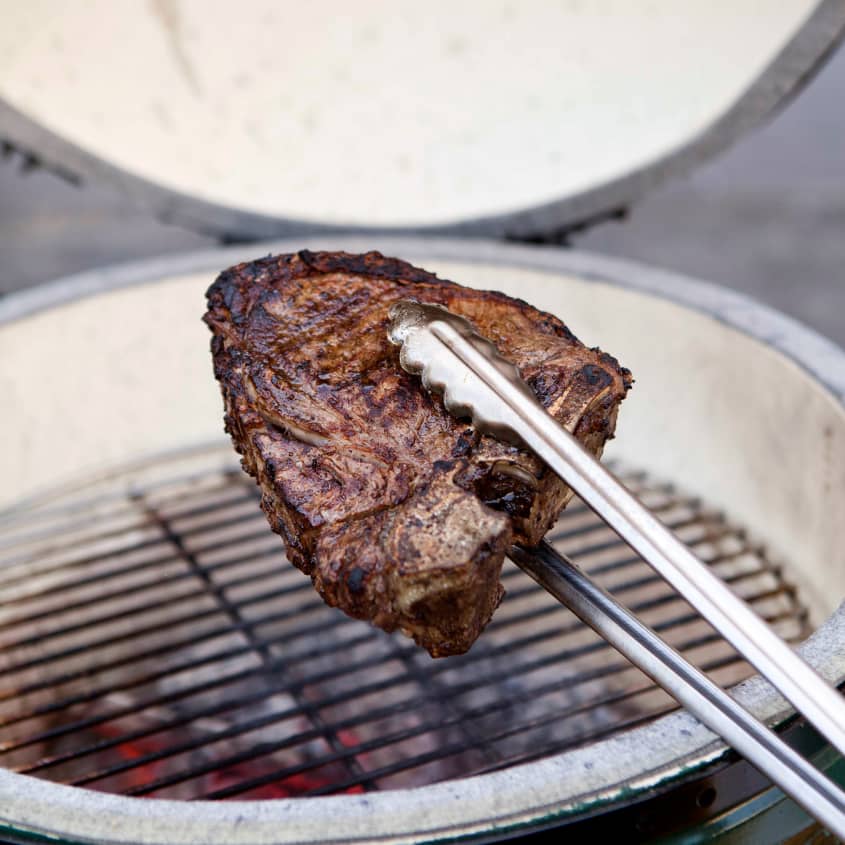
Gril to desired doneness. Use the touch test or an instant-read thermometer to determine when your steak is cooked to your liking (125°F for rare, 130-135°F for medium-rare, 140°F for medium). Transfer the steak to a plate.
Make the finishing dressing. Drizzle the olive oil on a cutting board. Add the lemon zest and season with a little salt and pepper.
Add herbs from the herb brush. Chop up some herbs from the end of the herb brush and sprinkle on the dressing.
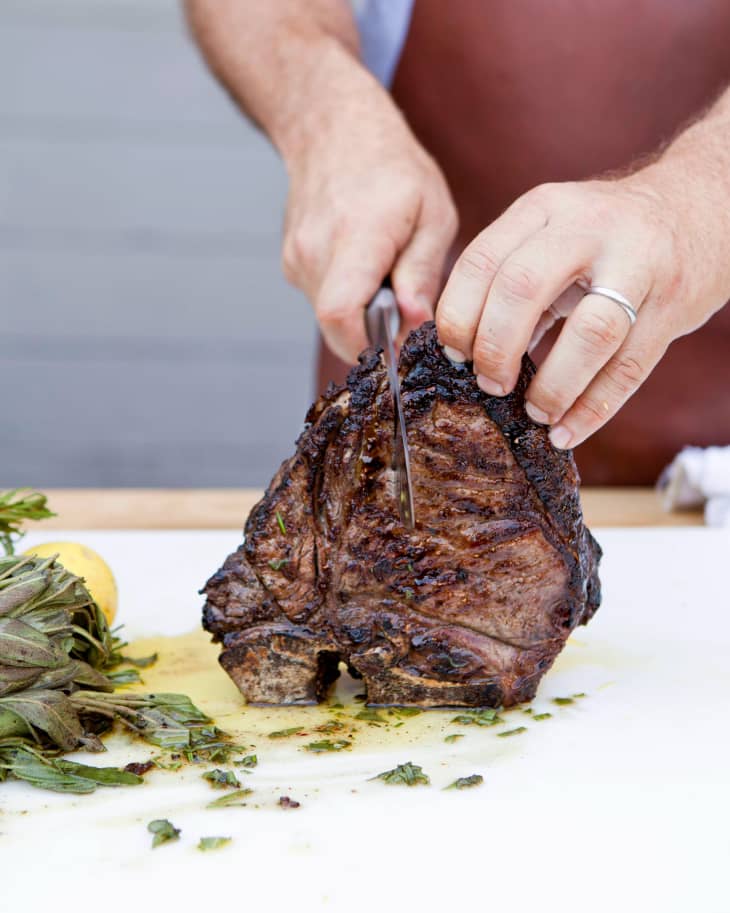
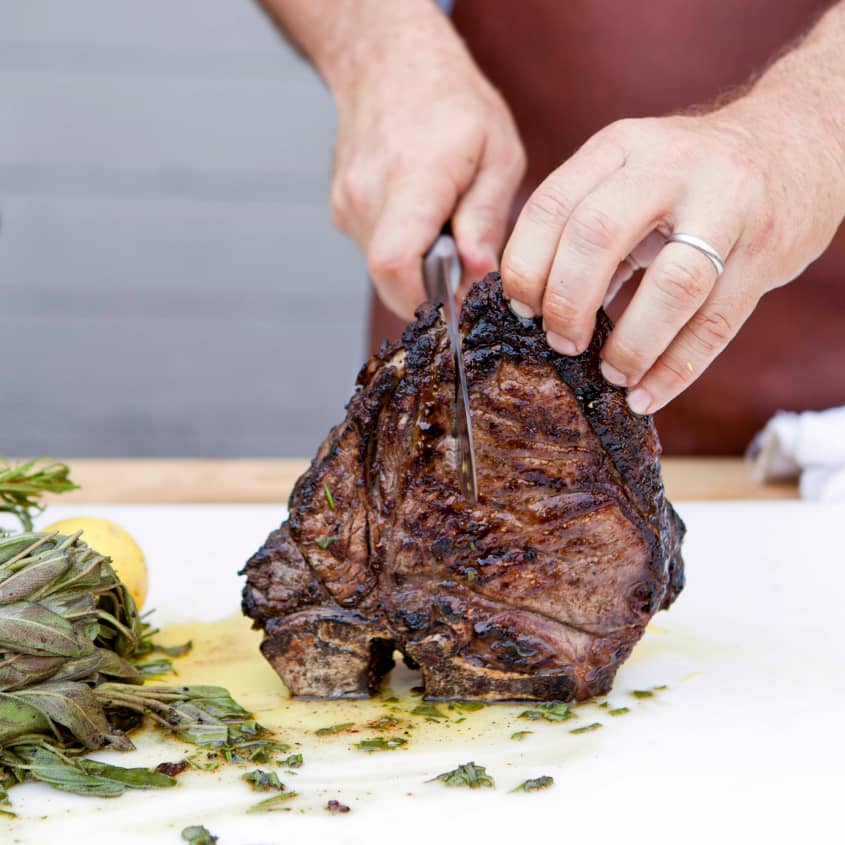
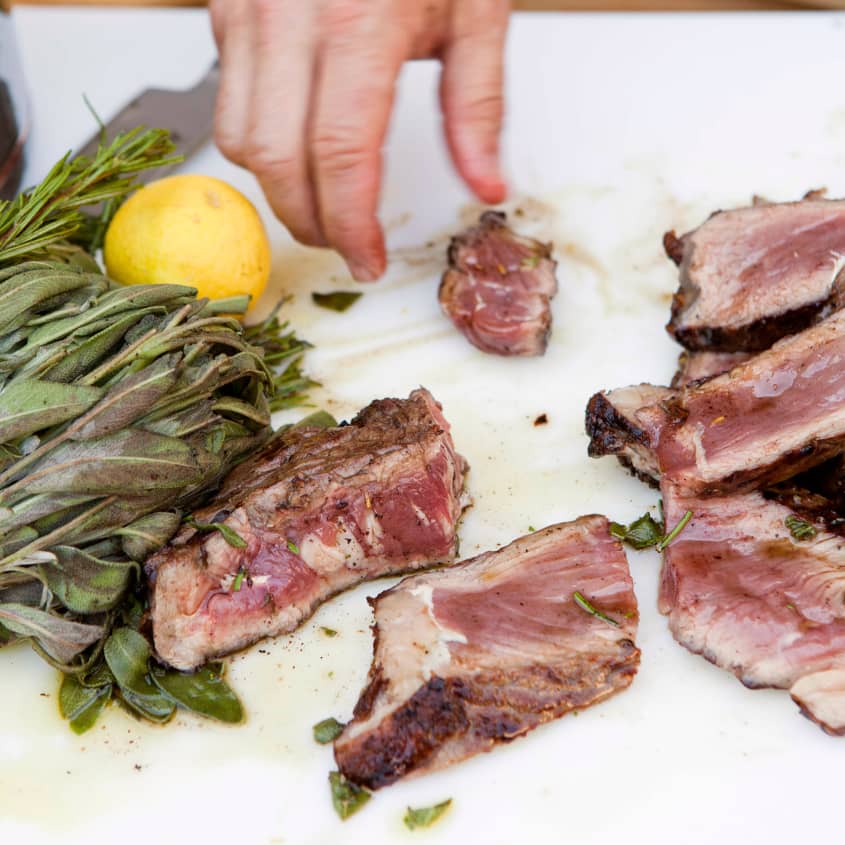
Slice the steak. Place the steak on top of the dressing and pour some of the juices that have collected on the plate over the meat. Cut to separate the meat from the bone and then slice the meat across the grain into 1/4-inch thick slices.
Dress the steak. Dredge the pieces in the dressing to coat them. Transfer to a serving platter, and pour the remaining juices over the steak.
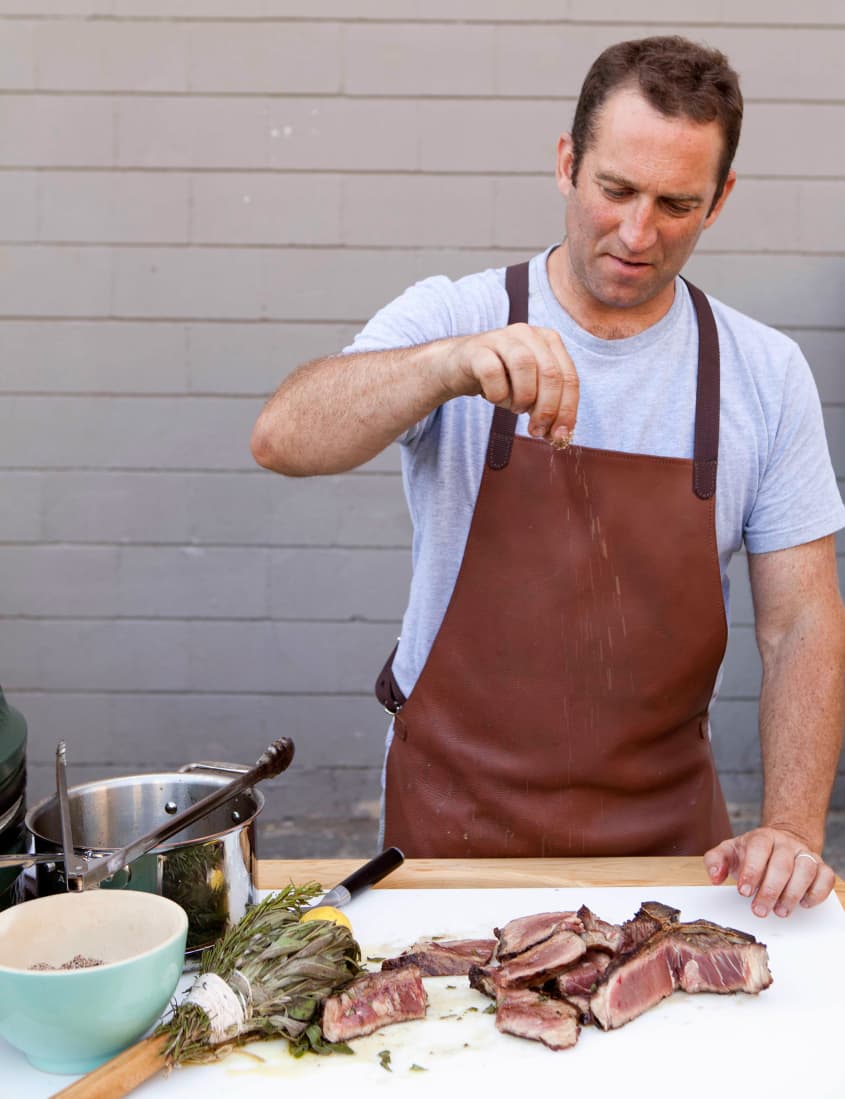
Season the steak. Taste and season with more salt and pepper as needed.
Recipe Notes
Using oil: You can use vegetable oil in place of the butter, but your steak won't be quite as browned and delicious.
Scaling up: This recipe easily multiplies if you are cooking more than one steak. When scaling up, use 4 tablespoons of butter for every two steaks.
Storage: Leftovers can be refrigerated in an airtight container up to 4 days.
Adapted from Serious Barbecue.
Learn more about grilling from Adam Perry Lang
→ Get his latest book: Serious Barbecue: Smoke, Char, Baste & Brush Your Way to Great Outdoor Cooking
→ Check out his website
→ Follow him on Twitter