
How To Frost & Decorate a Layer Cake

It’s a special occasion (or just a random Tuesday), and you are looking for a way to celebrate. We have just the thing: cake. A gorgeous, mouth-watering, decorated layer cake, to be exact!
Have you just baked up your favorite cake recipe, made a batch of frosting, and don’t know what to do next? It’s time to learn how to stack and decorate cakes like a pro and start creating sky-high, sugar-filled masterpieces!

Trim and Torte
Before we get to frosting and decorating, it is important to start with a level and stable cake. Sometimes when we bake cake, a dome forms on the top. Think about stacking several of these uneven cakes on top of each other — you will probably end up with an unstable structure that resembles something more like the leaning Tower of Pisa than cake, right?
Instead, trim all your cakes so they are level and flat before filling and stacking. If your cakes bake up extra thick, carefully cut them in half horizontally (or “torte” them) and split the cakes into multiple layers.
To do this, hold a long serrated knife parallel to your work surface. Carefully score around the cake where you want to cut, and then begin cutting the cake — a little at a time. Continue cutting around the cake and then towards the center until the top portion detaches from the bottom.
How to Fill and Stack a Cake
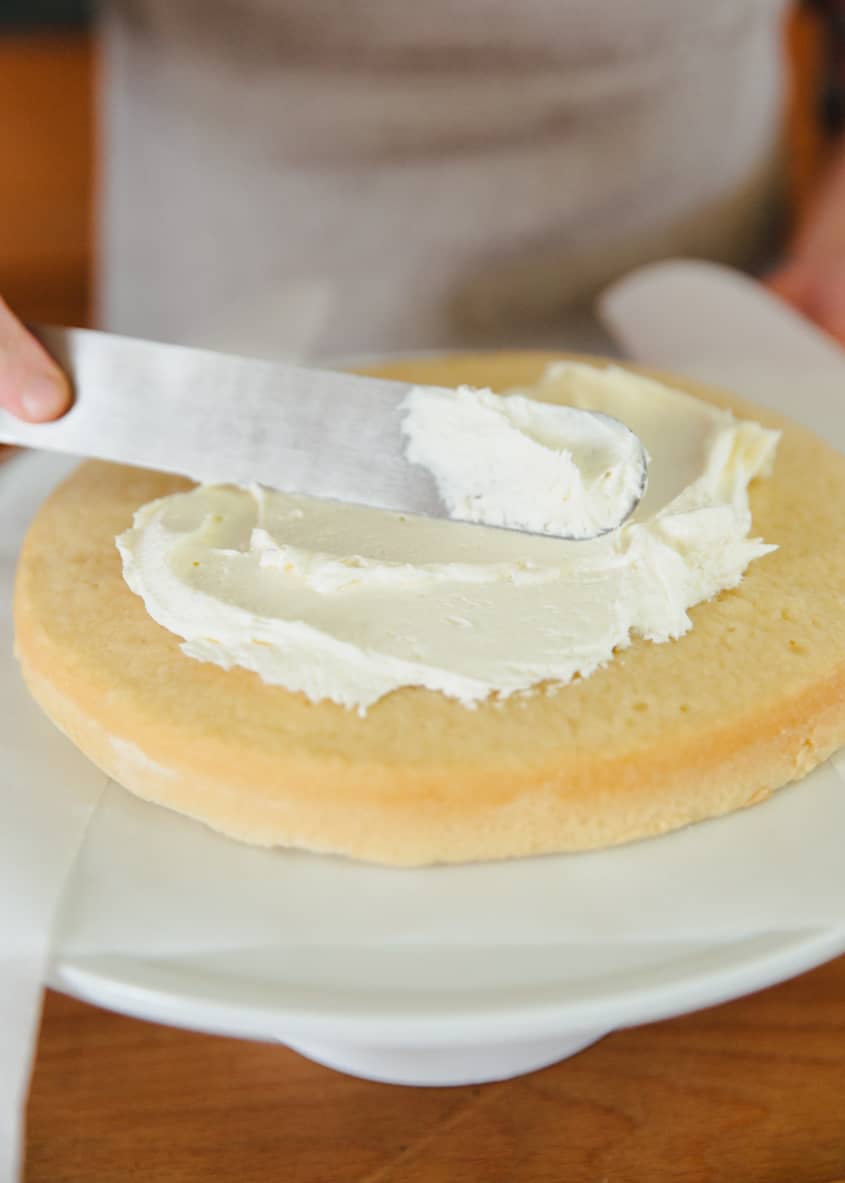
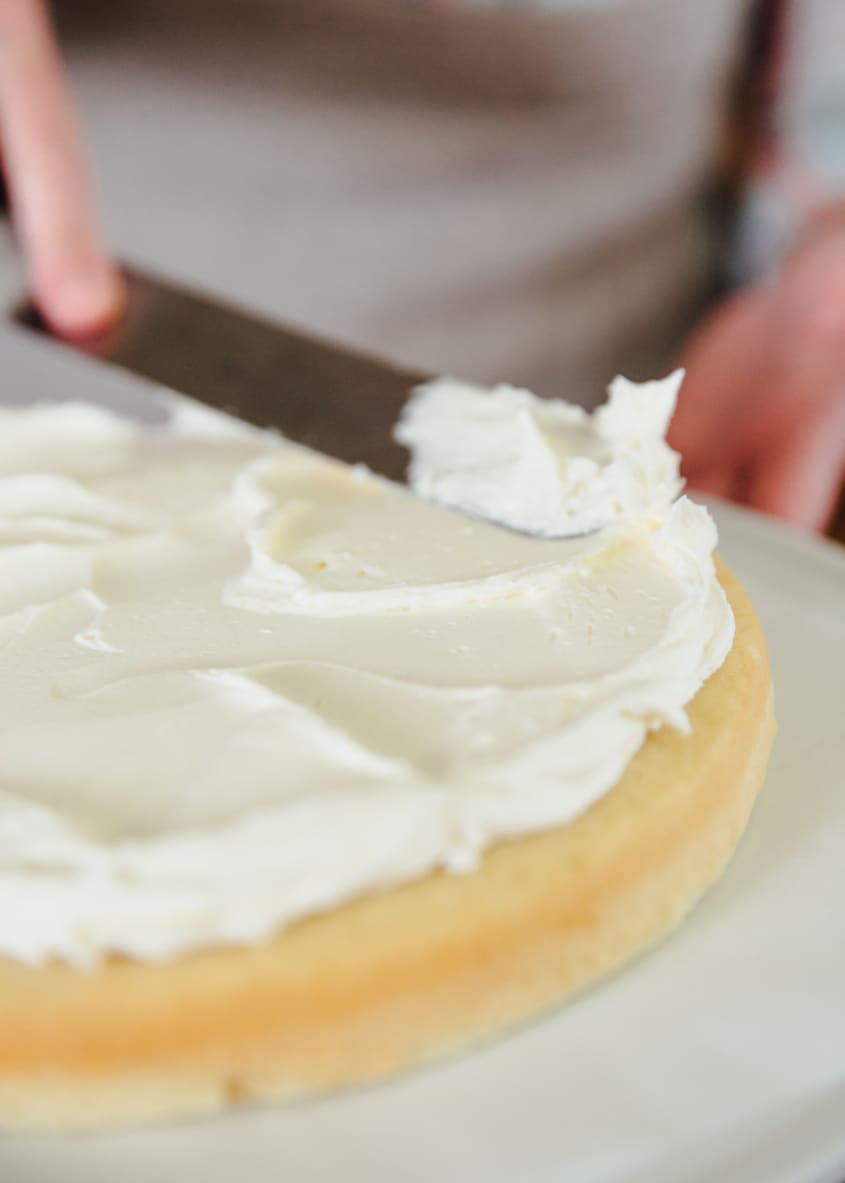
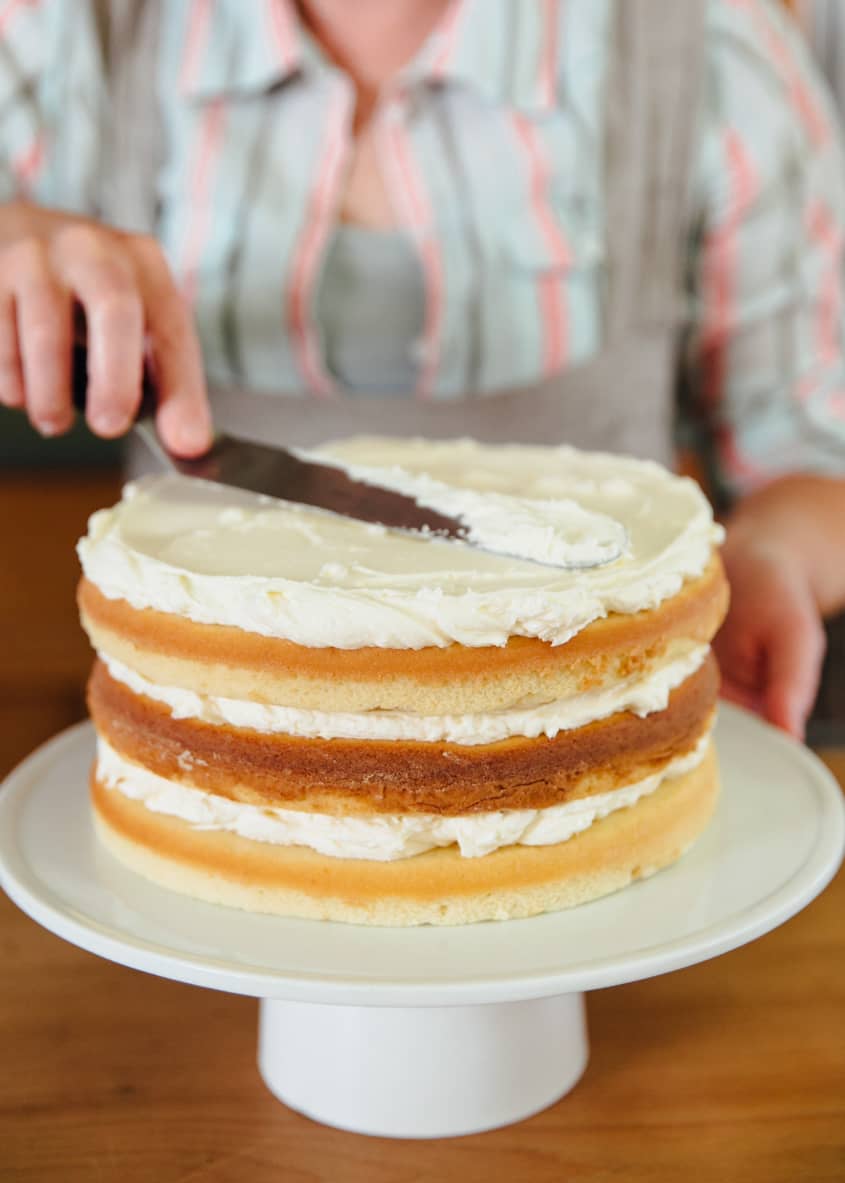
Place the bottom layer of your cake on a cake stand or serving dish. Take four strips of parchment paper and tuck them halfway under and around the bottom of the cake layer (this will keep your cake stand clean while we frost). For simple buttercream and more stable filling, like fudge or cream cheese, simply spread on the filling between the layers of cake with a metal spatula. Begin by placing a dollop of frosting in the center of the cake, then spread it around towards the edges. Smooth out the filling as evenly as possible.
For softer fillings, like pastry cream or fruit preserves, create a frosting “dam” to keep the filling from leaking out. To do so, fill a piping bag fitted with a medium plain tip with whatever frosting you are using on the outside of your cake. Pipe a ring or dam of frosting around the outer edge of your cake, and then spread the filling in the center.
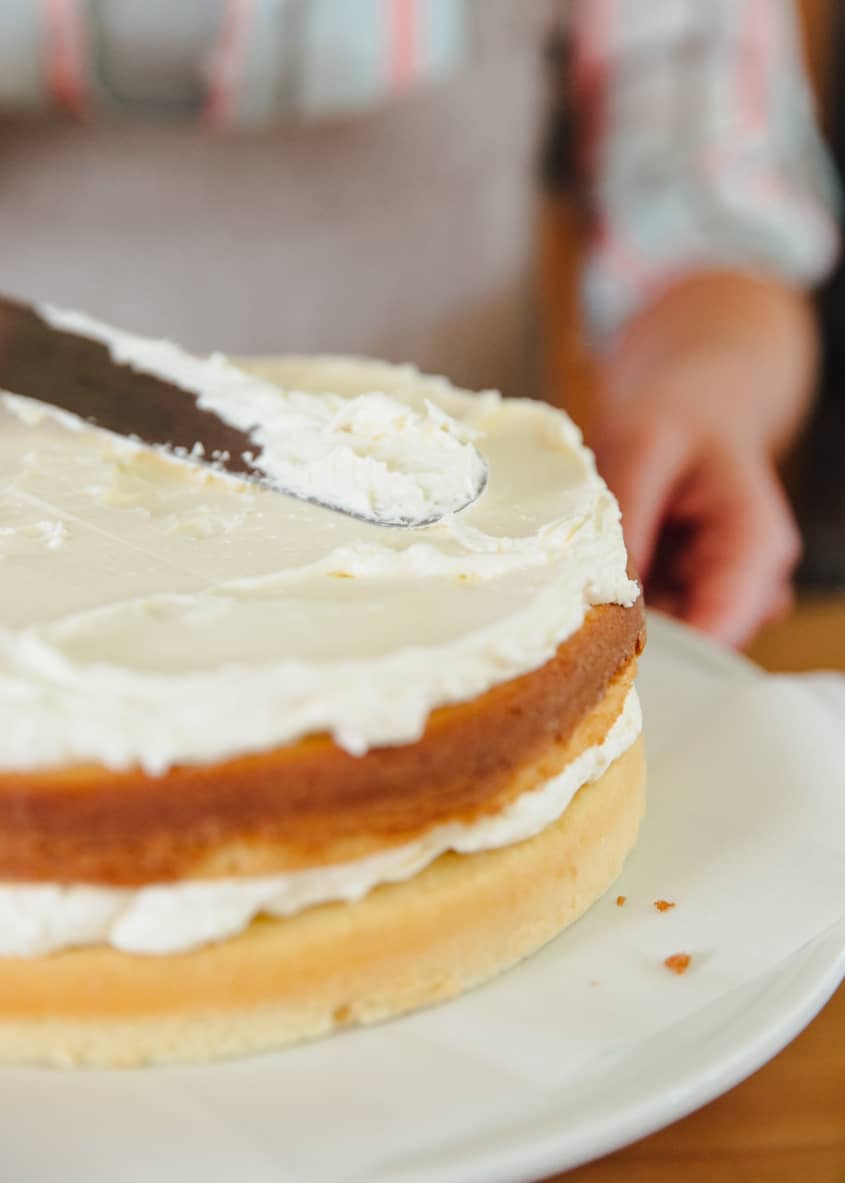
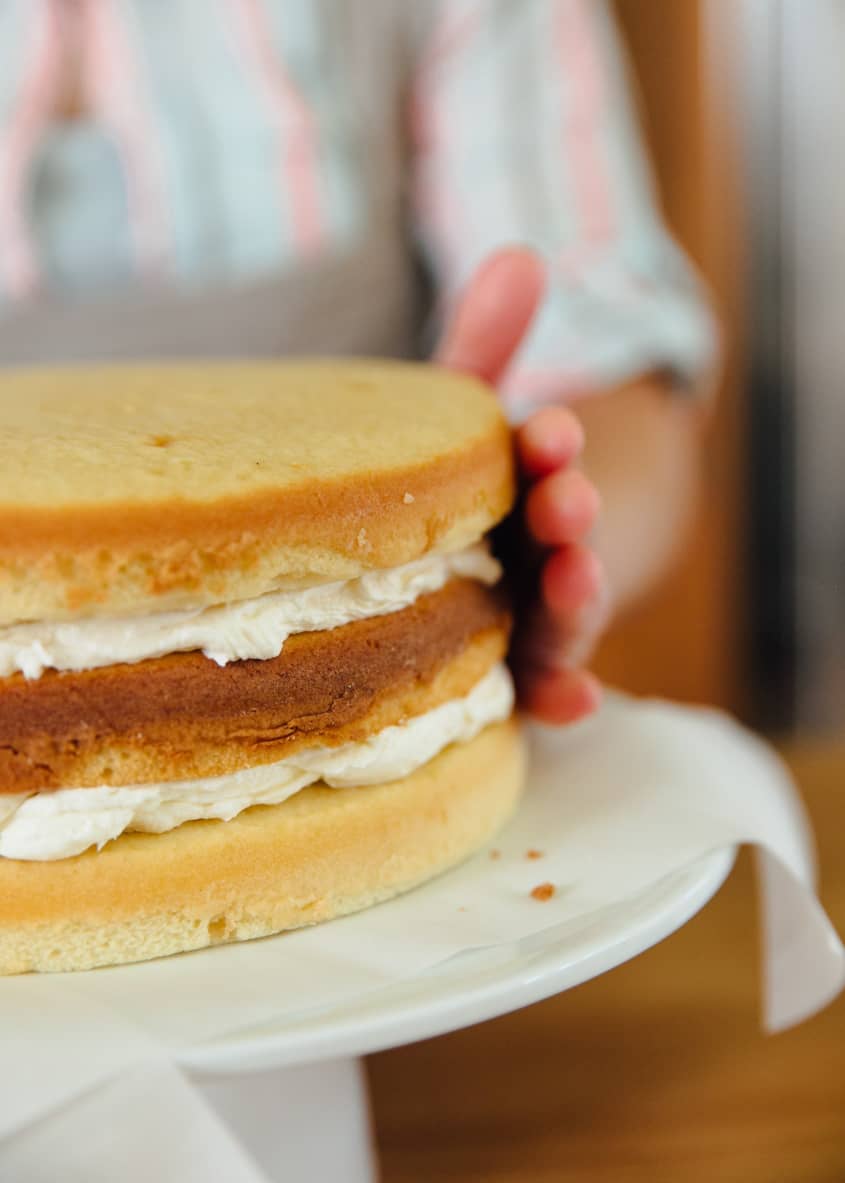
Continue to fill and stack your cakes, keeping them as even and level as possible. Invert the last layer of cake upside down. The bottom of the cake creates a nice, flat top for the cake, while the cut side is facing down to prevent too many crumbs from getting into your frosting.
Take a step back and really look at your cake. If it is leaning or appears crooked, gently press it back into place.


How to Frost a Cake
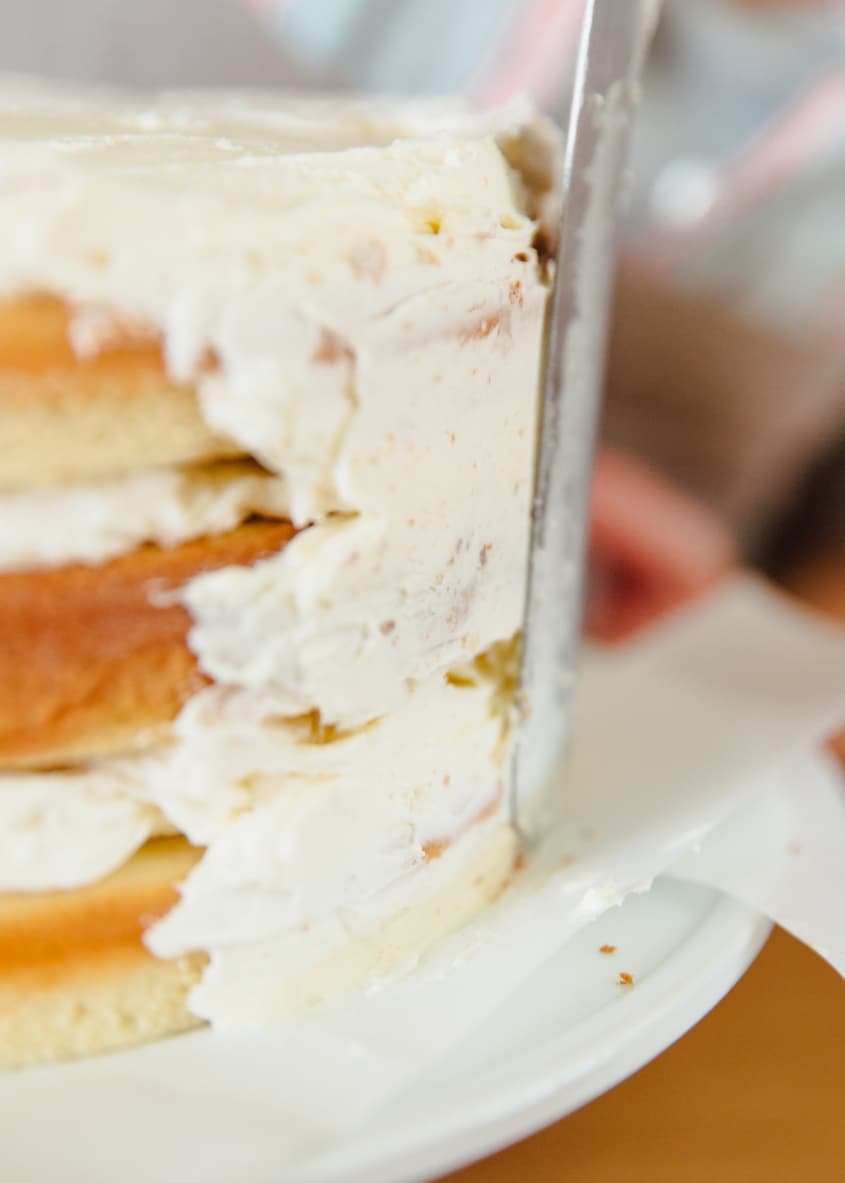
After the cake is filled and stacked, it is time to work on the outside. The first step to frosting a cake is actually giving it a crumb coat of icing. This is simply the first coat of buttercream that traps in all of the crumbs.
To create a crumb coat, apply a thin layer of buttercream to the top and sides of the cake with a metal spatula. The buttercream does not need to be perfectly smooth, but try to keep it relatively even. Cover the entire cake, and then place the cake in the refrigerator to chill for about 15 minutes. In an effort to keep those pesky crumbs from ending up in your final coat of frosting, make sure not to mix the buttercream with the crumbs with the buttercream saved for your final coat.
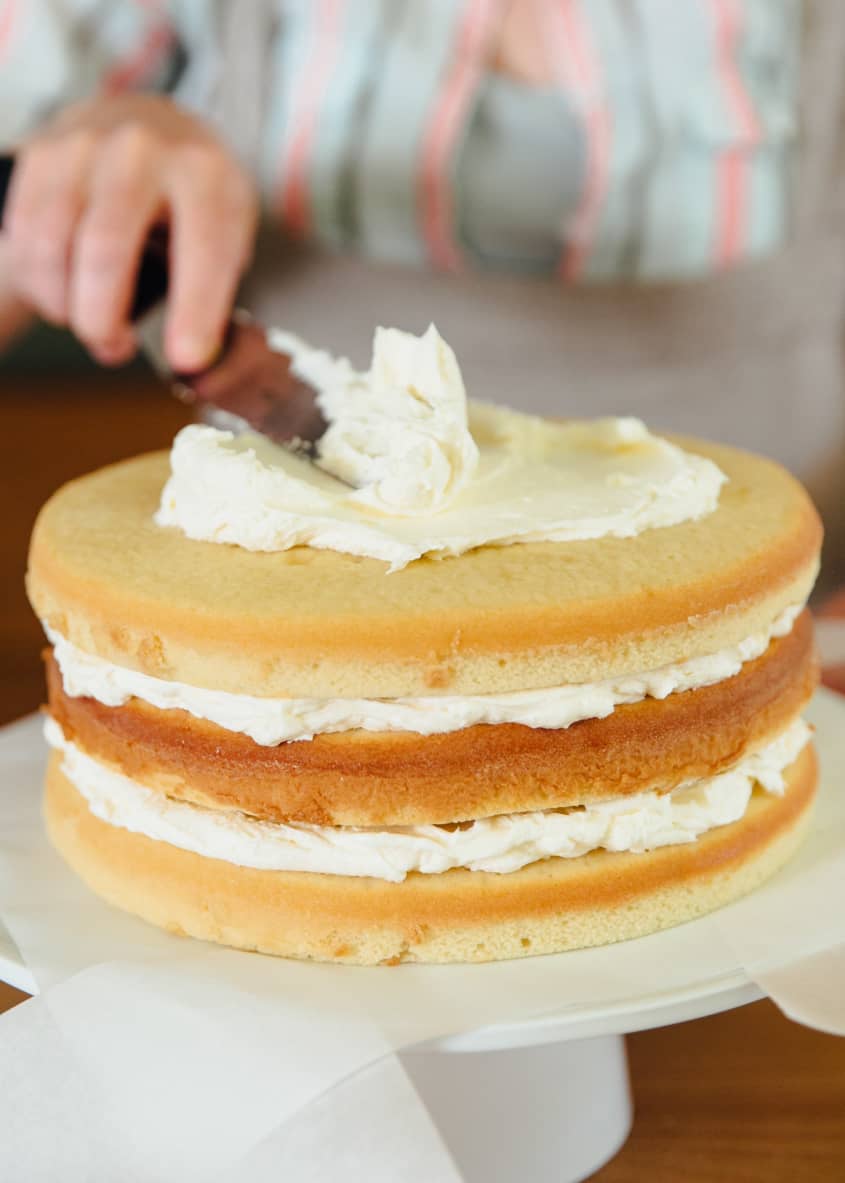
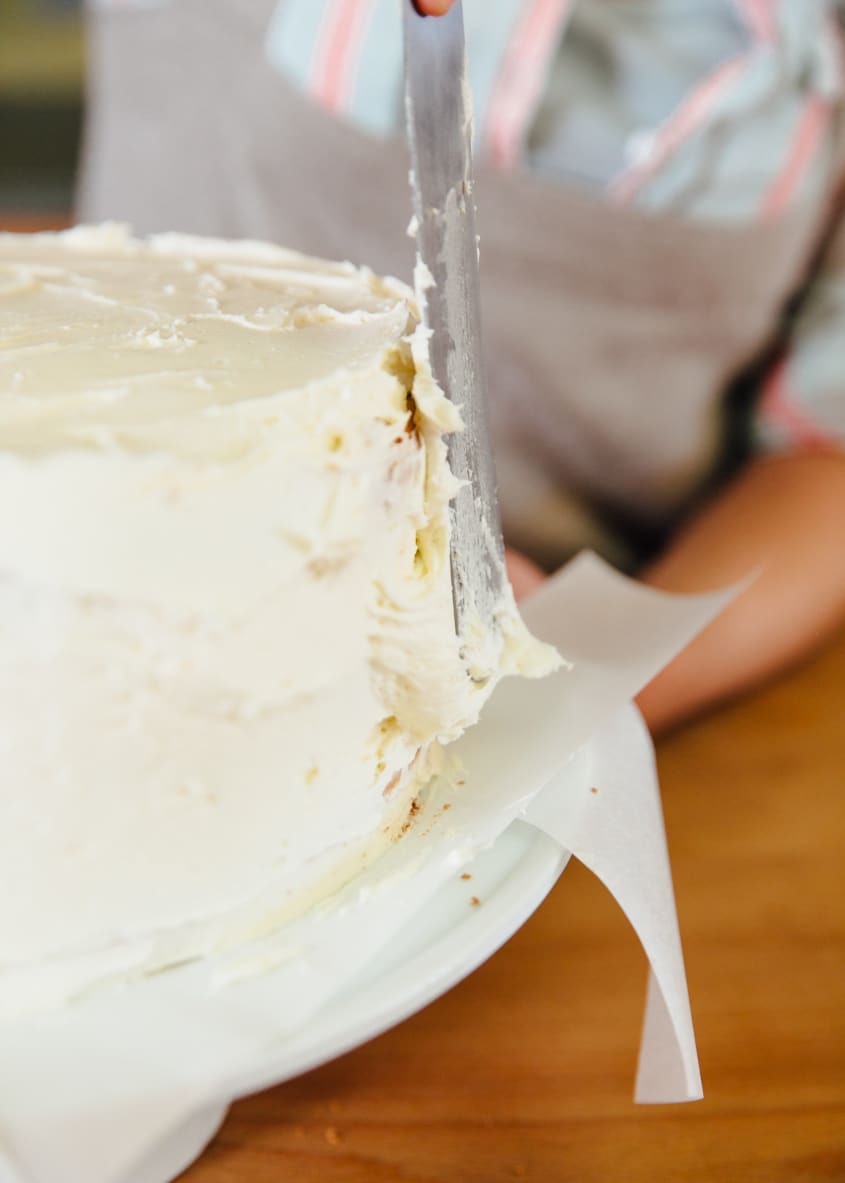
Once the crumb coat has set, it is time to apply the final coat of frosting. Place a large dollop of buttercream on the top of the cake. Using an offset spatula, begin to smooth out the frosting and push it towards the edge of the cake.
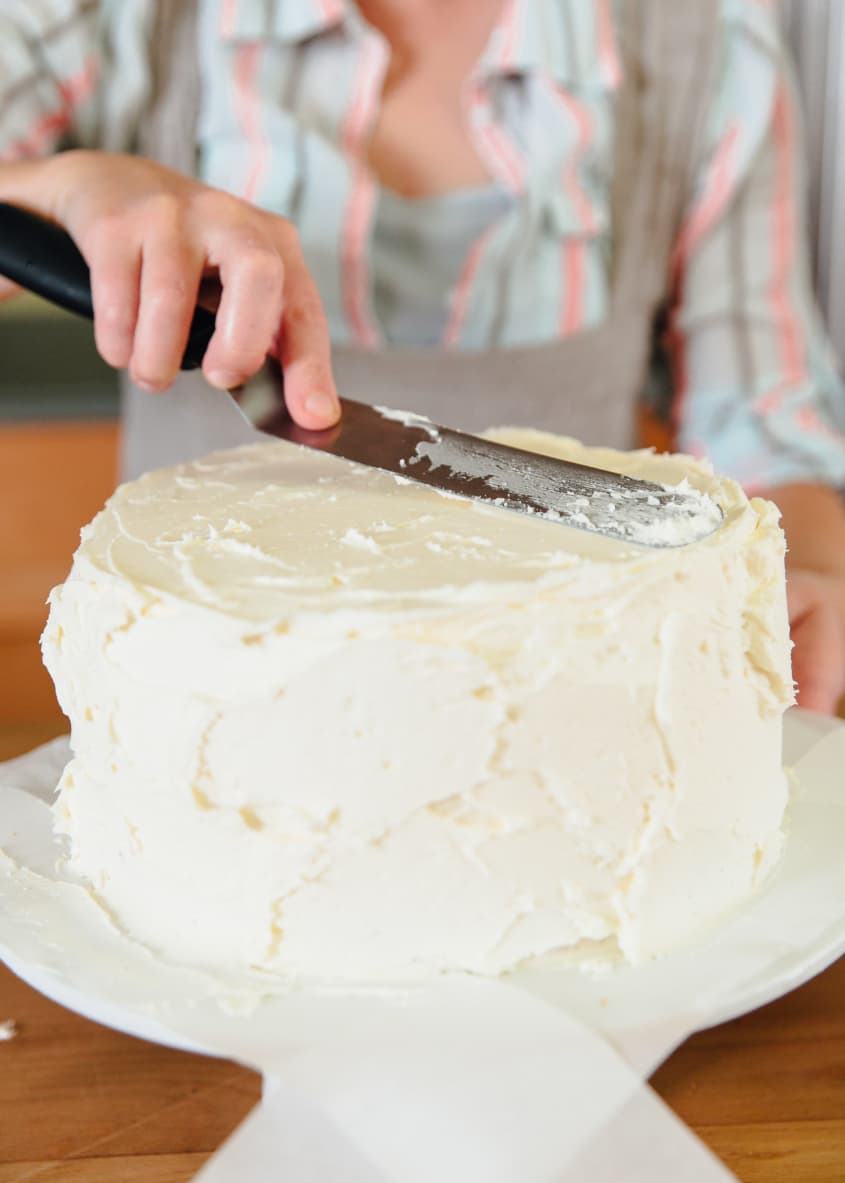
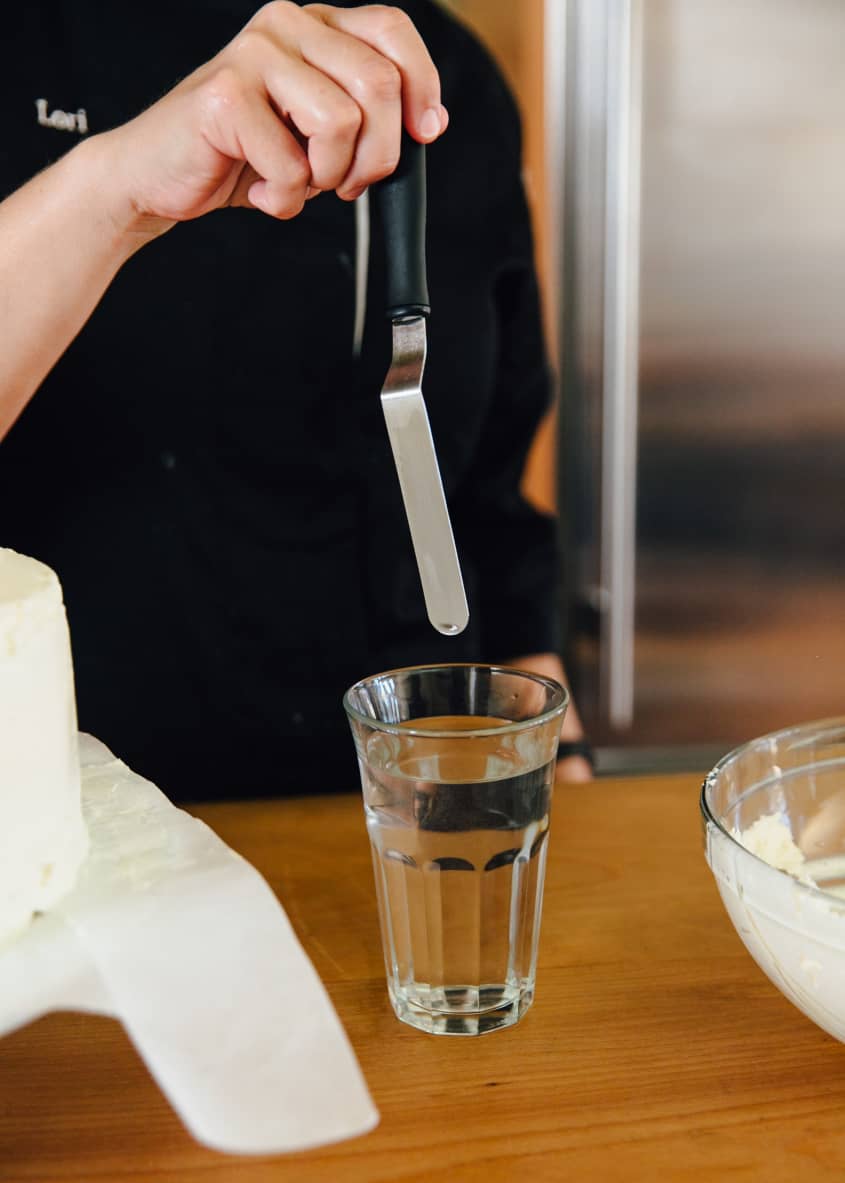
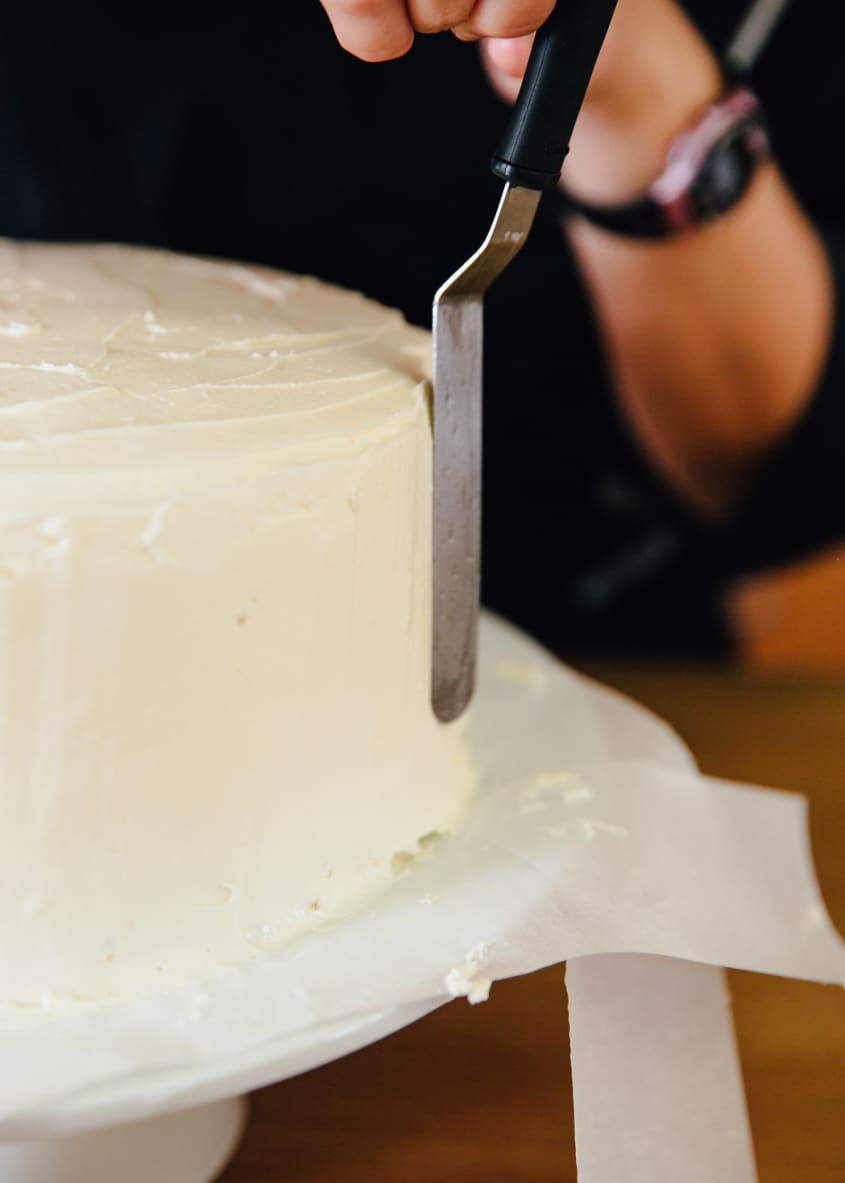
After the top of the cake has been frosted, begin applying buttercream to the sides of the cake. Working with small amounts for more control, first aim at applying an even coat of buttercream, and then work on smoothing it out. Once there is buttercream on all sides of the cake, take the long edge of your metal spatula and begin smoothing it out in large strokes. For an even cleaner, smoother finish, dip the metal spatula in hot water (or run it under hot water), dry it off, then use the heat from the metal to gently warm the buttercream and smooth it out further. Continue smoothing out the sides and touching up the top of the cake as needed.
Can’t quite get things looking as smooth as you’d like? That’s okay, too! Use the tip of an offset spatula or the back of a spoon to create a rustic, more “homemade” finish for your cake.
Let’s Decorate!
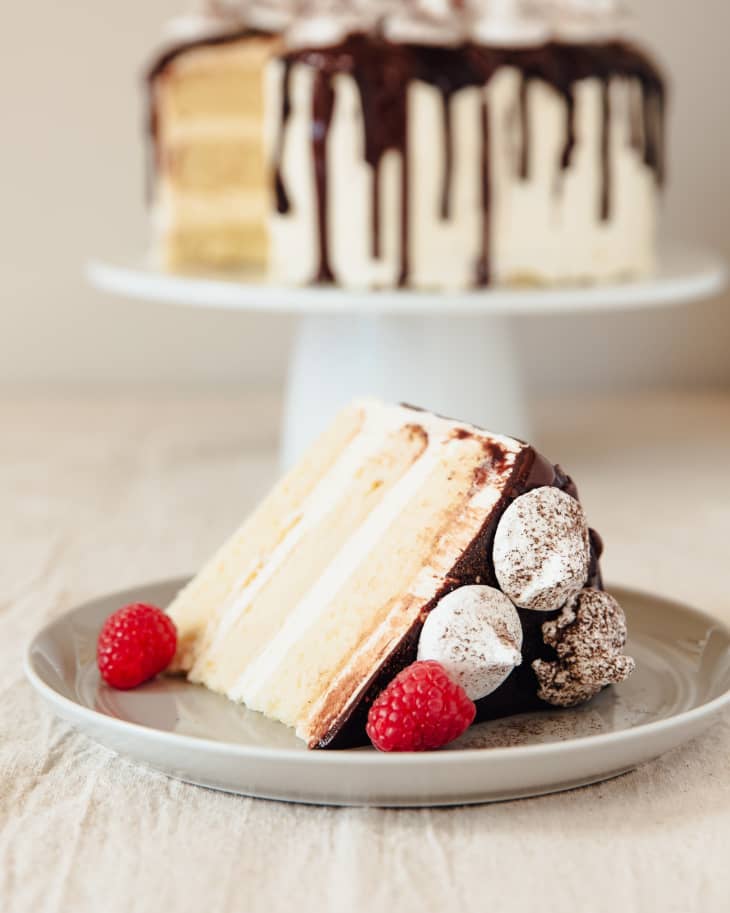
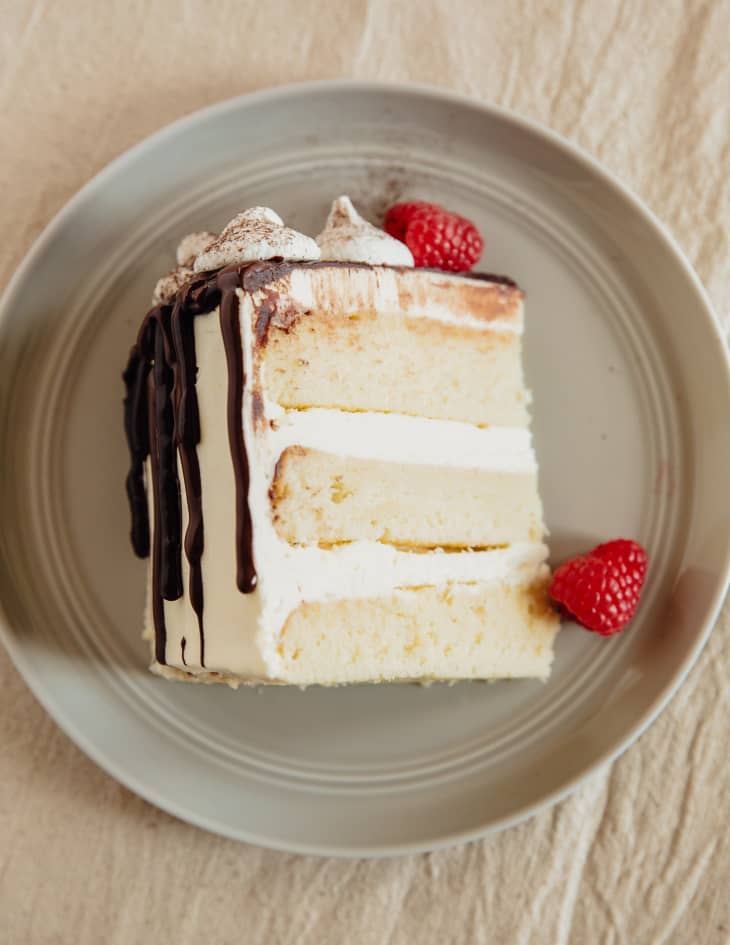
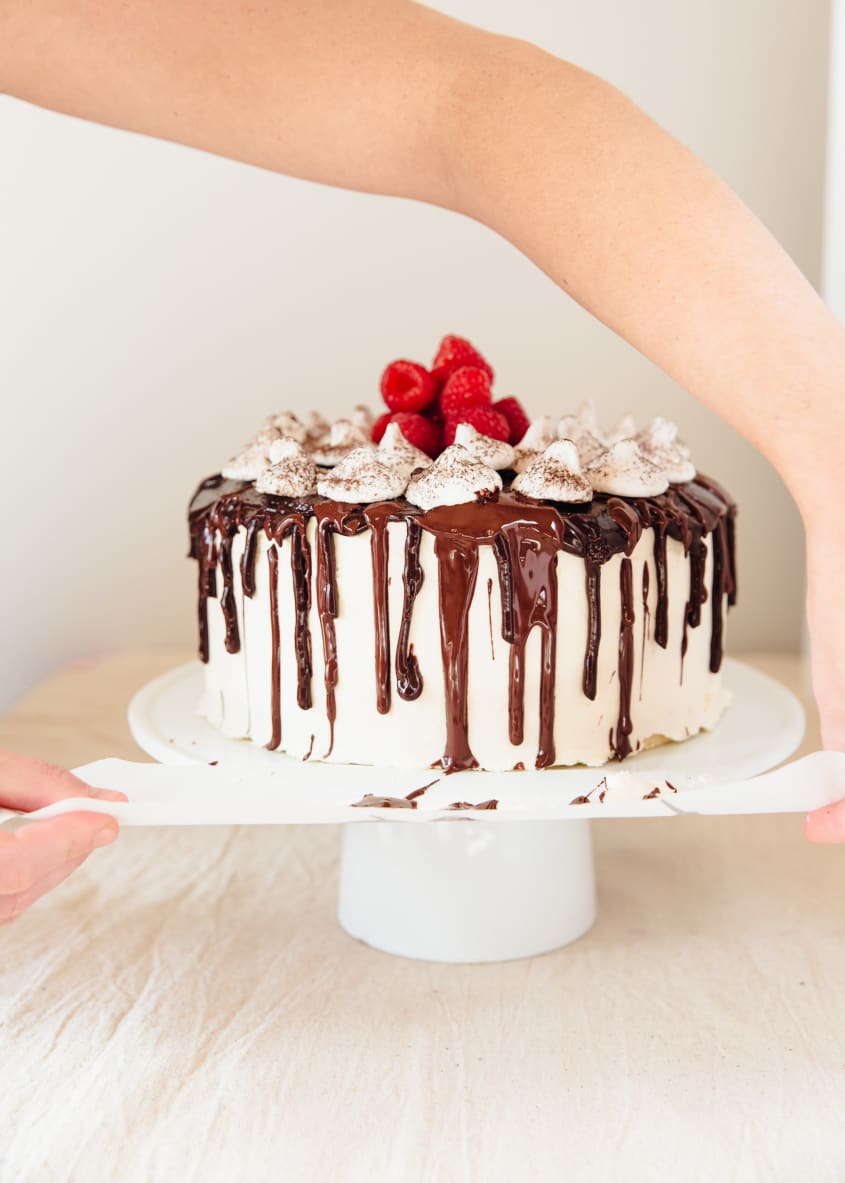
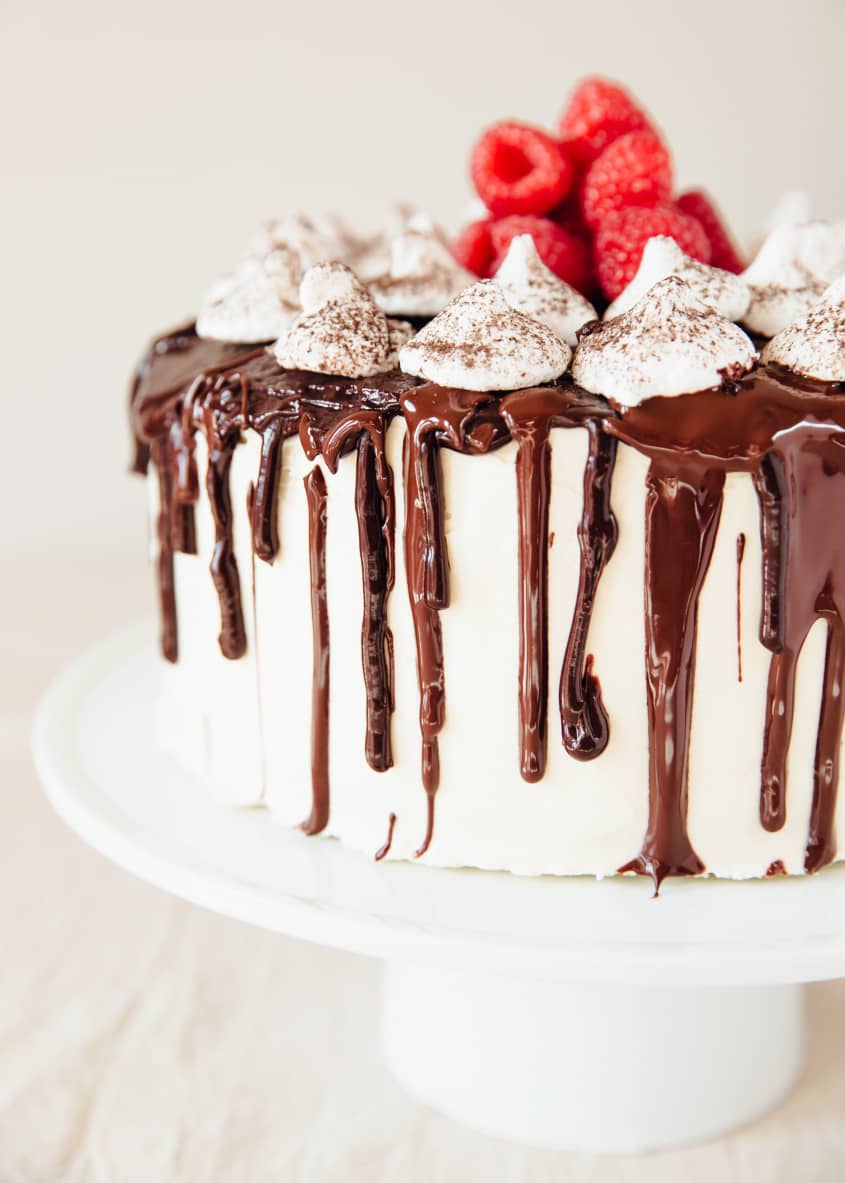
There are infinite ways to decorate a layer cake! This is the time to get creative and add some extra flair to your cake. Try a drizzle of chocolate glaze, ganache, or caramel sauce over the top of your cake, and let it drip down the sides. Pile on fresh fruit for some added color or some crispy meringues (as we have done here) for added crunch and texture.
If you think things might get messy, keep the parchment pieces under your cake, but be sure to remove them before piping a bottom border of buttercream around the base.
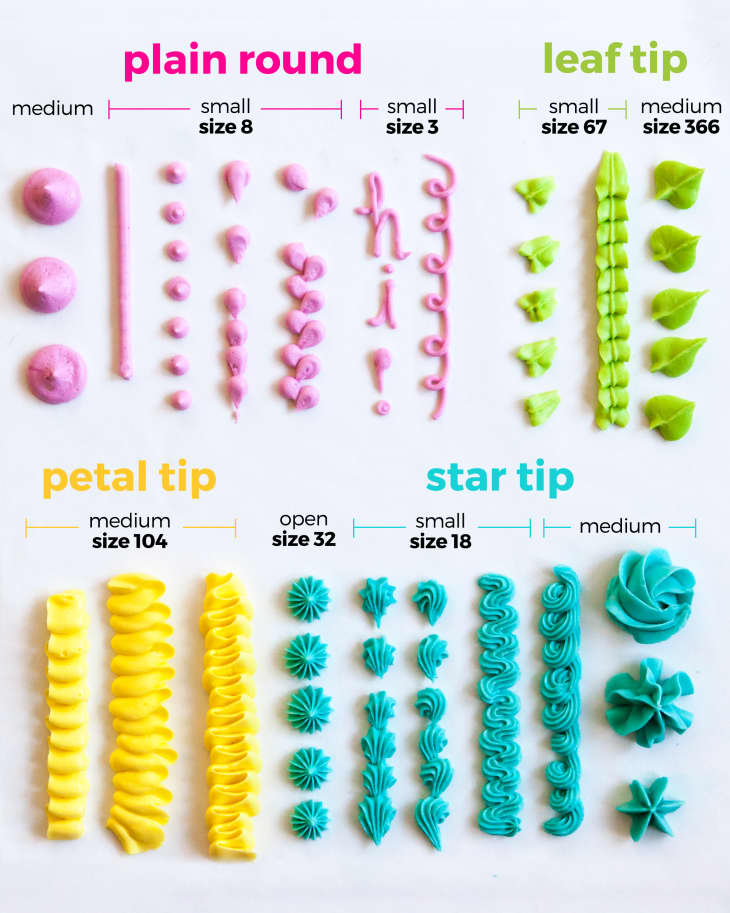
For even more pizzazz, use a variety of piping tips to create different textures and borders with any leftover buttercream. Use a round, star, leaf, or petal tip to create pearl, shell, or ruffle borders. If you’d like, cover the entire surface of the cake with buttercream stars, ruffles, or rosettes!
Some other easy ways to dress up a cake include:
- Cover the entire cake with sprinkles by gently pressing small handfuls of sprinkles into freshly applied buttercream. Try this with coconut flakes, shaved almonds, sanding sugar, etc.
- Create decorative patterns by placing colorful candies on a frosted cake.
- Use edible flowers to add color and elegance, or fresh herbs for a rustic look.


How To Decorate a Cake
Nutritional Info
Ingredients
- 2 to 4 baked cake rounds
- 2 batches
of buttercream, such as basic buttercream (see Notes)
Equipment
- Cake stand
- Parchment
- Large offset spatula
- Piping bag (optional)
Instructions
Lay one round of cake in the middle of the cake stand. Tuck 4 pieces of parchment around the cake to catch drips.
Frost the first layer: Dollop a large amount of buttercream in the middle of the cake with an offset spatula. Gently smooth the buttercream out, pushing it toward the edges.
Add another layer of cake: Dollop more buttercream on top of this layer and spread it into an even layer.
Repeat with remaining layers: Check to make sure your layers are roughly even and that the layers are stacking straight.
Add a crumb coat around the edges: Spread a very thin layer of frosting around the outside of the cake. This is the crumb coat and will help prevent crumbs from appearing on the finished cake. Chill the cake for about 15 minutes to set.
Add another layer of frosting over the crumb coat. Start by placing a large dollop of frosting on the top of the cake.
Smooth the top of the cake. Use a metal spatula to spread out the frosting into an even layer. Push the frosting towards the edges of the cake.
Smooth the sides of the cake: Once the frosting has been applied in an even layer around the cake, begin to smooth it out; the easiest way to do this is to dip the offset spatula in a cup of very hot water, and then steadily smooth the sides of the cake with the flat of the spatula.
Decorate the cake as desired: You can pipe decorations around the bottom edge or on top of the cake with buttercream, drizzle chocolate ganache over the top and sides, or add decorations, like meringue kisses or fresh fruit.
Remove the strips of parchment paper: When you're totally finished decorating, wiggle the strips of parchment out from under the cake. This will leave the cake stand clean and free of drips. (Note: If you wish to pipe a bottom border around your cake, the remove the parchment first.)