
10 Hidden Cabinet Hacks That Dramatically Increased My Kitchen Storage
Unless you designed your kitchen from scratch, with a custom layout and cabinets, it’s probably not perfect for your needs. But new cabinets can quickly eat up a small remodeling budget, and re-designing the kitchen isn’t usually an option if you rent. And I won’t even get into the environmental impact of trashing old cabinets and producing new ones. Fortunately, there are a lot of clever DIY ways to make the most of your current kitchen cabinets.
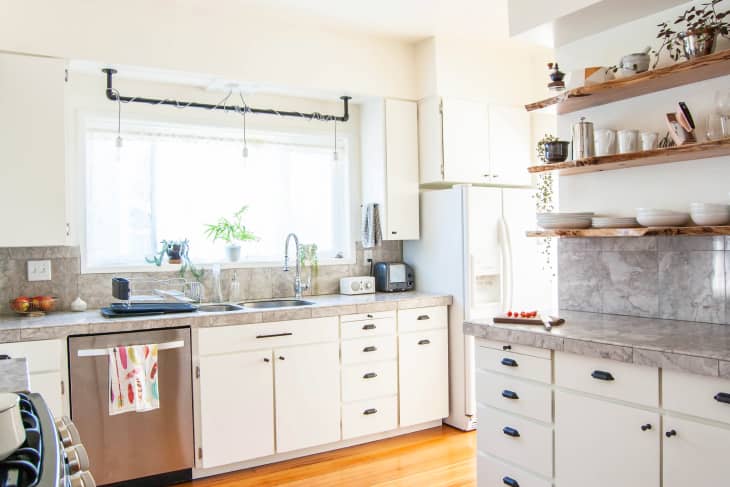
Last summer my husband and I gave our kitchen a makeover (see the entire Before & After project on my blog). Our 100-year-old house came with cabinets from the ’60s or ’70s that we didn’t want to replace. They looked completely different after we painted over the dark, streaky stain and replaced cheap-looking hardware. Of course, it’s the behind-the-doors upgrades that have made the biggest functional difference. We were able to do all of them ourselves, and it’s amazing how much more we like using our kitchen now.
Here are some useful kitchen hacks that I can recommend. Many of them are even renter-friendly, and could easily be removed and transferred to a new kitchen.
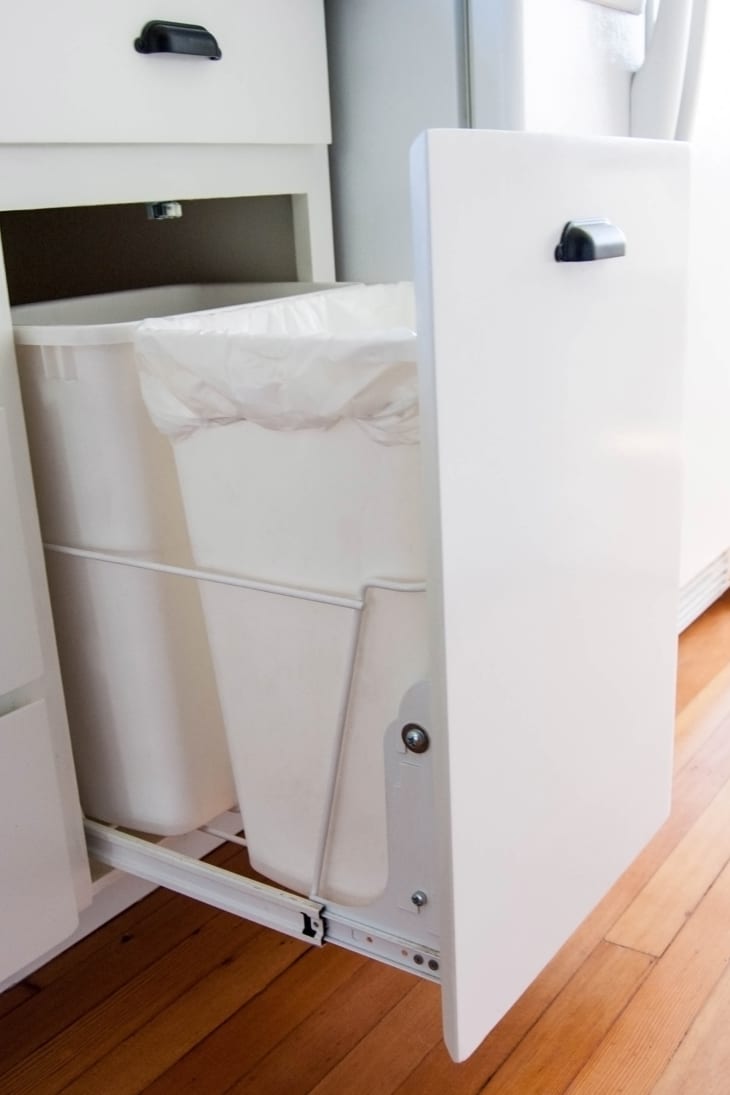
1. Pull-out garbage and recycling bins
There was no good spot for our garbage and recycling in our kitchen when we moved in. There wasn’t really room under the sink, and there wasn’t a spot for freestanding bins that wasn’t in the way of other stuff. So we decided to install pull-out bins in a cabinet, and they were the perfect solution. They keep our garbage and recycling easy to access, but out of the way. A tiny tip: If you have an extra inch or two, put a container of baking soda near the wall behind the bins to absorb odors.
The installation itself was very easy, although we had to do additional prep work because our cabinets were constructed with non-removable shelves. To do it yourself, you’ll need a to buy the pull-out slides, and a door kit if you want the door to be attached to the front of the slides.
Get the Supplies

2. Sink tip-out tray
Many older kitchens (and bathrooms) have fake drawer panels in front of the sink. There isn’t room for a whole drawer because of the sink bowl, but you can often fit a tip-out tray. It’s perfect for corralling sponges and scrubbers that might otherwise clutter up your countertop. To install mine, I bought a kit, and then pried off the glued- and nailed-on drawer panel. It took two people to help line up the hinges and panel when we put it on, but now we use it on a daily basis, and our sink area looks much neater.
Buy: Tip-Out Tray, $13 at Build
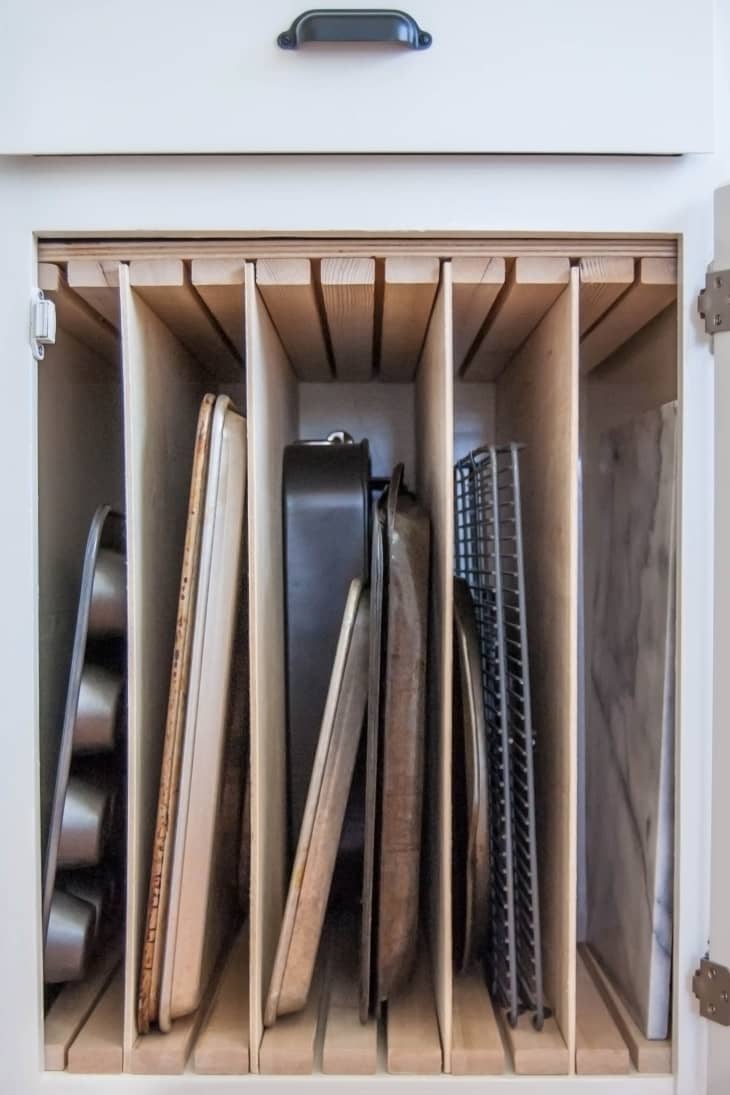
3. Vertical pan storage
Storing baking pans and sheets vertically versus stacking them is like the difference between filing and piling paper. They’re so much easier to access when stored vertically, so if you have a lot of baking pans, I highly recommend this hack. I built my own vertical storage rack by adapting this tutorial, but you can also buy pre-made pan organizer racks, or even use tension rods to divide a shelf.
Shop: DecoBros Organizer Pantry Rack, $13
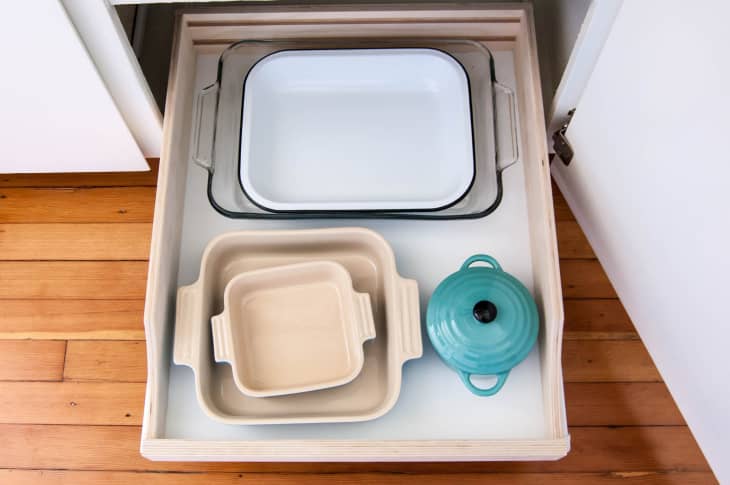
4. Pull-out drawers
If you have low, deep shelves, getting things from the back may be difficult. You could put items only in the front, where they’re easy to reach, but then you’re giving up space that you may need. The best solution is pull-out drawers. I bought some of the commercially available ones from Home Depot and Rev-a-shelf, but if you’re handy, building your own with a tutorial like this one is also an option. If even the pre-made drawers are too much work, a tray or basket that you can pull forward to access stuff in the back without removing everything individually can make a big difference.
Buy: Small Wood Base Cabinet Pull-Out Drawer, $53 at Home Depot
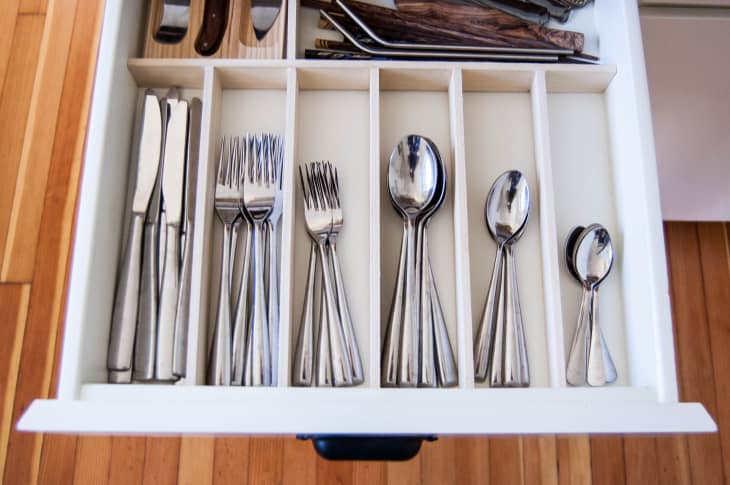
5. Drawer organizers
Drawer organizers might seem like an obvious kitchen solution, but if you have non-standard drawers or utensils, it might not be possible to buy an off-the-shelf version. I built my own out of wood and glue, and while I may modify them slightly for a snugger fit for the smallest spoons, they’ve been a much better solution than any I could buy.
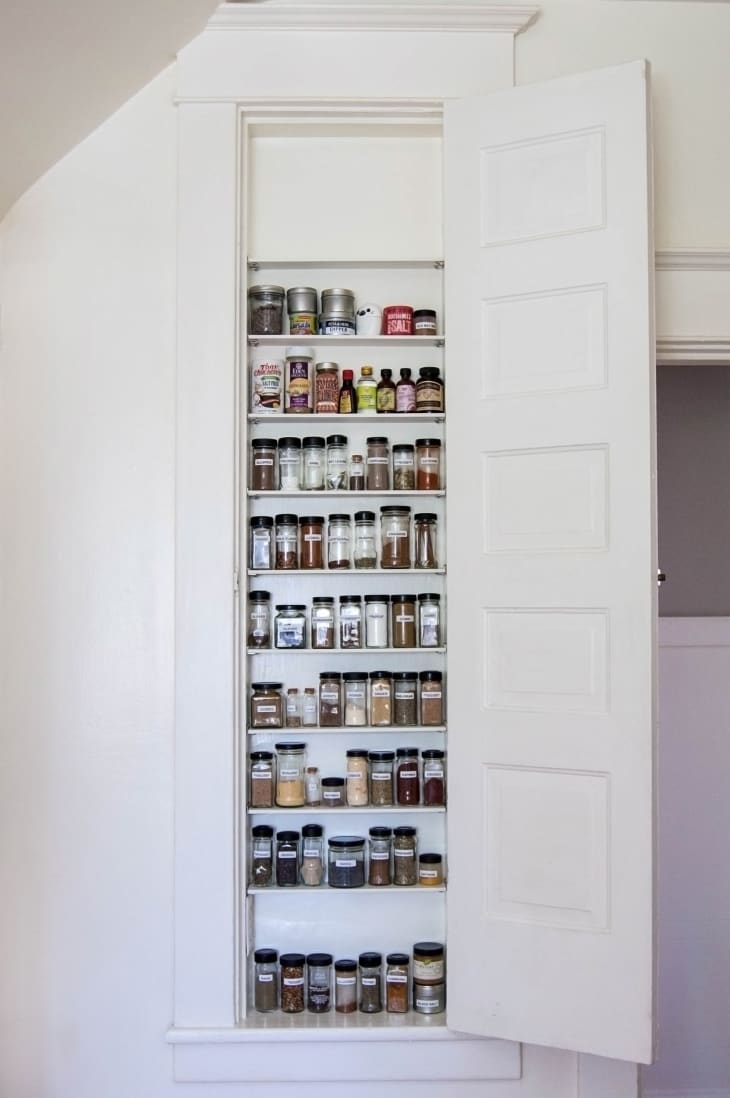
6. Custom spice shelves
Chances are, you’ve accumulated a lot of different herbs and spices. Having a spice rack to organize them is a huge help, but you might not think you have the space. There are many ways to fit a spice rack in spots you might not have considered, though. There are pre-made and DIY door-mounted spice shelves you might be able to fit in your cabinets, and you can get really creative with magnetic containers and standing racks that fit in narrow niches.
When we moved in to our house, we loved the vintage details like the fold-down ironing board in the kitchen. But I quickly realized that I was never going to iron in our kitchen, and the narrow, shallow cabinet would be perfect for a spice rack. So I converted it by removing the ironing board hardware, patching the holes, and adding shelves with shelf pins. Yes, we lost a cute historical detail, but I’ve been so happy with the practicality of the spice cabinet that I’d do it again.
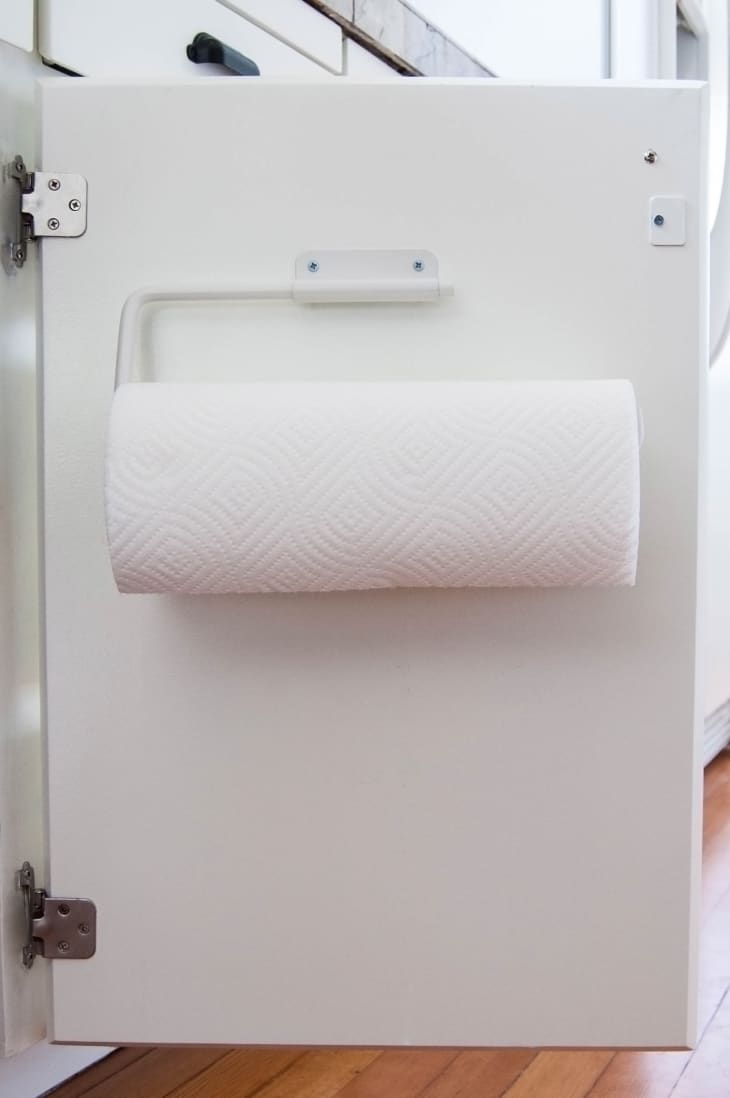
7. Door-mounted paper towel holder
I try to use reusable kitchen cloths whenever possible, but paper towels certainly have their uses. (Personally, I draw the line at cleaning up cat hairballs with anything reusable.) So having paper towels someplace handy, but not out on the counter, was the goal. This simple mounting rack that I bought at a local hardware store installed with just a few screws, but you can also buy over-the-door versions that don’t require screws.

8. Stacking shelves
These are a must for tall, non-movable shelves. They basically double your shelf space, and can be used for everything from plates to pans. Although mine are the metal rack type, if I were buying new ones I’d go for more versatile solid ones like these.
Buy: Small Bamboo Stackable Shelf, $12 at The Container Store
9. Door storage shelves
Buy: Cabinet Door Mount 2-Shelf Storage Bin, $17 at The Home Depot
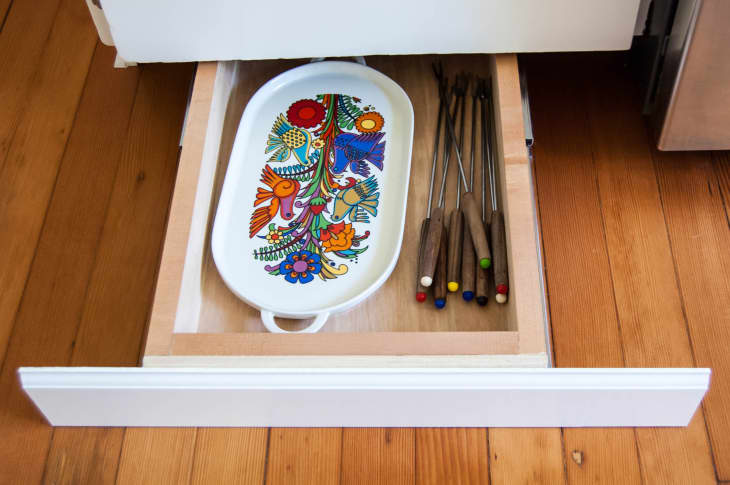
10. Under-cabinet toe-kick drawers
I have to admit that in my case, adding this under-cabinet drawer was more for novelty than anything else. There was already an opening under one of my cabinets where there used to be ductwork and a heating register, so I converted it to a secret drawer, complete with push-to-open drawer slides and toe-kick trim on the front. It’s invisible if you don’t know it’s there, so it’s perfect for secret storage. Larger, more practical toe-kick drawers could actually be a storage boon in a tight kitchen, and you can build them yourself with this guide.
This post originally ran on Apartment Therapy. See it there: Here’s How Hidden Cabinet Hacks Dramatically Increased My Kitchen Storage