
Baking School Day 10: Puff Pastry

The Kitchn’s Baking School Day 10: All about puff pastry.
Join The Kitchn’s Baking School: Sign up and see all The Kitchn’s Baking School assignments
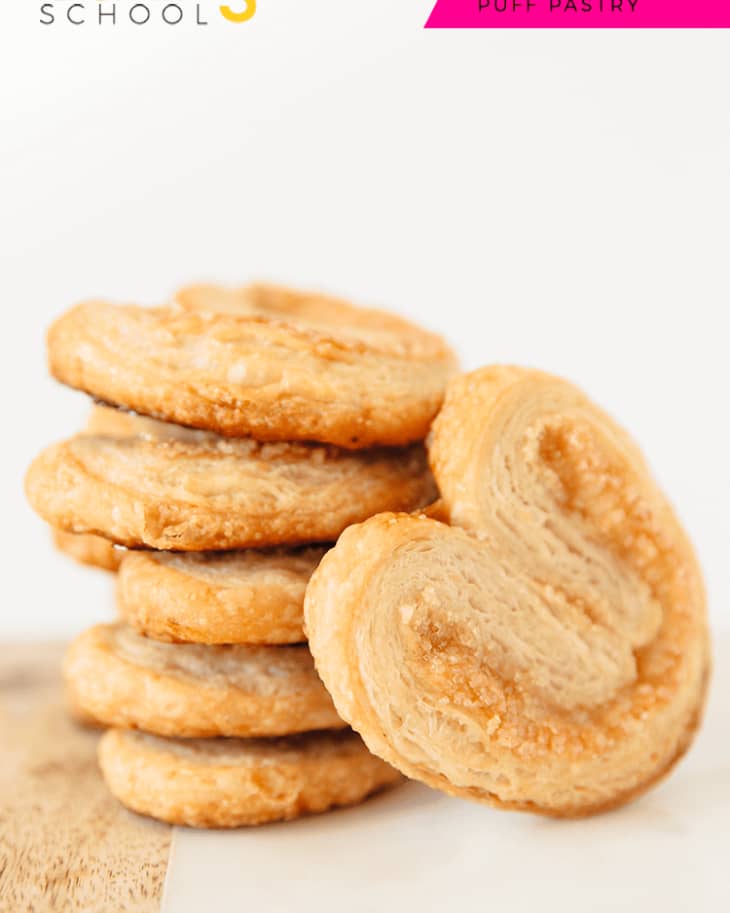
Crispy, light as air, and puffed as all get-out, puff pastry is in a class of its own. With its fantastic texture and the endless ways it can be used for both sweet and savory pastries, this dough reigns supreme in the pastry kitchen.
A pastry made with puff dough can have as many as 500 to 700 layers — no wonder nothing else can compare. Here’s a deep dive into the wondrous world of puff pastry — making it from scratch, and putting it to use in all sorts of ways.

What Is Puff Pastry?
Puff pastry is a classic pastry dough that has dozens (hundreds!) of alternating layers of butter and dough. When baked, those layers puff up and turn into the most delicate, light, golden, buttery flakes of pastry. (Like, melt-in-your-mouth clouds of flaky goodness.) It is used to create a multitude of pastries, from apple turnovers and free-form tarts to savory cheese straws and bite-sized appetizers.
As much as we all love to eat puff pastry, it takes some true commitment if you are going to make your own. This labor-intensive pastry dough takes nearly four hours to make from scratch. Okay, most of that time is inactive — letting the dough rest and chill in the fridge — but it will demand your time, attention, and patience. Thankfully, frozen puff pastry provides a very fine alternative — it’s a secret weapon of sorts, and can help make equally crispy treats without nearly the effort.
What Puts the “Puff” in Puff Pastry?
But really, what’s the deal with all those layers? Is it magic? Where do they come from? Do you have to create each layer by hand?
No, it’s not nearly so complicated. And it’s not yeast, baking powder, or baking soda making that puff pastry puff: it’s actually steam.
Making puff pastry involves layering butter between a simple dough of flour and water, then folding it again and again — six times total — to create all those hundreds of paper-thin layers. In the oven, the water in the butter and in the dough turns to steam and puffs each layer. What’s left behind is the airy, crispy, buttery creation we call puff pastry.
The Butter Block
All those hundreds of layers of butter start from one block. The key is keeping this butter cool — you don’t want the flour to start to absorb softening butter — but also keeping the butter pliable enough to fold and roll without cracking. We accomplish this in two ways: pounding the butter with a rolling pin until it’s pliable, but still cool, and then chilling the pastry at regular intervals to avoid overworking or warming the butter too much.
Although the butter can be finicky and difficult to work with, it’s worth it. Nothing beats butter for its superior flavor, especially in a pastry like this. If you’re going to splurge on really good, high-quality butter, puff pastry is the time to do it.
How to Make Puff Pastry
In brief, puff pastry is made by wrapping a lean dough (meaning, no fat is used in the dough) of flour and water around a pliable block of butter, then rolling it out, folding it, and rolling it out again. One round of rolling and folding is called a “turn.” For puff pastry, you do eight full “turns,” chilling the dough every two turns — or more frequently if it’s very warm in your kitchen. Let’s take a look at each part of the process.
- Make the lean dough: First, make the dough — since the pliability and temperature of the butter is so crucial, it’s better to make the dough first and the butter block second. Dump all the flour out on the counter and draw a trough down the middle. Pour a tablespoon of water into the trough and then use your fingers to scoop the flour from either side and fluff in the water. Continue creating a trough and adding the water a tablespoon at a time until the dough holds together in clumps. Pat it into a square, wrap it in plastic, and chill while you make the butter.
- Create the butter block: Next, create your butter block. To transform sticks of cool butter into a giant block of butter, pound them together with a rolling pin — pound it flat, then scrape it up with a pastry scraper, then pound it flat again. Continue until you can fold the butter over on itself, but it doesn’t crack. Sprinkle your rolling pin with a little flour to keep it from sticking as you pound. Once pliable, shape the butter into a flat square, wrap it in plastic, and chill for 10 minutes — no longer or you’ll lose the pliability.
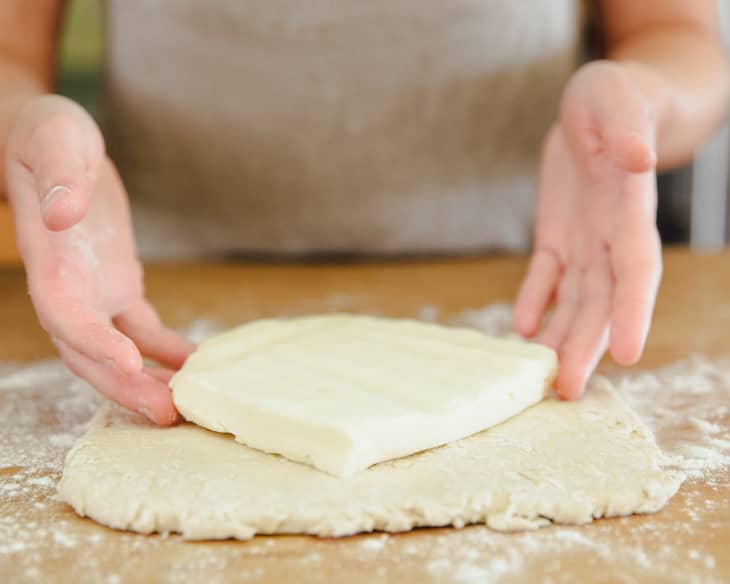
- Package the butter inside the dough: Once both the dough and the butter are made and chilled, gently roll out the dough into a large square. Place the butter block diagonally on top of the dough, so the corners of the butter point to the middle of each side of the dough. Without stretching the dough, carefully fold the corners of the dough over the butter and pinch the seams together. Essentially, you are packaging your butter block inside an envelope of dough.
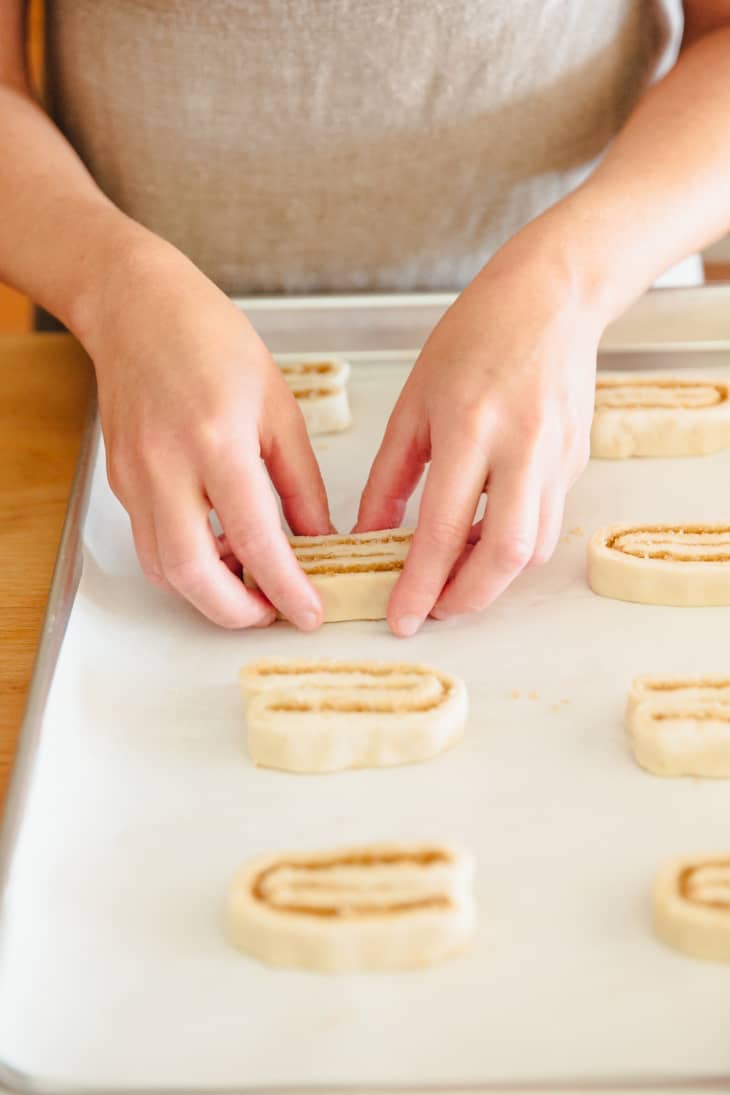
- Roll out the dough and butter package: Begin rolling out the dough and butter together to form a rectangle longer than it is wide. Be careful not the tear or stretch the dough as you roll. Once it’s roughly 12 inches tall and 6 inches wide, fold the dough into thirds towards the centre, like a letter. This is one “turn.” Repeat rolling and folding another time — this is your second turn.
- Repeat for four to six turns: You will need to do four to six turns total, depending on what you’re making and on how high you want your pastry to puff — more turns mean more puff, but more than six turns and you risk overworking the dough.
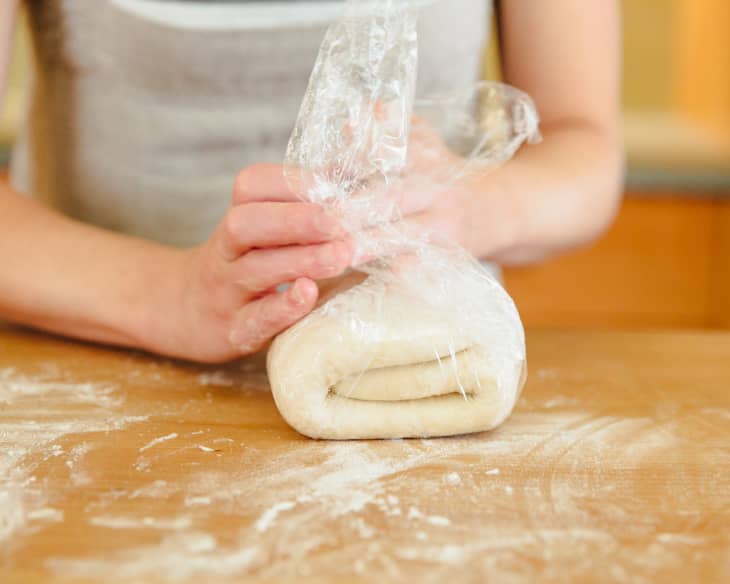
- Chill — frequently! To keep the pastry cool, you will need to chill the dough for 30 minutes at least every two turns; or between every turn if it’s very warm in your kitchen or it looks like the butter is starting to melt. When chilling the dough, press a fingertip into the dough to indicate how many turns you have completed.
- Chill or freeze for later: Once you’ve finished all the turns, you can roll it out and use it for any recipe calling for puff pastry. You can also chill it in the fridge for a few days, or freeze it for up to three months.
Get your full step-by-step baking lesson:
Make It Yourself or Buy at the Store?
Making your own puff pastry from scratch is unbelievably satisfying, but admittedly, not very practical for everyday baking needs. For those times when you want puff without the work, there’s store-bought dough.
Frozen puff pastry is so easy to use and yields quick, no-fuss results. You usually get slightly higher, prouder puff from homemade pastry, but the difference is quite small. Another bonus? Frozen puff pastry can sometimes be cheaper than buying pounds of quality butter to make your own. All-butter brands of frozen puff pastry (without the addition of shortening) are arguably just as good as homemade puff, so be sure to look for those. You’ll find puff pastry in the freezer section at the grocery store.

How to Properly Handle Puff Pastry
Whether you make your own or buy the frozen stuff, all puff pastry must be treated with care and respect. Always keep the dough covered so it does not dry out, and use only as much flour as needed when rolling. Handle the dough as little as possible to prevent the end product from being tough.
From frozen, whether homemade or store-bought, let the pastry thaw overnight in the refrigerator or for about 30 minutes at room temperature. Do not unfold store-bought pastry while it is still frozen or it may break.
Once thawed, carefully unfold the dough and roll it out on a lightly floured surface. Should any tears or cracks occur, brush with water and gently press back together. If it starts to soften, pop it back in the fridge for a bit. Once rolled or cut to your desired shape, transfer the pastry to your baking sheet before adding in any fillings.
If you have any scraps, do not knead them back together. Instead, layer leftover pieces on top of each other, but then try not to roll out too much.
Get your full step-by-step baking lesson:
When and How to Use Puff Pastry
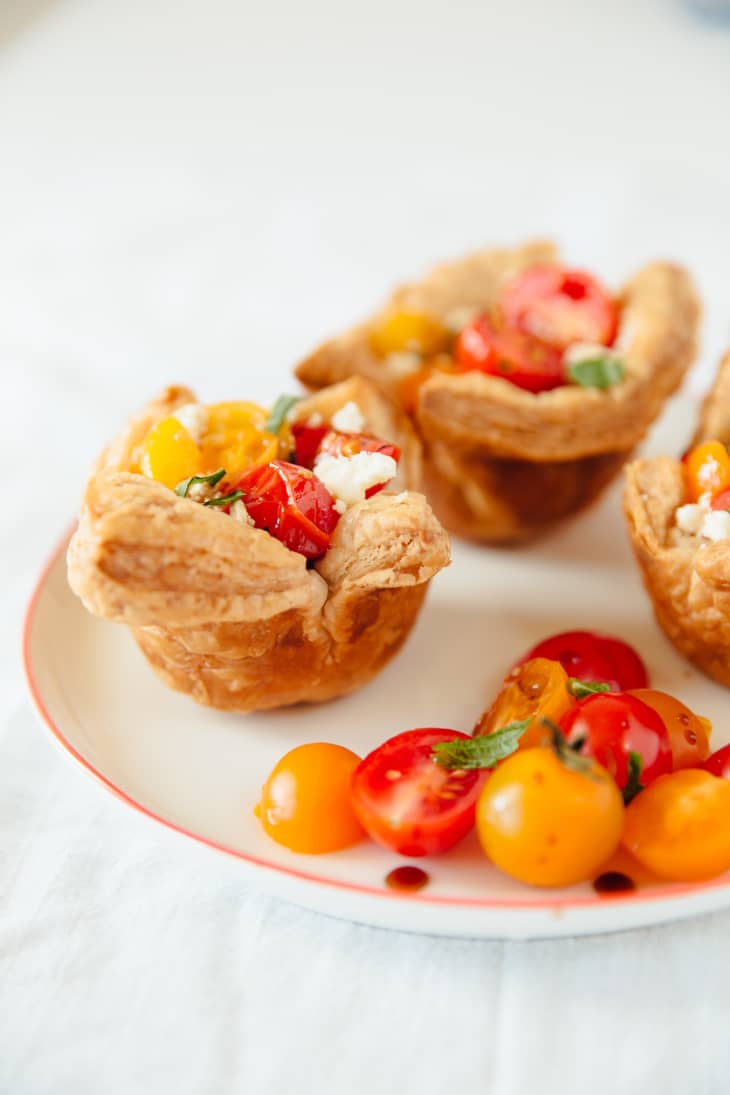
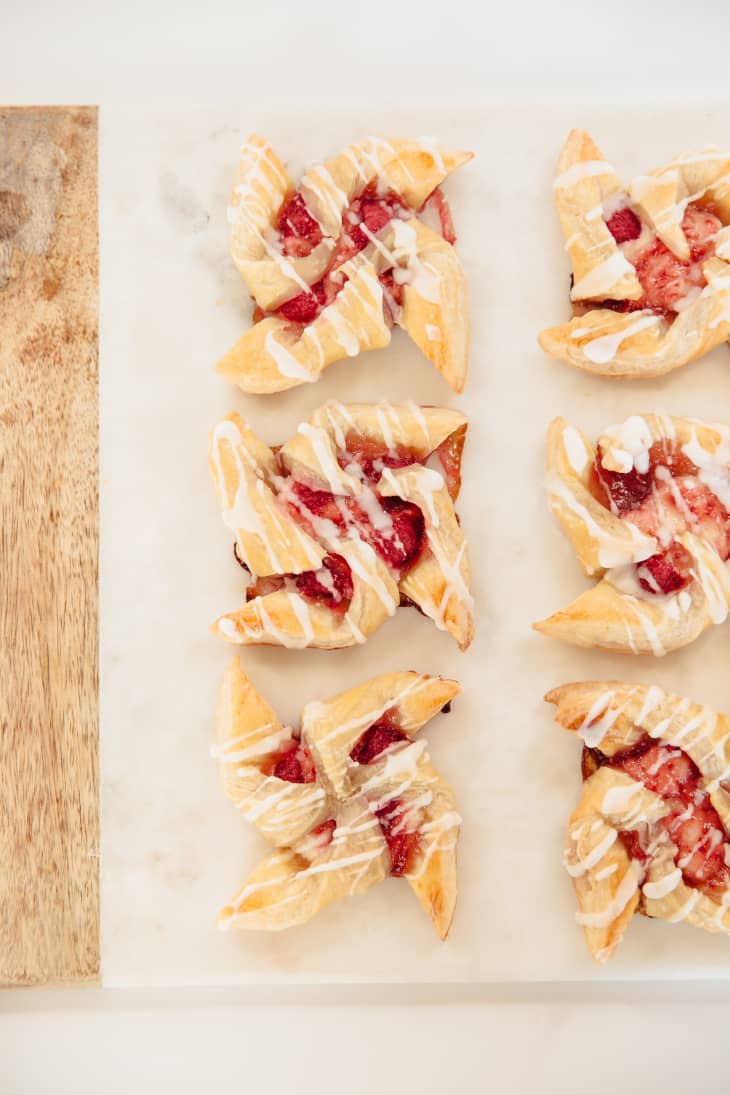
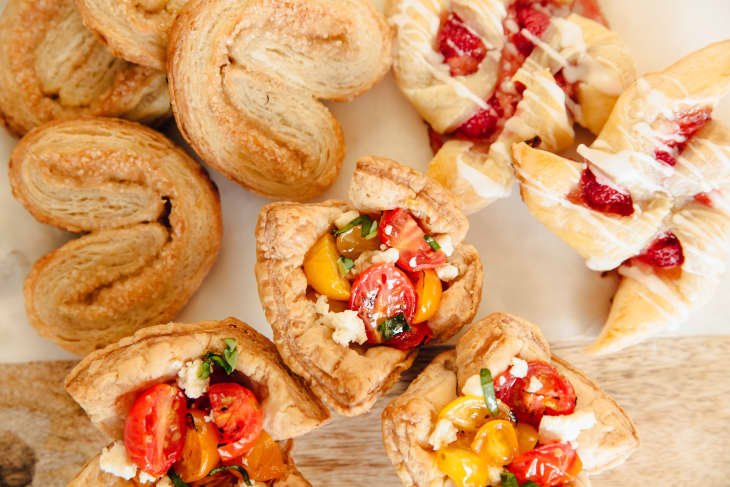
Puff pastry makes super-simple tart shells, easy appetizers, a multitude of desserts, and breakfast pastries. You can bake it into cups for savory filling, stuff it with fruit to make mouth-watering turnovers, braid it to make a stunning dessert, and even twist it to make cheese straws.
- To make a simple yet impressive braided pastry, mentally divide the dough into thirds. Cut diagonals down the outer thirds (on each side) of the dough. Top the center third with filling. Take the cut pieces and criss-cross them over the filling and down the length of the pastry.
- To make individual cups, cut circles or squares of dough and place them in the wells of a cupcake or muffin tin and bake. Fill baked cups with sweet and savory fillings. This is perfect for appetizers — especially minis!
- To make cheese straws, cut dough into strips. Brush the strips with an egg wash and sprinkle with cheese. Twist, bake, and enjoy!
More Recipes with Puff Pastry:
When You Don’t Want the Puff
Not all uses for puff pastry require its characteristic rise. When compressed and not allowed to puff, this pastry becomes ultra-crispy.
- To make compressed layers for Napoleons and mille-feuille, bake the sheets of puff pastry dough with a second baking pan pressed over top to keep them from puffing up.
- To make tart shells (large or mini) out of puff pastry: Score a 1-inch border around the edge of your dough — use a paring knife and just cut the surface of the dough, not all the way through. Prick the inner portion of the dough with the tines of a fork and then fill with anything from summer squash to fall fruit. When baked, the edges will puff while the center stays crisp.
Storing Puff Pastry
Store fresh, homemade dough in fridge for up to five days — wrap it tightly in plastic wrap. You may freeze prepared dough or ready-to-bake items, like a turnover, for up to three months.

Every lesson has three homework options. Maybe you’ve already got one down, or you just have time for a quick study session. So pick one, and show us by tagging it with #kitchnbakingschool on Instagram or Twitter.

Share one fun way to use puff pastry on Twitter or Facebook and make sure to include the #kitchnbakingschool hashtag.

Buy store-bought puff pastry and make something with it.

Make puff pastry from scratch. You can do it!
Join The Kitchn’s Baking School!
SIGN UP
SHARE YOUR PROGRESS
- Follow and show your progress on Instagram, Pinterest, Facebook, and Twitter! Make sure to use the #kitchnbakingschool hashtag.