
How To Make a Cheese Ball

Here's how to master the art of the cheese ball and make it your very own.
Serves6 to 8
Makes1 (4-inch) cheese ball
When cream cheese and the happy hostess met, a magical cocktail party food was born. I’m talking about the cheese ball. Creamy, dreamy, and cheesy, this centerpiece of a cheese tray or standalone snack with crackers was the elegant update on dips. The combination of the mildness of cream cheese and the sharpness of the grated cheddar, all amped up with a dash of Dijon and a splash of Worcestershire, made it oh so inviting.
Now it’s your turn. The cheese ball may be retro, but there’s a reason that cheese balls have a hallowed place in the hors d’oeuvre hall of fame. Here’s how to master the art of the cheese ball and make it your very own.
Why You Should Make a Cheese Ball
From the 1950s through the 1970s, cheese balls sat next to every martini and Manhattan at every soirée and fancy-pants affair. Sure, to be a “cheese ball” eventually meant that you were corny and sort of hokey, but this food that rocked America remains quick and easy to make.
Since it has to be made ahead, it takes any last-minute to-dos off the list. It’s so handy, so versatile, and so good at being a “make it work, designers” dish that you can probably make two or three fantastically flavorful and creative versions from what you have on hand this very minute. (Tim Gunn would be proud.) So take the cheese ball out of the dustbin of once-trendy foods and you will discover why one of the great American recipes is still rockin’ and ready for your next gathering.
What Is a Cheese Ball?
Traditional cheese balls are a mixture of cream cheese, grated semi-soft or semi-firm cheese whipped smooth with a few added flavorings, which are then shaped into a ball of about four inches in diameter and rolled in nuts. With crackers, carrot sticks, and celery, they serve the same function as the crudité platters of cut veggies with dip that have commanded parties since the early ’80s.
More Technique than Recipe
In many ways, a cheese ball isn’t even a recipe; it’s a concept with four directions. What makes a cheese ball so versatile is that you can quite literally change almost every element and still be good to go.
- Mix room-temperature cream cheese and other cheese until smooth.
- Shape into a ball.
- Chill.
- Roll in crunchy stuff and serve.
What Cheese to Use for a Cheese Ball
When it comes to the creamy component, cream cheese is the classic foundation, and it works incredibly well. As in any dish with a few ingredients, the quality of what you use becomes vital, so pick the best cheese you can afford. You’ll be stretching any pricey cheese or flavorings with inexpensive cream cheese, which helps keeps this dish both special and doable on most budgets.
The single trick to getting a cheese ball to work well is that every ingredient must be at room temperature. Yes, must. Soft, warm cheeses become integrated into a single flavor, with a new texture and aroma that simply cannot occur if you start with cold ingredients. Set the cream cheese and cheeses out on the counter for about an hour before you start and you will be problem-free.
For the base cheese: Cream cheese is our first choice for its firm texture and mild creaminess. It creates a base so handy that it is easy to make the mixture into whatever you want. With the addition of one or two ingredients, the base is made firmer and shaped into a sculpture (think football or snowman, not three-foot swan) or softer (think dip). It’s easy to make, easy to modify, and easy to fix.
If you feel adventuresome, try mascarpone, quark, neufchatel, creamy feta, soft goat cheese, or fromage blanc as an alternative base to the cream cheese.
The second cheese: Once you have the base set, you can get crazy with the second cheese. As long as it’s not a grating cheese or crumbly, like Parmesan or cotija, it’ll work.
Knowing How Long to Leave Cheese Out
Don’t leave cream cheese out more than about two hours unrefrigerated, please, but the second cheese can sit out for about four hours; just keep them all covered and away from a hot stove or running dishwasher.
Topping Your Cheese Ball
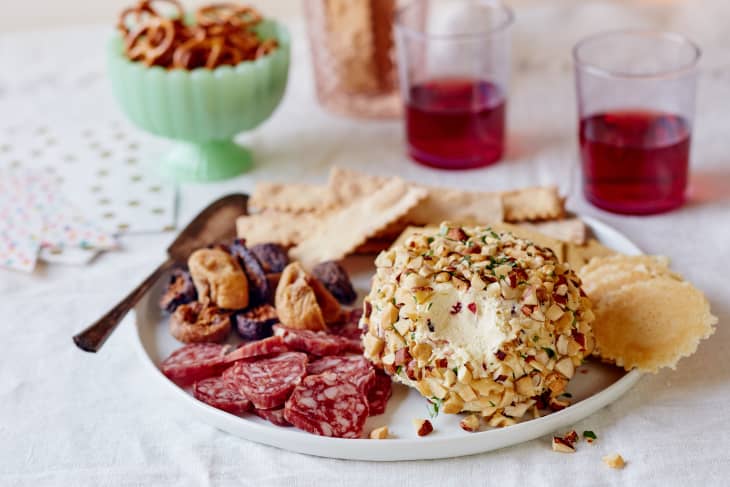
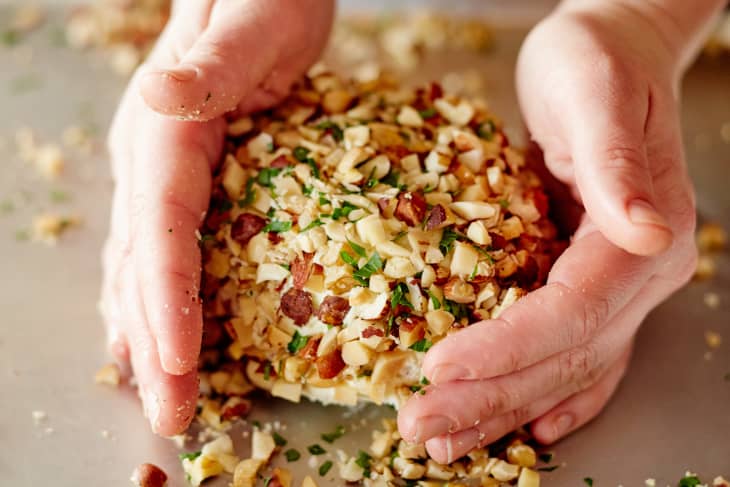
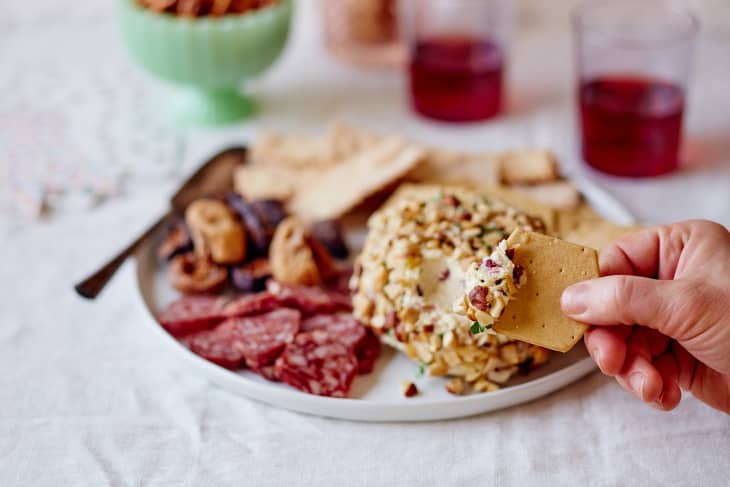
A good cheese ball is a study in texture. You want to create contrast between the smooth, creamy interior and the chewy add-ins. Things like crunchy bacon, crackers, and roasted nuts are all ideal toppings. Mince your toppings — they should be pretty small so they are easily incorporated into the cheese as it spreads.
Cheese balls keep extraordinarily well as long as you do not roll them in the outer topping until just before serving. Wrapped in plastic and then foil, a cheese ball will keep for up to a week, making it a great nibble to have on hand during party season or any random get-together.
Troubleshooting Cheese Balls
Having some trouble with your cheese ball? No worries. The texture of a cheeseball is super easy to fix, so if you add a few too many optional ingredients, or if the cheese you used ends up runnier than you expected, fear not.
- Your cheese ball is too runny: Once you have added all the extras, and it’s all mixed in well, if the texture is more salad dressing-like than something you might spread on a bagel, you can tighten it up easily by adding unsalted butter, one tablespoon at a time, mixing before you add more. You could also add more cream cheese, but it will not solidify the ball once it’s chilled as well as the butter.
- You added too many ingredients: If you add too many “things” like fruits and meat, add 3 tablespoons of cream cheese plus 1 teaspoon butter at a time and mix very well and taste. Still not quite right? Go one more round and add a teaspoon of the liquid flavoring, 1/2 teaspoon Worcestershire along with 3 tablespoons of cream cheese and mix very well. This will help you retain the backbone flavors.


How To Make a Cheeseball
Here's how to master the art of the cheese ball and make it your very own.
Makes 1 (4-inch) cheese ball
Serves 6 to 8
Nutritional Info
Ingredients
For the cheese ball:
- 8 ounces
cream cheese, at room temperature
- 8 ounces
semi-soft or firm finely grated cheese, at room temperature
- 1 to 3 cloves
garlic, 1/2 small shallot, or 1/4 small sweet onion, peeled and grated
- 2 tablespoons
freshly squeezed lemon juice, Cognac, sherry, port wine, or whiskey
- 1 to 2 teaspoons
Worcestershire sauce
- 1 to 3 tablespoons
unsalted butter, at room termperature (if needed)
Optional add-ins:
- 1 tablespoon
mustard
- 1/2 to 2 teaspoons
hot sauce, harissa, chipotles in adobo sauce, or chutney
- 1 to 2 tablespoons
minced fresh flat-leaf parsley leaves, chives, or dill
- 1/2 to 1 teaspoon
minced fresh rosemary, sage, or thyme leaves
- 1 to 2 teaspoons
spices, such as paprika, smoked paprika, or caraway seeds
- 2 tablespoons
minced dried fruit (such as apricots, figs, dates, or cranberries)
- 2 tablespoons
minced, dried sausages or firm, cured meats (such as pepperoni, salami, sopressata, saucisson, dried chorizo, or any cured charcuterie, any casings removed)
For the coating:
- 3/4 cup
chopped roasted nuts, crackers, or pretzels; crushed chips or cereal; crumbled, cooked bacon or prosciutto; or chopped dried fruit
For serving:
Sturdy, cut vegetables such as bell peppers and cucumbers, thick crackers or pita chips, clusters of grapes, dried figs (cut open), and/or toast points
Equipment
Work surface
Measuring cups and spoons
Food processor or handheld electric mixer
Soft silicone spatula
Plastic wrap
Aluminum foil
Rimmed sheet pan, roasting pan or casserole dish
Serving tray or platter
Instructions
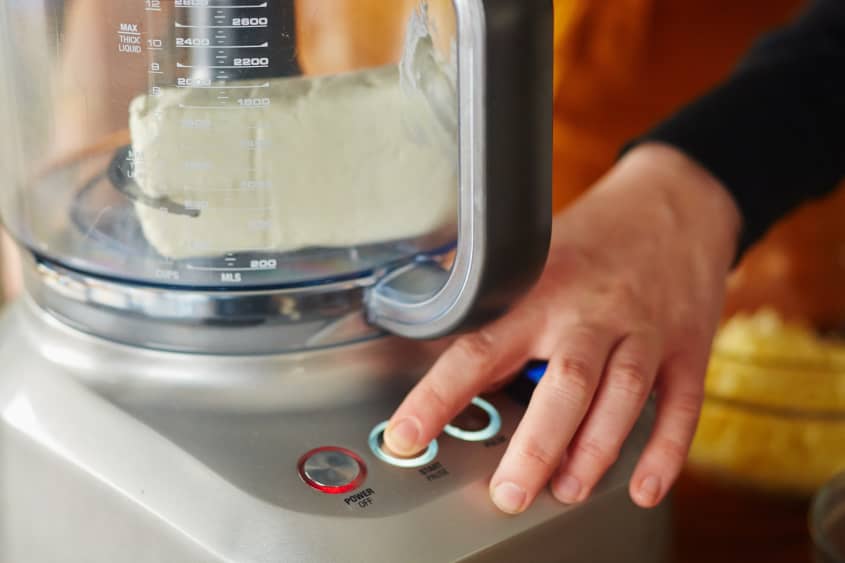
Process the cream cheese. Place the cream cheese in the bowl of a food processor fitted with a metal blade. (Alternatively, use a handheld electric mixer and large bowl.) Process or beat until light and fluffy in texture, 30 seconds to 1 minute.
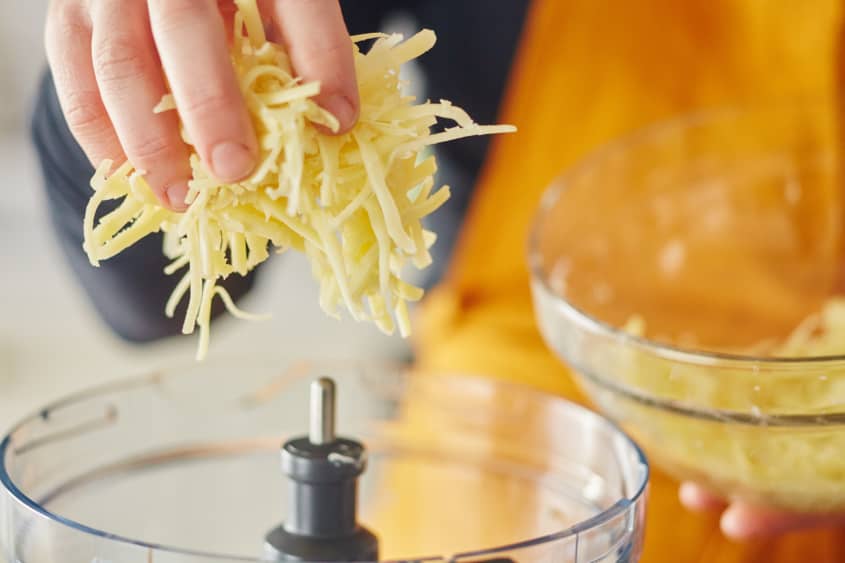
Mix in the second cheese. Add the grated cheese and process or beat for 30 to 45 seconds. Stop the machine and scrape down the sides of the bowl. It should be very smooth and completely combined. If it is not, process or mix another 30 seconds.
Mix in the liquid flavoring. Add the garlic, lemon juice or alcoholic spirit, and Worcestershire. Process or beat until the mixture is completely smooth, there no lumps or bits, and the mixture is thick and fluffy, one full minute or more. Stop the machine and scrape down the side of the bowl.
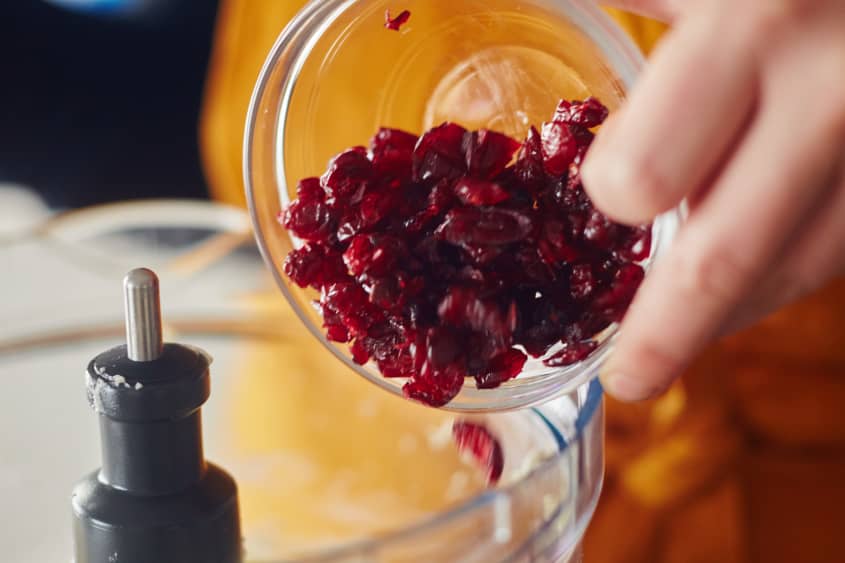
Mix in any optional ingredients. Add any combination of add-in flavorings and process or beat until the mixture reaches the desired texture.
Correct the texture if necessary. If the mixture has become runny, like salad dressing or yogurt, add 1 tablespoon room-temperature butter at a time and process or beat until completely incorporated, fully processing or beating between each addition.
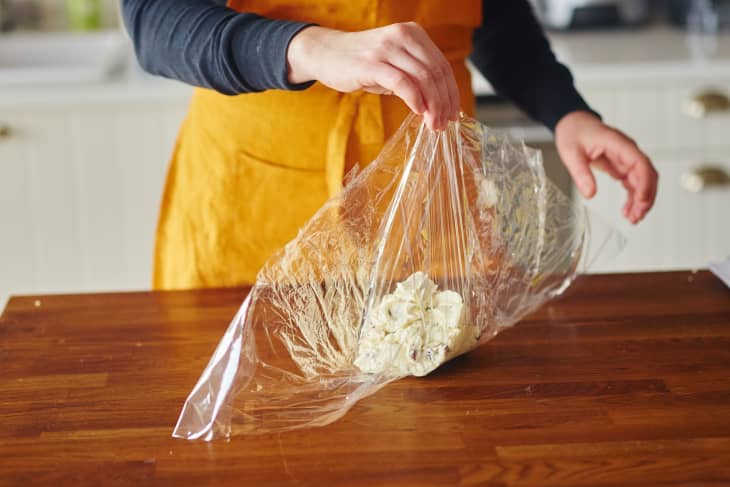
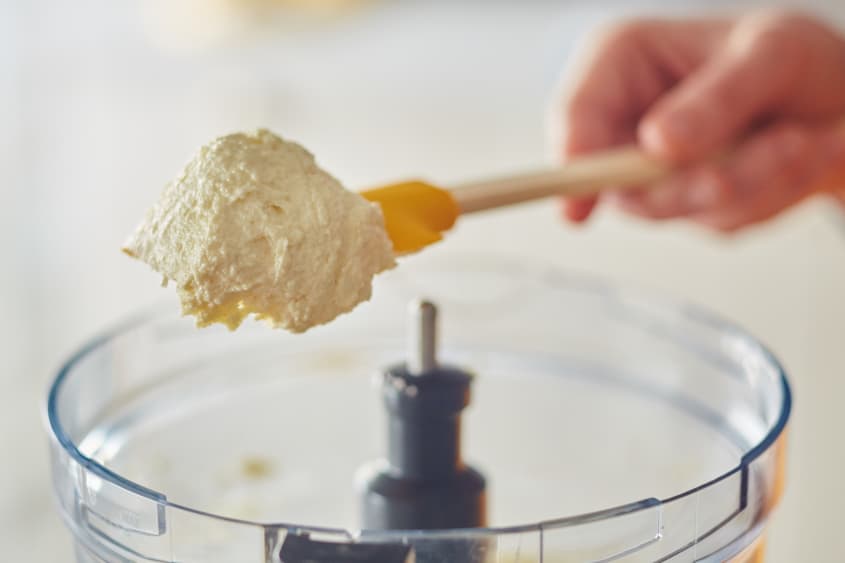
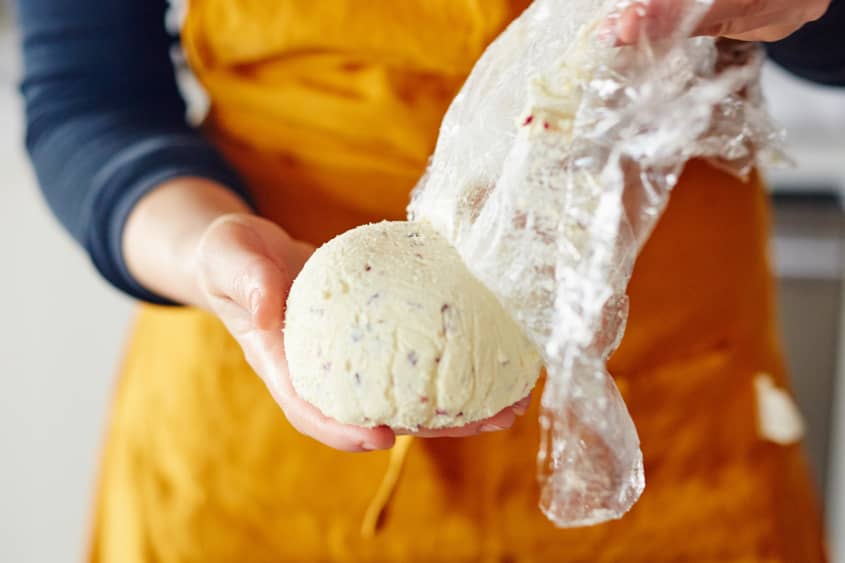
Scoop the mixture into a mound: Place a large piece of plastic wrap about 12 by 16 inches on a work surface. Using an ice cream scoop or a large spoon, transfer the mixture into a mound in the center of the plastic wrap.
Shape it into ball using plastic wrap. Lift up 2 opposite sides of the plastic wrap and cover the sides of the cheese mixture. Place your cupped hands against the plastic wrap, and gently press the mixture into a round. Lift up the remaining plastic, one piece at a time, and cover all sides of the cheese round. Shape it into a ball. Collect all the plastic pieces at the top and twist them together, creating a bundle that looks like a tied sack or pouch.
Wrap in foil and refrigerate. Wrap the plastic-wrapped cheese ball completely in aluminum foil and shape again with your hands. Refrigerate for at least 8 hours and up to 6 days.
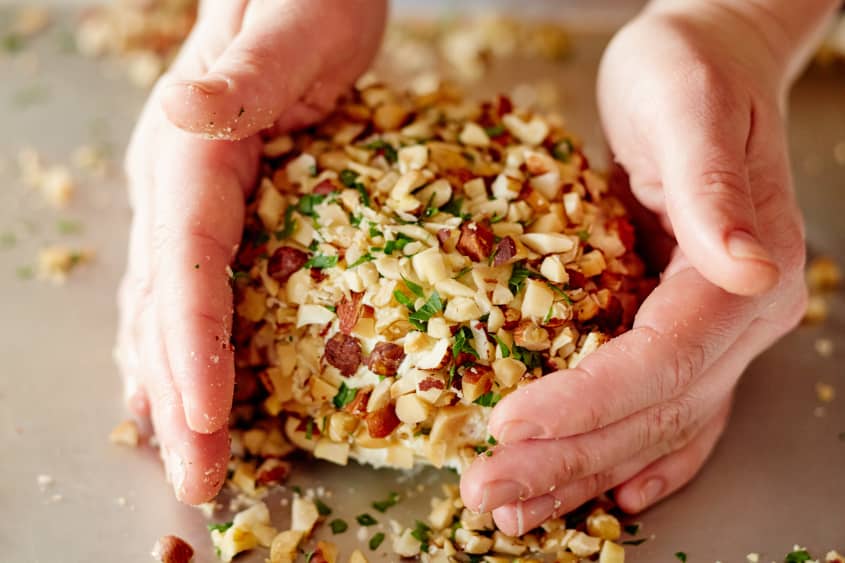
Coat the outside. Before serving, pour the coating into a rimmed baking sheet, roasting pan, or 9x13-inch baking dish and spread into an even layer. Remove the cheese ball from the refrigerator, unwrap completely, and place on the topping. Gently roll to coat, or using a spoon, scoop the coating over the top. Pat the sides and top well to ensure a full coating.
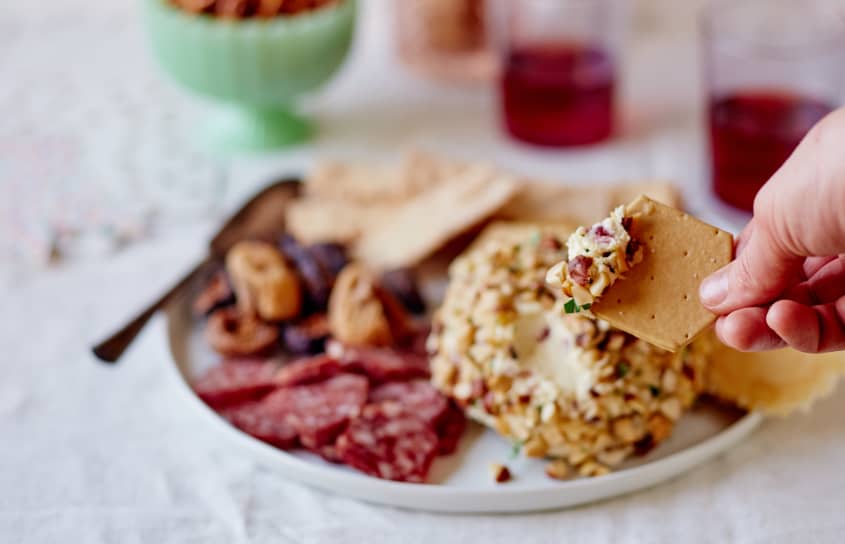
Serve the cheese ball. Place the cheese ball on a serving tray or platter, with a selection of sturdy, cut vegetables, thick crackers or pita chips, clusters of grapes, and a few dried figs (cut open). You can also opt for toast points, which are simply pieces of great-quality toast slices with the crust cut off. Set out 2 or 3 small cheese knives or butter knives for spreading, plenty of napkins, and serve.
Recipe Notes
Cream cheese alternatives: You can use mascarpone, quark, Neufchatel, creamy feta, soft goat cheese, or fromage blanc instead of cream cheese.
Cheese options: You can use Colby, Havarti, fontina, cheddar, Monterey Jack, Gouda, Swiss, Gruyère, blue, Stilton, Gorgonzola, Roquefort, all without any rind.
Garlic alternatives: You can use 1 teaspoon finely minced pimientos, roasted peppers, chiles, or pitted olives instead of the garlic or onion.
Storage: The cheese ball will keep for up to 1 week, but be sure to include any advance chilling time in the amount of time you keep it (i.e., if you prep and chill it for 3 days before serving, it will keep for 4 more days). Make sure to rewrap the ball in plastic wrap if there are leftovers, but know that the outer coating will get very soft and "melt" into the cheese ball. If you used nut halves or any large, easy-to-remove coating, take it off before the second refrigeration.