We Tried 5 Egg-Poaching Methods and Found 2 We Loved
When I first started dating my now-husband (27 years ago!), I was impressed that he ordered his eggs poached. He revealed this during a breakfast date at a local greasy spoon, where hungover college kids soothed their aches with black coffee and buttered toast, and I doubt many people took their eggs that way. I liked it. Those elegant, gooey-yolked eggs made our meal feel more special, more elegant, even in our humble surroundings. Poached eggs just always feel fancy.
Despite that wonderful memory, I don’t poach eggs at home all that often — just occasionally when I happen to make a Benedict or hash that begs for them. I think I’ve always been a little apprehensive, unsure of which poaching method to use. There’s a lot of advice out there and methods that vary wildly. Are you supposed to add vinegar to the water to help the whites set quickly? What about salting the water to season the egg? And do you poach in shallow water or deep? Should you stir the water into a vortex and send the egg into that, or do you just slip it into still water?
To find the answers, I tested five popular methods touted by trusted website sources. And I have to say, my ultimate takeaway was a little surprising.
A Few Notes About Methodology
Eggs: Since every poaching technique suggested using the freshest eggs possible, I visited a few stores first to find those with the most distant expiration date. To ensure consistency, I purchased them all from one store. They were all large eggs, all the same brand (Vital Farms pasture-raised eggs) with the same expiration date. Every method called for refrigerator-cold eggs going into the water.
Tests: To keep the tests consistent, I tried each method twice, from start to finish — meaning pouring off the hot water, cooling down the pan, and starting again with fresh water (and new eggs, of course!).
Time: The time I’ve listed includes everything, from starting with an empty pot to putting the egg on the plate.
Ratings: I rated each egg method of a scale of 1 to 10, with 10 being perfection. The ratings are based on ease of method, consistency of results, taste, texture, and appearance.
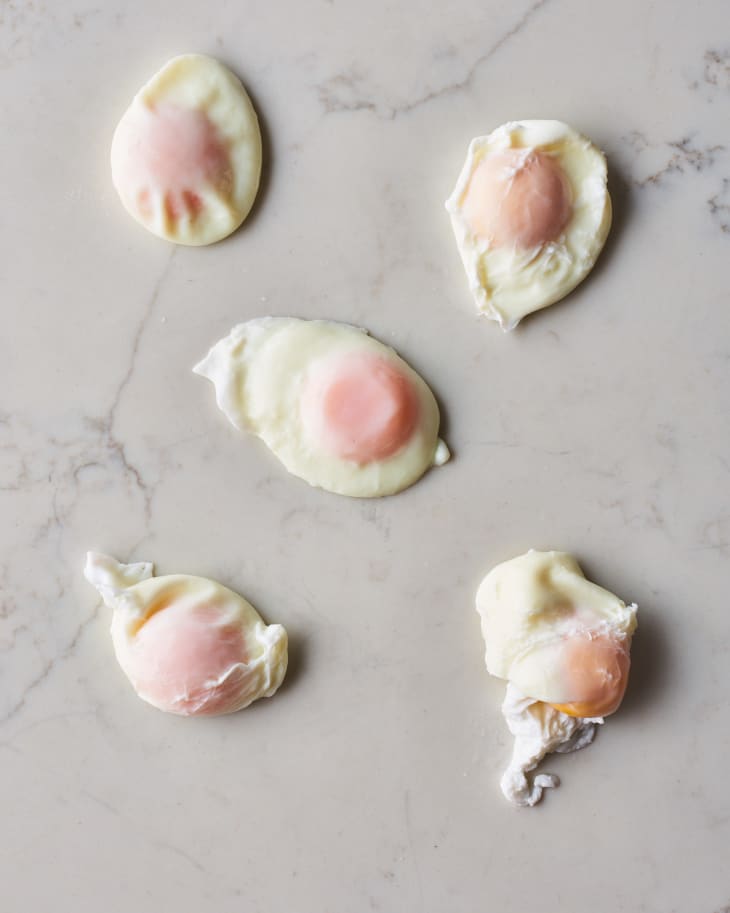
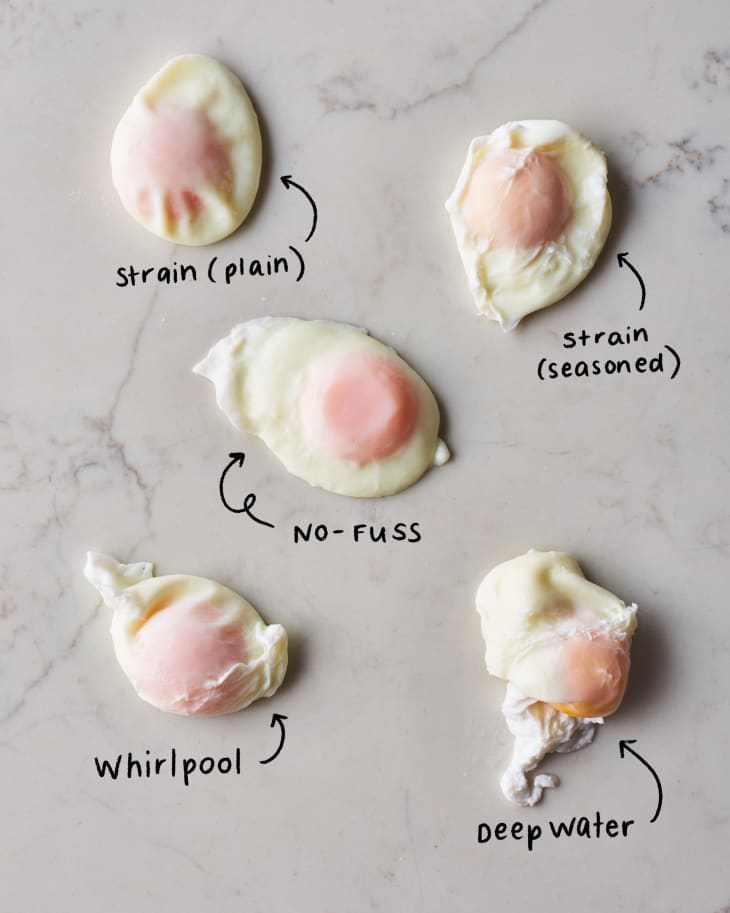
Method: Poach in Deep Water
Total time: 20 minutes
About this method: This technique from Fine Cooking works for one egg or multiple eggs. It starts with a pan filled with 4 inches of water (this is deeper than you think!) plus 2 tablespoons vinegar and a 1/2 tablespoon of salt per quart of water. For me, it took 2 1/2 quarts of water, so I added 5 tablespoons vinegar and 1 1/2 tablespoons salt.
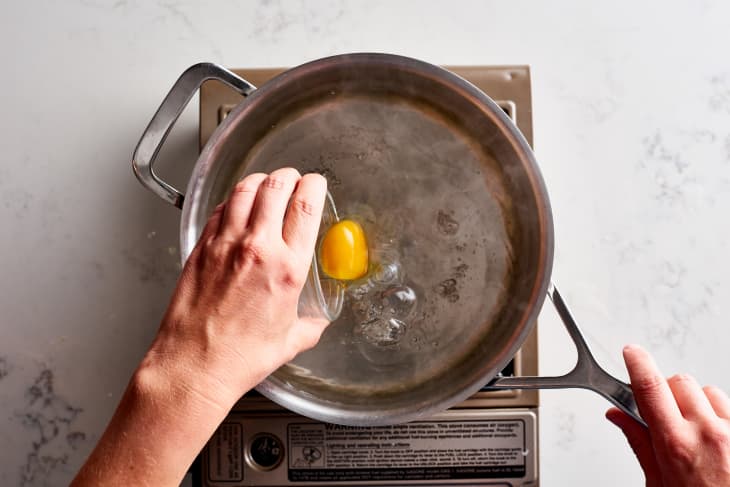
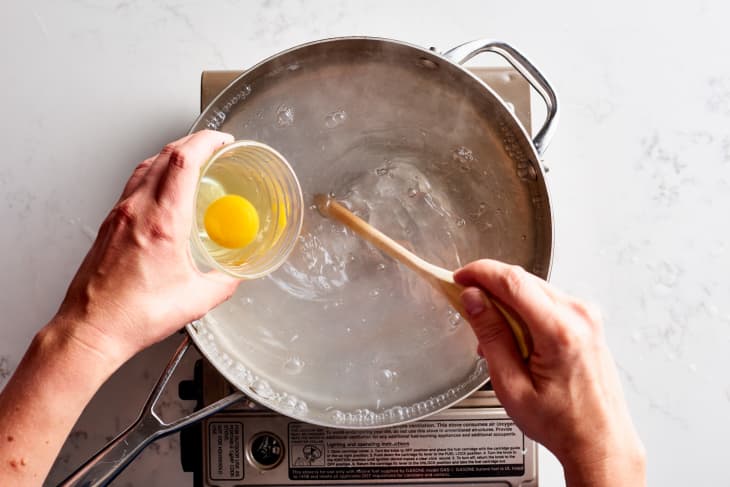
You bring the water to 205°F — just below a boil — and “decant” each egg into a ramekin, then gently pour each egg into the water with the dish close to the water’s surface. The heavy yolk sinks to the bottom, while the white trails above to create a teardrop shape. After about four minutes, the egg should be done.
Results: I had tons of wispy whites rise to the surface of the water, which alarmed me at first but turned out to be no big deal. The eggs slightly resembled a teardrop shape when I lifted them from the water. But they tasted a little salty — not just seasoned, but salty. The whites were firm and a little chalky, but the yolks were perfect golden lava.
My takeaway: It took a long time to bring that much water to 205°F — long enough to make this method unrealistic for weekday breakfasts. For comparison, some other methods took only 10 to 11 minutes. Attaining a teardrop shape isn’t that important to me, so the extra time didn’t feel worth it.
Rating: 6/10
Method: Create a Whirlpool
Total time: 10 minutes
About this method: I followed the instructions from Alton Brown’s recipe, called Perfect Poached Eggs, on Food Network. (There is an accompanying video that shows a different method.) After bringing 1 inch of water, a teaspoon of kosher salt, and 2 teaspoons of white vinegar to a simmer in a narrow, deep saucier (a type of rounded saucepan), you stir the water quickly in one direction to create a whirlpool. You then slip the egg (which you’ve cracked into a custard cup or ramekin) into the center of the whirlpool, turn off the heat, cover the pan, and let the egg stand undisturbed for five minutes. This method only works for cooking one egg at a time. (Brown does also give non-whirlpool directions for poaching multiple eggs.)
Results: Despite the claim that the whirlpool’s “swirling water will help prevent the white from ‘feathering,’ or spreading out in the pan,” I definitely got lots of feathering and some wispy egg white tentacles. The egg tasted seasoned but not salty, and the egg white was firm and just the teensiest bit chalky. There was a hint of thickening on the outside of the yolk, but the rest was molten and gooey.
My takeaway: Surprisingly, the motion in the pan seemed to hurt, not help, creating more wispy bits than I wanted. Even though the finished egg wasn’t the most beautiful, it was still tasty. I don’t think I’d return to this method, though. I think it’s just too tricky to nail.
Rating: 7/10
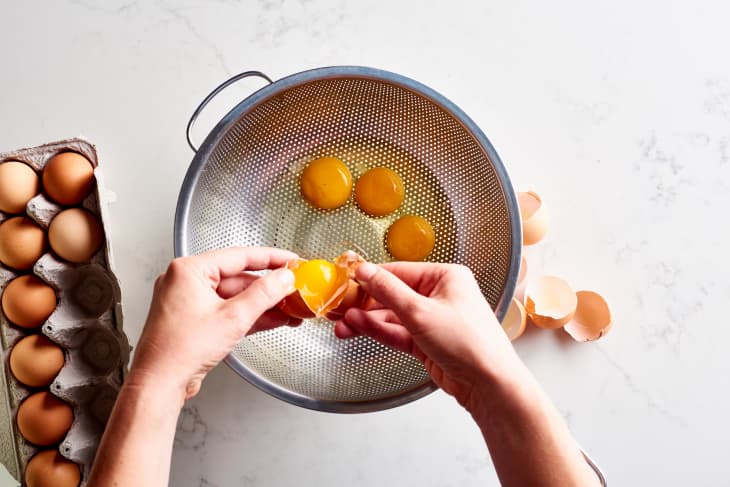
Method: Strain and Poach in Seasoned Water
Total time: 13 minutes
About this method: This technique from America’s Test Kitchen specifies poaching 4 eggs and straining them in a colander first to allow the thin, loose whites to drain away (thus preventing wispy flyaways). After straining each egg, you transfer all 4 to a 2-cup liquid measuring cup. You then bring 6 cups of water to a boil in a Dutch oven and stir in a tablespoon of white vinegar and a teaspoon of salt. After removing the pot from the heat, you slide the eggs out of the measuring cup, one at a time, leaving space between them. Cover the pot, and let it stand for about 3 minutes to cook the eggs.
Results: The eggs had a lovely flattened oval shape, with the yolks sitting up a little off the whites. The whites were firm, but not unpleasantly so. The outermost part of the yolk was a little more cooked than I wanted, but the interior was wonderfully runny.
My takeaway: I was skeptical of having all the eggs come out of the measuring cup cleanly — thinking that they might become one mass of egg — but they retained their separateness beautifully. These pre-strained poached eggs were of course smaller than the unstrained eggs that I poached for other methods, so I wanted to see how much egg was lost in the process. Straining removes 25% to 27% of the egg’s total weight, which might bother some folks. But I reasoned that you’re still losing some volume of egg with other techniques because the wispy whites end up clouding the water and getting left behind anyway.
Rating: 8/10
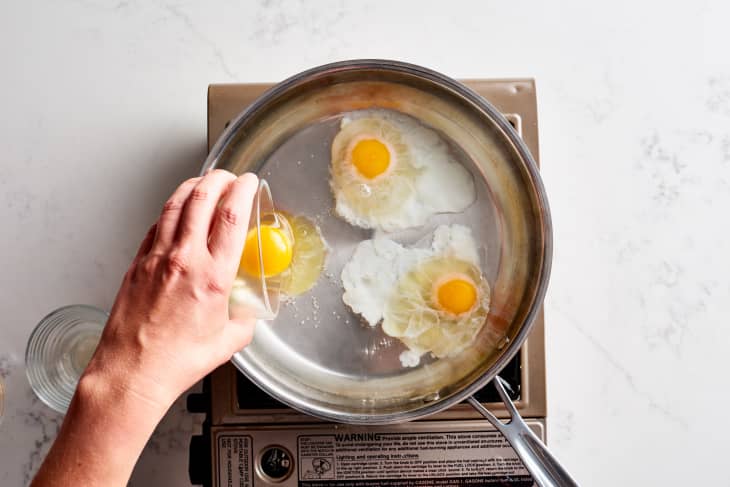
Method: No-Fuss Poaching
Total time: 10 minutes
About this method: In this detailed piece for Food52, Alice Medrich argues to just keep it simple — no vinegar or salt (which she says can toughen the whites and make them chalky), no swirling of the water, no egg-straining. You simply bring 1 1/4 to 1 1/2 inches of water to a gentle simmer, and either crack eggs directly into the water or crack them into a ramekin first and slide them in (I chose the latter). You then turn off the heat, cover the pan, and let stand for 3 to 5 minutes. Medrich says you can easily “trim raggedly whites between the edge of the [slotted spoon] and the sides of the skillet as you lift the egg from the water.”
Results: I went 3 1/2 minutes for my eggs, and the texture was gorgeous — silky, tender whites and lovely runny yolks. The wispy flyaway whites (there were a lot of them) were left behind in the water. The overall shape was nice, and I admittedly could have done a better job of trimming to create a prettier shape.
My takeaway: The no-fuss idea is extremely appealing to me and might just have me poaching eggs more often. I liked that once the eggs go in, I can walk away without watching and tweaking the heat to maintain a certain temperature. This is the method I’ll use for quick weekday breakfasts for myself or weekend brunch for my family.
Rating: 9/10
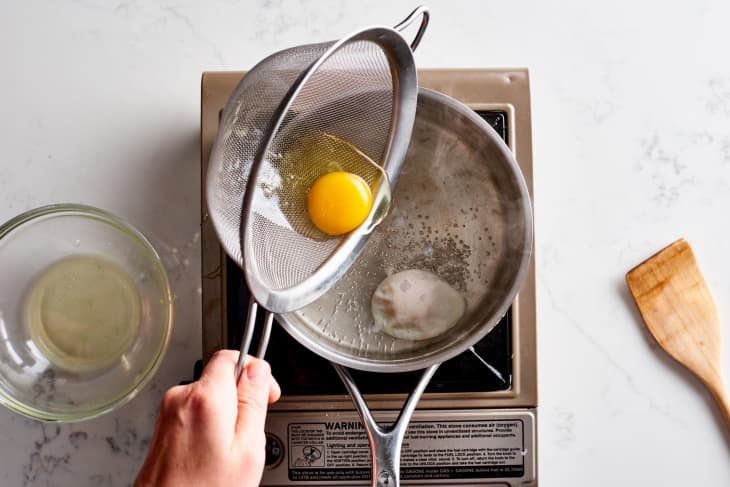
Method: Strain and Poach in Plain Water
Total time: 10 minutes
About this method: This Food Lab–tested method from J. Kenji López-Alt (with helpful video and video transcript) calls for you to strain the raw egg in a fine mesh strainer, which allows the watery, loose part of the white to drain away. You slip 1 (or up to 4) eggs into a pot of water at 180°F to 190°F and cook, swirling occasionally, for 3 1/2 to 4 minutes. (I went 3 minutes and 45 seconds.)
Results: The eggs were beautiful, with a perfect shape and no flyaways to trim or clean up. The whites were tender, the yolks rich and beautifully runny.
My takeaway: This method purports to be “an easy, 100% foolproof method for cooking perfectly poached eggs with tight, clean whites and golden, liquid yolks,” and it does seem to be pretty much foolproof. You do have to watch the temperature as the eggs cook, so there is some babysitting involved (which is the only thing preventing a perfect rating from me). But for the end result, it’s worth it. This is the method I’ll use for company — when I want eggs that look absolutely perfect.
Rating: 9/10

Overall Takeaways
Poached eggs are easy!
Some methods require a little more effort than others, but none require any significant work. Poached eggs are relatively quick, and every method I tried produced either pretty good or very good results. No methods bombed, so as long as you cook at the specified temperature and for the suggested amount of time, you’ll end up with lovely poached eggs.
You can make them ahead!
Several of the sites I visited mentioned that you can make poached eggs ahead, and since I had a lot of them on hand, I tested that theory. You simply poach as many eggs as you like to your desired doneness, then place them in a container of cold water to cover. Store in the fridge for up to two days. Reheat by submerging in hot water for one to two minutes. This is well worth doing, and it works like a charm!