
How to Naturally Dye Easter Eggs (Using Ingredients You Already Have at Home!)

How to dye Easter eggs with beets, turmeric, cabbage, and more.
Serves6
Makes6 dyed eggs
Prep5 minutes to 10 minutes
Cook15 minutes to 30 minutes
When it comes to decorating Easter eggs, there are plenty of pretty amazing, craft-tastic Easter egg ideas online, making it entirely possible to devote days to creating museum-quality masterpieces. But I prefer a less design-y and more rustic approach, and luckily, it’s actually pretty easy to make your own natural Easter egg dye using just a few things you likely already have at home. Plus, this means they’re totally edible afterwards. Yes, really!
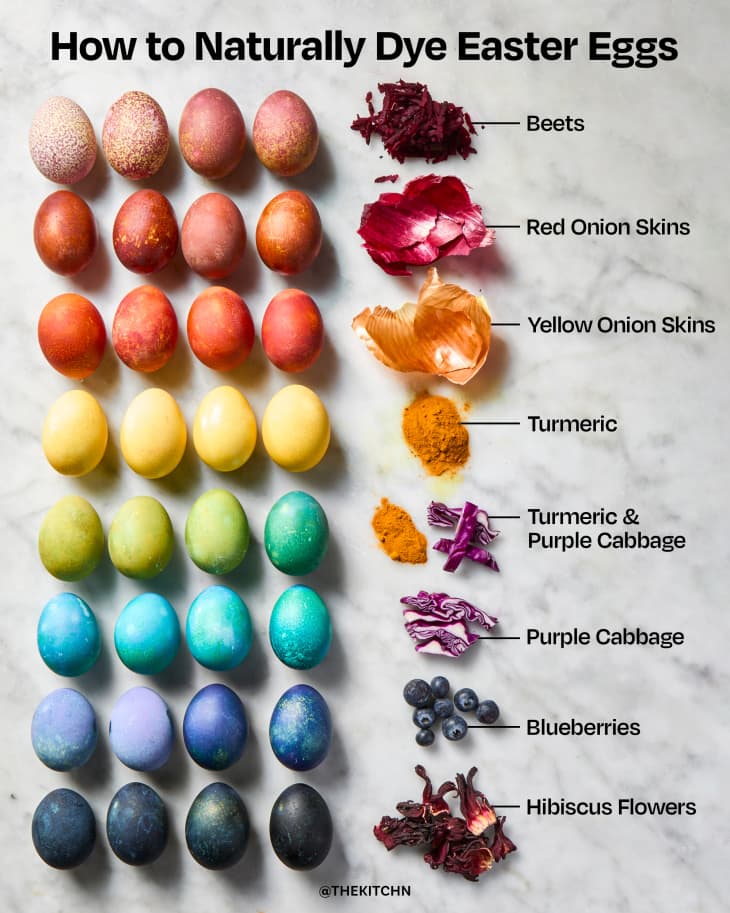
A long time ago, I wrote about dyeing eggs with onion skins, which gives the eggs a pretty spectacular result, especially if you rub them with oil afterwards to add shine. Then, I decided to take coloring eggs with vegetable scraps a step further and created a larger palette. Here’s everything you need to know about how to dye eggs with beets, cabbage, turmeric, onion skins, and more.
How to Create the Perfect Colors for Naturally Dyed Easter Eggs
Here’s a handy guide to follow:
1. Pick one of the below and simmer with 2 cups water (covered) for 15 to 30 minutes.
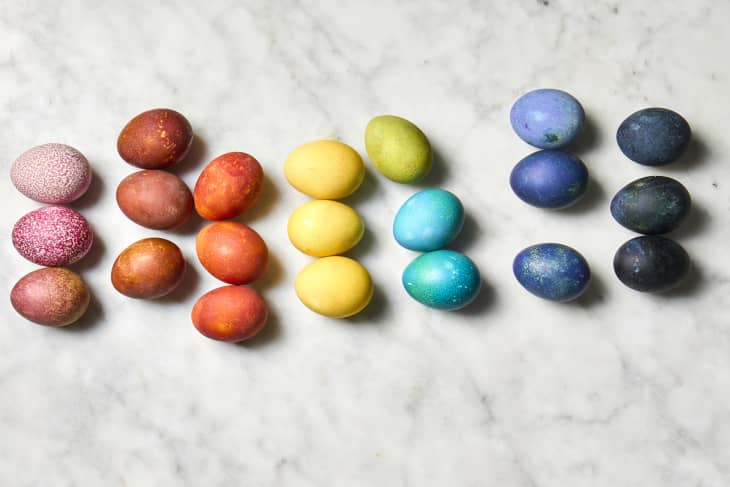
- 2 cups shredded beets = reddish pink on white eggs, maroon on brown eggs
- 2 cups red onion skins = reddish orange on white eggs or red on brown eggs
- 2 cups yellow onion skins = orange on white eggs, rusty red on brown eggs
- 1/4 cup ground turmeric = yellow eggs
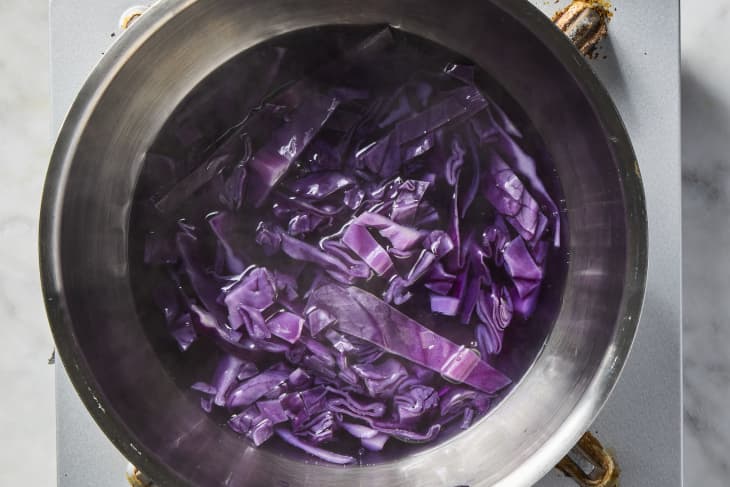
- 2 cups chopped purple cabbage & 1/4 cup ground turmeric (two separate soaks) = green eggs
- 2 cups chopped purple cabbage = blue on white eggs, green on brown eggs
- 2 cups blueberries = blue eggs
- 2 cups dried hibiscus flowers = lavender or indigo eggs
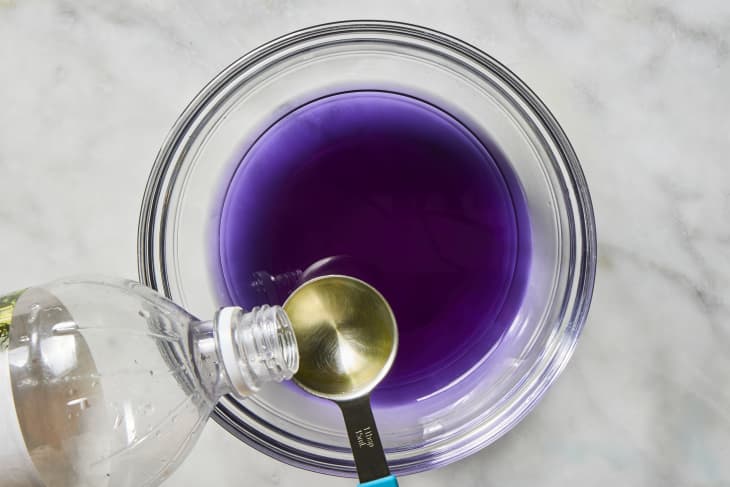
2. Strain the liquid. Add 1 tablespoon distilled white vinegar to every 1 cup strained dye liquid.
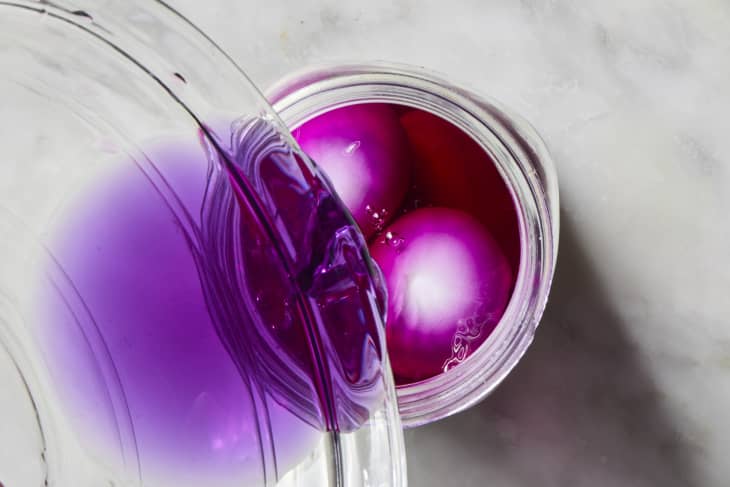
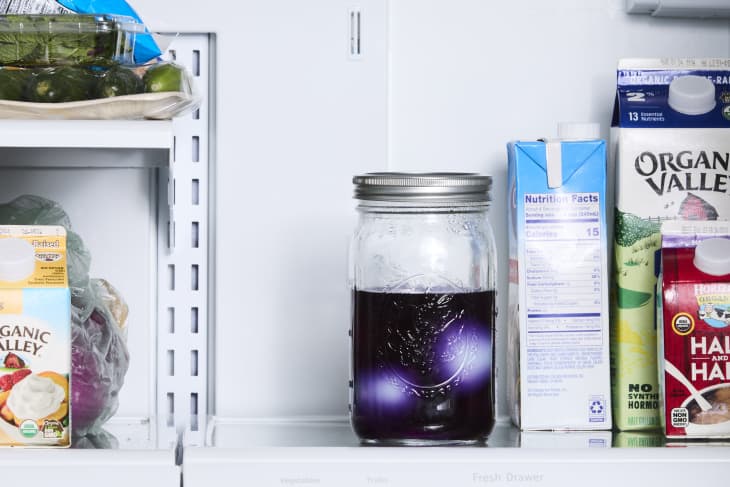
3. Soak hard-boiled eggs in the dye liquid and refrigerate. (2 cups of dye liquid will dye 6 eggs.)
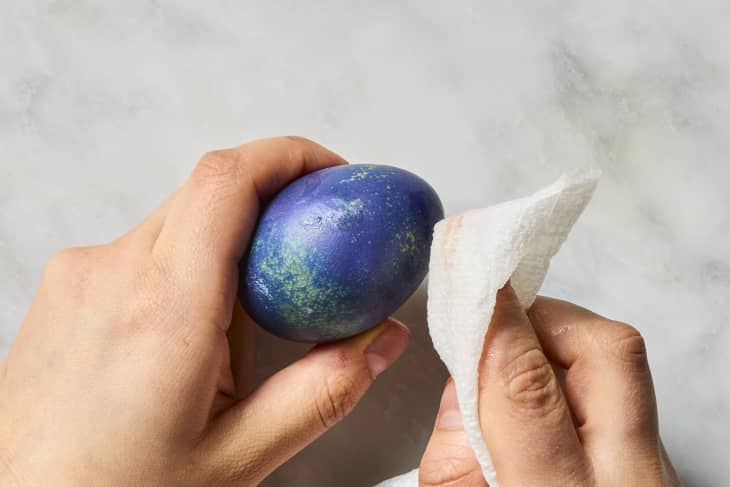
4. Dry the eggs and polish with a little oil to make them shine.
The Kitchn editors have tested this method several times and have found that the number of dips in the dye is even more important than the duration of time spent in the dye. The more stints in the dye, the deeper the color will be. Our point? You can really play with the final color.
Naturally-Dyed Easter Eggs
How to dye Easter eggs with beets, turmeric, cabbage, and more.
Prep time 5 minutes to 10 minutes
Cook time 15 minutes to 30 minutes
Makes 6 dyed eggs
Serves 6
Nutritional Info
Ingredients
For the eggs, dyeing, and finishing:
- 6
unpeeled, hard-boiled white or brown eggs (at room temperature, not fresh)
- 2 cups
water
Distilled white vinegar
Neutral oil, such as vegetable or grapeseed
Dye options (per 2 cups water):
- 2 cups
shredded red beets (for pink on white eggs, maroon on brown eggs)
- 2 cups
red onion skins (for lavender on white eggs, red on brown eggs)
- 2 cups
yellow onion skins (for orange on white eggs, rusty red on brown eggs)
- 1/4 cup
ground turmeric (for yellow eggs)
- 2 cups
chopped purple cabbage (for blue on white eggs, green on brown eggs)
- 2 cups
blueberries (for blue eggs)
- 2 cups
dried hibiscus flowers (for indigo or lavender eggs)
Equipment
Saucepan with lid
Fine-mesh strainer
A second saucepan or bowl
Baking dish or other container
Paper towels
Instructions
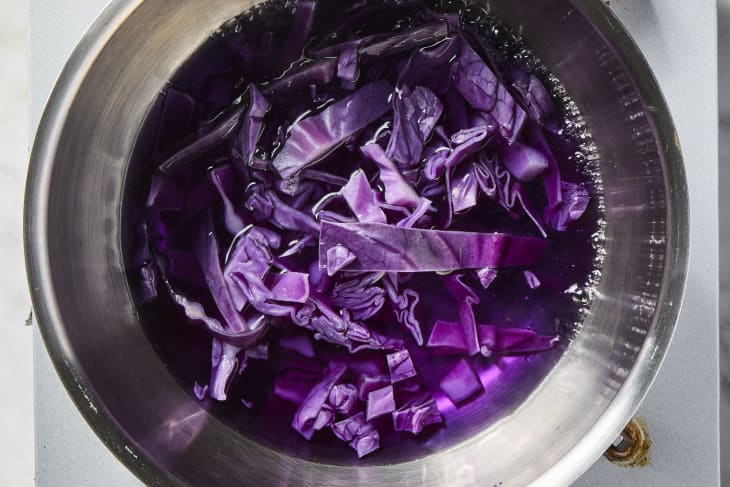
Place 2 cups water and dye option of choice (purple cabbage, onion skins, etc.) in a small saucepan and bring to a boil over medium-high heat.
Reduce the heat to low. Cover and simmer until the color is a few shades darker than you want for your egg, 15 to 30 minutes. Drip a little dye onto a white dish to check the color.
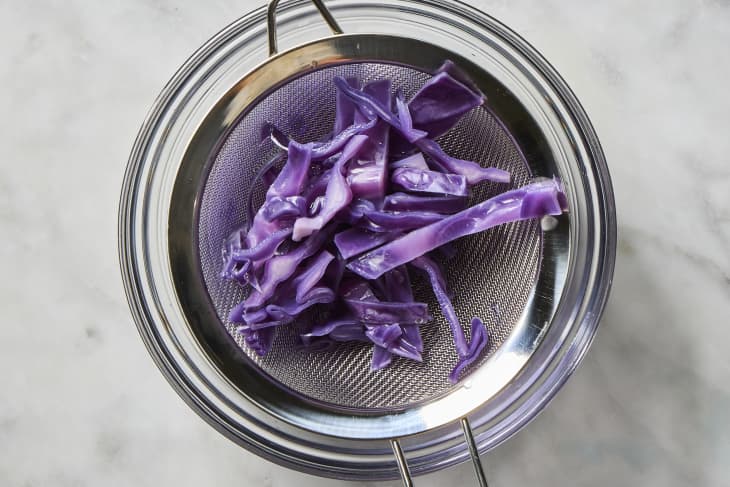
Remove the pan from the heat. Let cool to room temperature. Pour through a fine-mesh strainer set over another saucepan or bowl. Press on the solids in the strainer to extract as much liquid as possible. Discard the contents of the strainer.
Measure the amount of strained liquid. Add 1 tablespoon distilled white vinegar per 1 cup strained liquid and stir to combine.
Place 6 room-temperature, hard-boiled eggs in a medium bowl or quart container (like a yogurt container). Carefully pour the cooled dye over the eggs and make sure they are completely submerged.
Refrigerate until chilled and the desired color is reached, a few hours or up to overnight. Remove the eggs from the dye and dry with paper towels. If you want your eggs to be more vibrant and less pastel, give the eggs multiple soaks in the dye, being sure to dry them between stints in the dye.
When the eggs are dyed to the desired color, dry each one thoroughly with a paper towel. Gently rub in little oil neutral oil into each egg. Polish with a paper towel. Refrigerate until ready to use.
Explore a variation of colors with different natural ingredients on your eggs — which are all totally safe to eat!
Recipe Notes
- You can also start with raw eggs and cook them in the dye bath as described in this how-to on onion-skin eggs. I found that with dyes like the hibiscus tea and beets, the color was more concentrated with the refrigerator method. Of course, this method requires clearing out some space in the refrigerator.
- Play around with different ingredients to find new colors, or soak in different dye baths for a layering effect.
- Beware that the actual shade of the final eggs may change when exposed to the air and dried.
- Keep in mind the effect of the dyes varies depending on how concentrated the dye is, what color egg you use, and how long and how many times the eggs are immersed in the dye. Err on the side of more material rather than less when creating your dye.