
Recipe: Gluten-Free Cut-Out Cookies

Makesabout 30 cookies
This is a recipe that has stood the test of time and has become a family treasure. I developed it when our daughter was a toddler, and she is now a senior in high school (which I still can’t quite believe). In our house, it comes out several times a year for all sorts of holidays and occasions.
The cookie recipe is easy to make and it’s quite forgiving — it works for dough that is rolled out thick or thin. It is also yummy iced or left plain, and can be lightly flavored with a bit of citrus in addition to the vanilla extract if desired.
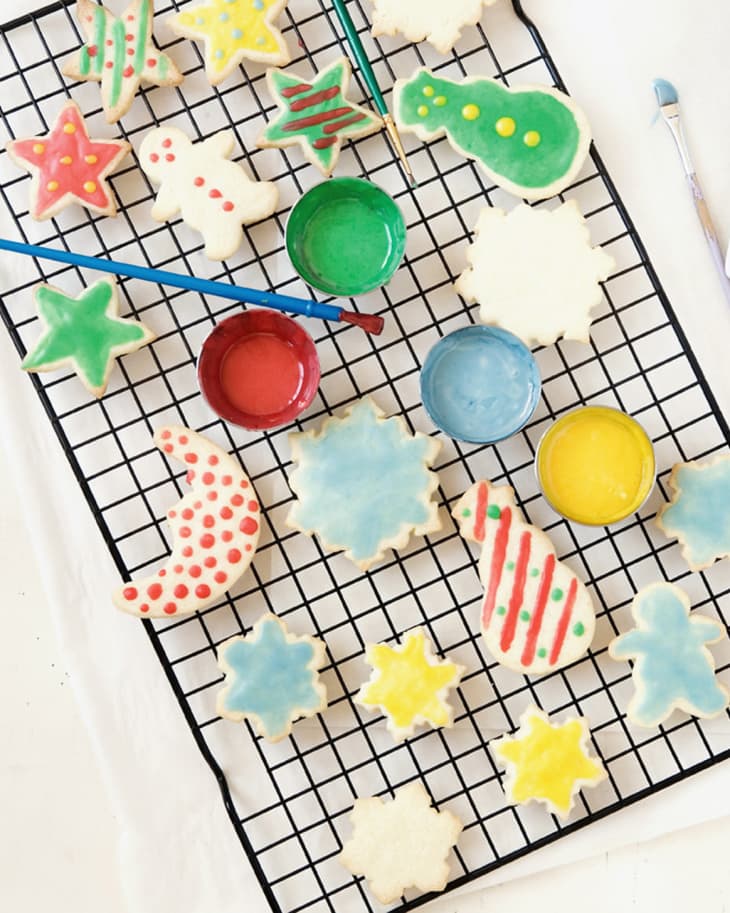
Originally, painting the icing onto each cookie with paintbrushes was to help little hands easily decorate the cookies, but I have found that it releases the inner artist in cookie decorators of all ages and allows everyone to relax and just have fun making their mini-masterpieces!
Gluten-Free Cut-Out Cookies
Makes about 30 cookies
Nutritional Info
Ingredients
For Jeanne's gluten-free all-purpose flour (makes 4 1/2 cups):
- 1 1/4 cups
brown rice flour
- 1 1/4 cups
white rice flour
- 1 cup
sweet rice flour
- 1 cup
tapioca flour
Scant 2 teaspoons xanthan gum
For the cookies:
- 2 cups
Jeanne's gluten-free all-purpose flour
- 1 1/2 teaspoons
baking powder
- 1/4 teaspoon
salt
- 1 stick
(1/2 cup) unsalted butter, at room temperature
- 1 cup
granulated sugar
- 1
extra-large egg, at room temperature
- 1 teaspoon
vanilla extract
- 1/2 teaspoon
finely grated lemon or orange zest (optional)
Tapioca flour, for dusting
Colored sugar, for decorating (optional)
For the icing:
- 2 cups
powdered sugar, sifted
- 1 teaspoon
vanilla extract
- 4 to 6 tablespoons
heavy cream
Food coloring in various colors (optional)
Instructions
Make the flour blend: Place the brown rice, white rice, sweet rice, and tapioca flours and xanthan gum in a large bowl and whisk to combine. Transfer the mix to an airtight container. Store in a cool, dark place for up to 6 weeks or in the refrigerator for up to 4 months.
Make the cookies: Place 2 cups of the flour blend, baking powder, and salt in a medium bowl and whisk to combine.
Place the butter in the bowl of a stand mixer fitted with the paddle attachment. (Alternatively, use an electric hand mixer and large bowl.) Beat on medium-high speed until light and fluffy, about 2 minutes. Add the granulated sugar and beat for 1 minute. Add the egg and beat for 1 minute. Add the vanilla and beat to combine. Add the citrus zest (if using). Add the flour mixture and beat on low speed until combined.
Divide the dough in half, shape each half into a disk, and wrap each disk tightly in plastic wrap. Refrigerate until firm, about 30 minutes, or for up to 3 days.
Arrange 2 racks to divide the oven into thirds and heat to 375°F. Line 2 rimmed baking sheets with parchment paper or silicone baking mats.
Remove 1 dough disk from the refrigerator. If the dough is rock hard, let it sit at room temperature to warm up a bit. Place the dough between two sheets of waxed or parchment paper and roll to 1/8-inch thick.
Using cookie cutters dipped in tapioca flour, cut out as many shapes as possible. Using a spatula, transfer the cutouts to the prepared baking sheets, spacing them at least 1 inch apart. Roll out the dough scraps and repeat the process until all the dough is used or the cookie sheets are full. The dough is best cut when it is firm, so you may have to return it to the refrigerator before cutting more shapes.
Sprinkle the shapes with colored sugar if desired, or leave them plain and decorate with icing after baking. Bake until the edges of the cookies are lightly browned, 8 to 10 minutes. Let cool on the baking sheets for about 2 minutes, then transfer to wire racks to cool completely. Let the sheets cool completely and repeat with the remaining dough. While the cookies are cooling, make the icing.
Make the icing: Place the powdered sugar in a large bowl. Add the vanilla and 4 tablespoons of the cream. Whisk until all the ingredients are combined and smooth. If desired, add more cream to make the icing thinner. If you want to color the icing, divide it among small bowls and tint each bowl of icing with a different food coloring. Using a small paintbrush per color, decorate the cookies. Place the decorated cookies on the wire racks to let the icing set.
Recipe Notes
Storage: Store the cookies in an airtight container, between layers of waxed paper, at room temperature for up to 5 days or in the refrigerator for up to 2 weeks.