
How To Start Seeds Indoors
We are all fascinated by the process of watching something grow from a small seed to a mature and productive plant. I fondly remember receiving a packet of green bell pepper seeds, when I was in the fifth grade. My first ripe pepper was the centerpiece for a memorable dinner I still recall vividly today.
I think we have all forgotten how easy and thrilling it was to germinate a seed between two wet paper towels way back in grade school (we all did an experiment like this, right?). Each spring, I relive that same excitement, when I start my vegetables and herbs from seed. And you don’t need a massive greenhouse, expensive equipment, or even a green thumb to get a head start on summer’s bounty.

How to Choose Which Seeds to Start Indoors
For the sake of cost effectiveness and effort, don’t waste your time starting something from seed, if you only need one plant. For example, I have room in my garden for only one squash plant. It is more cost effective for me to simply purchase a $3 starter plant than to purchase a $3 pack of seeds. I won’t be able to use all of them before they expire.
On the other hand, I plan on planting over 30 tomato plants, so purchasing one packet and starting from seed is very advantageous for me.

Not every seed benefits from starting indoors. Some plants perform better when directly sown into the garden soil. Tender greens, like lettuce, and row crops, like carrots or beets, do not transplant well. Some plants can even be grown from kitchen scraps you may already have in your kitchen!
Tomatoes, peppers, and squash, however, do best when started indoors. This is especially helpful for me, as I live in a northerly latitude with a shorter growing season. I can get a head start on the season indoors while it is still cold outside.


How to Start Seeds Indoors
I chose to spend as little money as possible for my seed-starting project by doing almost everything myself. The following instructions include the DIY steps I took along the way. Of course, you can purchase the supplies listed above, if you are pressed for time. The results are still just as rewarding!
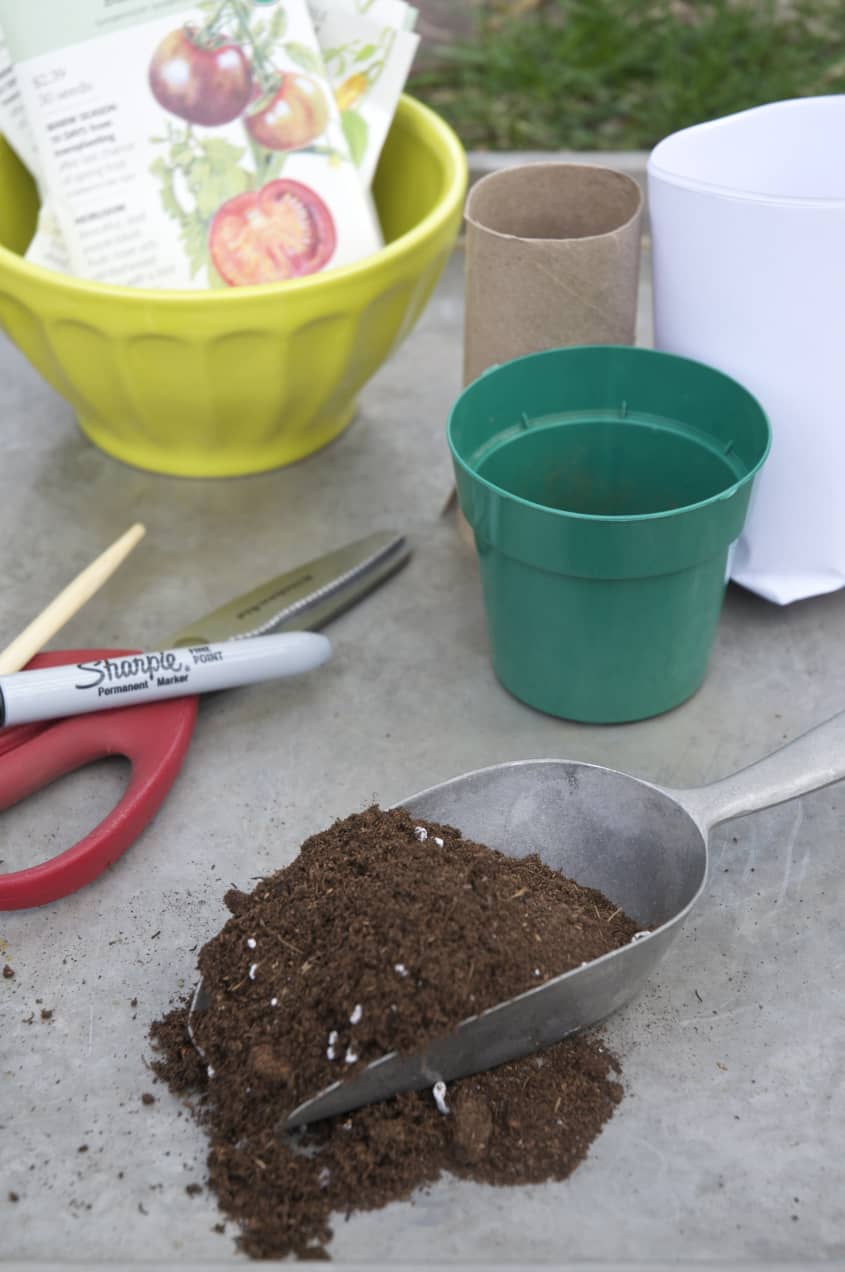
What You Need
Supplies
SeedsSoil
Containers Tray
Light source
Heat source
Labeling system
Instructions
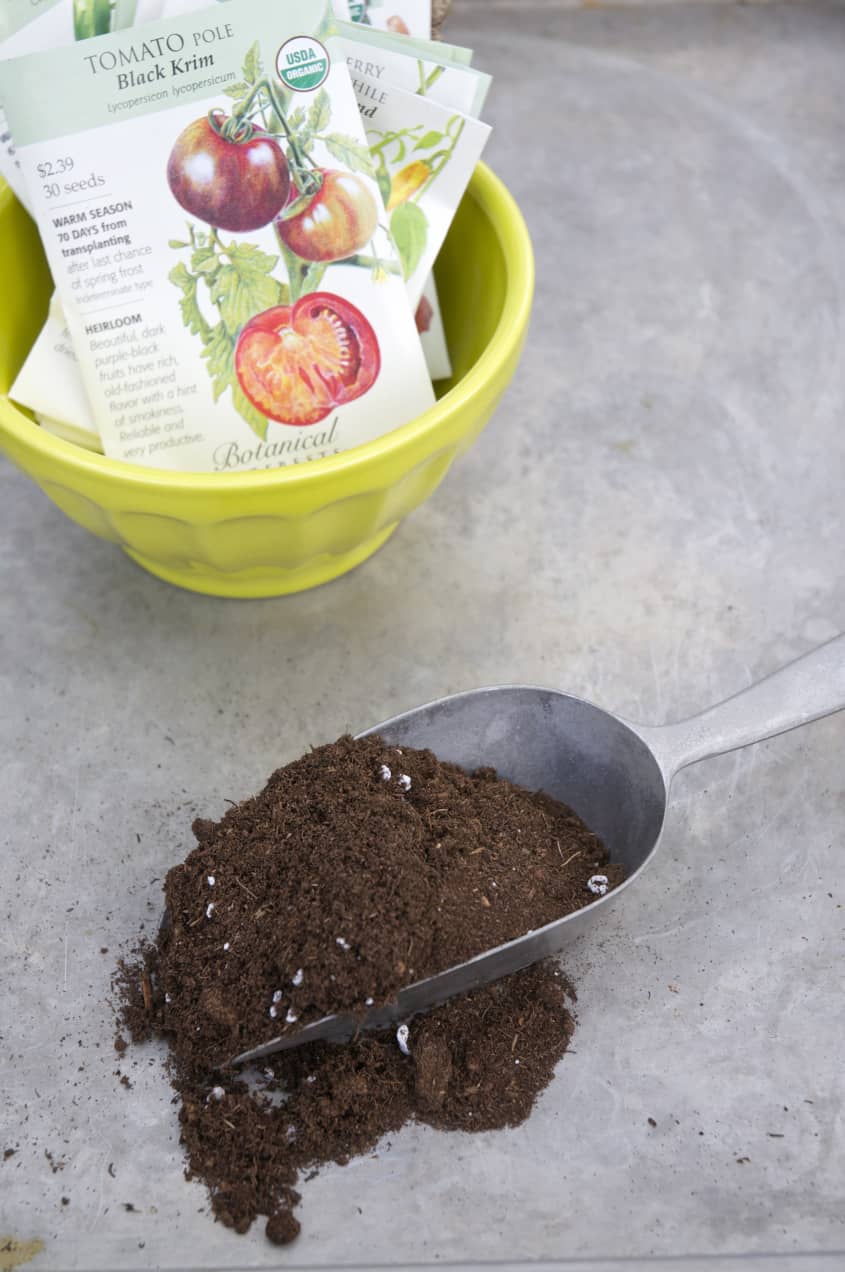
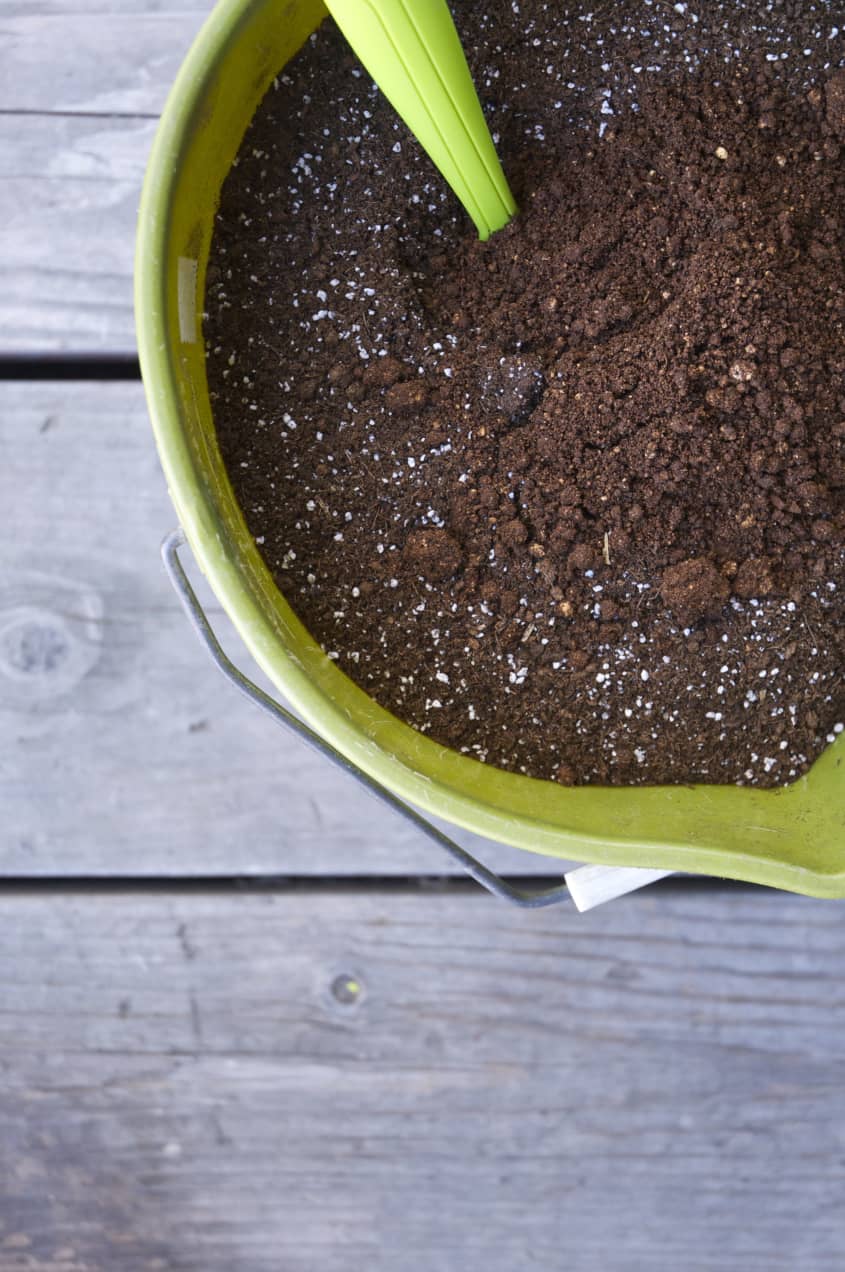
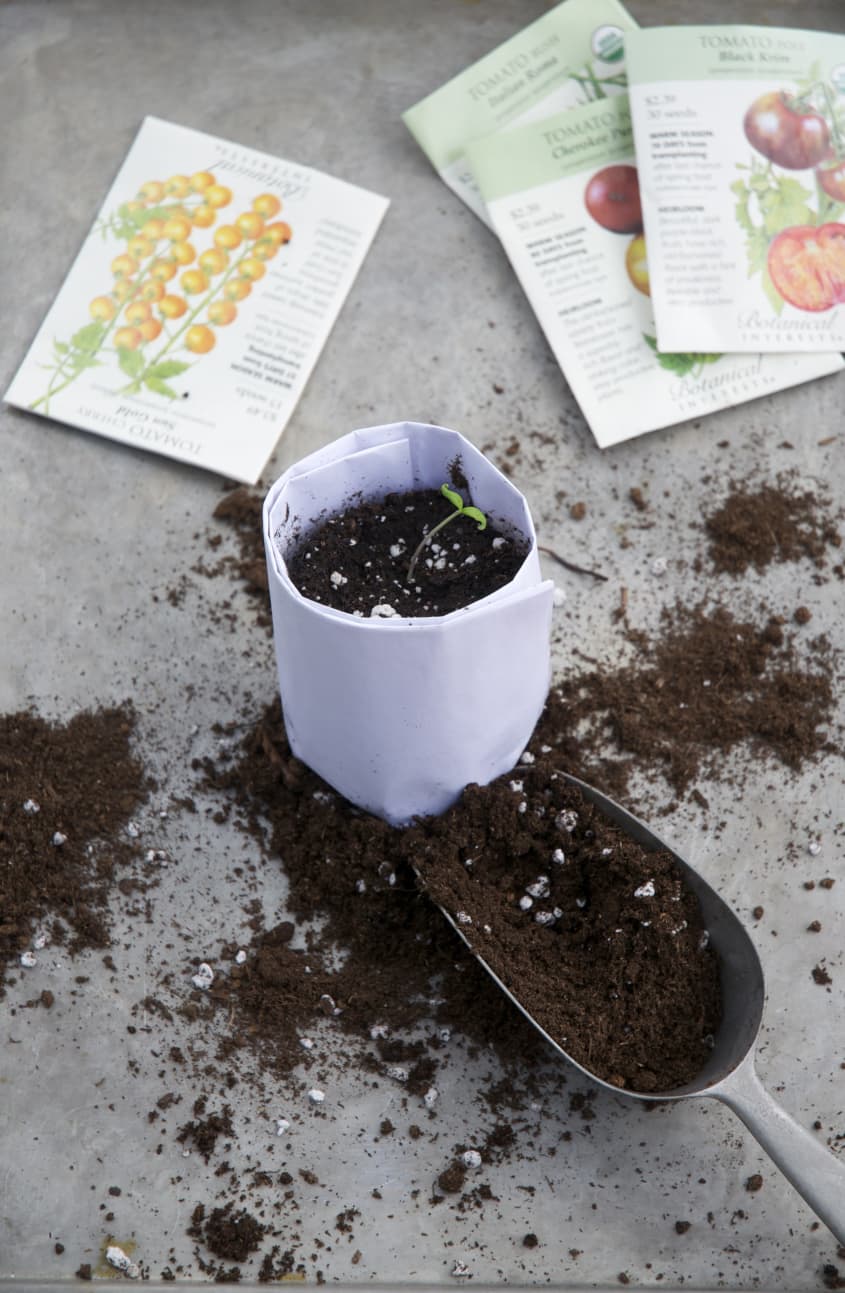
- Prep your soil: Choose seed-starting soil and make sure it is slightly moist. You can always make your own seed-starting soil by mixing 4 parts compost, 2 parts peat moss, 1 part perlite, and 1 part vermiculite.
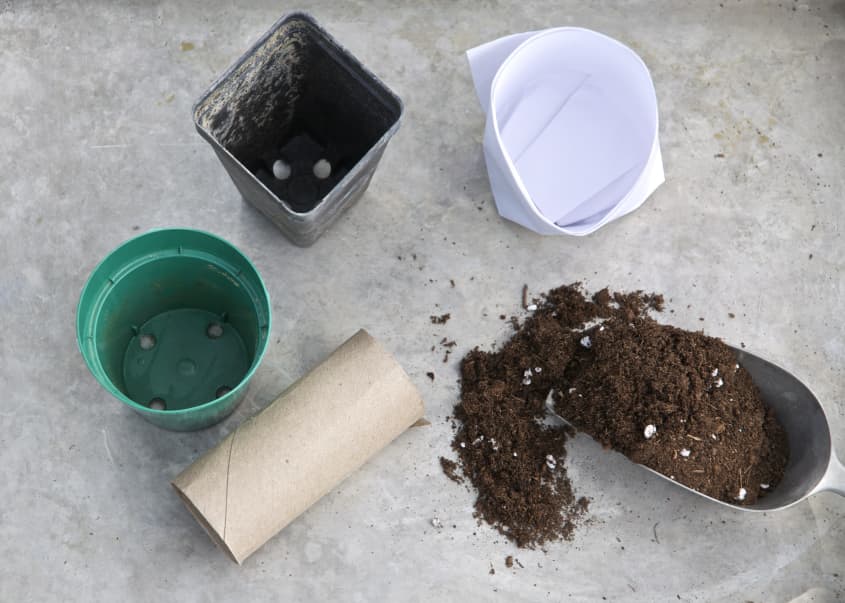
- Gather your supplies: Have your soil, seeds, hand trowel, containers, and labels at the ready.
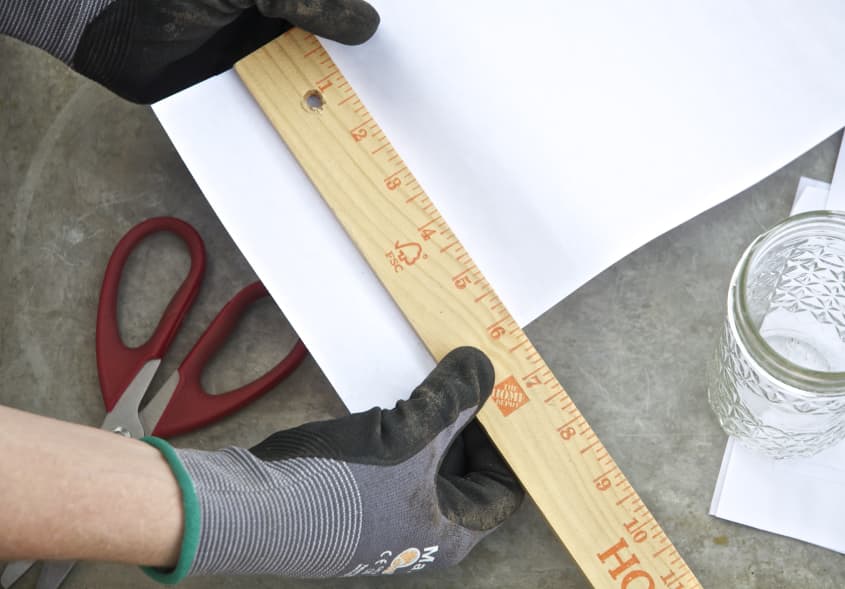
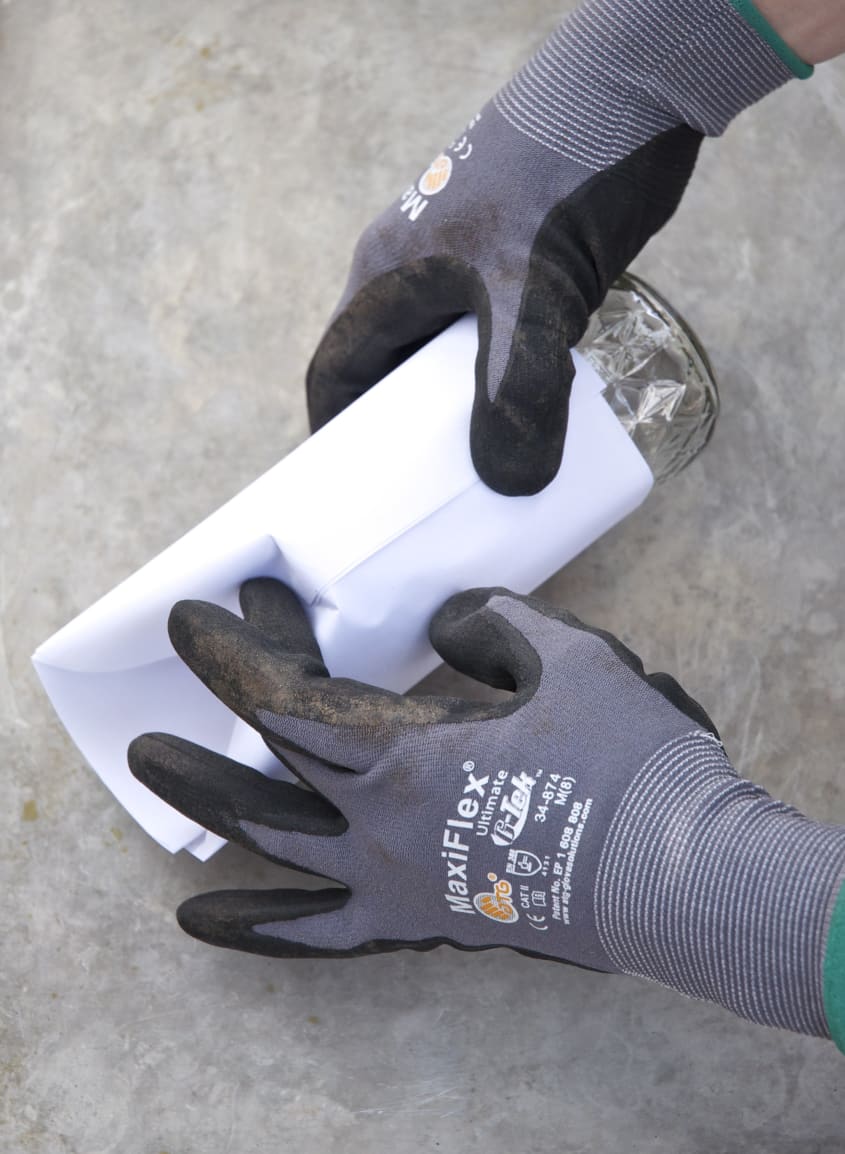
- Decide upon your container: If you already have pots, skip to step 11. If you are joining me with the DIY method, gather newsprint or black-and-white newspaper, scissors, a ruler, and an open-ended straight cylinder (I used a narrow Mason jar).
- Measure and cut your strips of newspaper: I had an old flip chart down in my basement that was collecting dust. I cut long strips, 6 by 30 inches. Avoid using any glossy paper or colored print.
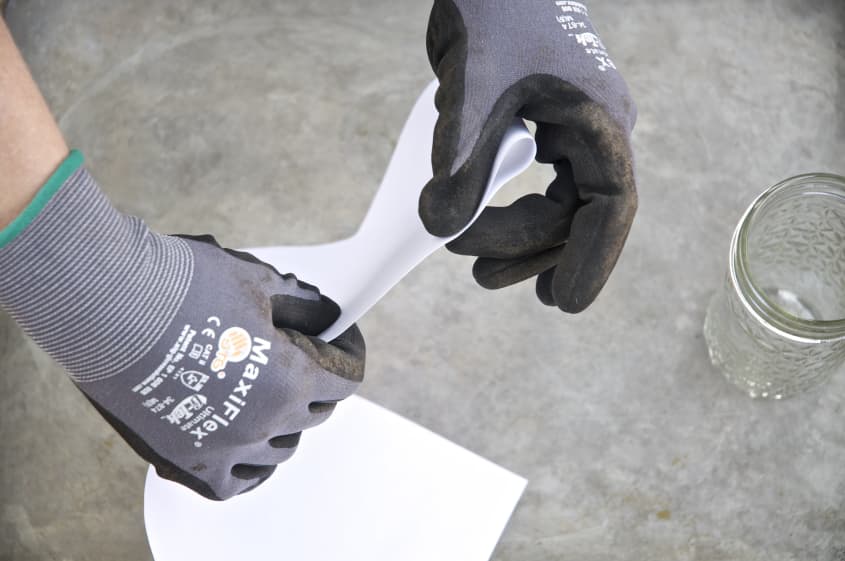
- Fold the strip in half, lengthwise: This step saves time rolling and makes for a neater pot.
- Roll the newsprint around an open-ended, straight cylinder: Don’t roll too tightly; it will release easier. You can also use a wine bottle, a drinking glass, or an aerosol can to shape your pots, if you don’t have a Mason jar on hand.
- Hold the seam down and position the paper: Leave 1/3 of the paper hanging off the open side of the glass.
- Tuck one third of the newsprint into the open end of the glass: Don’t worry about imperfections with the base at this point.
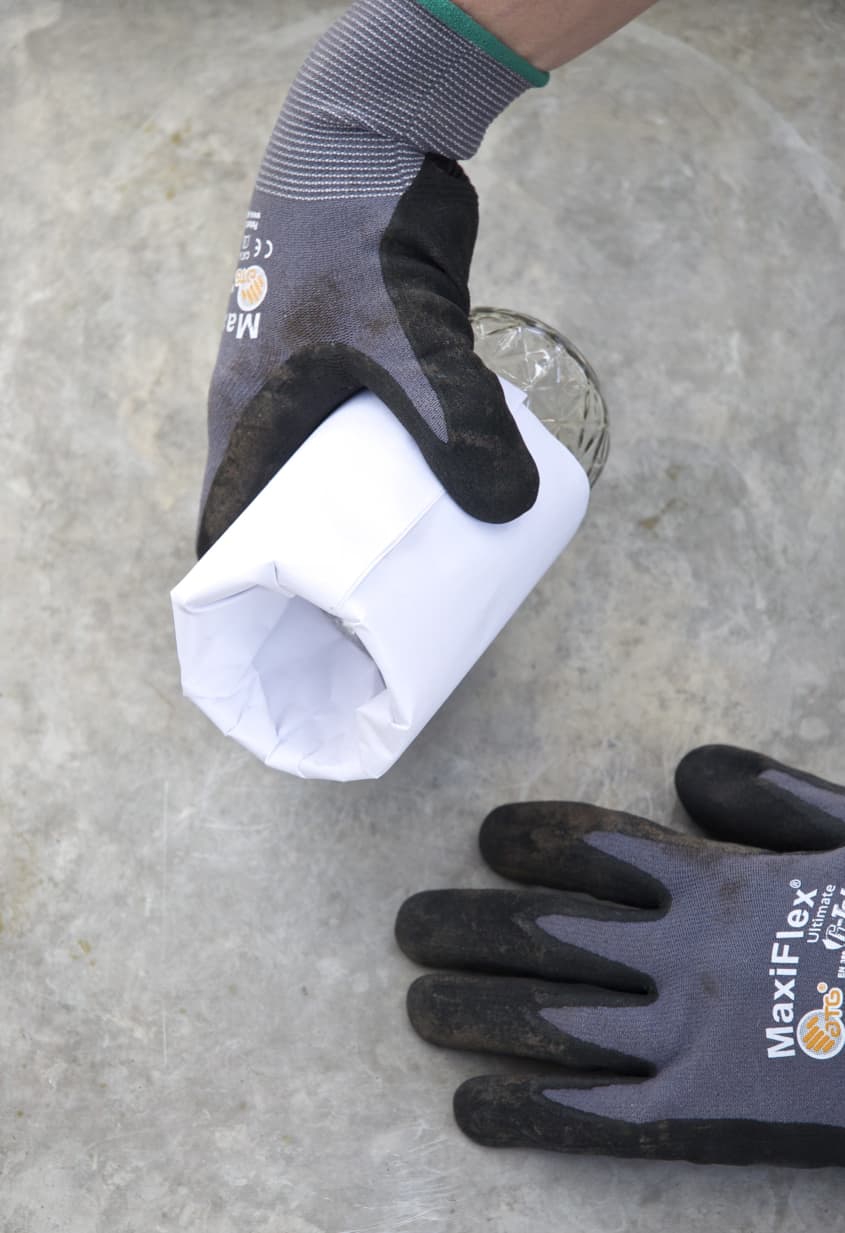
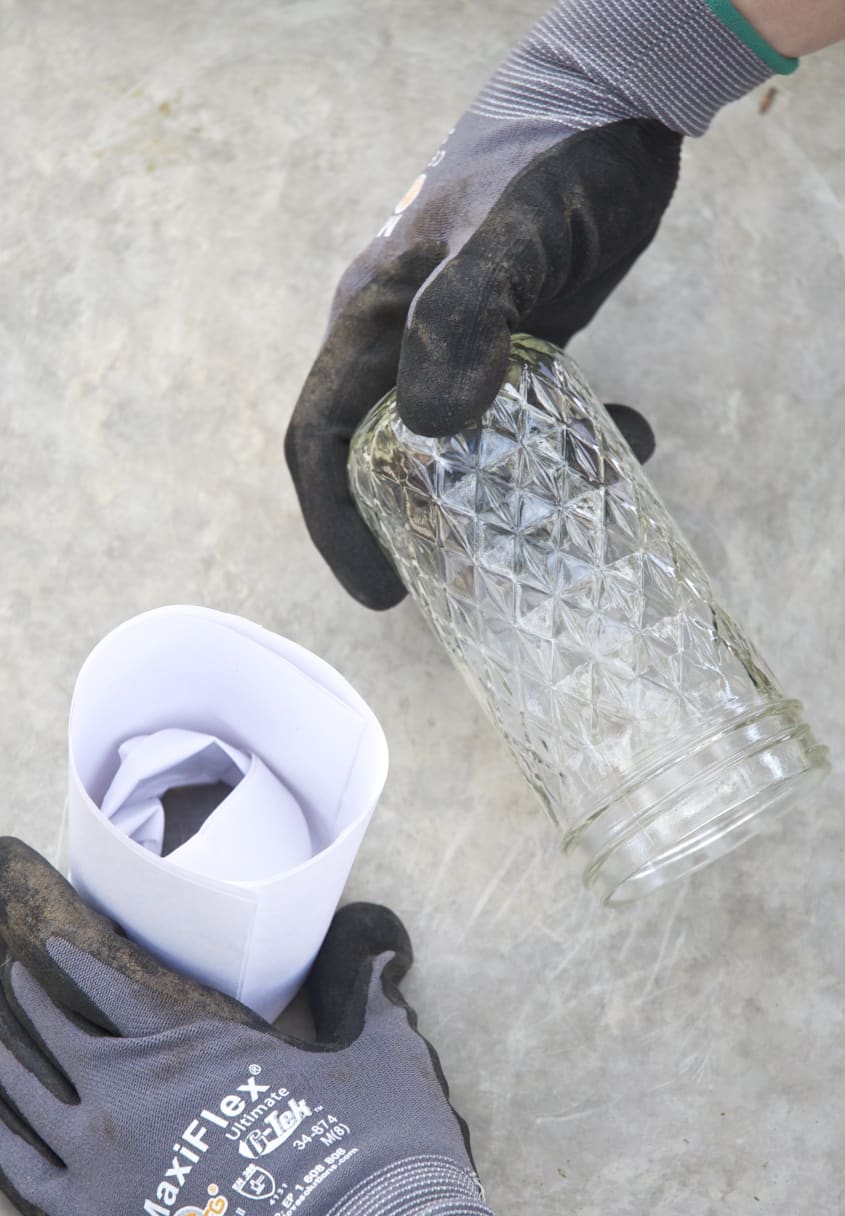
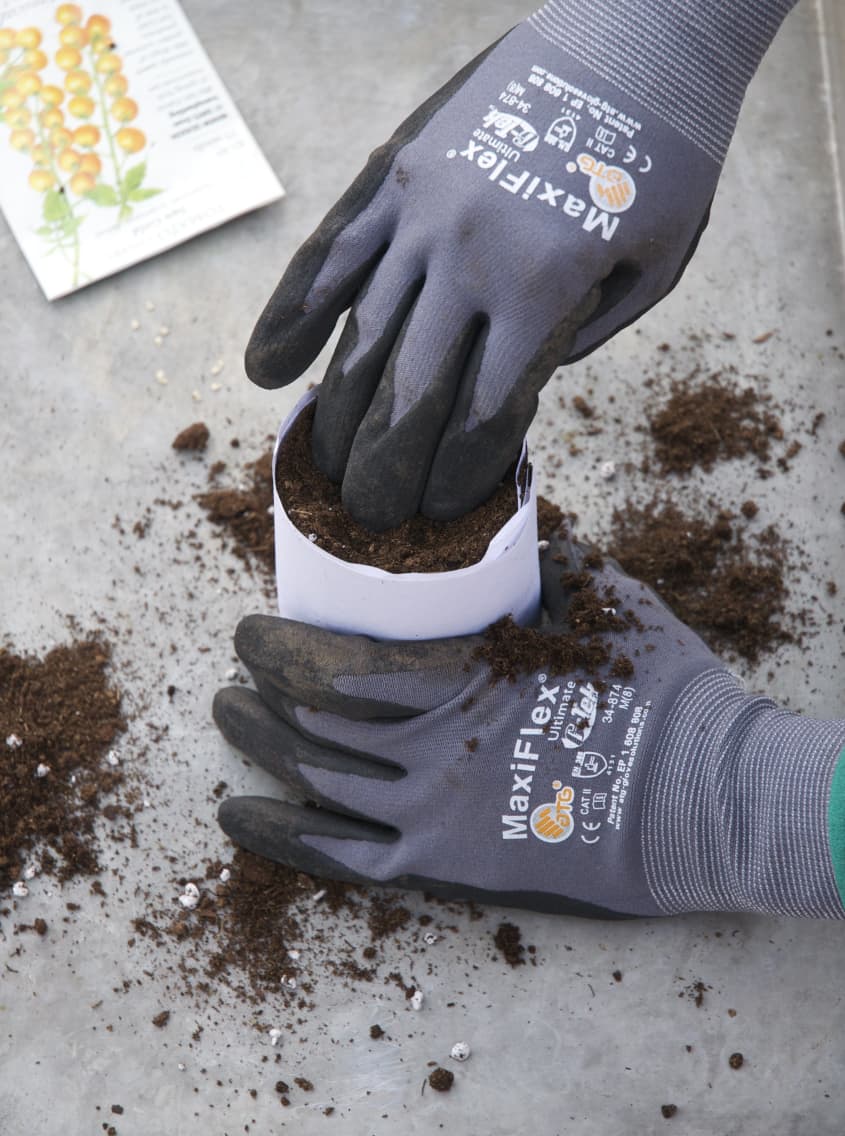
- Slide the rolled paper off the glass: This should be easy, if you kept the paper loose.
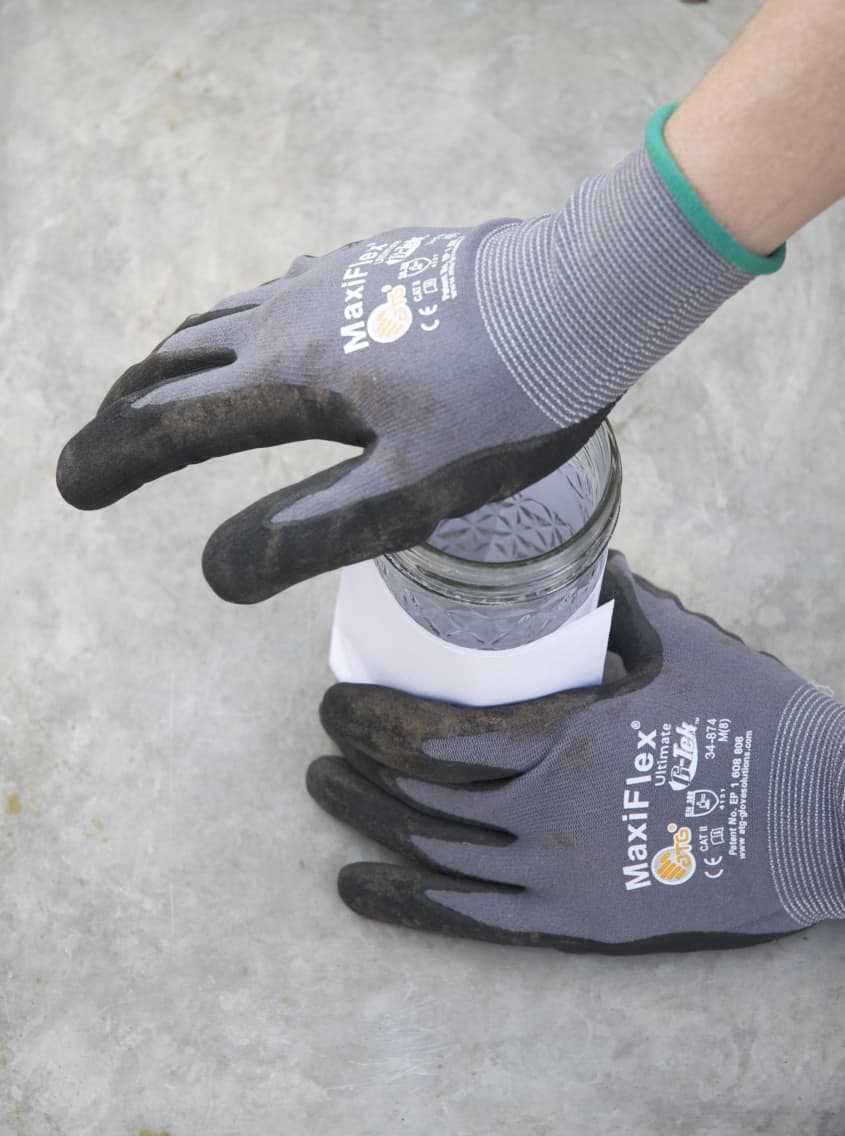
- Invert the glass and use the flat end to flatten the base: This will form the base of the pot.
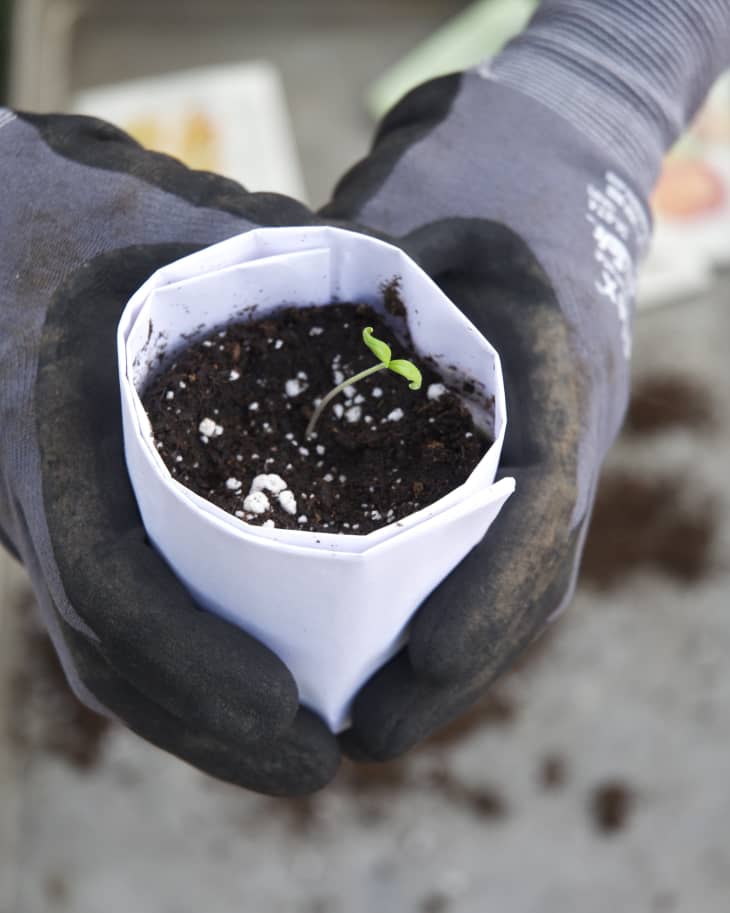
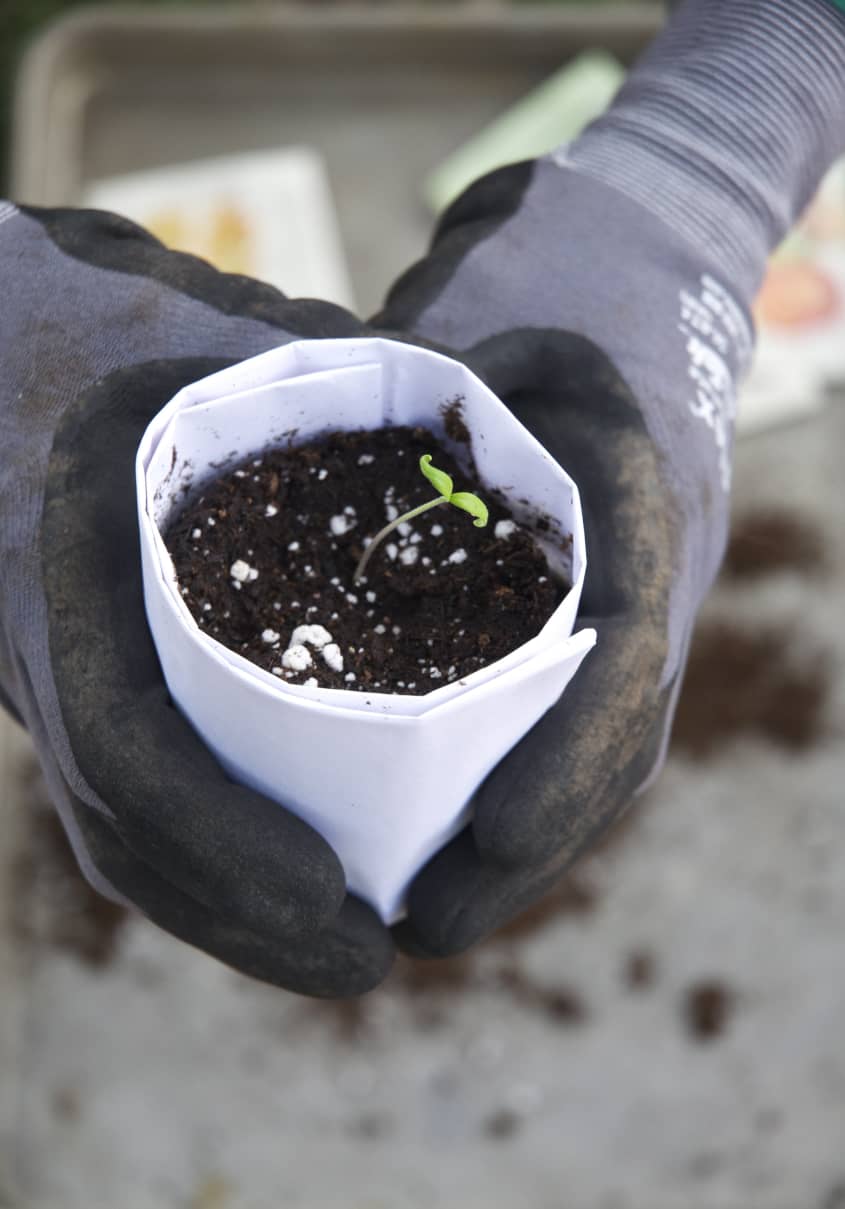
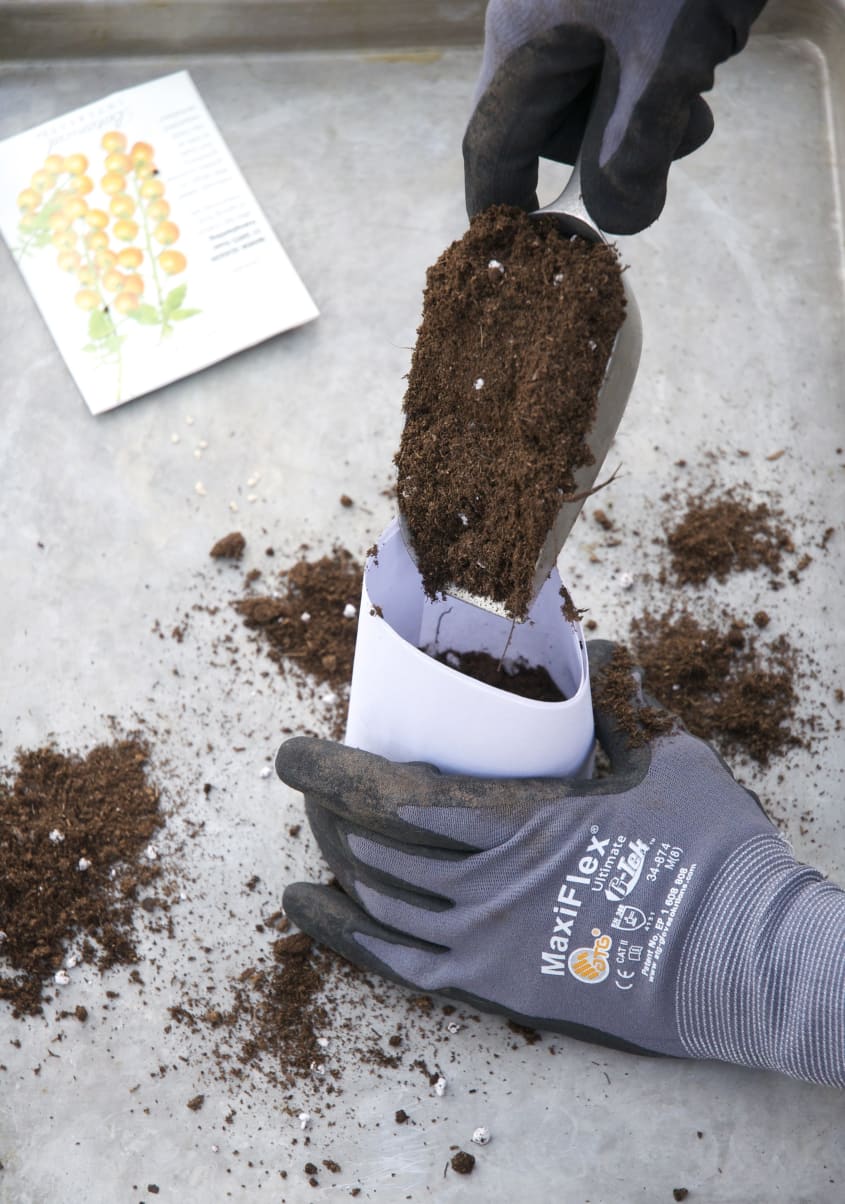
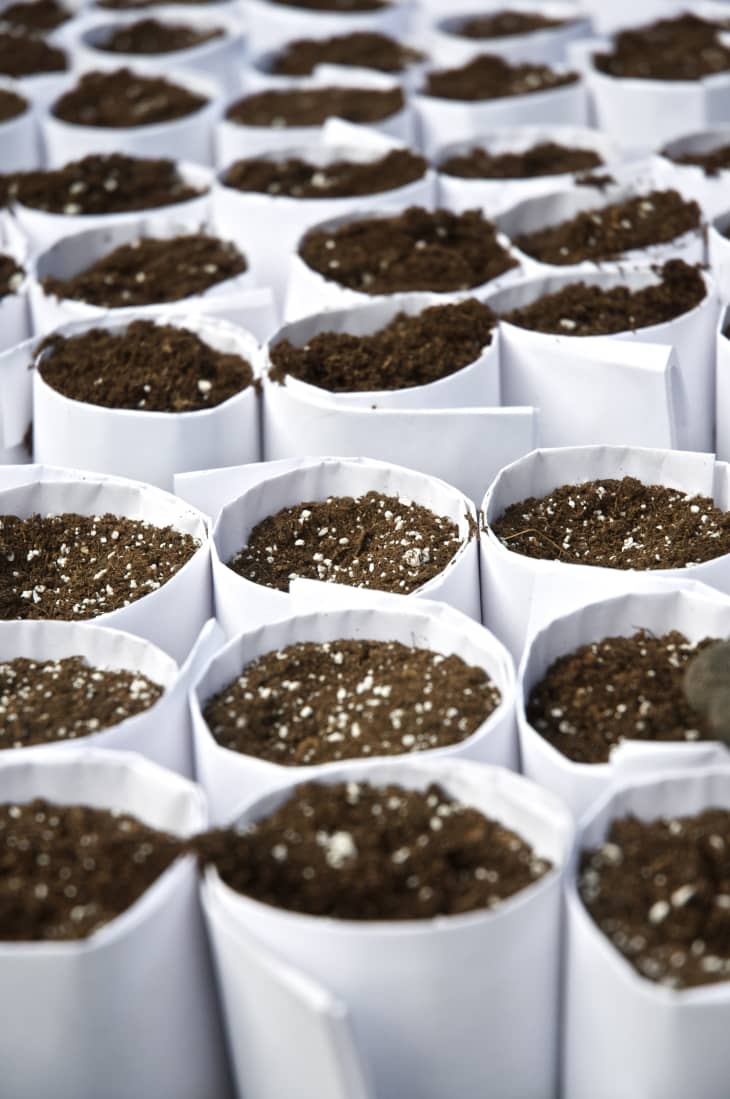
- Fill container with soil: Be sure to use the highest quality soil to ensure healthy plants. This is a corner you do not ever want to cut.
- Lightly pack the soil: Make sure the soil is not too compressed.
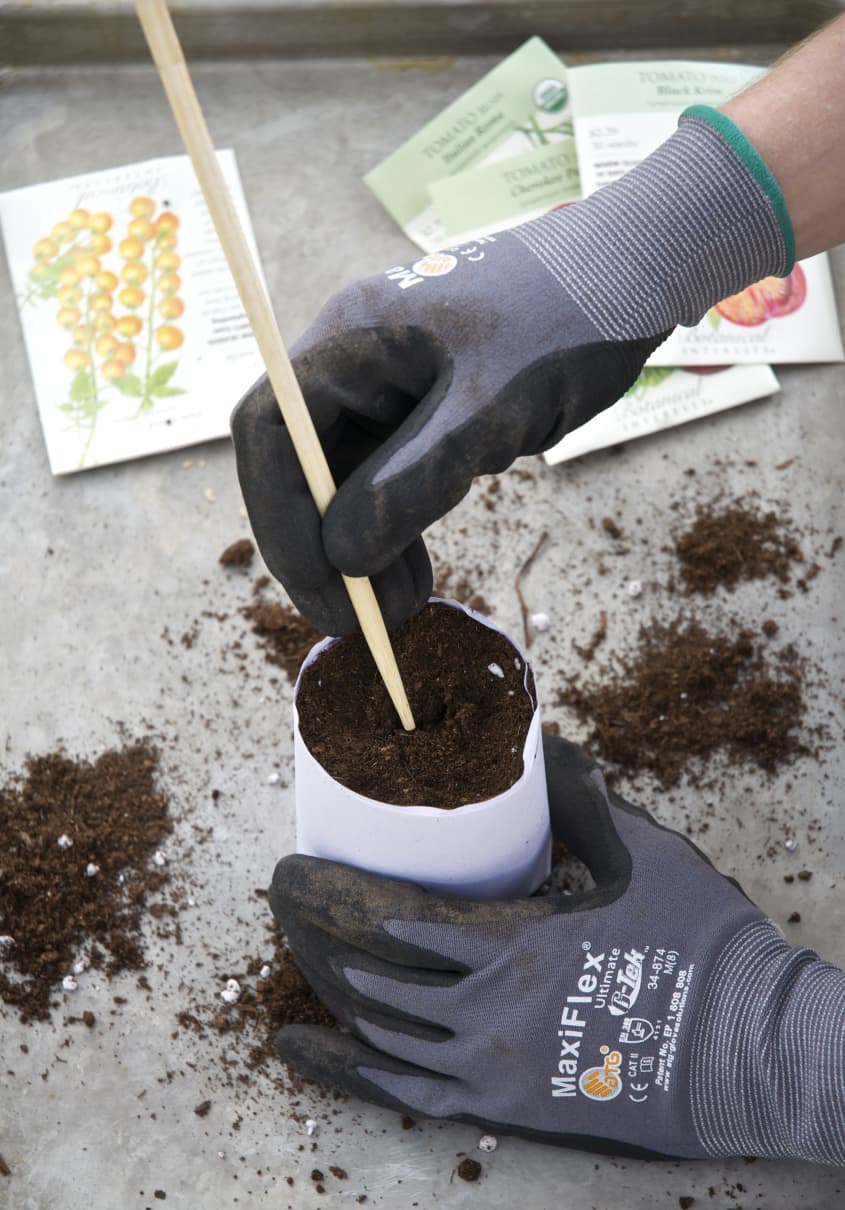
- Make a small indention in the soil to house the seed: I use a chopstick.
- Sow the seed and cover with soil: Make sure you read the seed packet for proper planting depth. Cover with the suggested amount of soil for that specific seed.
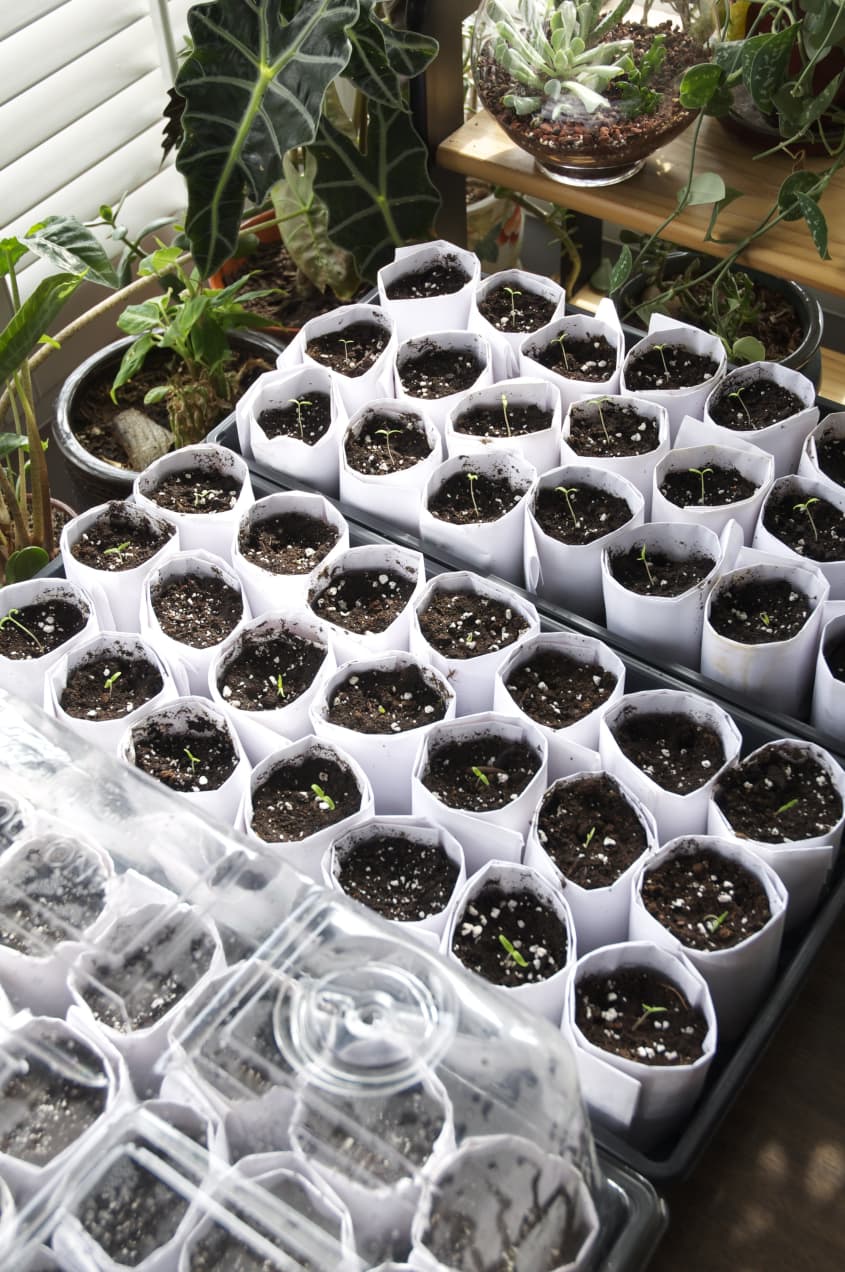
- Place containers onto a tray and lightly water: I used a plastic tray from the garden center. You can use an old baking sheet or anything with a lip.
- Cover the trays and set under light source: To ensure germination, cover the seed trays with a layer of plastic wrap or a plastic dome, easily found at the garden center. Inverted plastic spinach containers from the grocery store serve this purpose, as well.
- Keep the soil moist but not soggy and wait for seedlings to emerge: The plastic lid will trap moisture and heat and will assist with the germination process. Be careful not to over water. Once the seedlings have emerged, remove the plastic lids, so that the small plants have proper air circulation.
Seed Resources
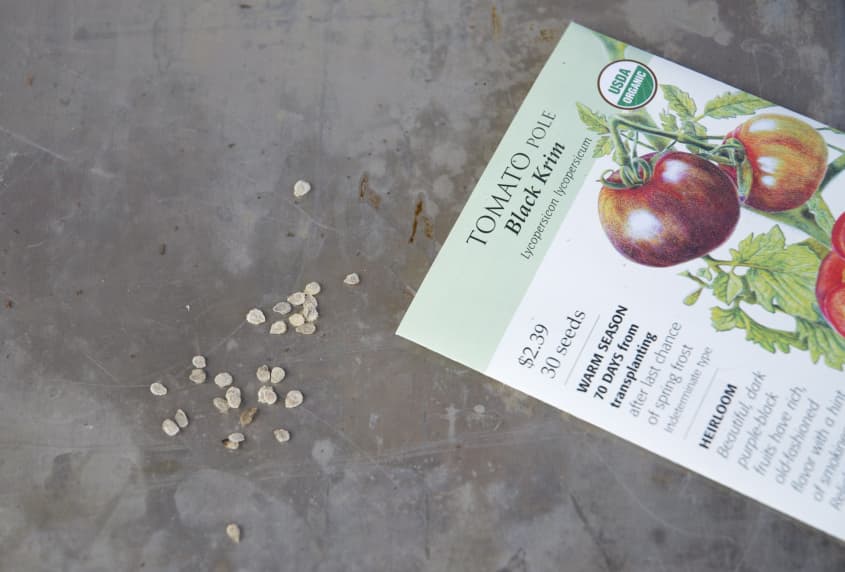
Purchase high quality seeds, organic when possible. My favorite, reliable, seed companies are the two below; they have many heirloom varieties.
Project Notes
- If this is not the year for you to start from seeds, go ahead and purchase vegetable “starts” from the garden center, but get ahead for next year by saving the containers. You can also collect yogurt cups or toilet paper rolls.
- Label seedlings as soon as possible. I have made this mistake before. It’s no fun guessing which plants are which! I use popsicle sticks for my labels, but you can definitely get fancier and purchase die-cut plastic or copper labels.
- To ensure that germination occurs, place the trays in a warm, sunny window, under a warm lamp, or on a heating pad.
- If you do not have a sunny, south-facing window like I do, you can purchase fluorescent bulbs or grow lights from the hardware shop. Be sure to place the plants about three inches away from the light and raise the light, as the seedlings grow.
- Reference seed packets, your local garden center, or a nearby university’s website for proper transplanting dates. If you made the DIY newsprint seed pots, transplanting will be a breeze: the paper is biodegradable and does not need to be removed.
- When you are ready to transplant your plants, gently introduce them into your gardening space. Transplant them in the morning or evening to avoid drastic temperatures.

Troubleshooting Seed-Starting
- Choose larger pots over smaller ones. Avoid purchasing the tiny starter pots. You will have to transplant them to larger pots indoors long before planting outside. Save yourself the trouble and save the stress on your plants’ fragile root systems.
- Don’t forget that plants need air circulation. Once the seeds have germinated, the seedlings must be uncovered for a large portion of the day. A fan blowing near them helps, too.
- Avoid “damping off.” Small seedlings sometimes die after germinating. This happens when the seedlings are subjected to too much moisture. Prevent “damping off” from happening by providing air circulation and by misting the plants and soil with water and a little cooled chamomile tea.
Want more smart tutorials for getting things done around the home?
See more How To posts
We’re looking for great examples of your own household intelligence too!
Submit your own tutorials or ideas here!