
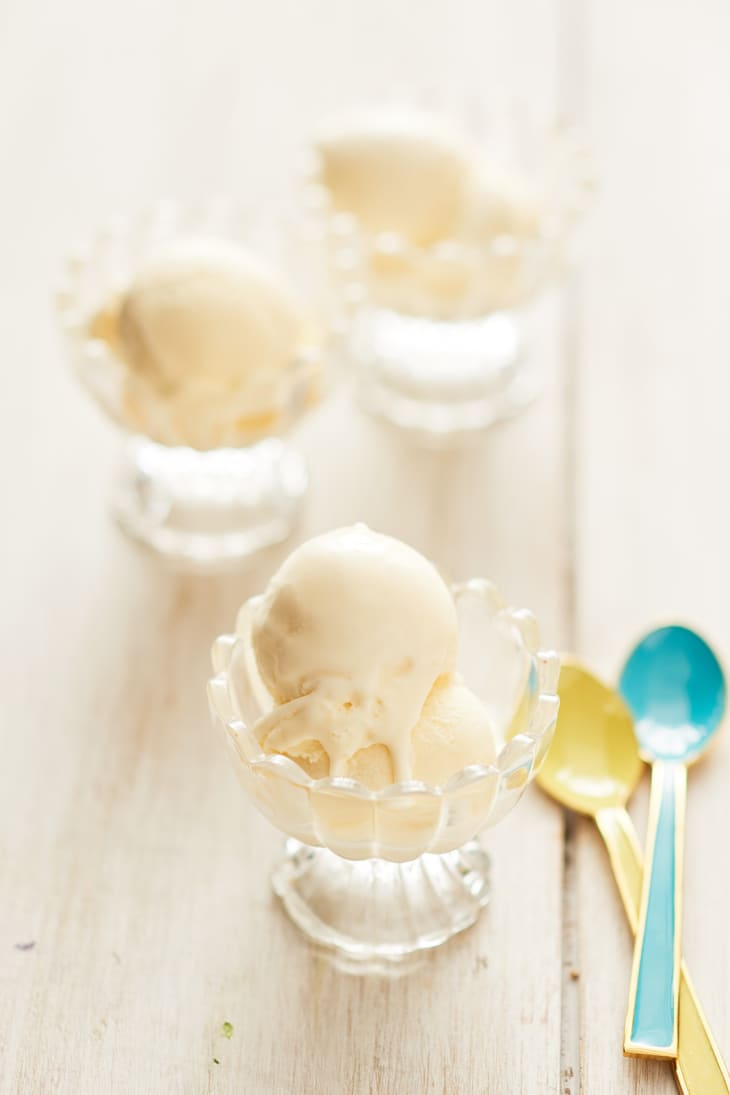
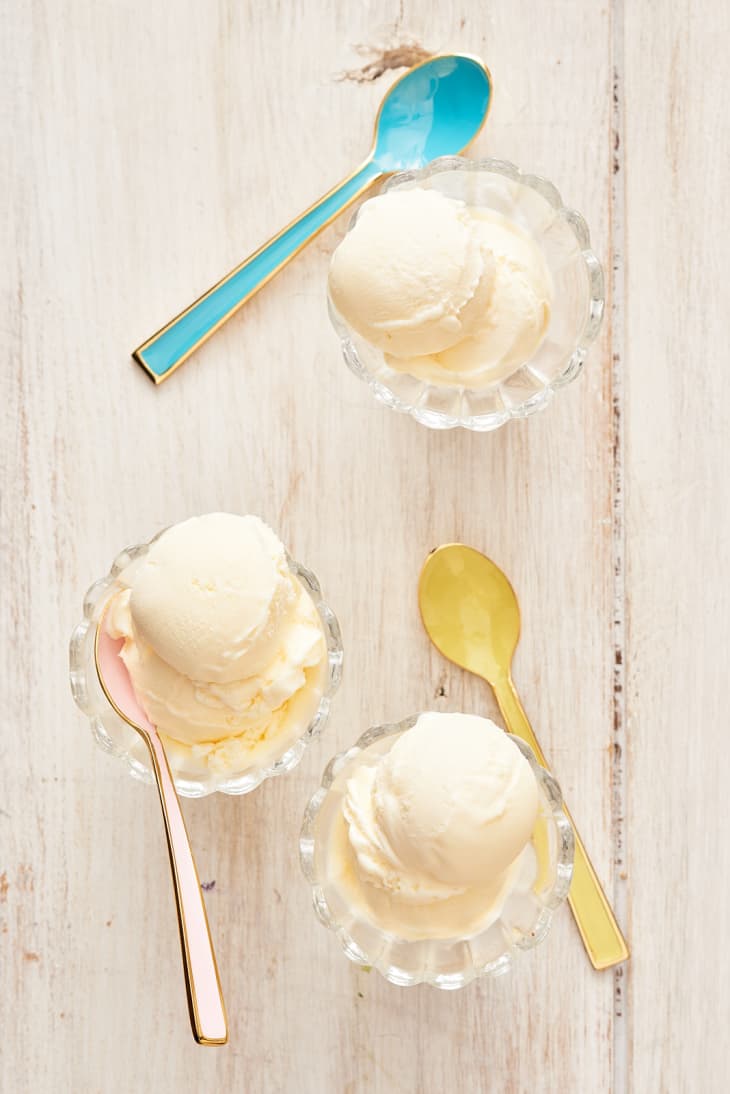
How To Make Classic Vanilla Ice Cream
Homemade ice cream only takes aboout 25 minutes to make. Just remember to pre-chill you bowl for 24 hours and set aside with the mixture for 3 hours before churning.
Makes1 quart
Prep5 minutes to 10 minutes
Cook20 minutes
Knowing how to make a basic vanilla ice cream will serve you well in life. This is what makes a slice of birthday cake, a wedge of Thanksgiving pie, or even a simple banana split on a hot summer night feel extra special and extra memorable. Plus, once you master vanilla ice cream, you’re well on your way to inventing your own flavors like sour cherry or coffee, and making the ice cream of your dreams.
Tips For Making Classic Vanilla Ice Cream
- Freeze the ice cream make bowl.
- Use more egg yolks for a richer and creamier ice cream.
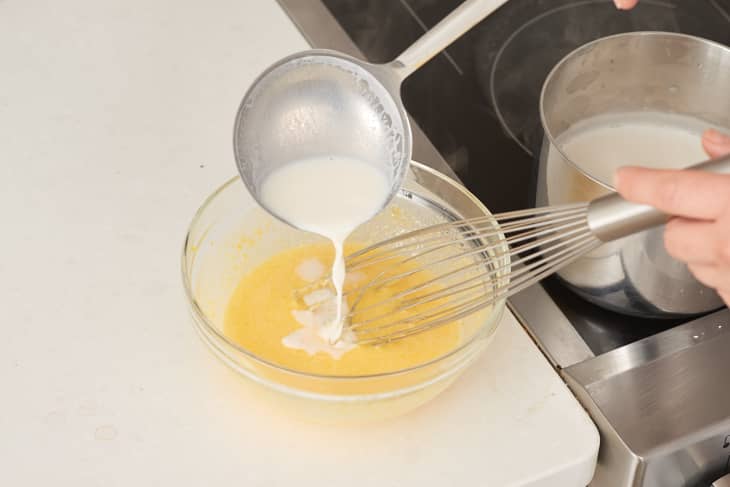
- Whisk a small scoop of the hot milk into the egg-sugar mixture to prevent curdled eggs.
- Keep the heat low when cooking the ice cream base.
- Strain the base before churning the ice cream.
Vanilla ice cream with an egg custard base isn’t particularly hard, but it can feel that way the first time you make it. Follow this step-by-step guide to make the best creamy vanilla ice cream with a custard base perfect for any occasion. Here’s a straightforward guide through all the steps for making vanilla ice cream with an ice cream maker.
Using Egg Yolks to Make Old Fashioned Ice Cream
This ice cream is a classic, if not the classic. It uses egg yolks to both thicken the milky ice cream base and gives the finished ice cream a richer taste and creamier mouthfeel.
The more egg yolks you use, the richer and creamier your ice cream — use fewer yolks and your ice cream will taste lighter, milkier, and a bit less smooth. Personally, I like a ratio of four yolks to three cups of dairy. I think this makes a solidly decadent ice cream without making it taste overly eggy.
How to Prevent Curdled Eggs in Custard
Using eggs to make ice cream, while delicious, does requires some caution.
When heating the eggs along with the milk and sugar to make the base, it’s easy for your attention to wander, resulting in little curdles of cooked egg in your ice cream. But never fear! There are a few built-in safeties to prevent this from happening:
- Temper the eggs: After warming the milk on its own, whisk just a small scoop of the hot milk into the eggs and sugar. This warms the eggs just a bit, making them less likely to curdle when you stir them into the pot with the rest of the milk to cook over direct heat.
- Heat the base slow and low: Once you start cooking the ice cream base — the mix of milk, eggs, and sugar — on the stove, keep the heat low and heat everything slowly. Keep stirring, scraping the bottom and sides of the pot, so the mixture cooks evenly and the bottom doesn’t scorch. It’s tempting to turn up the heat to make this step go faster, but try to resist! Keep slowly cooking the base until it’s thickened enough to coat the back of the spoon.
- Strain the finished custard: As a final fail-safe, just in case your eggs did start to curdle a little, strain the base before churning the ice cream. Any accidental bits of curdled egg will get caught in the strainer — not in your ice cream.
This is all to say, don’t let the fear of curdled eggs keep you from making this ice cream. Keep your wits about you and an eye on the pot, and you’ll be fine.
Churn, Then Freeze
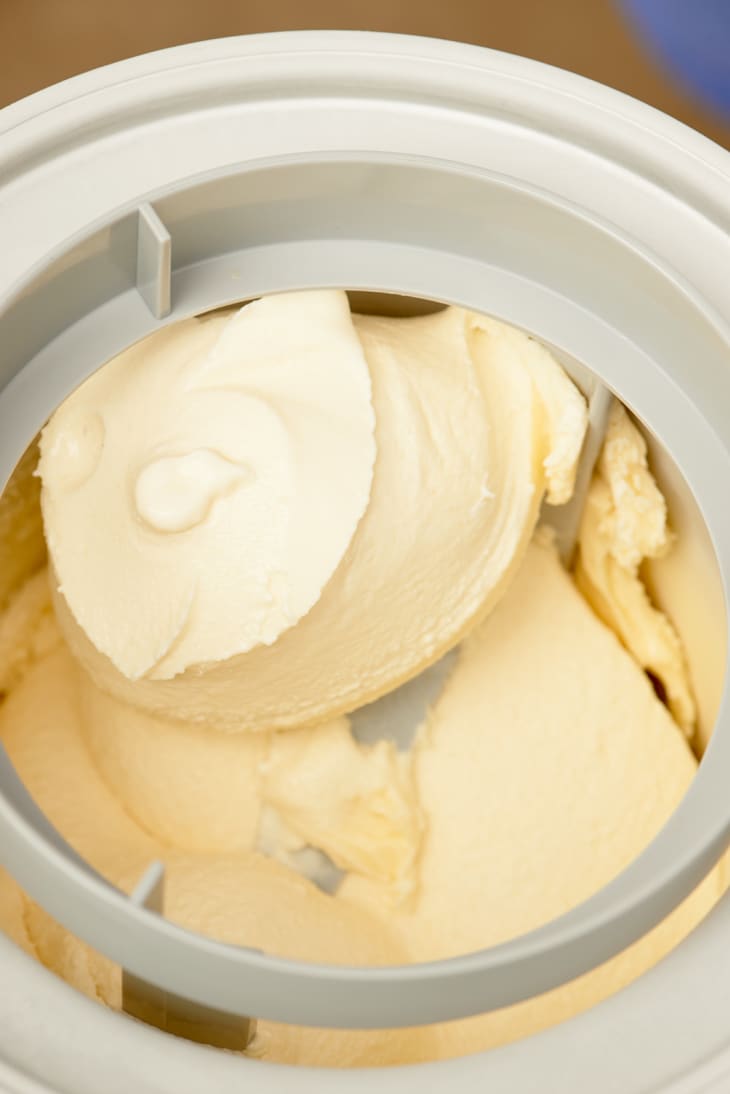
The finished ice cream is a two part process: First you churn the ice cream base in an ice cream maker until it’s roughly the consistency of soft-serve, then you freeze it until hard.
Of course, if you want soft serve, then you can eat it right away! But most of the time, you’ll want to transfer the just-churned ice cream to a freezer container and freeze it at least four hours or overnight (which is even better) before serving.
Churning begins the freezing process, breaking up ice crystals as they form and incorporating some air into the thickening ice cream. If you freeze the ice cream without churning, it will freeze into a solid, icy brick.
How to Make Other Ice Cream Flavors
Once you have this basic method down, it’s easy to branch out into other flavors. The best place to start is by infusing the milk with things like fresh herbs (mint), spices (cinnamon), coffee beans, and cacao nibs.
Add any of the above along with the vanilla, and by the time you strain the base before churning, the ice cream will be infused with their flavor.
You can also add mix-ins — like chocolate chips, chopped fruit, or toffee bits — in the last few minutes of churning, or layer them into the ice cream when you transfer it to the freezer container.
Vanilla Ice Cream Recipe
Homemade ice cream only takes aboout 25 minutes to make. Just remember to pre-chill you bowl for 24 hours and set aside with the mixture for 3 hours before churning.
Prep time 5 minutes to 10 minutes
Cook time 20 minutes
Makes 1 quart
Nutritional Info
Ingredients
- 4
large egg yolks
- 2/3 cup
granulated sugar
- 1 1/2 cups
whole milk
- 1
vanilla bean or 1 teaspoon vanilla extract
- 1 1/2 cups
heavy cream
Equipment
Mixing bowls
Fine-mesh strainer
Whisk
Measuring cups and spoons
Medium saucepan
Spatula or wooden spoon
Instant-read thermometer
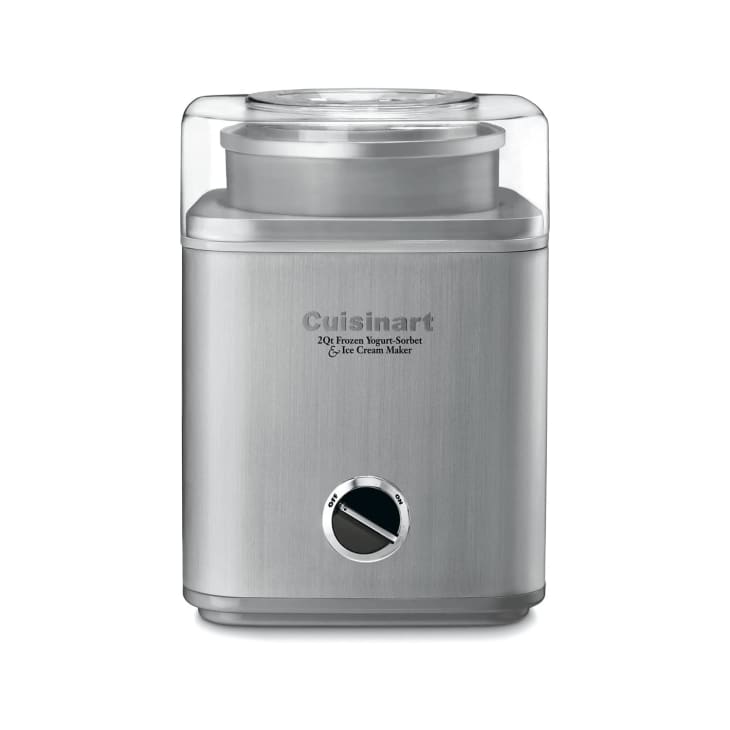
Ice cream machine
Wax paper
Instructions
Instructions:
Chill the ice cream bowl: If your ice cream machine has a bowl that needs to be frozen before churning, put it in the freezer the night before you plan to make ice cream. (If you forget, you can make the base and refrigerate it overnight while the bowl is freezing, and churn the ice cream the next day.)
Prepare an ice bath: Fill a large bowl with ice cubes and some water. Place another smaller bowl on top of the water, and place a fine-mesh strainer inside. Keep this close by while you make the ice cream base.
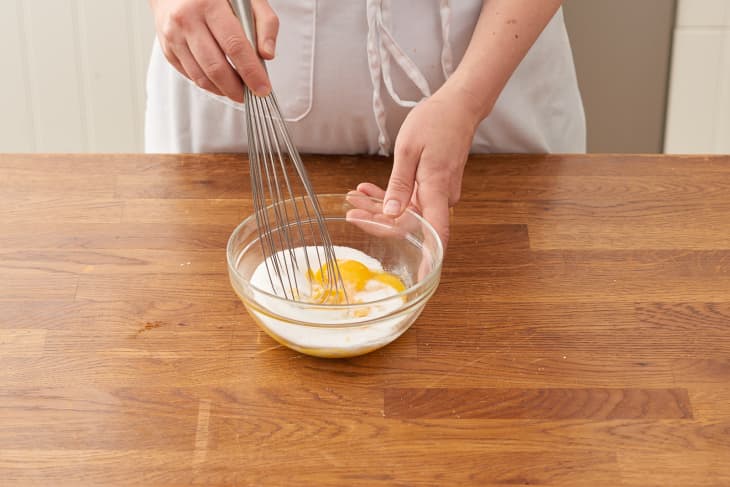
Whisk the yolks and sugar together: Place 4 egg yolks and 2/3 cup granulated sugar in a medium bowl and whisk until combined. At first the mixture will be very thick and dark yellow, then it will smooth out and lighten to a pale lemon-yellow color.
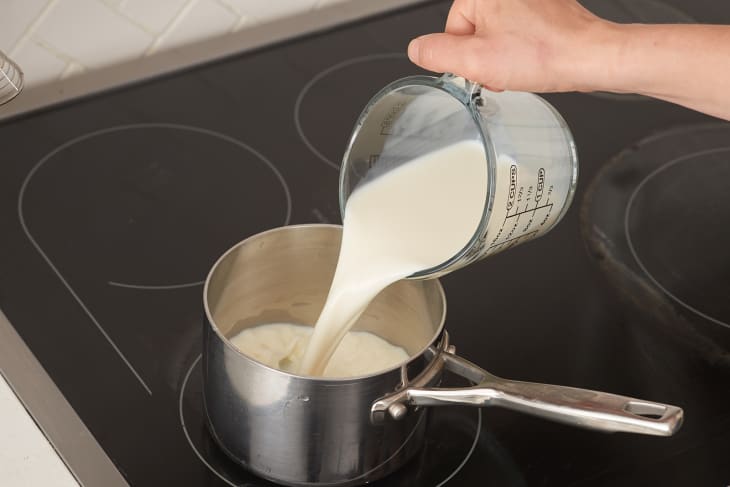
Warm the milk: Pour 1 1/2 cups milk into a medium saucepan and place over medium heat. Split 1 vanilla bean lengthwise, scrape the seeds into the milk, and add the pod (or just add 1 teaspoon vanilla extract). Bring the milk to a simmer, then remove from heat.
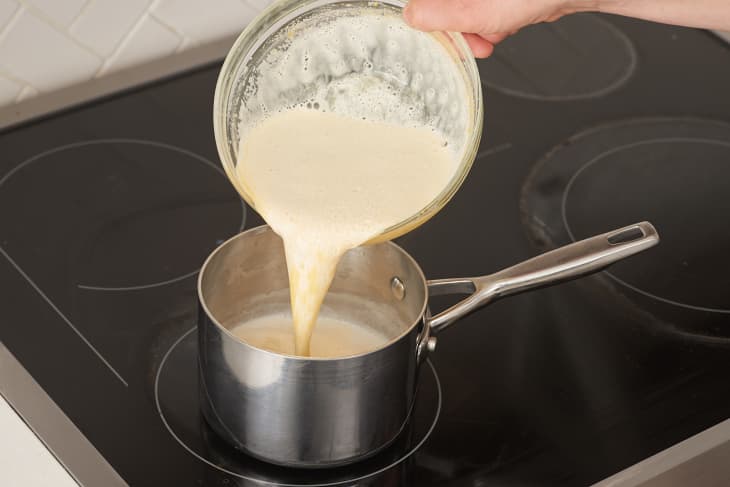
Temper the egg-sugar mixture: Ladle out about 1 cup of the hot milk (no need to be exact). While whisking constantly, slowly pour it into the egg-sugar mixture. This warms the eggs and prevents them from curdling in the next step, and it's known as tempering.
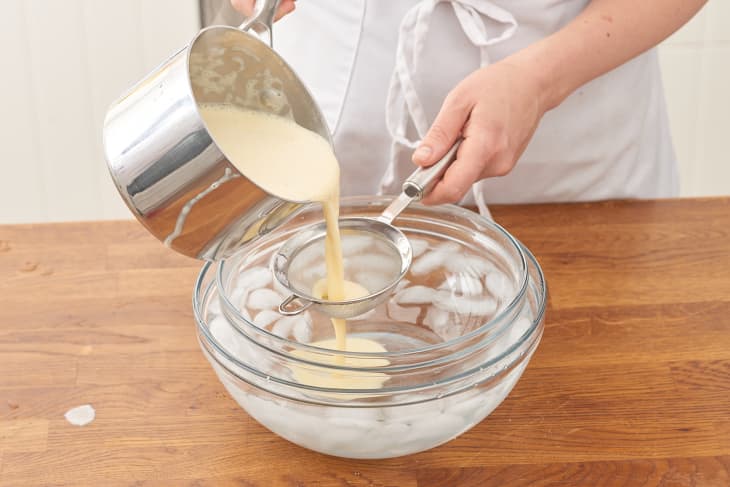
Add the tempered egg-sugar mixture: Slowly pour the tempered egg-sugar mixture into the saucepan with the remaining milk.
Cook the ice cream base until thickened: Return the saucepan to low heat. Stir the mixture slowly, but constantly, scraping the bottom and sides of the pot. Keep cooking until the base has thickened enough to coat the back of the spatula and registers 170°F with an instant-read thermometer.
Strain the ice cream base: Pour the base through the reserved fine-mesh strainer set over the bowl to remove the vanilla pod and any bits of egg that may have accidentally curdled. Remove the strainer, making sure to scrape any base that clings to the underside of the strainer off into the rest of the base.
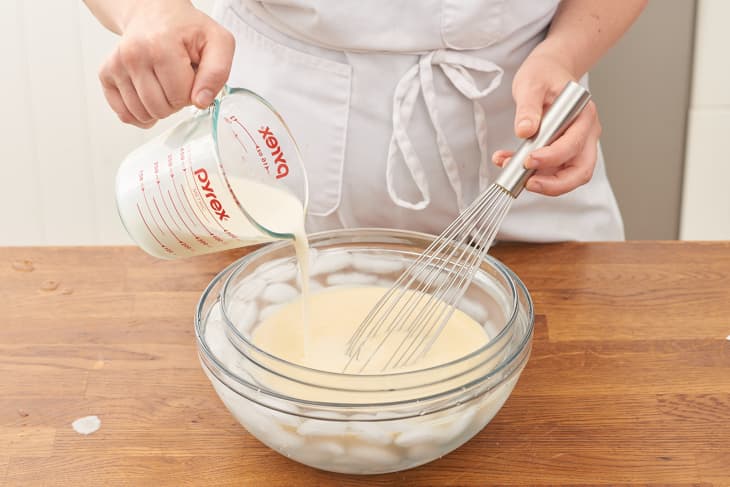
Add the cream: Stir 1 1/2 cups heavy cream into the ice cream base.
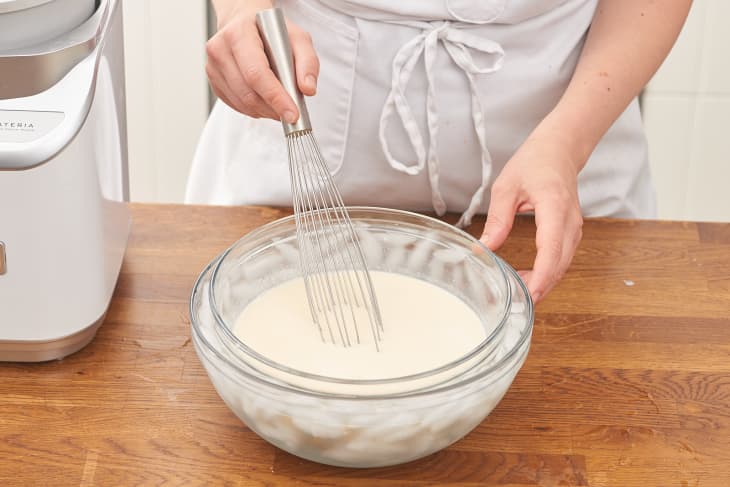
Chill completely: Leave the ice cream base over the ice water bath, stirring occasionally, until completely chilled, about 20 minutes. Alternatively, cover the bowl and refrigerate for at least 3 hours or up to overnight.
Churn the ice cream base: Transfer the ice cream base to the bowl of your ice cream machine. Churn until the base has thickened to a consistency somewhere between a very thick milkshake and soft-serve ice cream. In most ice cream makers, this takes about 20 minutes — check the instructions for your particular machine.
Freeze the ice cream until solid: Transfer the churned ice cream to a freezer container. Press a piece of wax paper against the surface of the ice cream to prevent ice crystals from forming. Freeze until solid, at least 4 hours.
Recipe Notes
- Other ice cream flavors: You can flavor your ice cream base by adding ingredients to the milk along with the vanilla. Steep fresh herbs, whole spices, coffee beans, cacao nibs, or any other ingredients. You can also melt chocolate into the milk to make chocolate ice cream.
- Storage: The ice cream will keep in the freezer for about 2 weeks before becoming icy.